Project Management
This section introduces various project management features of the XRCC XR. Similar to the XRCC PC, you need to have a project file for using the XRCC XR.
Create New Project
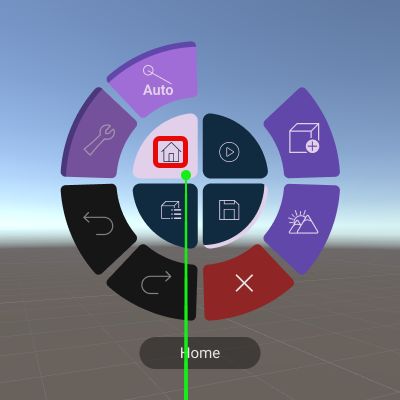
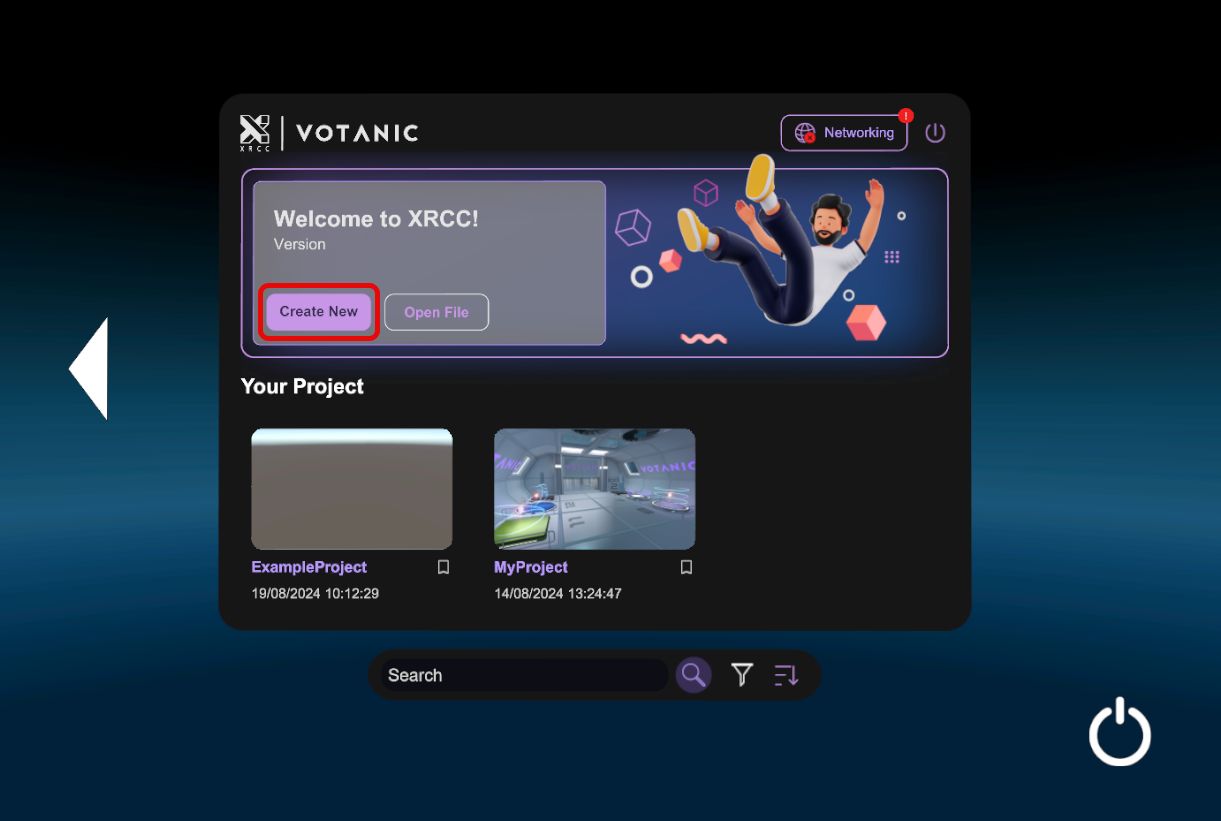
A new XRCC project can be created from Home. Point and click "New Project" with the Select button in Home.
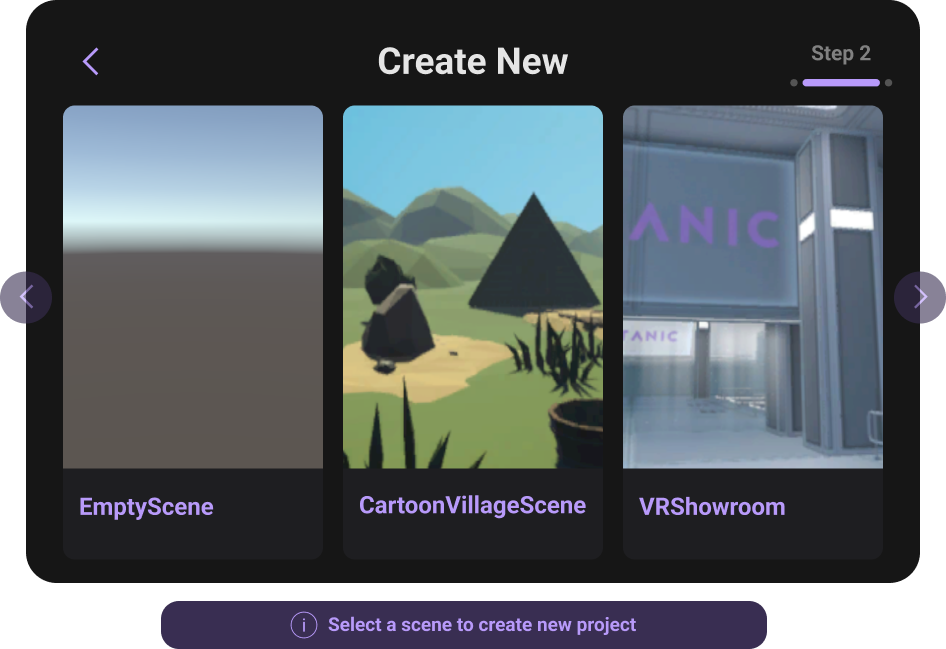
The XRCC provides a few pre-configured scenes for use as a starting point for your project. Pick one of the Start Scene to kickstart your project or select the "Empty Scene" if you prefer to build everything yourself from scratch. Click the Start Scene's picture to select the Start Scene you want.
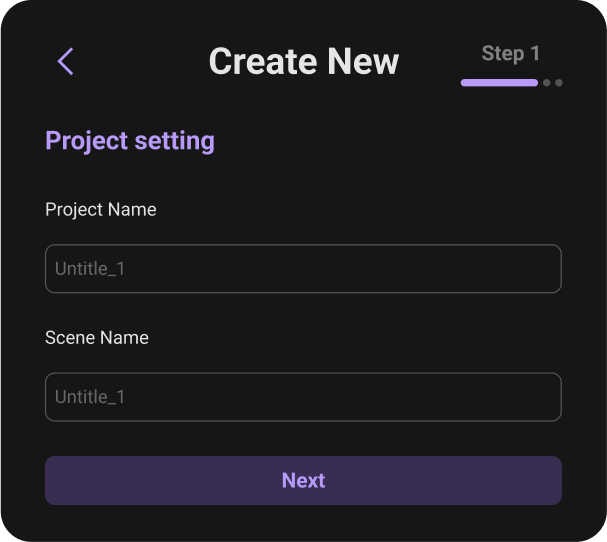
A file browser will appear for you to choose a save location for the new project. Click "Next" after choosing the location.
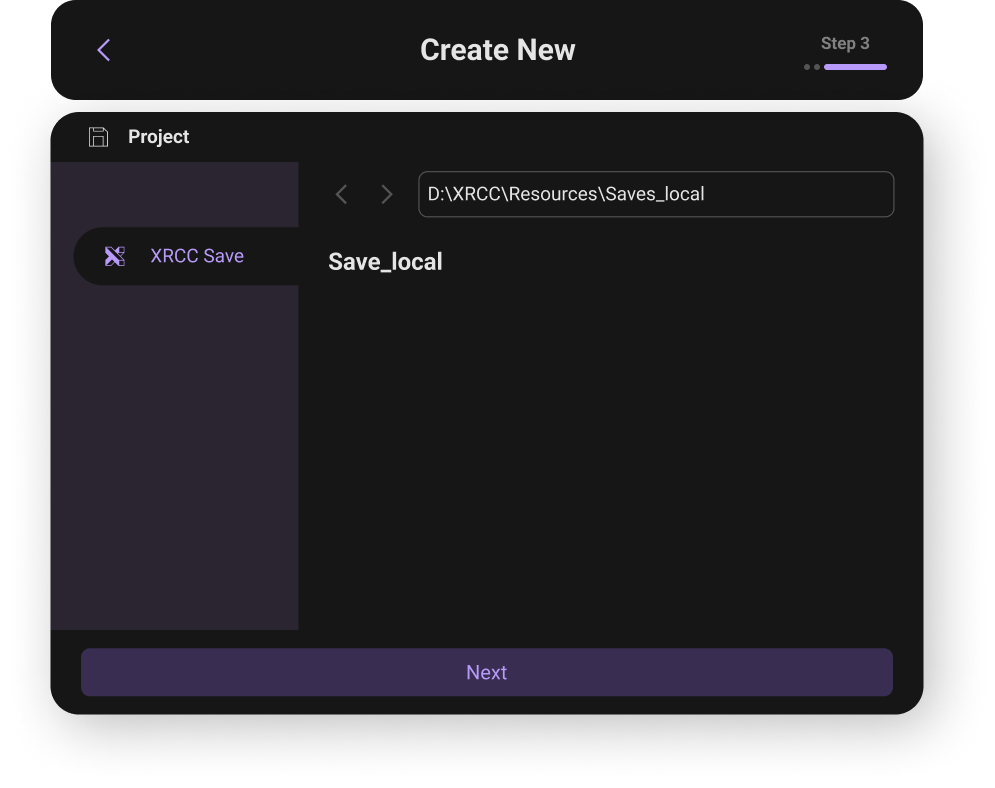
When creating the project, a resource folder and a .ccdata file will be generated at the designated save location.
After the project is created, it will load the Start Scene automatically into the Workspace, and you can start building the project in an XR environment now.
Edit Project
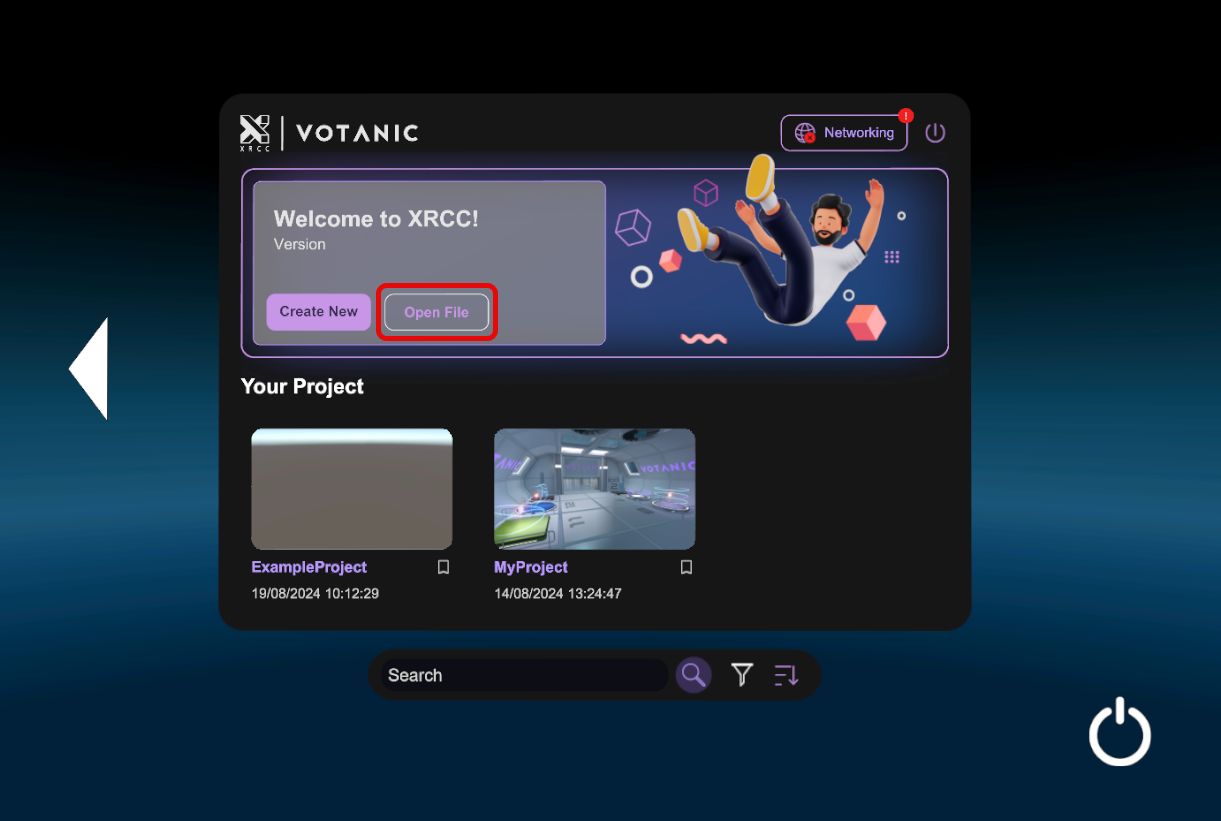
Existing projects can be loaded from Home. Point and click "Edit Project" with the Select button in Home.
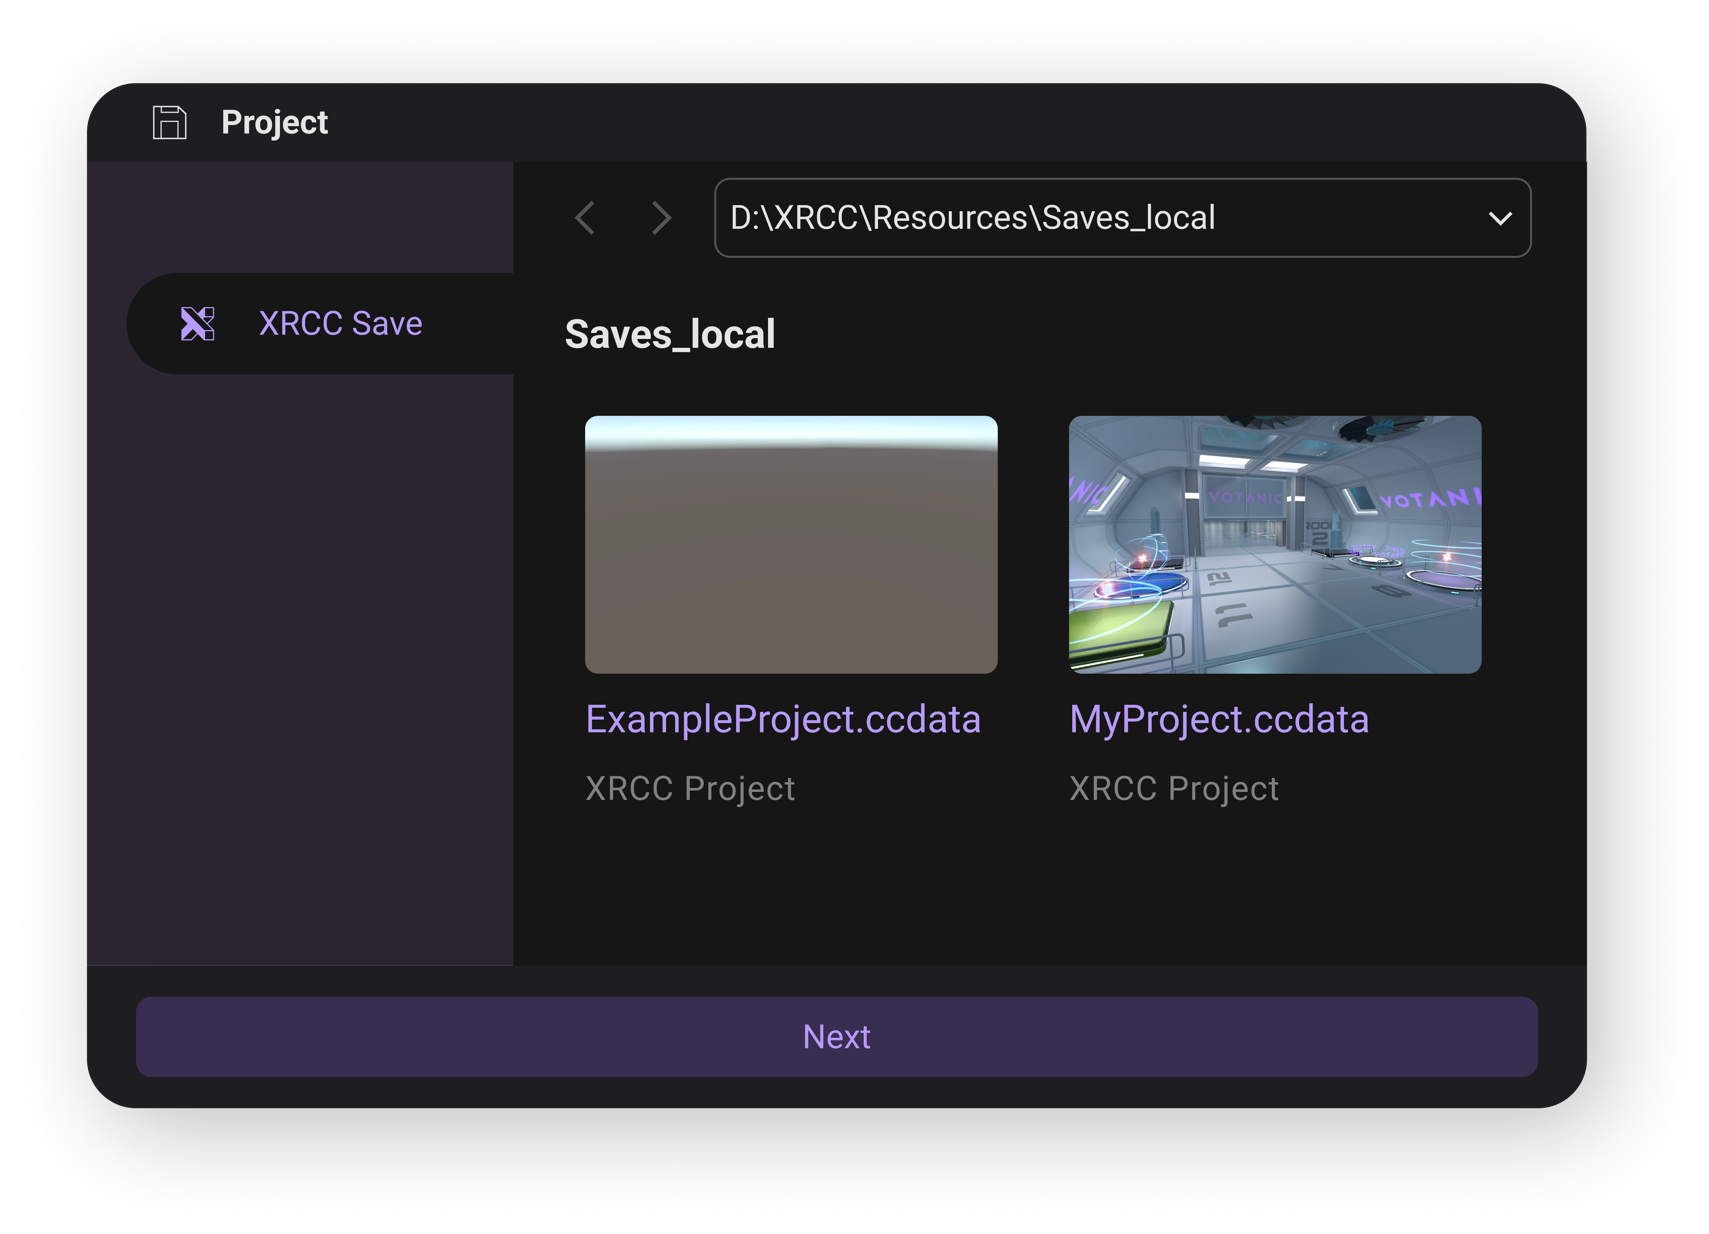
A file browser will appear for you to find your project save location. Select the .ccdata file of your project and click "Select".
The Start Scene of the selected project will load into the XR system, and you can start working on the project in an XR environment now.
Save Project
Save Project
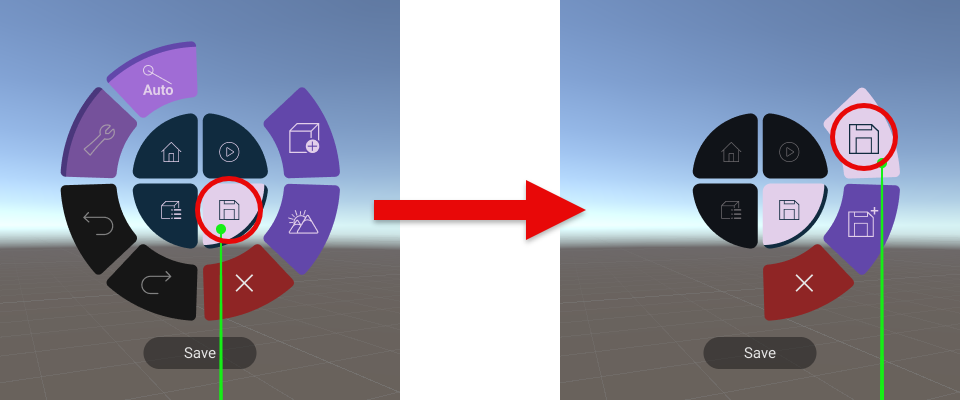
Open the main menu, click "Save" to save the changes to your current project.
If you attempt to close the current project with any unsaved changes, you will be prompted to save or discard the changes before closing the project.
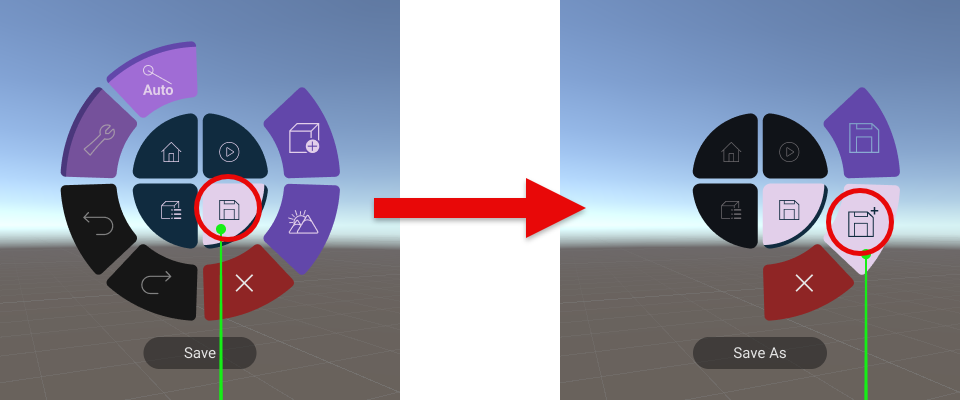
Save Project As
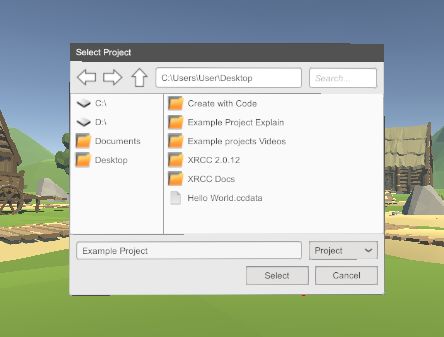
You can save the currently loaded project to a new project file by opening the main menu, click "Save" and then "Save As".
You will be prompted to select a new location and project name in the file browser. The new project will be opened in the XR environment after it is saved in the file system.
Debug Project
When editing the project, you can debug the project by switching to Play Mode. Open the main menu, click "Debug"
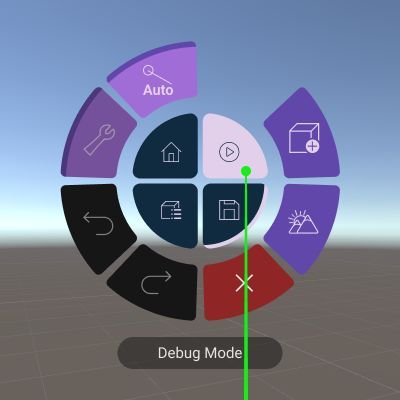
After the project enters Play Mode, the text "[Play Mode]" can be seen in the info wall as an indication, the features to edit the scene become unavailable, and the object will start following their behaviour (if any).

Open the main menu, click "Edit Mode" to continue editing the project. The objects will return to their original states if they are interacted with or moved during debugging when quitting the Play Mode.
Close Project
Open the main menu, click "Close" to close the current project and go back to the main menu.