XRCC Tutorial - Fundamentals
Overview
This guide will equip you with the basic knowledge to kickstart your XR content creation journey. You will learn how to plan the creation of the XR experience, as well as the basic operations in the XRCC content creation process. You can use this as a quick start guide to learn the fundamentals of XRCC.
Topics Covered
You will gain a basic understanding of the following topics through this fundamentals guide:
| Knowledge Area | Specific Topics Covered |
|---|---|
| |
|
The Tutorial Projects
A set of tutorials will follow this fundamentals guide to teach you various content creation techniques in XRCC. The tutorial materials are complimented by their corresponding video tutorials accessible from the link below to assist your learning process:
Planning for Your Content Creation
Before diving into creating the XR experience in XRCC, it's preferred that you spend some time planning for the content creation. The planning and preparation process would be invaluable to the actual content creation, as it helps you to straight out the flow of the XR experience from a macroscopic view, and get ready all the necessary materials for creation in XRCC.
Conception
We start with developing a concept for the XR experience. The conception process can help you gain a good understanding of how you will create the XR experience and identify the essential elements needed for the content creation process.
For developing the concept of the XR experience, you may consider the following aspects of the content to plan for the production:
-
What is the XR experience about?
-
Training / education experience
-
Presenting information / design showcase
-
Virtual tour
-
Interactive serious game
-
-
What is the goal and objective?
-
Acquire / share knowledge
-
Develop hands-on skills
-
Relaxation
-
-
How would user be guided to walk through the XR experience?
-
Virtual environment
-
Object placement
-
Scene structure of XR experience
-
User movement
-
-
What are the assets needed for the content creation?
-
3D models
-
Videos, images
-
Audio / sound effects
-
Prepping the Assets
Once you laid out the specifics of the XR experience, the next step is to gather all the assets for the project. Although XRCC has a few built-in assets available by default, it is probably not enough to meet the requirements of your unique XR experience. In this stage, you can try gather all the necessary assets yourself or from various online resources.
XRCC Asset Formats and Specifications
Assets are resources useful in constructing the scenes in a project. In XRCC, assets exist in two different forms: the pre-packaged assets that can be shared among different projects, and the project-specific assets imported and managed by the user.
Assets are identified by their asset type and are used in different ways in the scene. The default asset types in XRCC are:
| Asset Type | File Extension | Recommended Specification |
|---|---|---|
| .fbx, .obj, .ply, .stl, .gltf, .glb, .3mf | .fbx or .gltf / .glb format, maximum texture size of 2048x2048, file size not exceeding 100 MB, less than 30k triangles per model, with 1 embedded animation | |
| .bmp, .jpg, .jpeg, .png | 2D image size: 1920x1080, 360 image size: 4096x2048 | |
| .mp3, .wav | mp3 format minimal 1 second length, 44,100 Hz and 128 Kbps | |
| .mp4 | 2D video size: 1920x1080, 360 video size: 4096x2048, file size not exceeding 100 MB | |
| file size not exceeding 100 MB |
360-degrees images/ videos of Equirectangular monoscopic projection type are supported
Readying the 3D Models
You can prepare the 3D models by either creating them yourself or by leveraging content created by others from online resources.
| Method | Tools/Resources |
|---|---|
Although XRCC supports multiple 3D model formats, we recommend using the fbx or gltf/glb formats for best compatibility.
The file size and number of 3D models will significantly impact the loading time of the XRCC projects. We recommend that you keep the number of 3D models imported into your project to below 30 for an acceptable project loading experience.
Getting 360 Contents
Like 3D models, you can also create your own 360 degree contents yourself or from online resources.
| Method | Description |
|---|---|
| Create 360 contents yourself | Using a 360 degree camera to capture and export from the complimentary editing software |
| Online resources |
Content Production in XRCC
XRCC Workspace
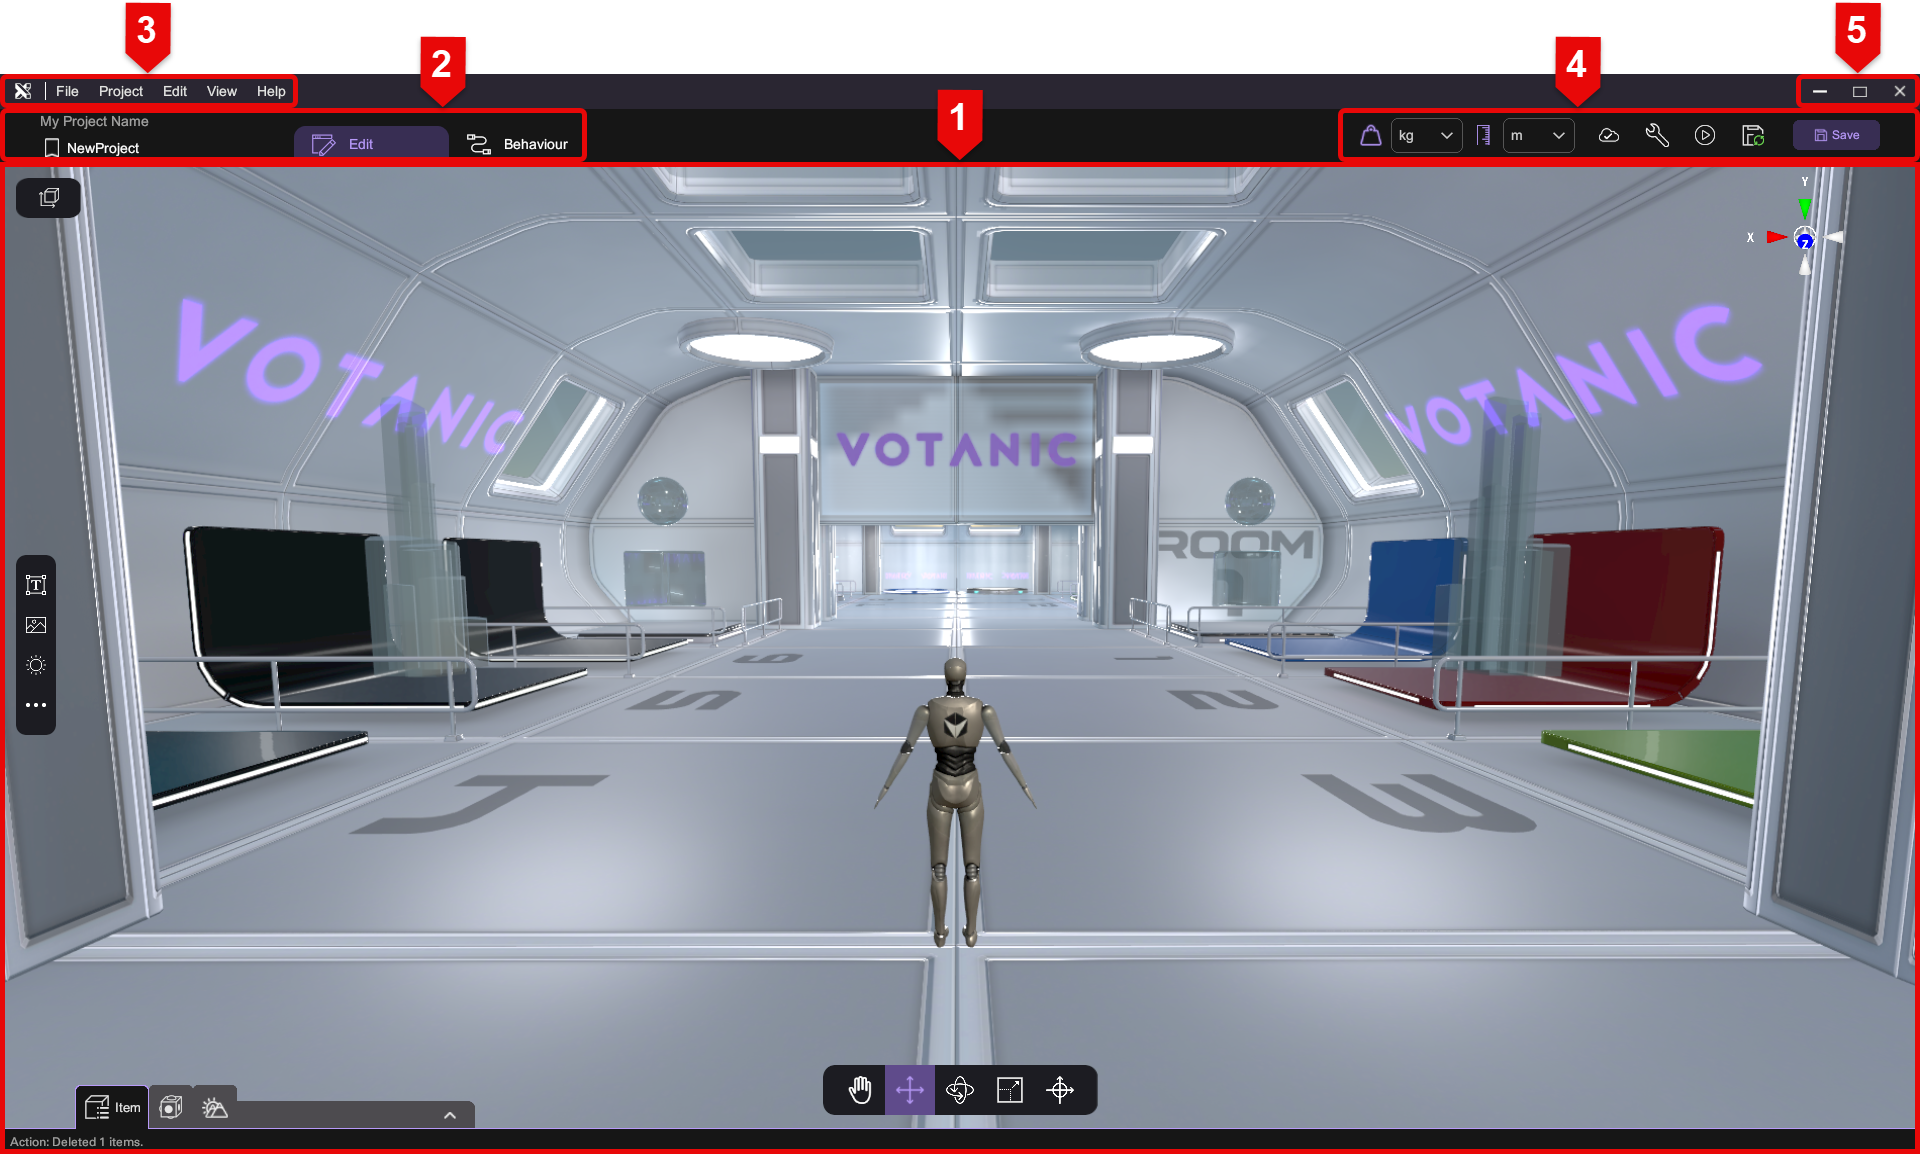
The Workspace is the default user interface in the XRCC PC where you work to create the XR content. The Workspace is organized using different tabs, each provide a set of tools for users to access different features of the XRCC.
| Section | Name |
|---|---|
| 1 | Main Workspace |
| 2 | Project Header |
| 3 | Main Menu |
| 4 | Status bar |
| 5 | Window Control |
General Control
The Scene View is accessible under the Edit tab; it visualizes the Scene in 3D space. While in Edit Mode, the Scene View allows you to navigate and edit the scene, and interact with different objects in the scene. While in Play Mode, the Scene View simulates the final visual representation of the created XR scene in first-person perspective, where you can test out the interactions designed for the scene.
Edit Mode
To navigate the user's view in Edit Mode, different navigation tools can be used.
Mouse Control
| Action | Control |
|---|---|
| Drag with Middle Mouse Button (or Left Mouse Button with Look Tool). | |
| Drag with Right Mouse Button. | |
| Scroll with Scroll Wheel. |
Flythrough Mode
By clicking and holding the Right Mouse Button on the scene, the control enters Flythrough mode, allowing the user to control the view using the keyboard.
| Action | Key |
|---|---|
Play Mode
The Play Mode can be initiated by pressing "Play Mode" () in the Edit tab. During Play Mode, you assume the perspective of the robot in the scene and use the keyboard to control.
Play Mode Control
| Action | Key |
|---|---|
To return to Edit Mode, press Esc.
Create Project
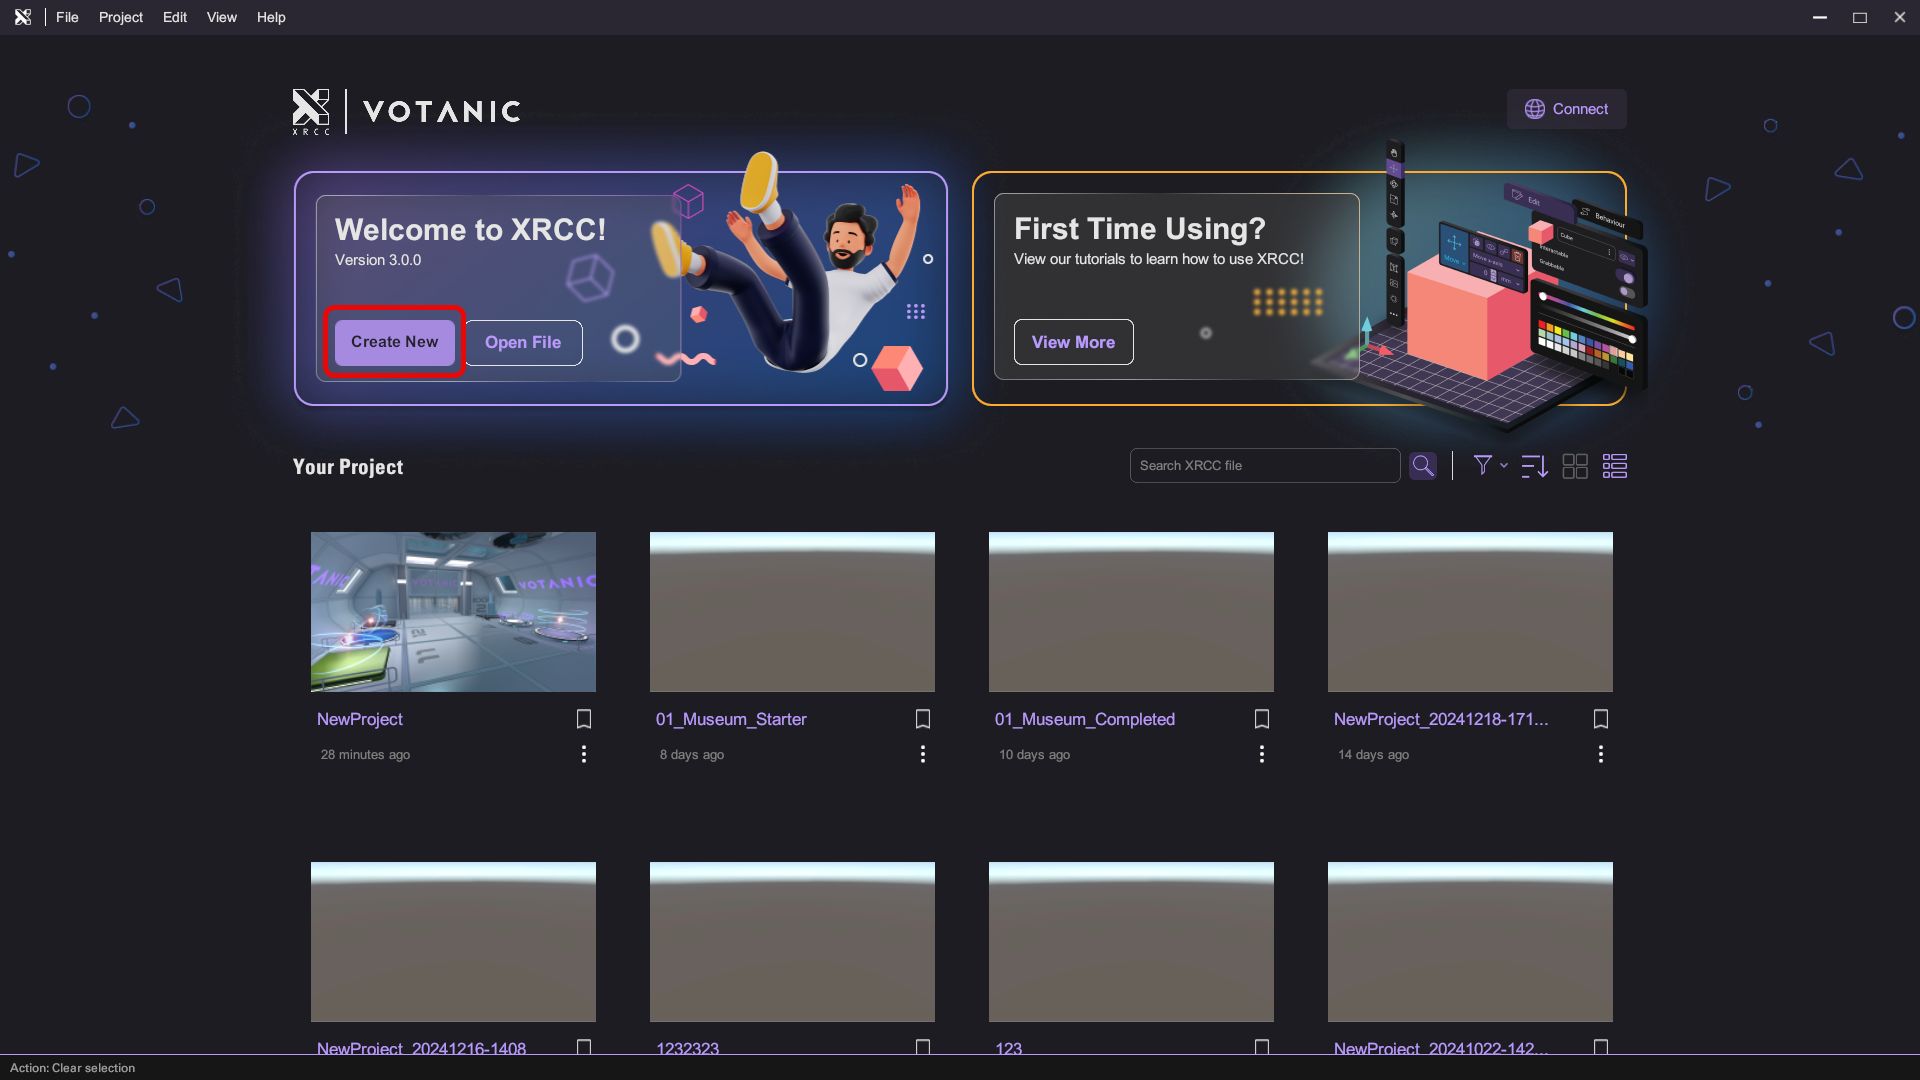
A new XRCC project can be created from the Start Menu or from the Workspace under the File tab.
-
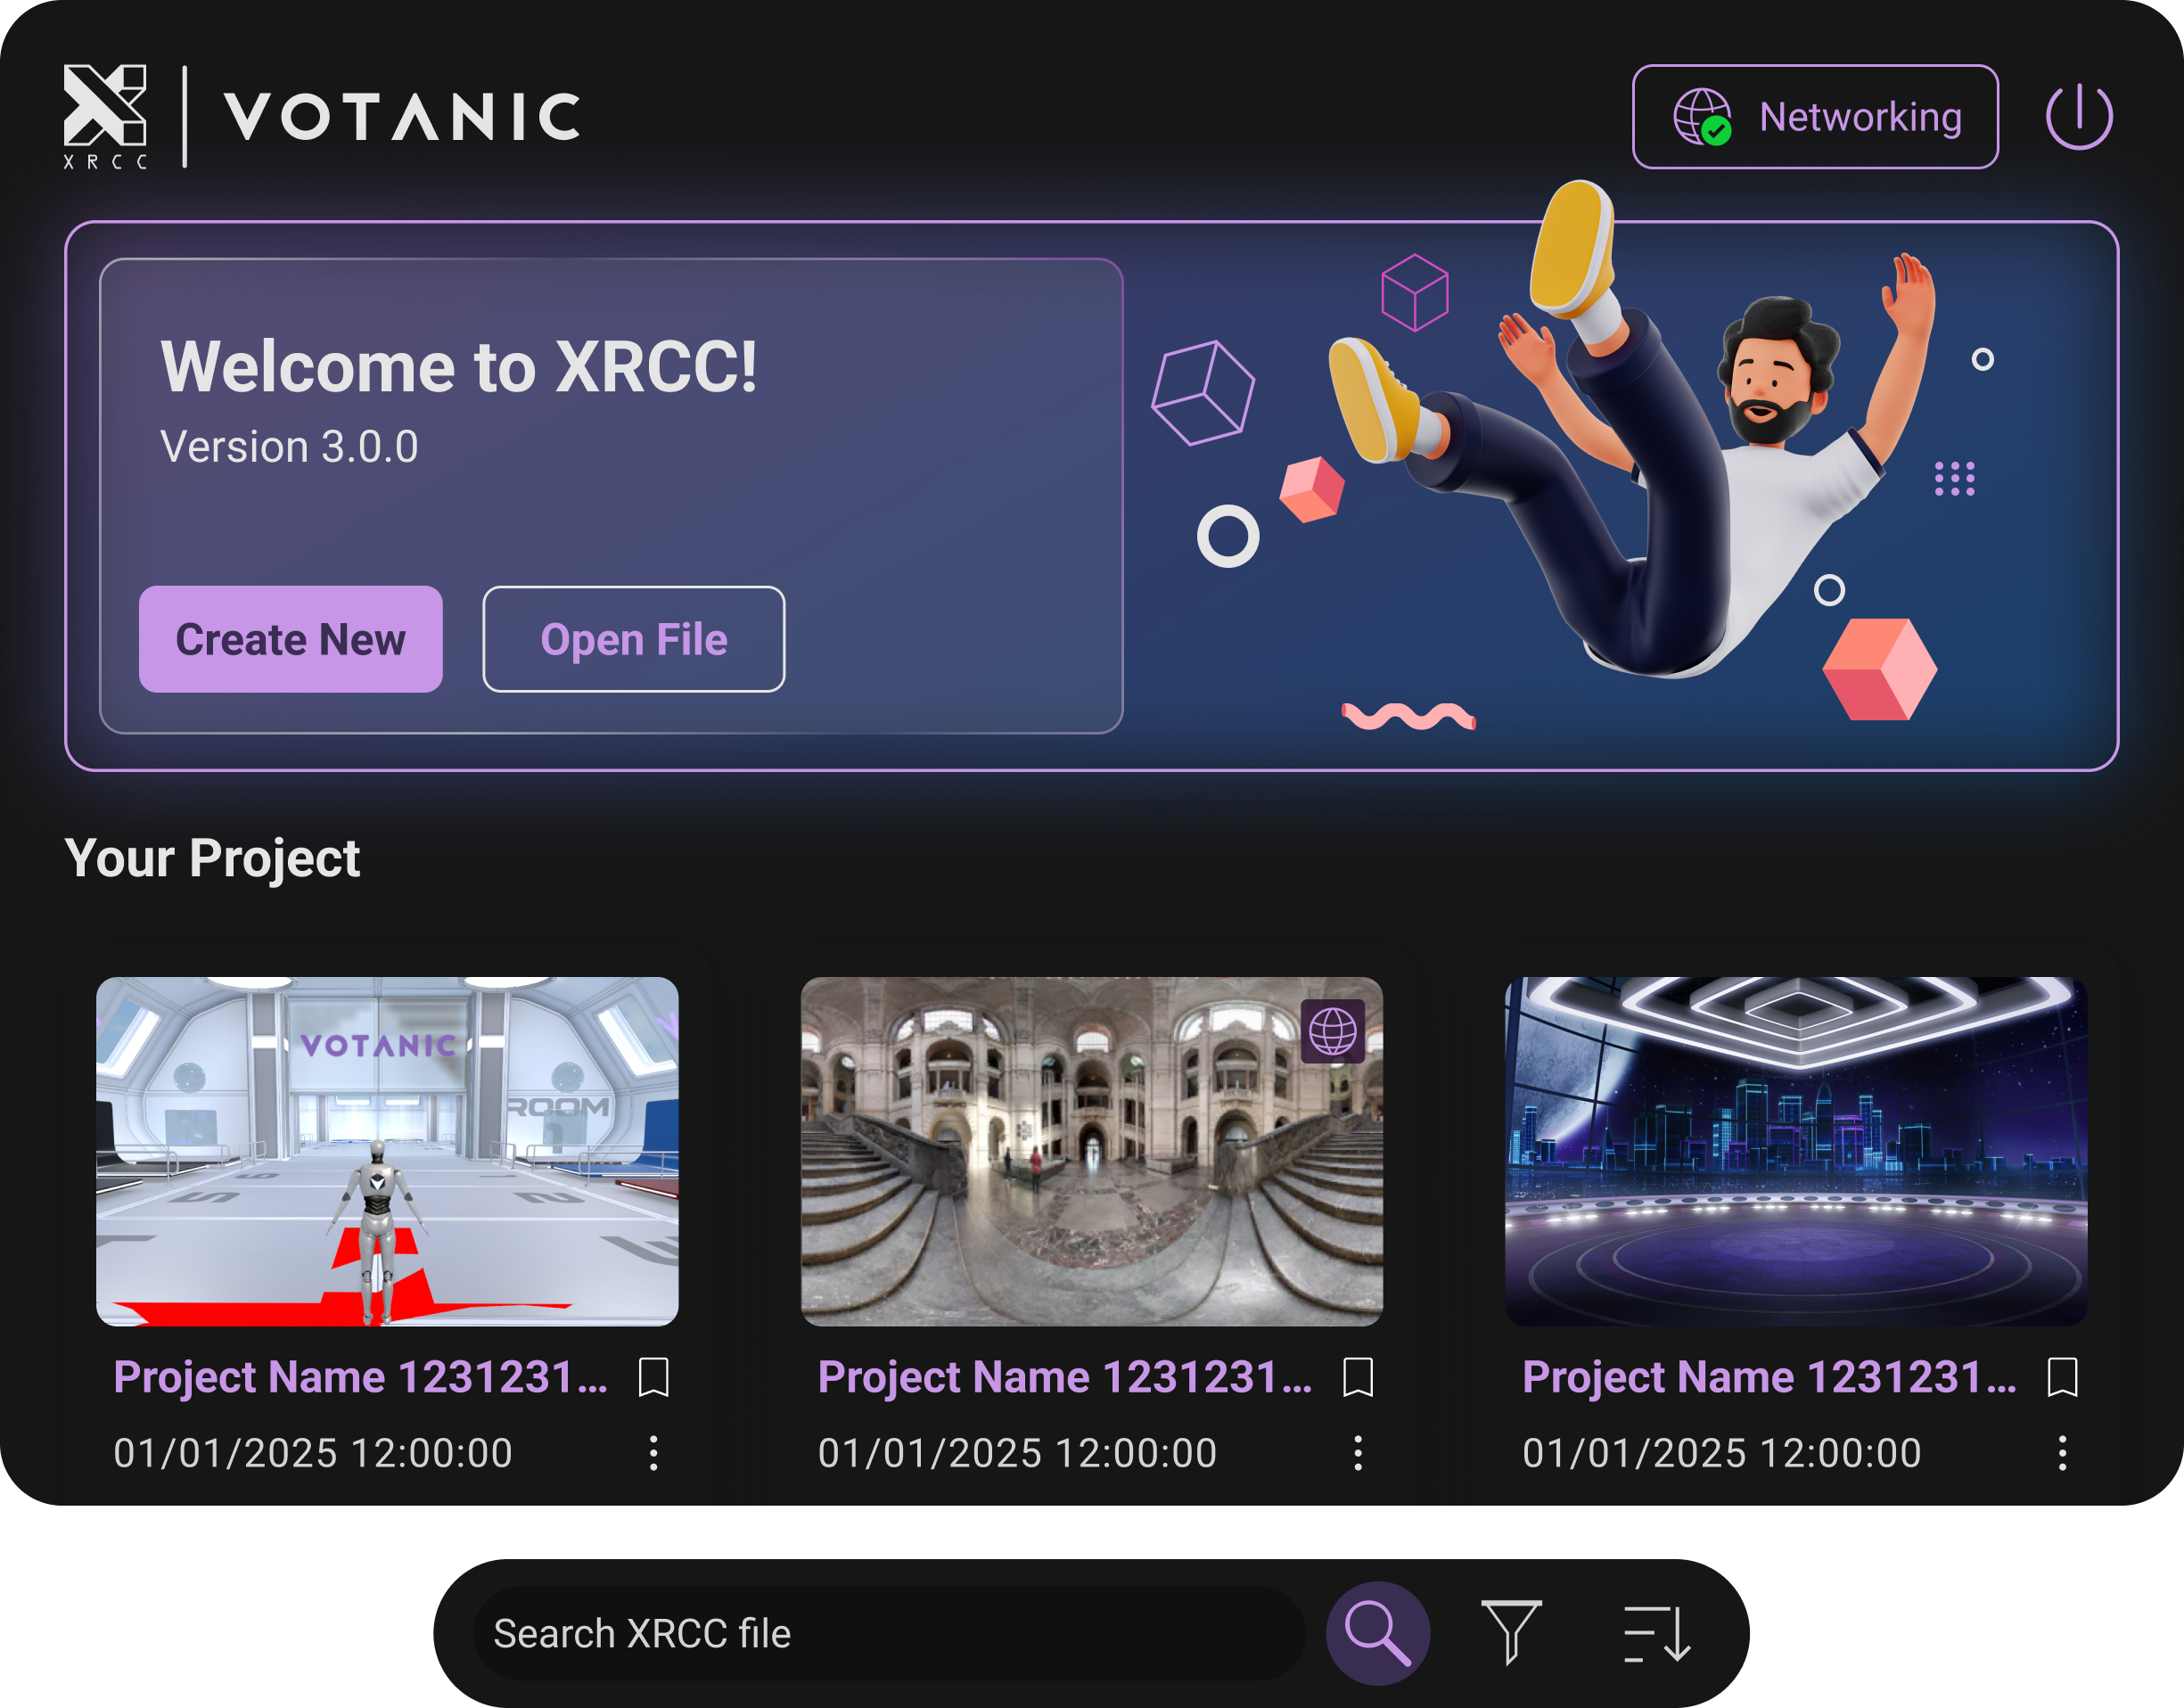
Home Page: At the Home Page, press "Create New" to create a new XRCC project.
-
Workspace: At the Workspace, press "New..." under the "File" tab in the Main Menu to create a new project.
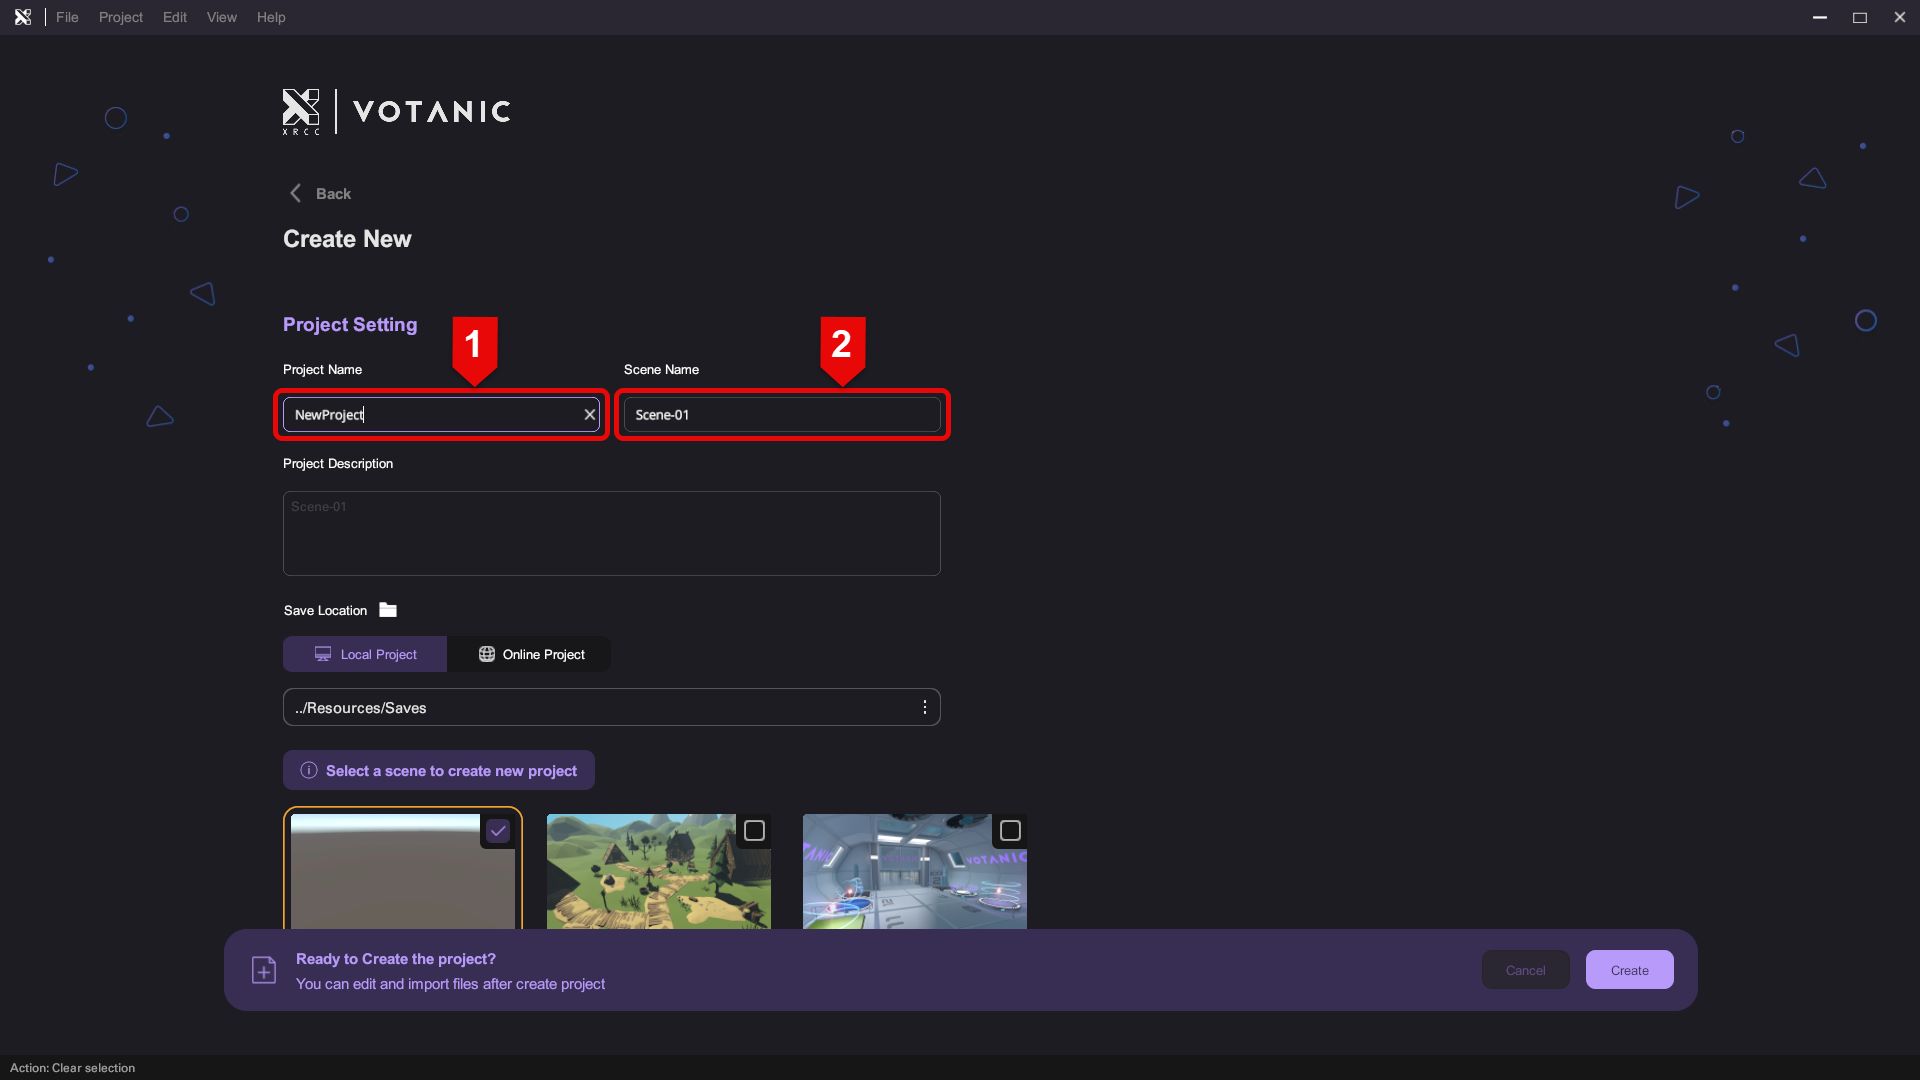
Enter "Project Name" and "Scene Name" for the new project.
Select the start scene you want by pressing on the "Thumbnail", then click "Create" to create a new project.
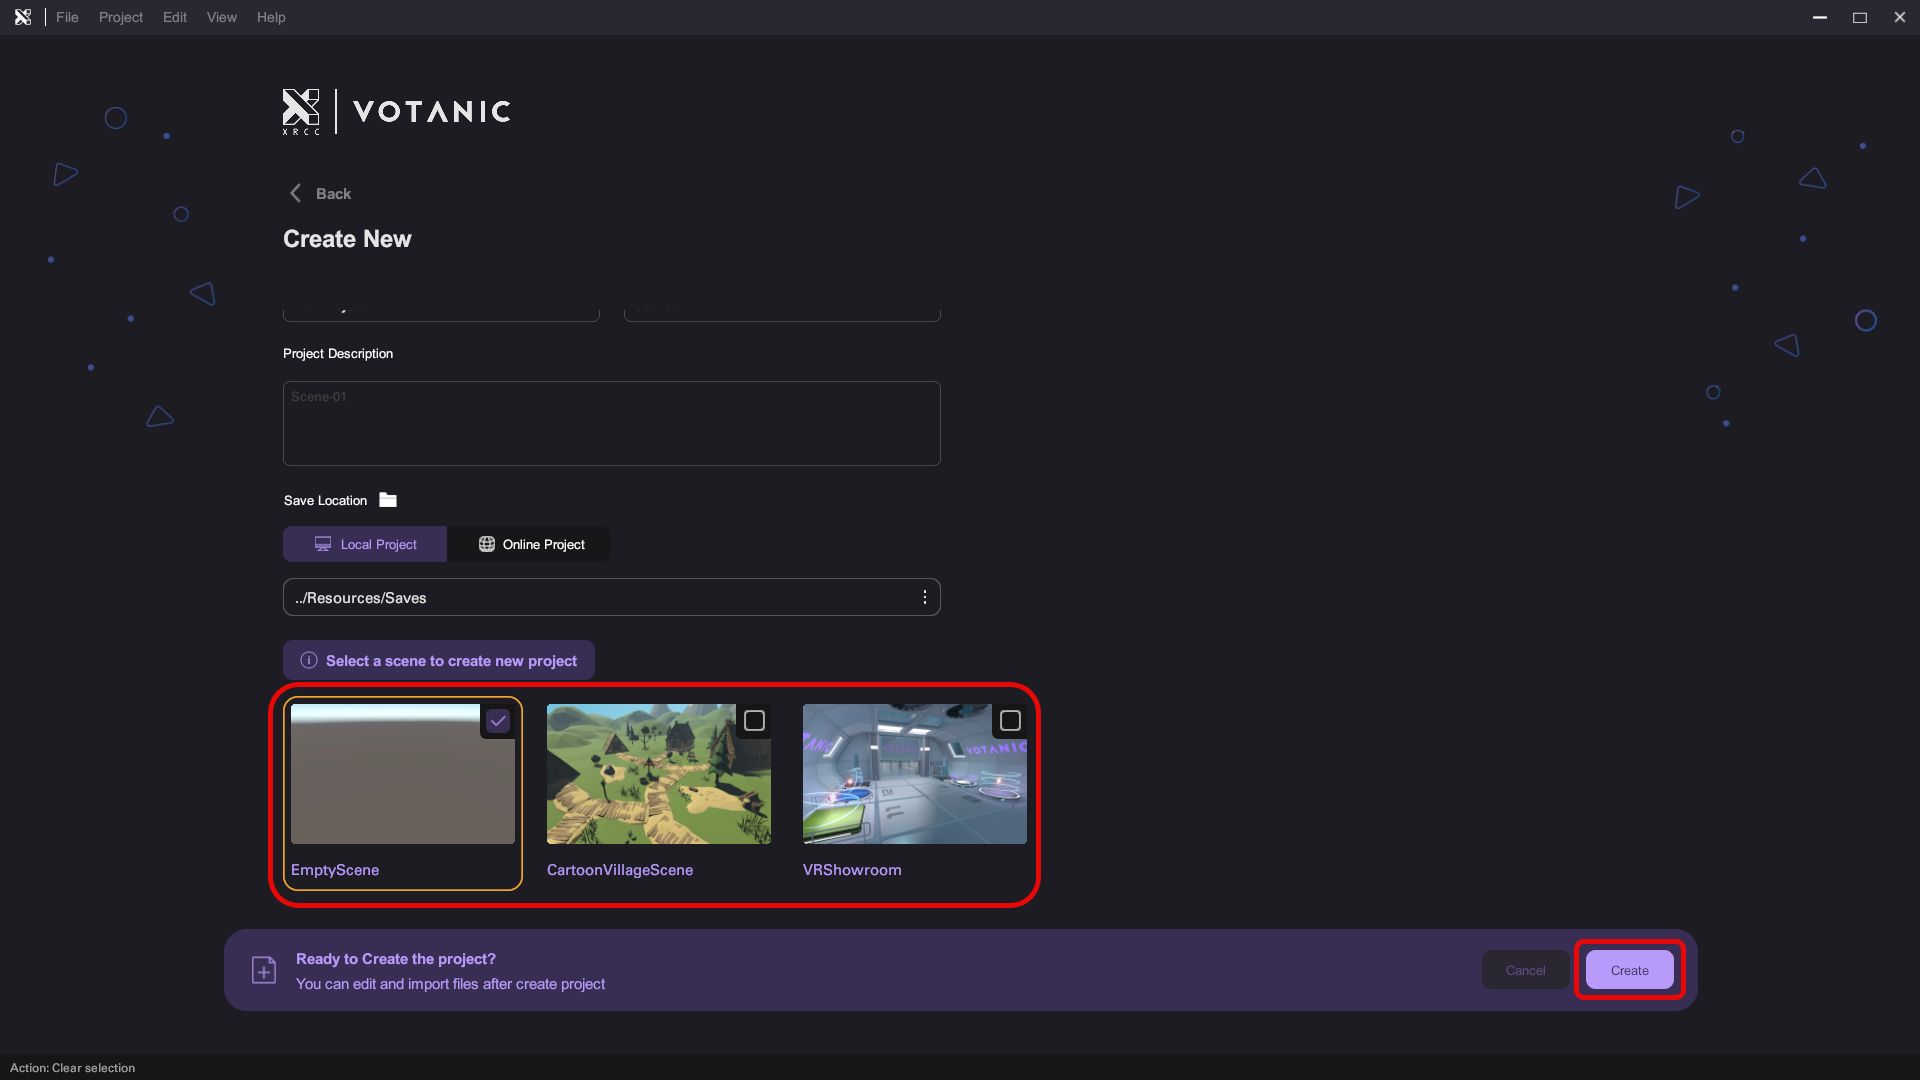
For project creation, a ".ccdata" file will be generated at the designated save location.
After the project is created, it will load the start scene automatically into the Workspace, and you can start building the project in the XRCC PC now.
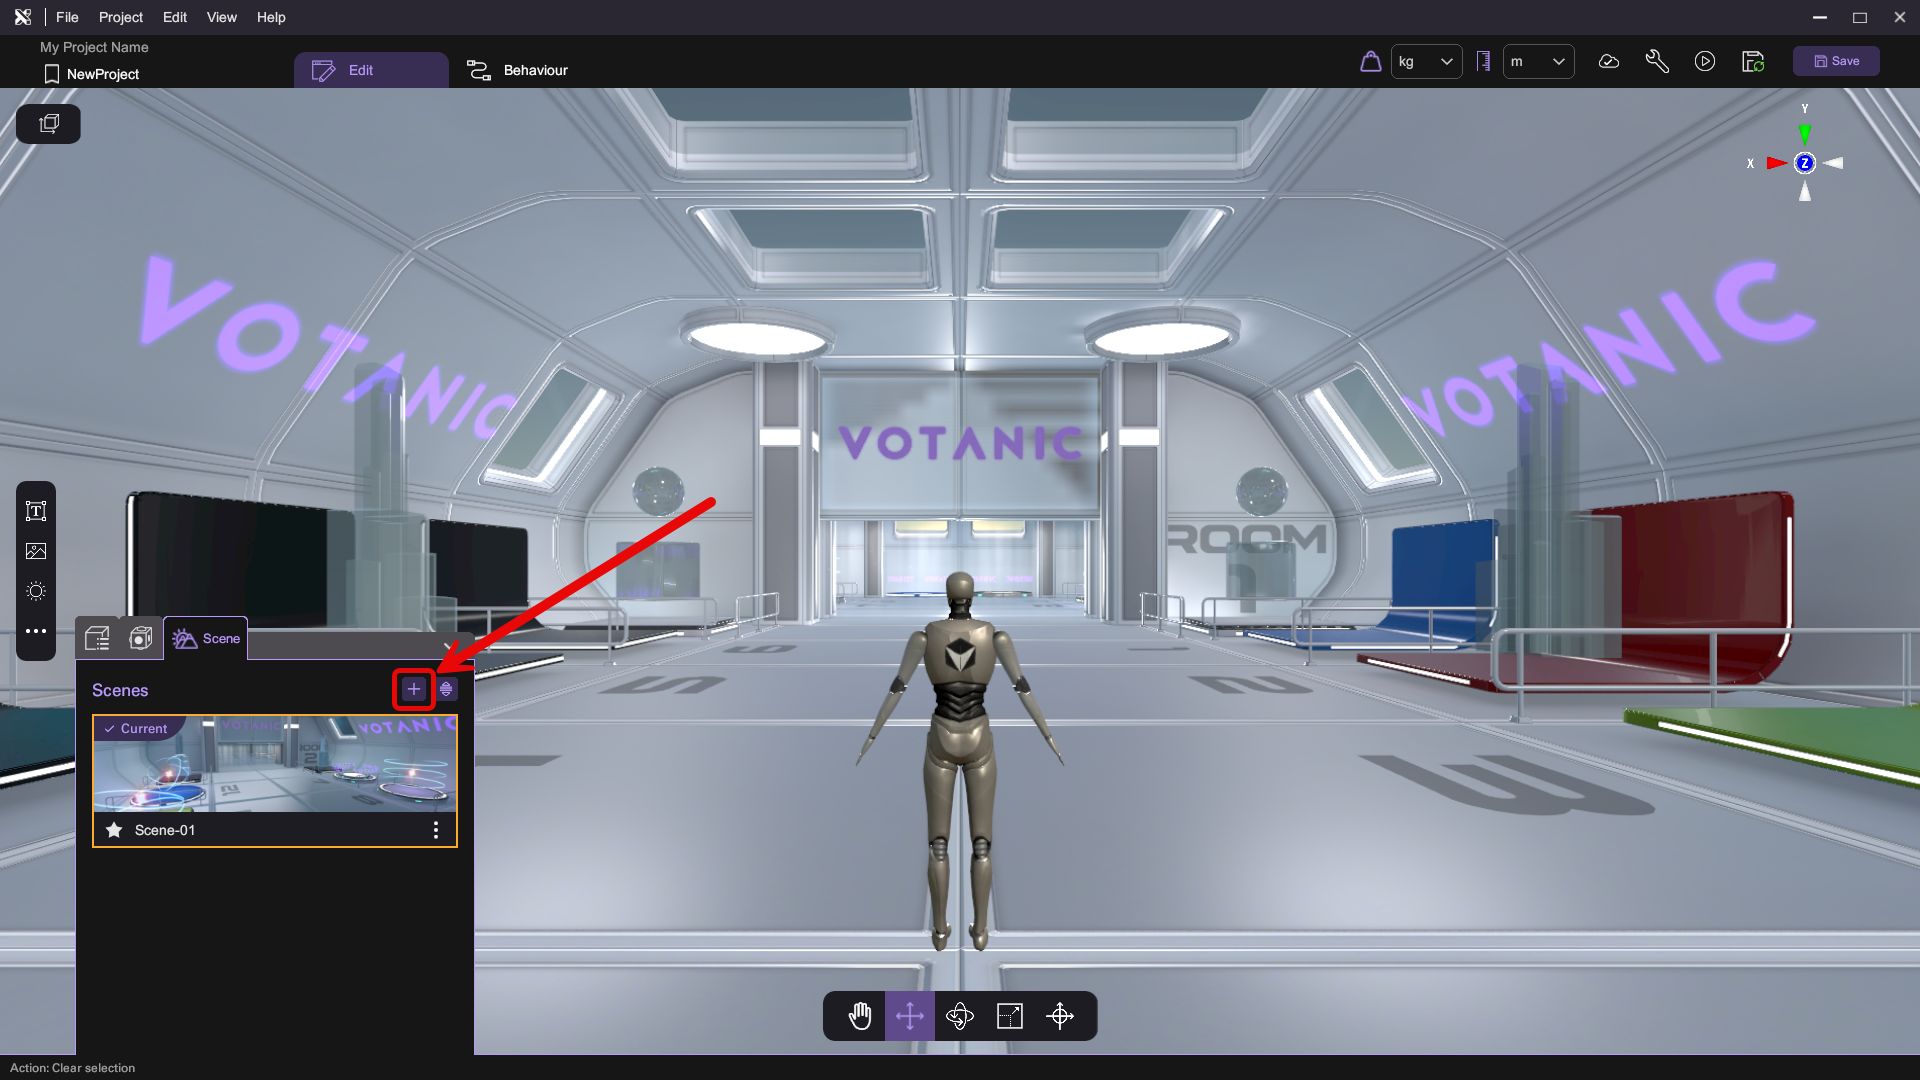
Create and Management Scenes
You may add scenes from the Scene Menu by pressing "Add New Scene" () in the "Scene Menu" at the bottom-left corner.
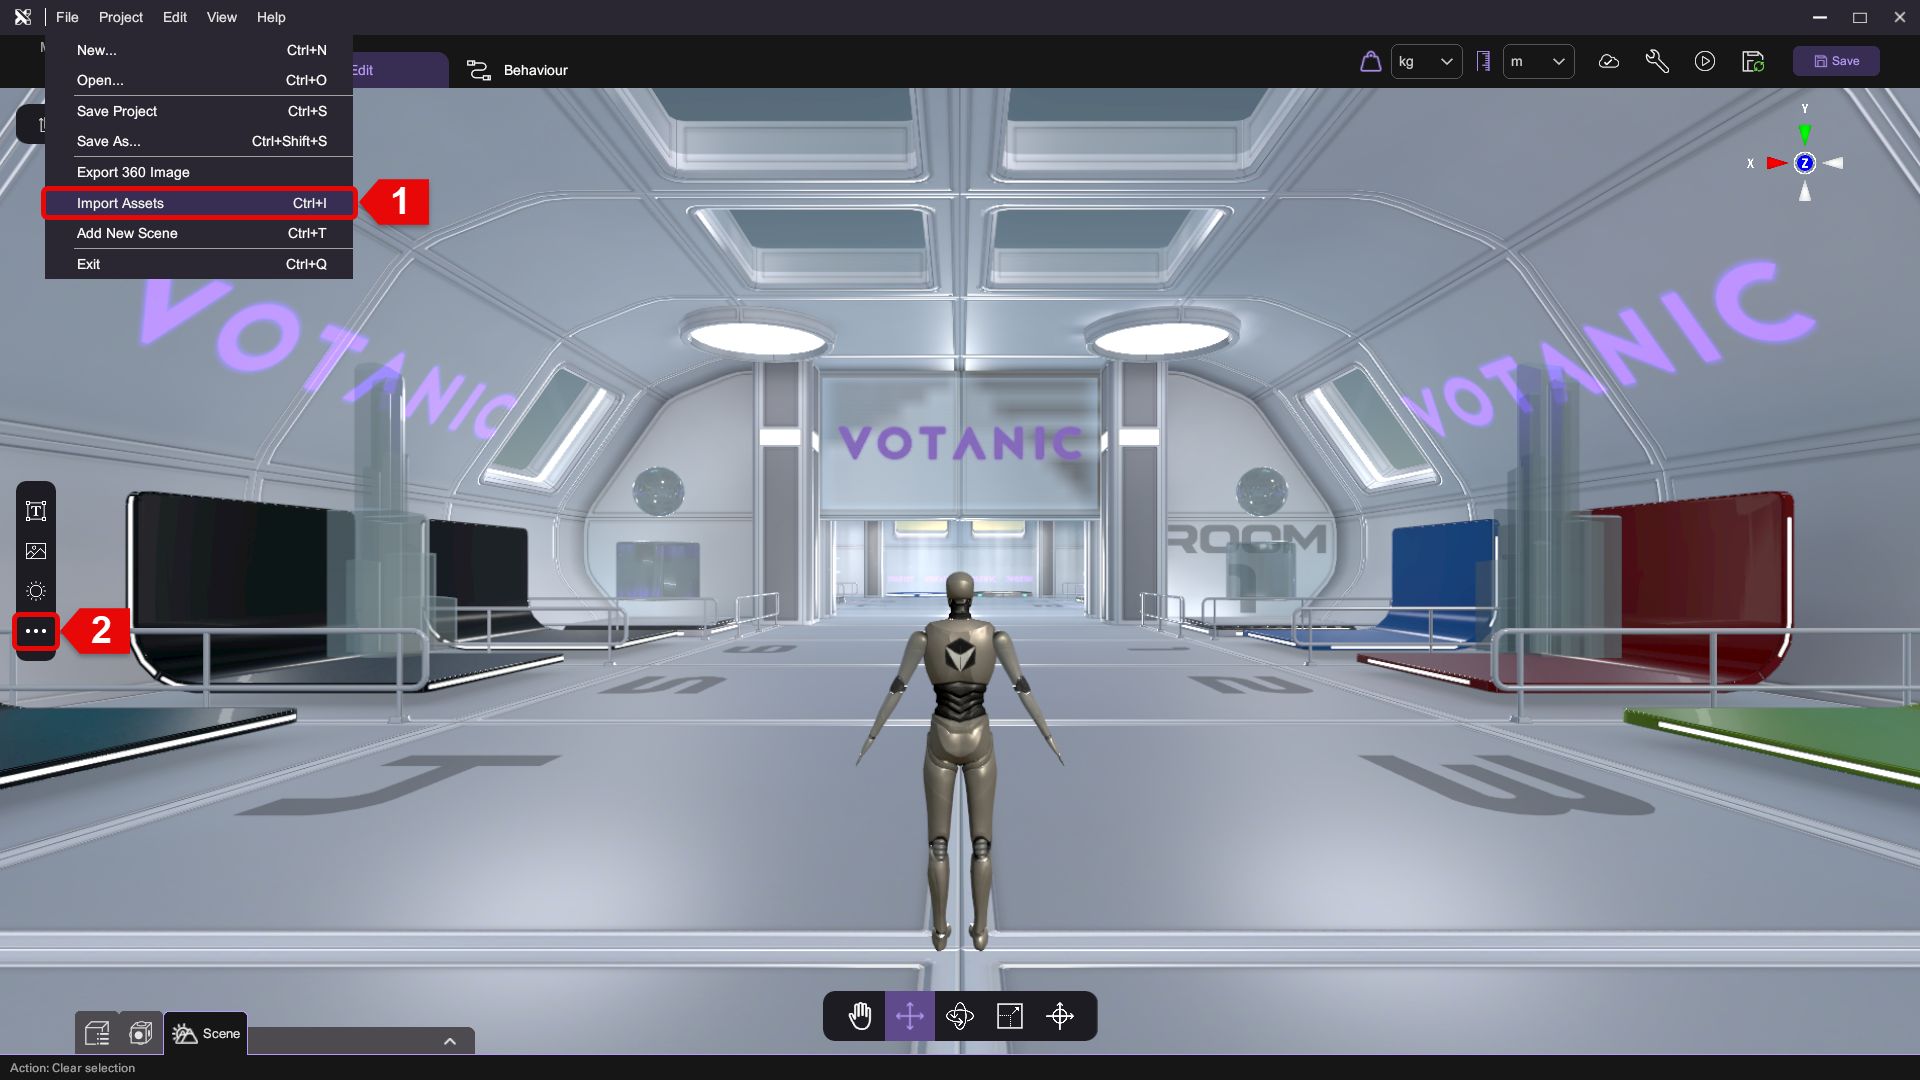
Import Assets
-
Press "Import Assets" (Ctrl + I) in the File tab at the main menu to import new assets to the project. The file browser will appear for you to select the assets to import to the project.
-
Press "Asset Panel" (G) to open asset panel and press the press the "Select File" button to import asset.
By default, the file browser will filter and list out all the supported files in the chosen directory for your selection. Additionally, you can designate an asset type to further filter out the files by selecting one type of asset in the File type drop down list.
To import multiple files at once, press and hold the Ctrl key and click on multiple items or click on the first file and hold the Shift key while click on another file to select all files in between, then press "Import" to import all selected files to the project.
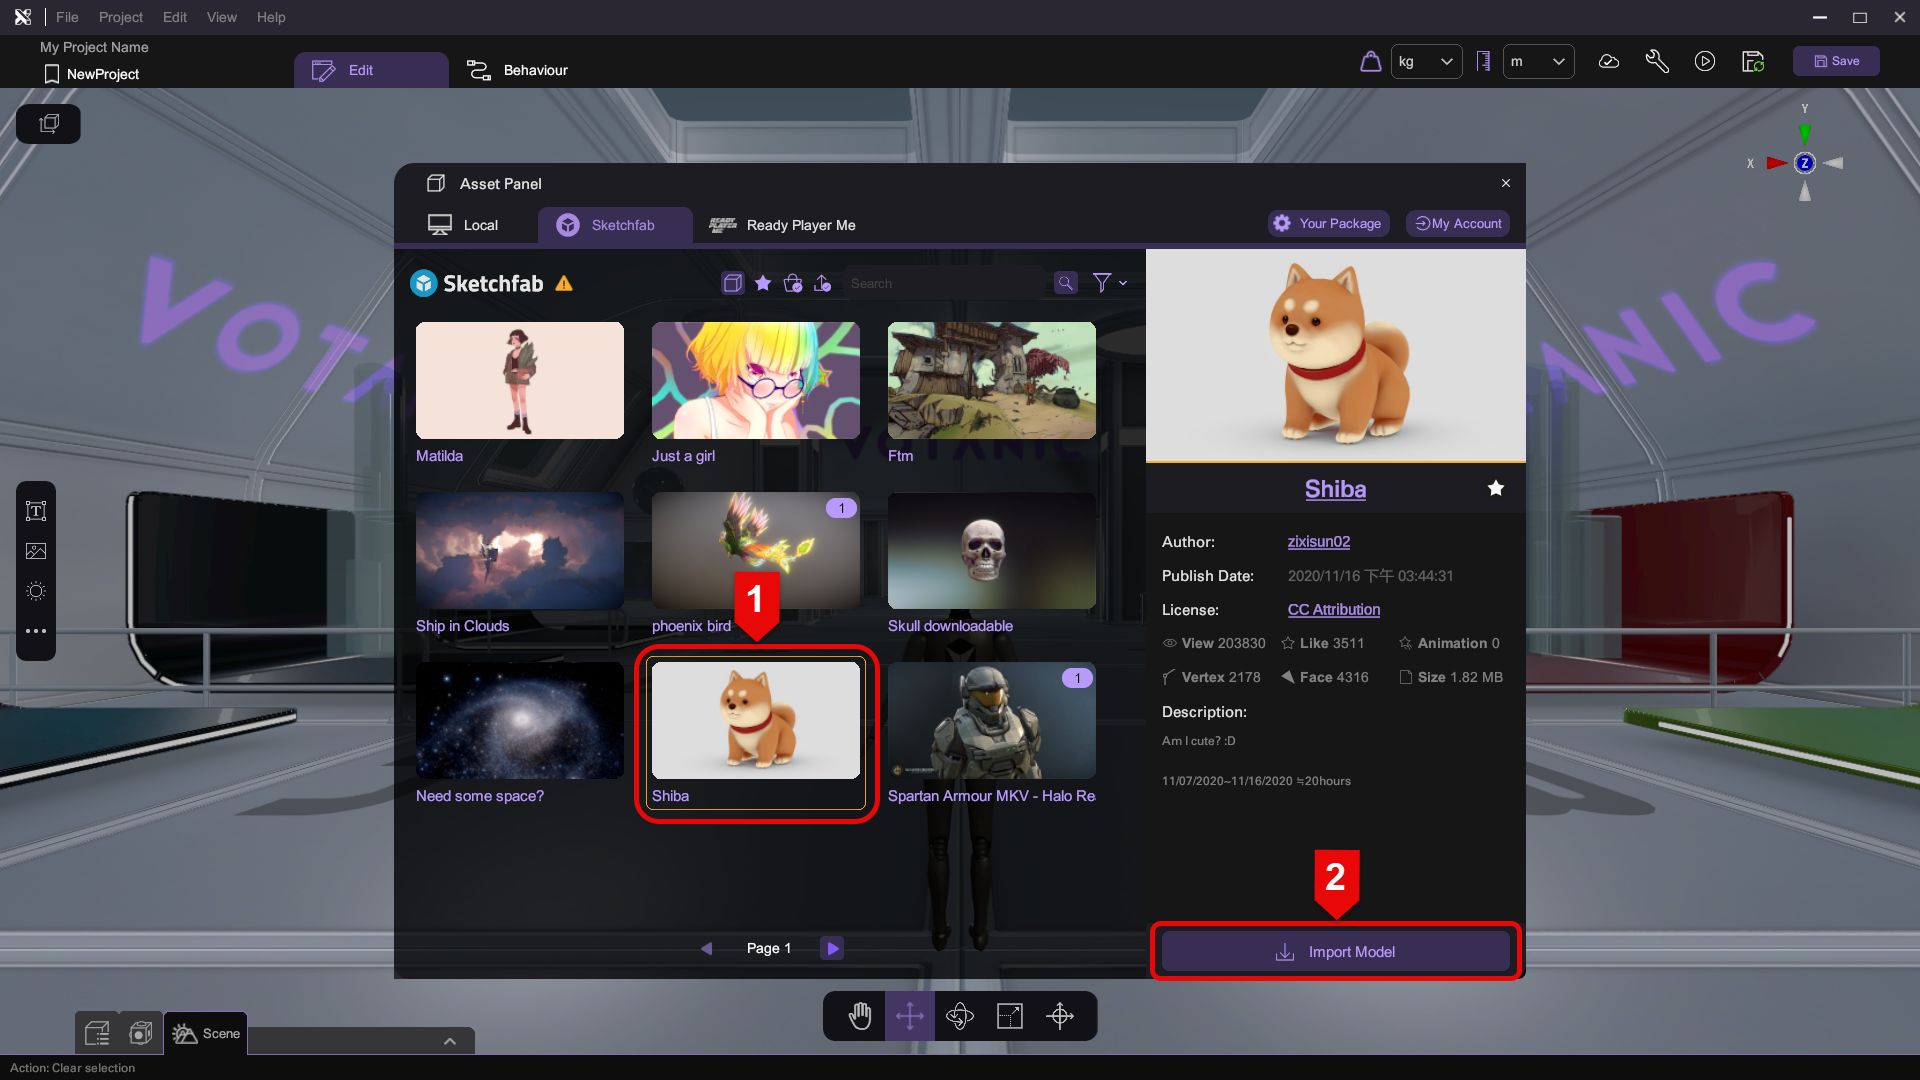
Import 3D Models from Sketchfab
You can search and download 3D models from Sketchfab and import them for use in the project. In the Edit tab, press "Sketchfab Panel" () on the Toolbar to open the panel that allows you to browse 3D models from Sketchfab. The Sketchfab Panel contains 4 components as shown below.
logging in to the Sketchfab account is required for model downloading.
To download 3D models from Sketchfab, select the model that you would like to download and press "Import Model" ().
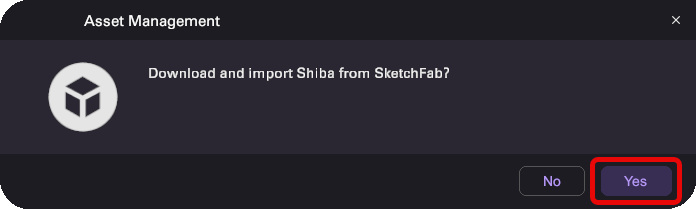
Press "Yes" to confirm to proceed to download the model.
When downloading a 3D model, the icon at the bottom-right corner of the model thumbnail and the status will change according to the download process. When the model is non downloadable, an error window will appear and the icon and status will be changed.
Build the Scene
Add Object to Scene
In the Toolbar, press "Asset Panel" () (G) to open the Asset Panel.
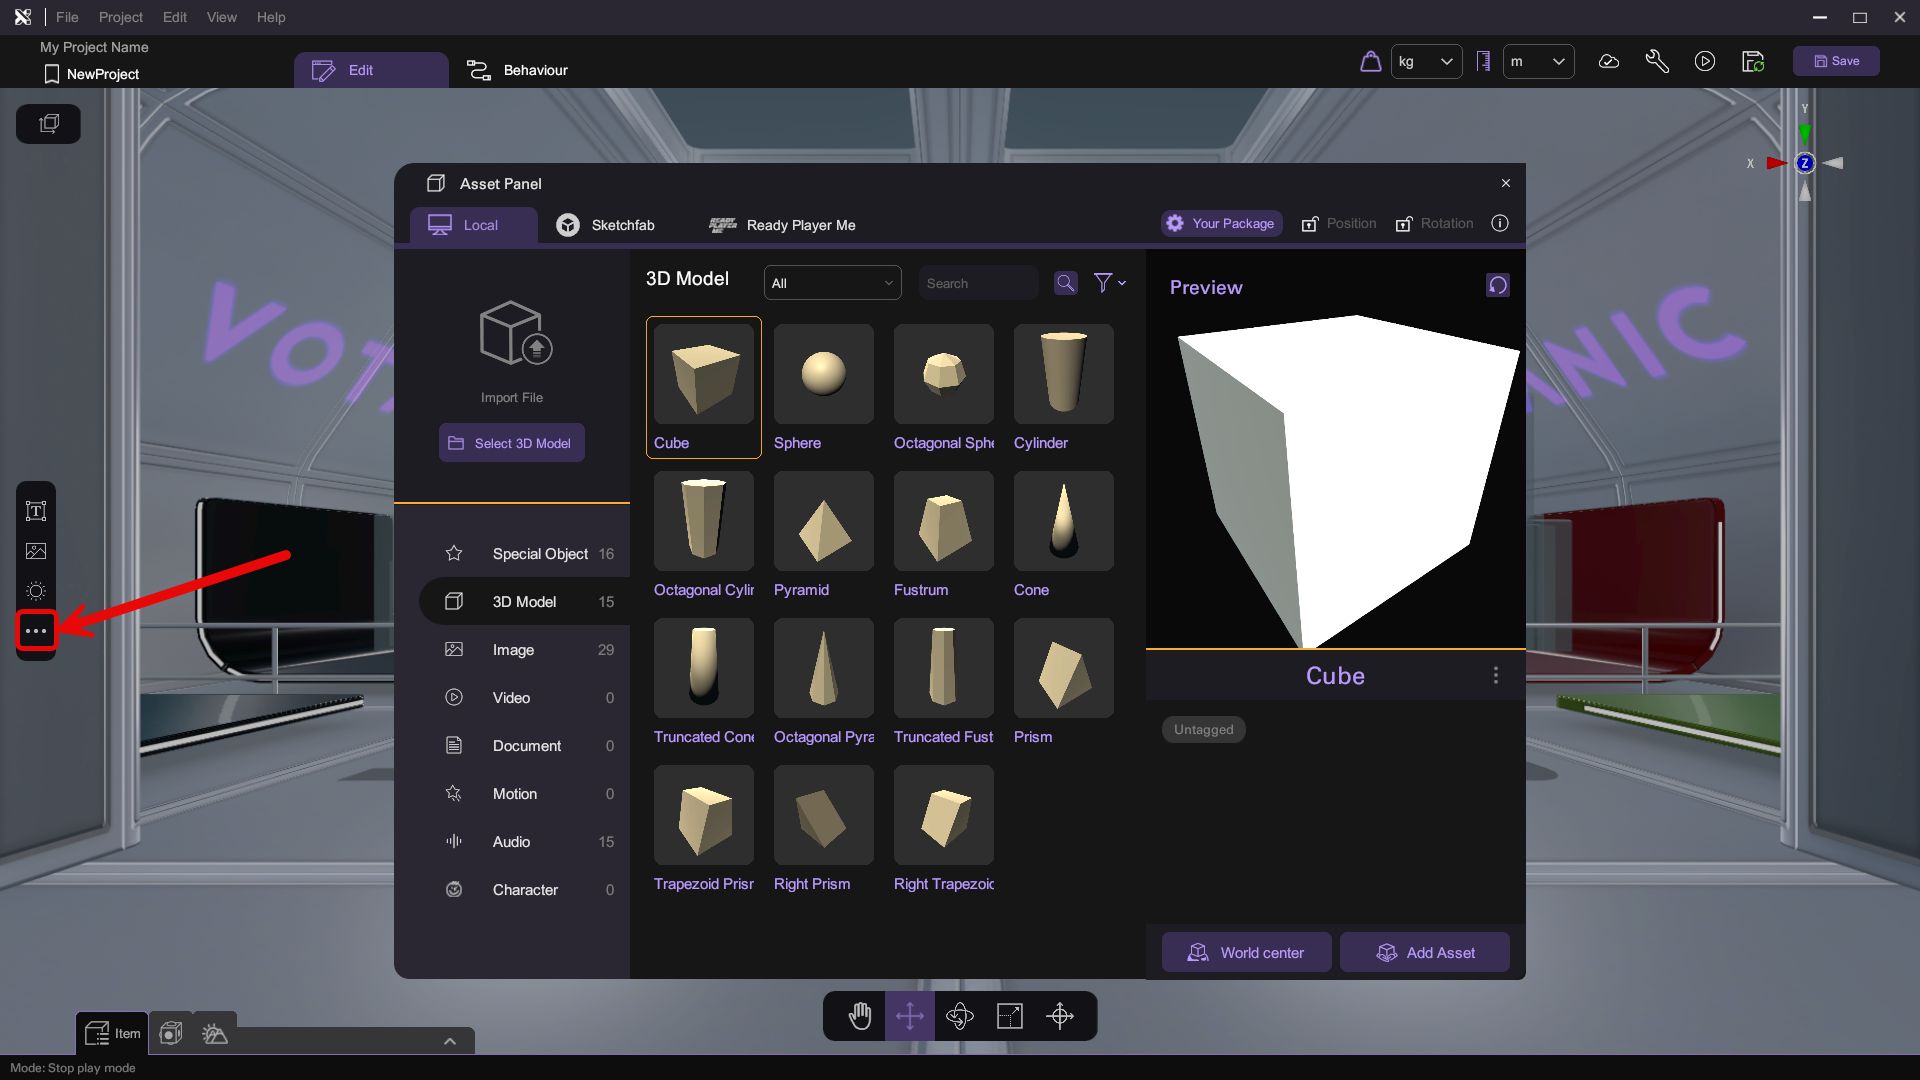
The panel displays all 3D model assets grouped by their theme. Select a model and press "World Center"/ "Add Asset" or double-click the model to spawn it in the scene as an object. The new object will spawn in front of you at the centre of the Scene View. Use the lock position / rotation buttons to add additional constraints when spawn objects to scene, and use the spawn button to select where you want the object to be spawned.
| Spawn Option | Description | Image |
|---|---|---|
| Spawn item in front of camera | Spawn item in front of the camera | |
| Spawn item at world origin | Spawn item at the world origin (0,0,0) |
Add Special Objects
Several pre-configured Special Objects are provided in XRCC with dedicated functions for use under different special use cases. The Special Objects can be accessed from the New Item Panel under "Special Objects".
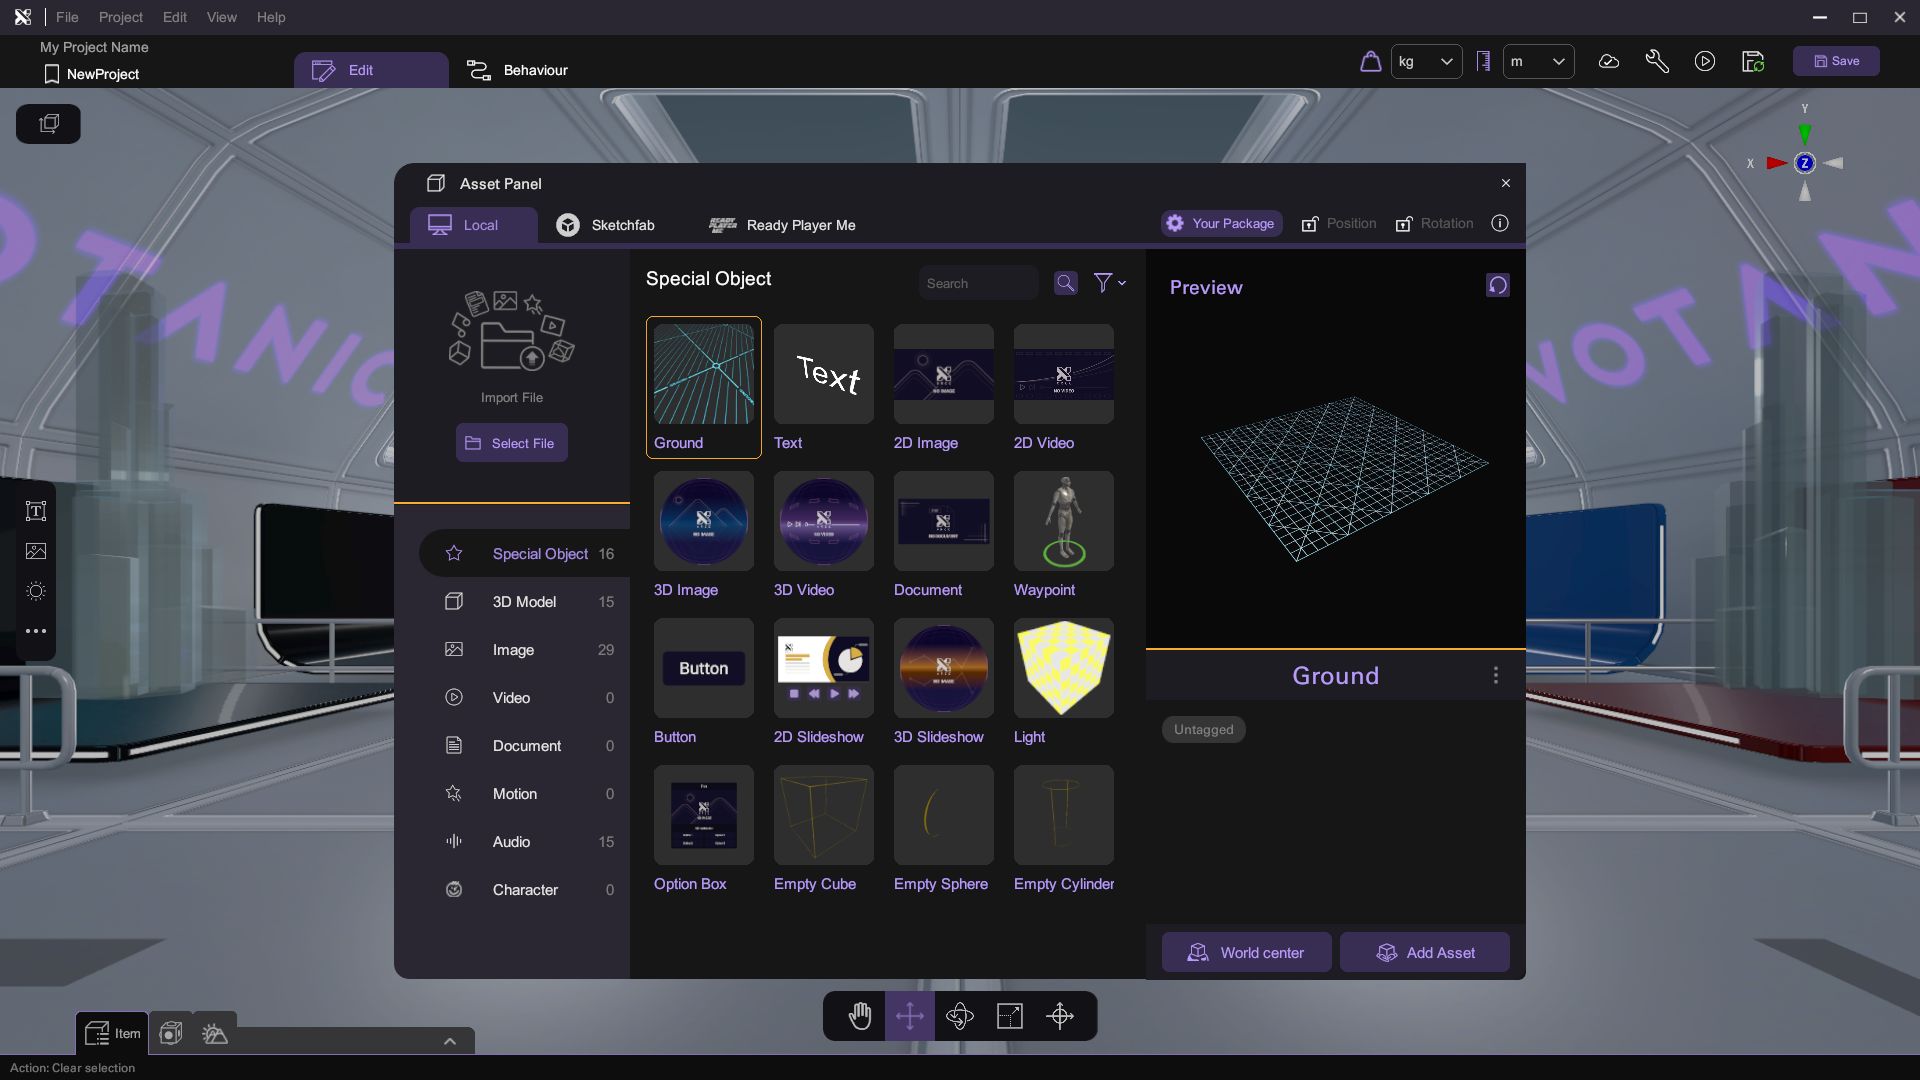
To add images, videos, documents to the scene, you need to use the corresponding special object.
Object Selection
To select an object, use a transform tool (move / rotate / scale / offset) to point and left-click on the object in the scene. Any objects that can be selected will have a green overlay when the mouse cursor hovers over it. Click on any region in the scene with no object to cancel the selection. The selected object will have a green outline around it.
| Selectable Object (green overlay) | Selected Object (green outline) |
|---|---|
 |  |
To quickly focus on the selected object, simply press the shortcut key 'F' on your keyboard.
Object Transform
When an object is selected, a gizmo will appear for you to control the chosen transform operation. All gizmos have 3 arms pointing the X, Y, and Z axis. Click and drag the arm to transform the object in the indicated axis.
| Tool | Icon | Shortcut | Gizmo | Description |
|---|---|---|---|---|
| Look Tool |  | Q key | / | Provide a clearer view to look and find the objects in the scene. |
| Move Tool |  | W key |  | Move the object position. Click and drag the square to move in 2 axes at once. |
| Rotate Tool |  | E key |  | Rotate the object. |
| Scale Tool |  | R key |  | Scale the object. Click and drag the cube to scale in all axes. |
| Offset Tool |  | T key |  | Offset the object's anchor point (centre). Click and drag the arc to offset in 2 axes at once. |
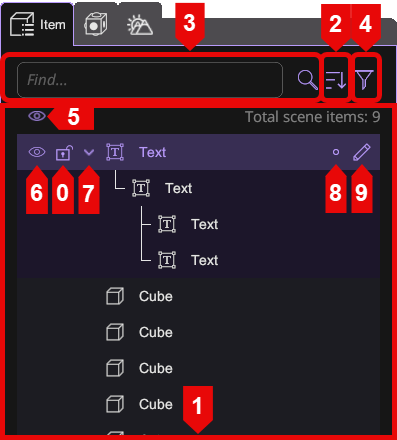
Item Menu
All objects added to the scene can be viewed from the Item Menu. To access the Item Menu, press the "Item Menu" () (B) in the Edit tab. In the menu, all objects in the scene including the parent/child relationship are displayed in a list, you will be able to select, search, sort, rename, delete and hide the object in the scene using the Item Menu.
| Section | Description |
|---|---|
| Lock Item | |
| Item List Area | |
| Sorting Options | |
| Search Bar | |
| Search Filter Toggle | |
| Hide all objects in editor mode | |
| Hide object in editor mode | |
| Expand object relationship | |
| Set bookmark color | |
| Rename |
Inspector
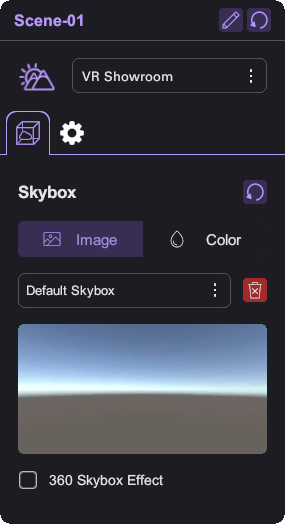
Press "Inspector" () (I) to toggle the Inspector Panel. The panel displays the detail of the selected object and allows you to modify various object properties. Some special objects have more unique settings that can only be assessed through the panel.
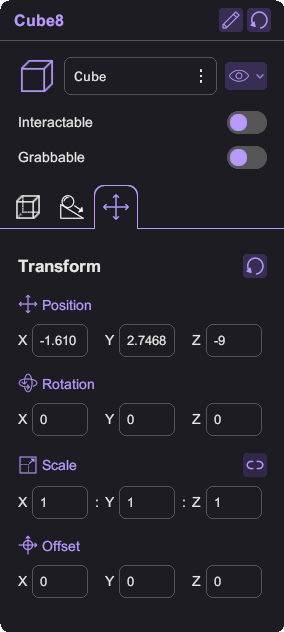
If you deselect all objects in scene, the Inspector will allow you to configure the Scene Setting.
Add Interactivity
You can create and view behaviour by first select an object in the Scene View, then switch to the Behaviour tab to add or view behaviour for the selected object.
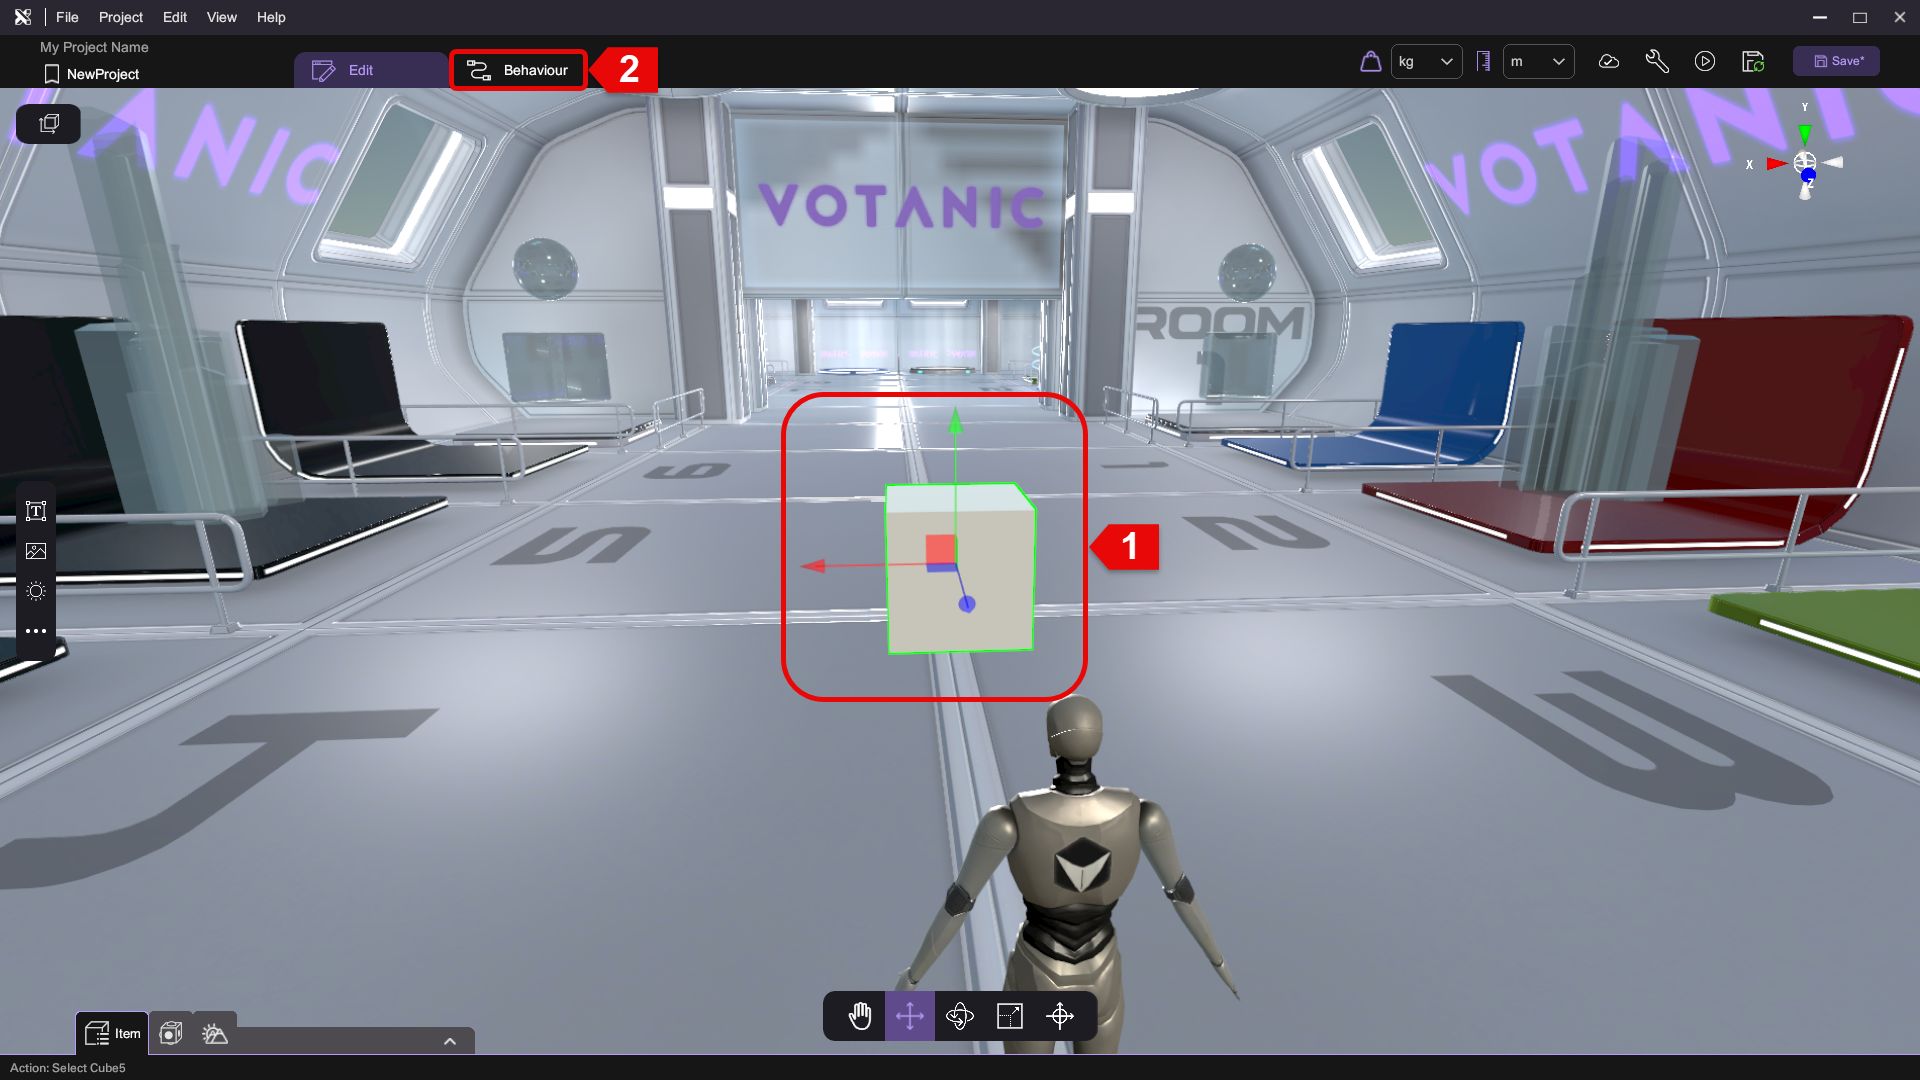
if you access the Behavior tab without selecting any objects, you can define or view behaviors for the current scene.
Building New Behaviour
To create a behaviour, simply drag the behaviour blocks you need to the Behaviour Graph Panel and connect the blocks. Drag-and-release from the output node to the input node of the destined block to form a line.
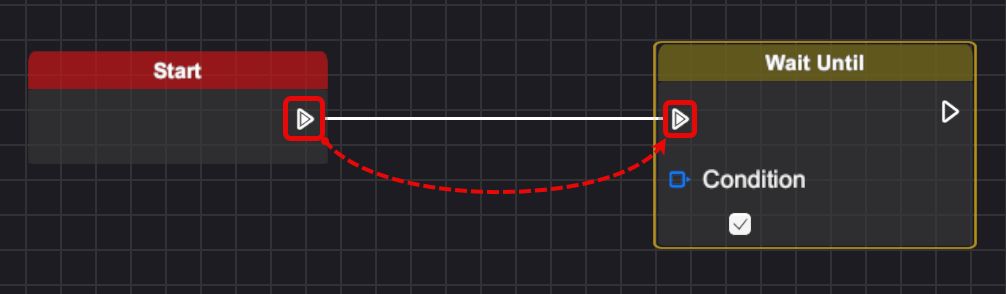
You will need to use an "Event" type block to kickstart any behaviour. We consider it one behaviour when different behaviour blocks are joined together by connection wires, which form a complete execution chain. More than one behaviour can co-exist for an item, and they can execute independently or even use the same event to start the behaviour.
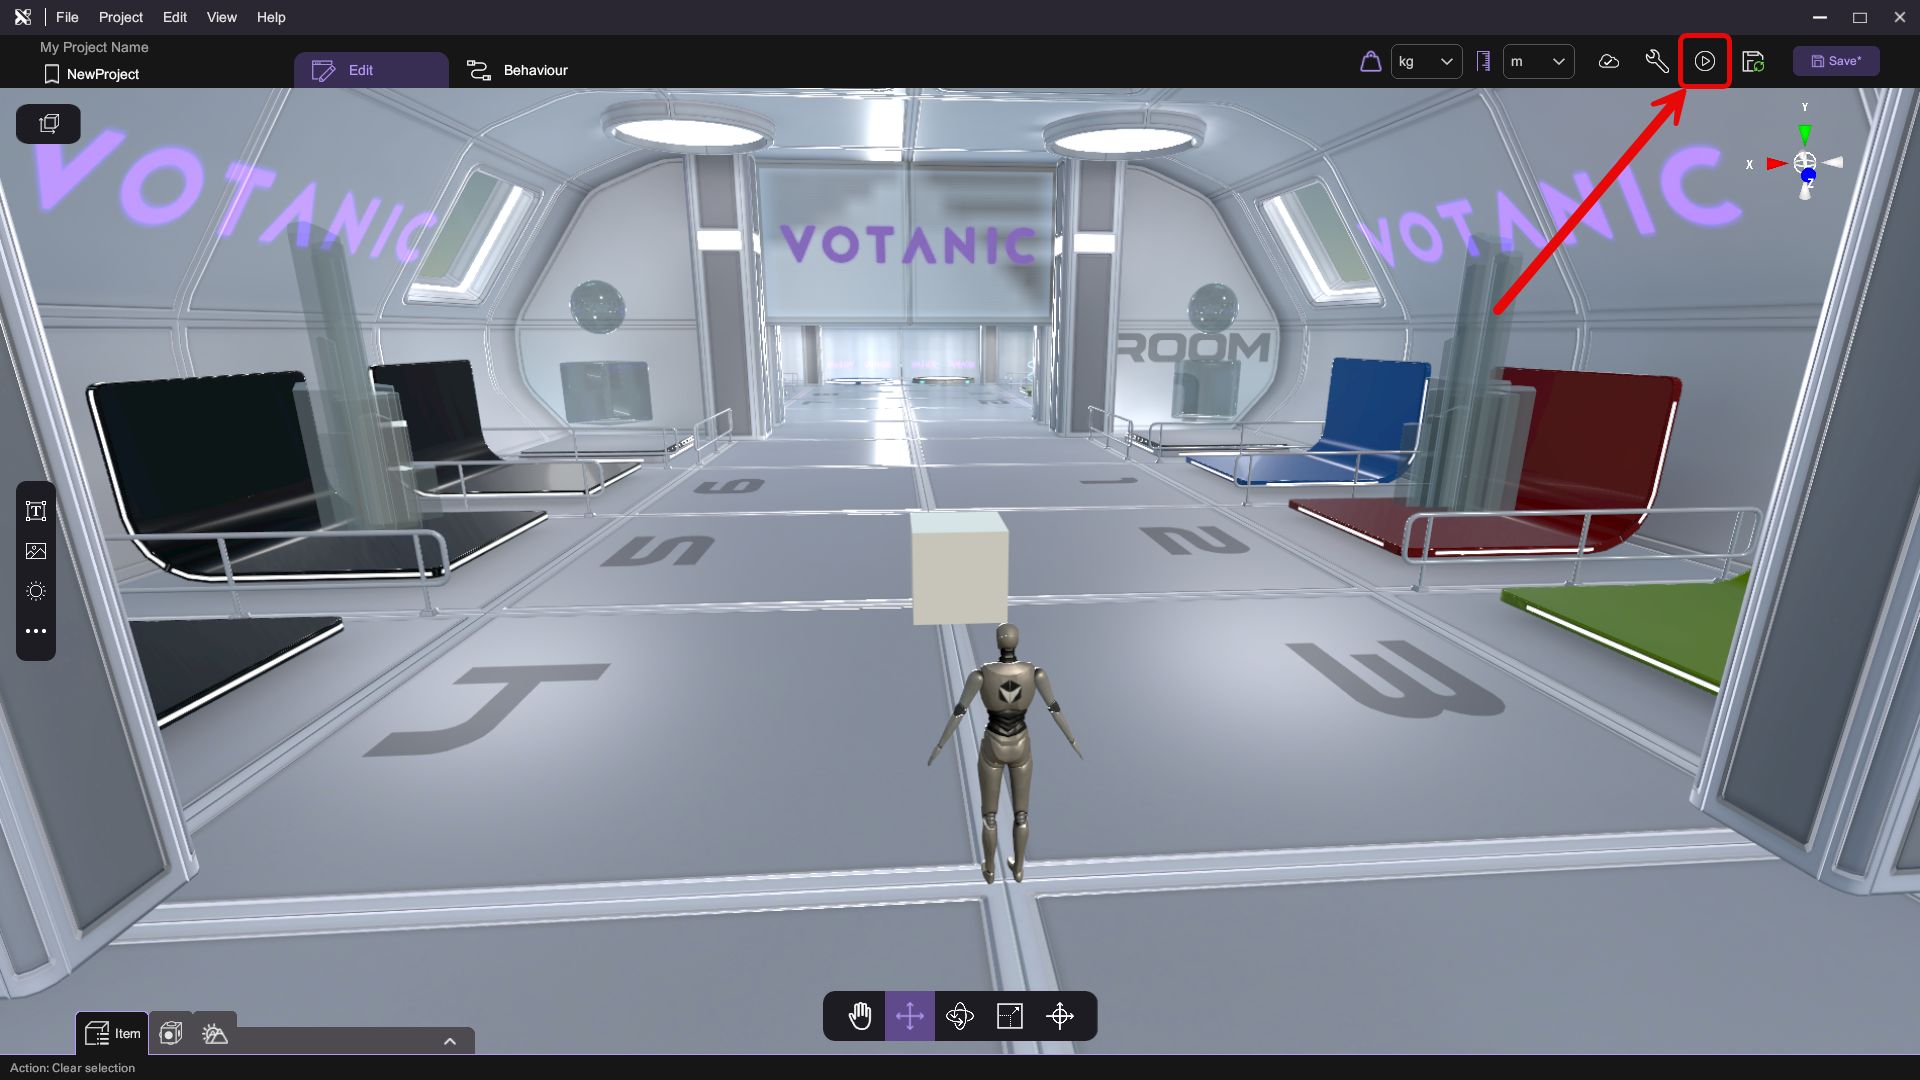
Test in XRCC (PC)
You can use the XRCC (PC) to test how your XR experience will work out. Select "Play Mode" () to test your content in XRCC (PC), press ESC to stop the Play Mode and return to the Workspace.
Fine-Tune and Play in XRCC (XR)
Launch the XRCC XR mode for various XR platforms by double-clicking the corresponding batch file:
-
CAVE: XRCC (XR)_[CAVE][XR].bat
-
VR Headsets: XRCC (XR)_[Local][HMD][XR].bat
-
PC: XRCC (XR)_[Local][PC][XR].bat
Play Project in XR
To start a local project, click on the thumbnail of the project and click the "Play" button.
A file browser will appear for you to find your project save location. Select the .ccdata file of your project and click "Open".
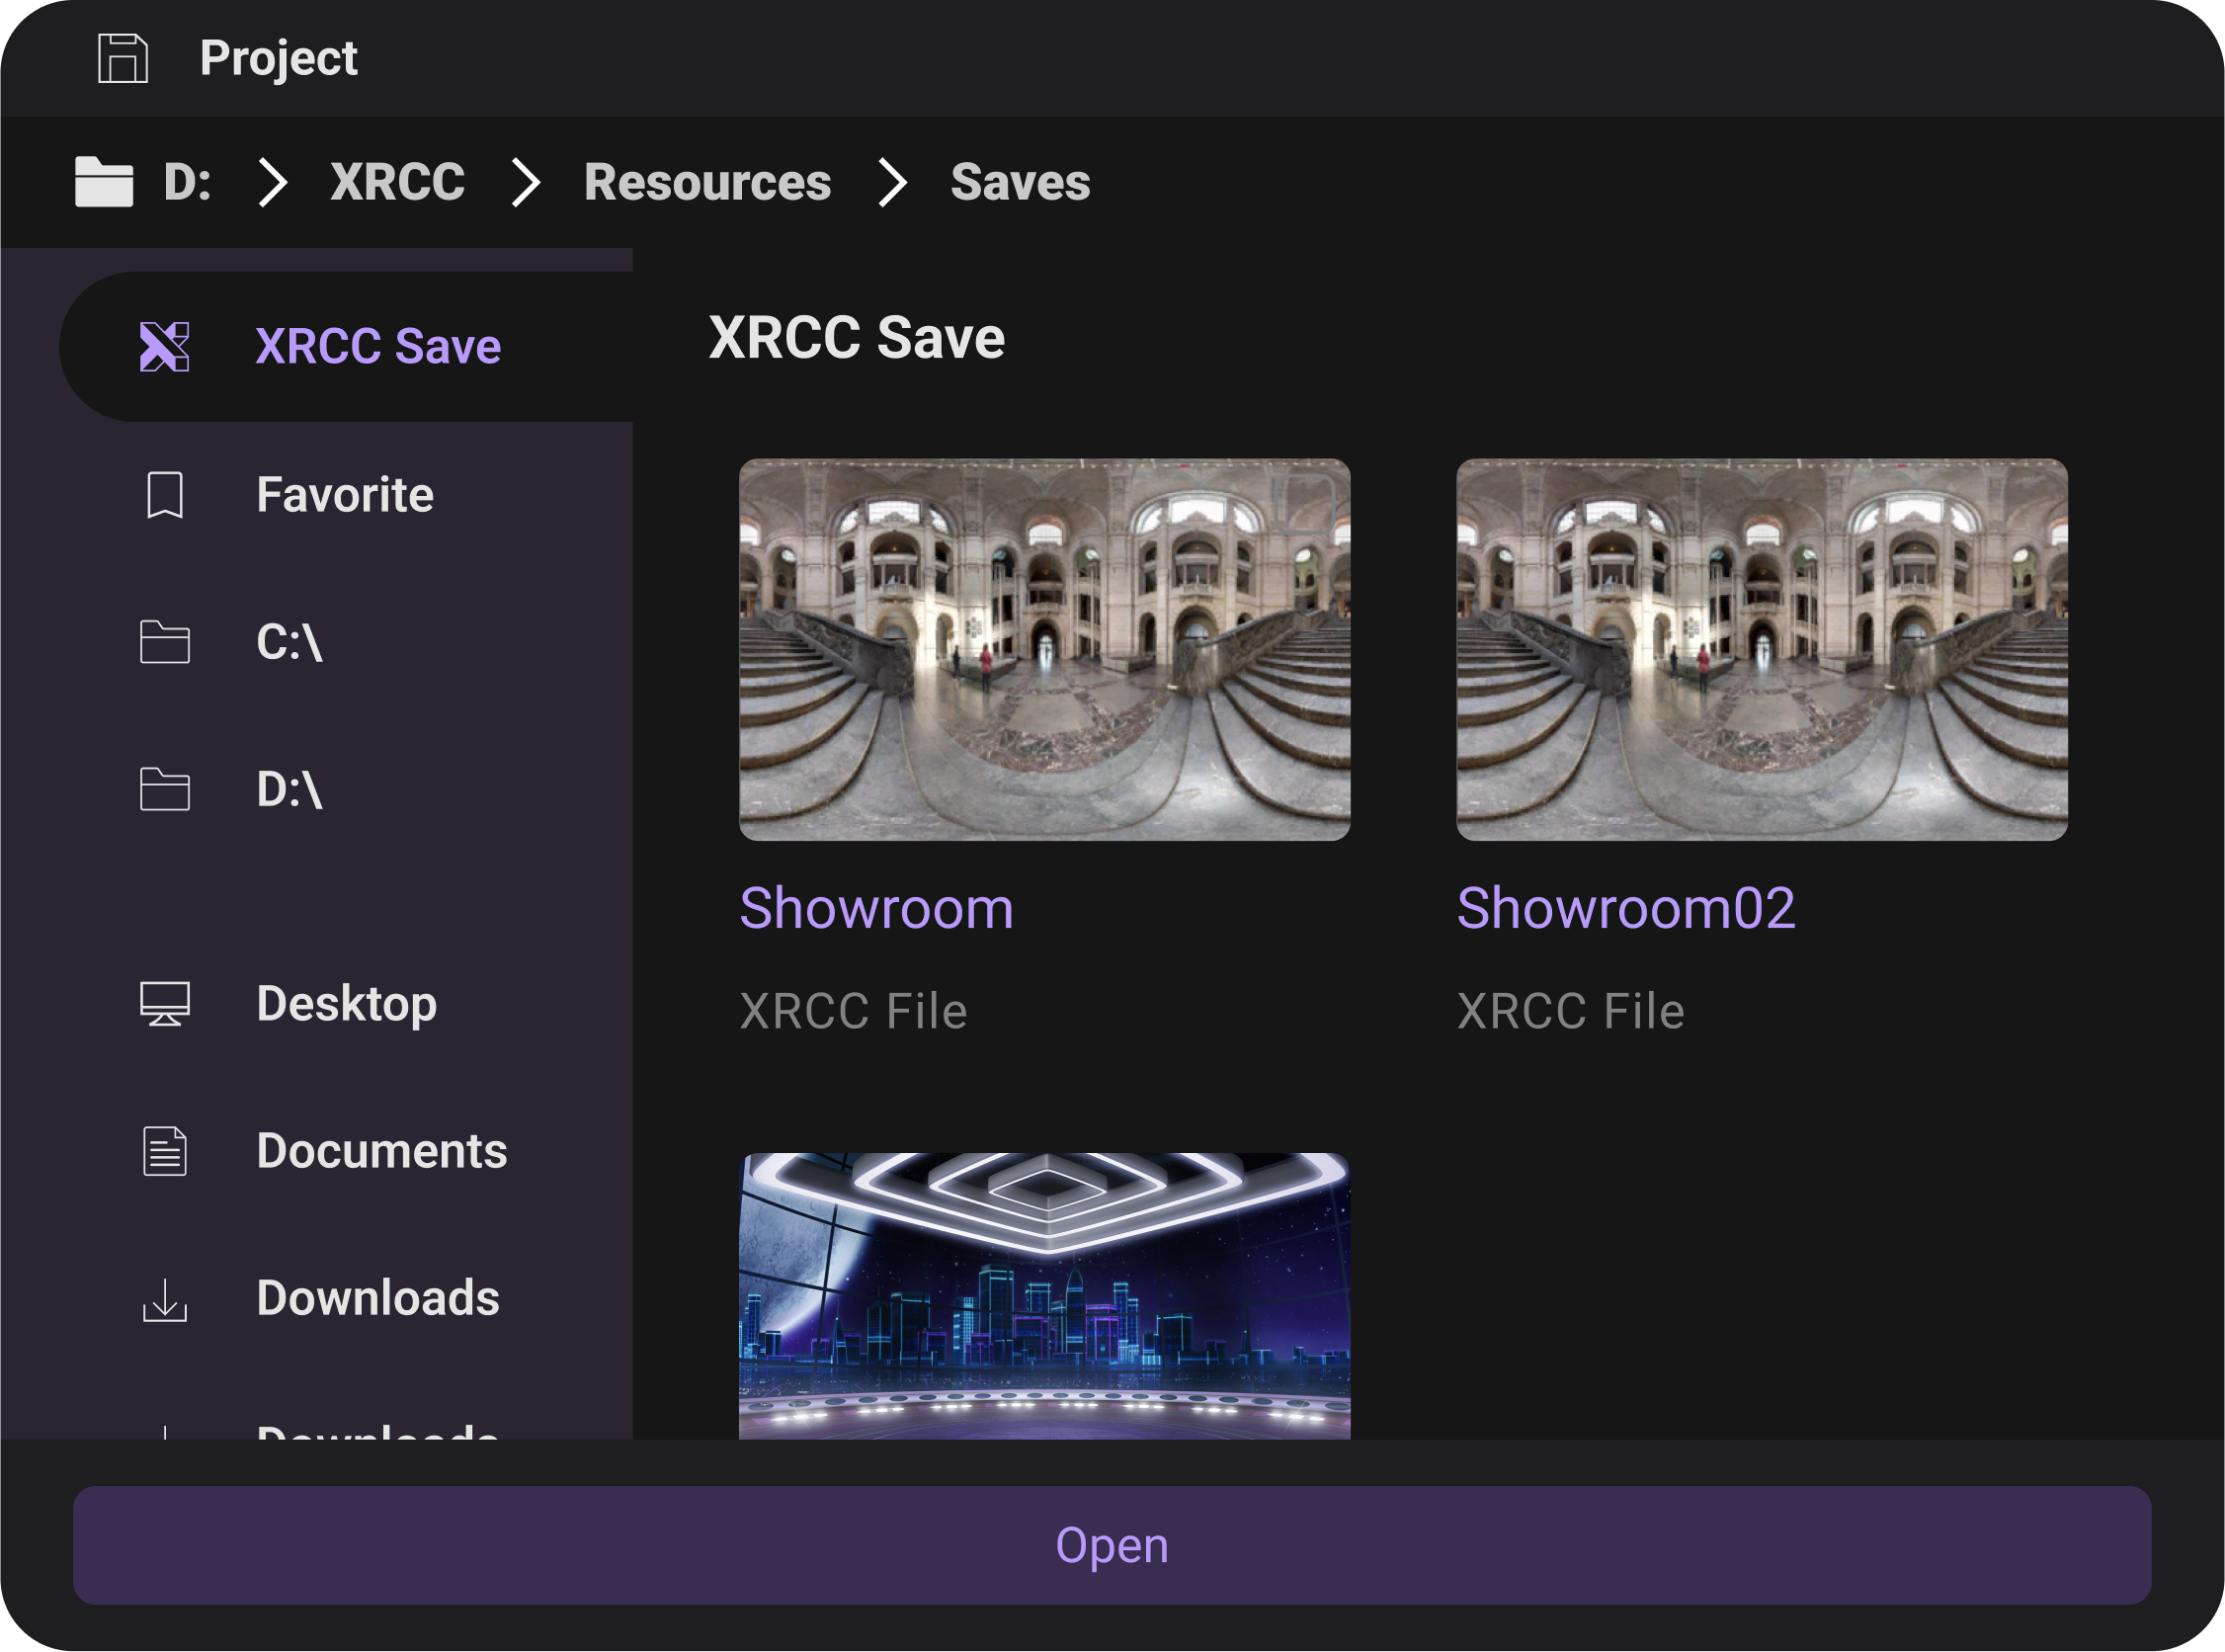
After selecting the project file, XRCC will start loading the project. Once the project has done loading, the starting scene of the project will be shown, and you can start playing.