XRCC Tutorial - Museum
Overview
You will build an interactive VR museum using XRCC in this tutorial. The techniques you'll learn in the tutorial are fundamental to building any XR experiences using XRCC, going through this tutorial will help you gain a basic understanding of the scene building process. We recommend that you start with this tutorial if it's the first time you are using the XRCC.
Techniques Covered
You will learn the following techniques in this tutorial:
| Technique | Specific Techniques Covered |
|---|---|
| |
| |
| |
|
Tutorial Project
The project used for this tutorial comes in two formats: a starter project for use in this step-by-step tutorial, and a completed project for your reference after you've completed the tutorial.
For this tutorial, the starter project will be used to guide you in building the VR museum in a step-by-step manner. All the necessary assets required for the tutorial are already included in the project, so just open the starter project in XRCC and you are ready to go with the tutorial.
Gameplay Flow
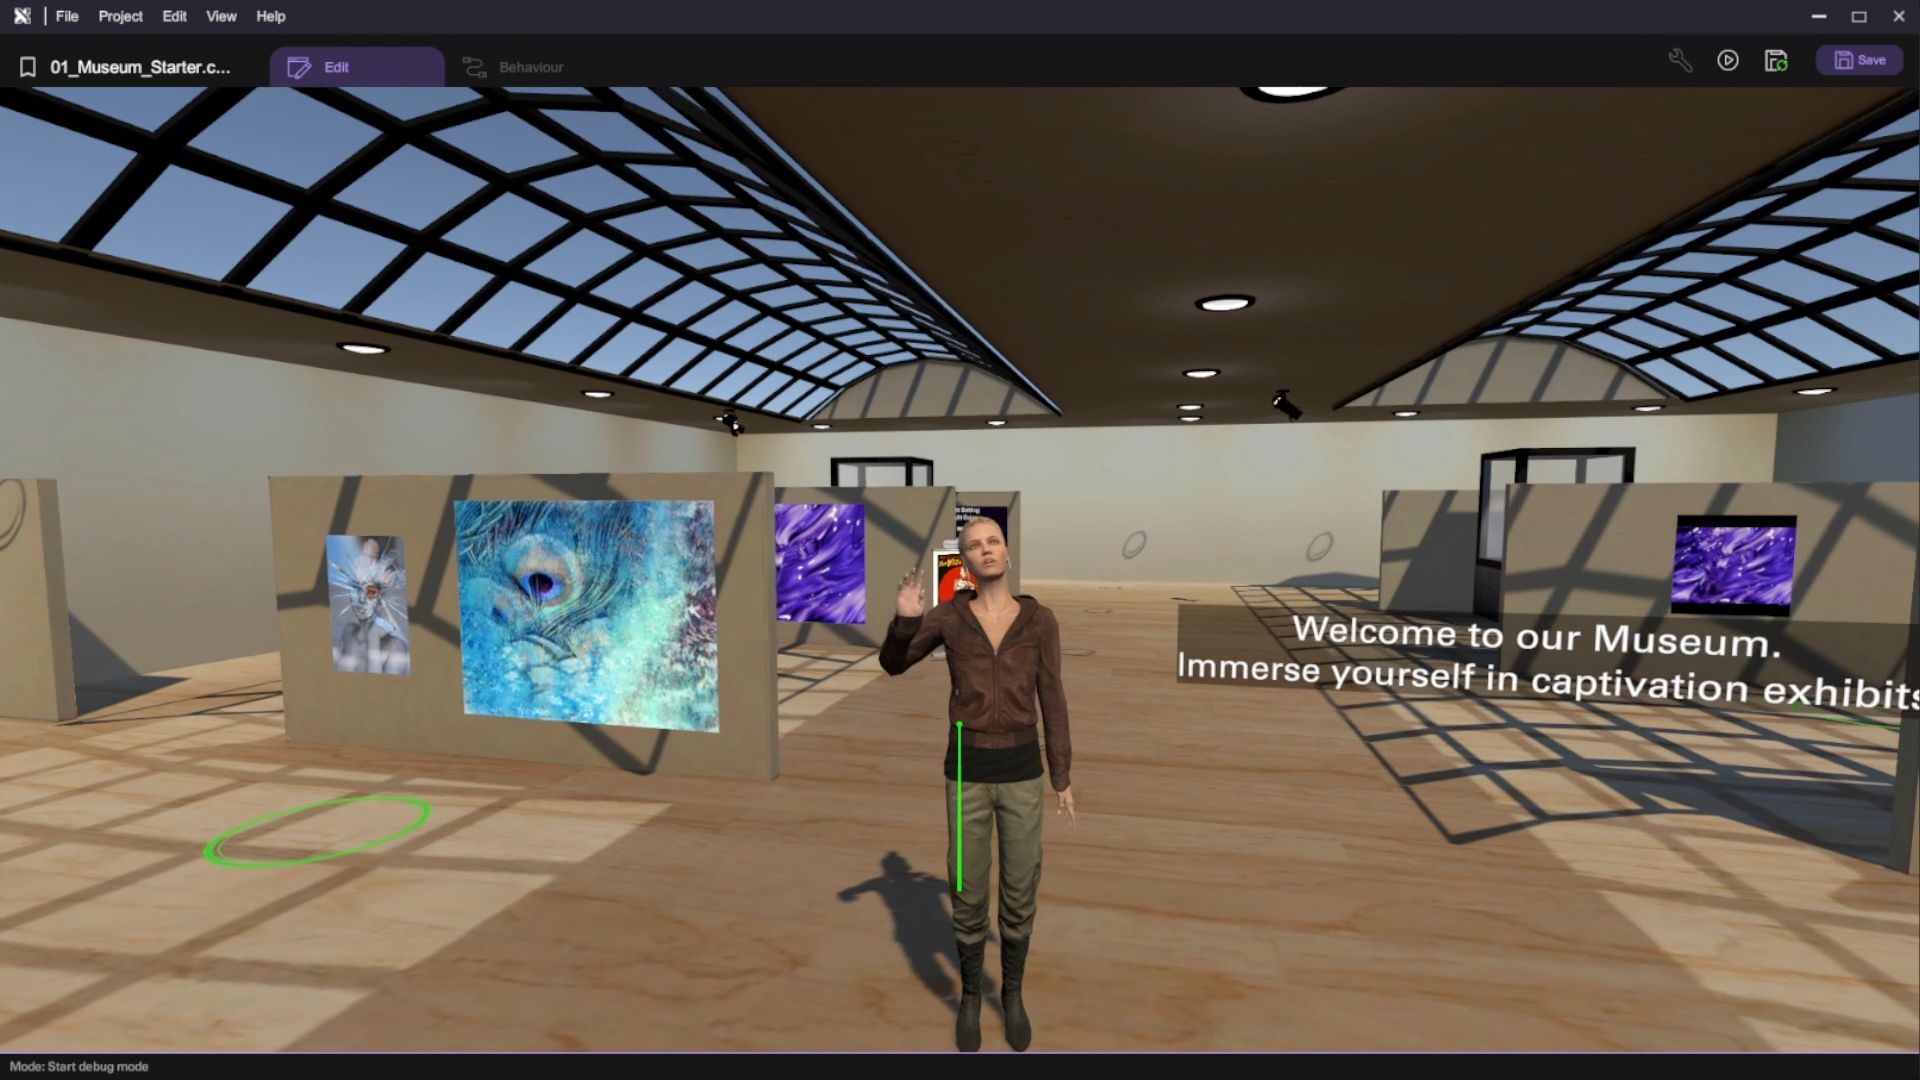
- The player starts in the museum's entrance.
- The player can navigate through the museum.
- Each exhibit in the museum is interactive and provides information about the exhibit.
- The player can interact with the exhibits by clicking on them.
- The player can also interact with special objects in the museum, such as buttons, 2D images, 3D models, and more.
Assets Provided in the Starter Project
The starter project includes a set of pre-configured 3D models and assets for the museum environment, providing a solid foundation for building the museum scene. Additionally, it features a basic 3D scene object that helps with constructing the scene. Furthermore, the project includes sample audio clips, video clips and animations for character interactions, allowing for a more immersive and engaging experience.
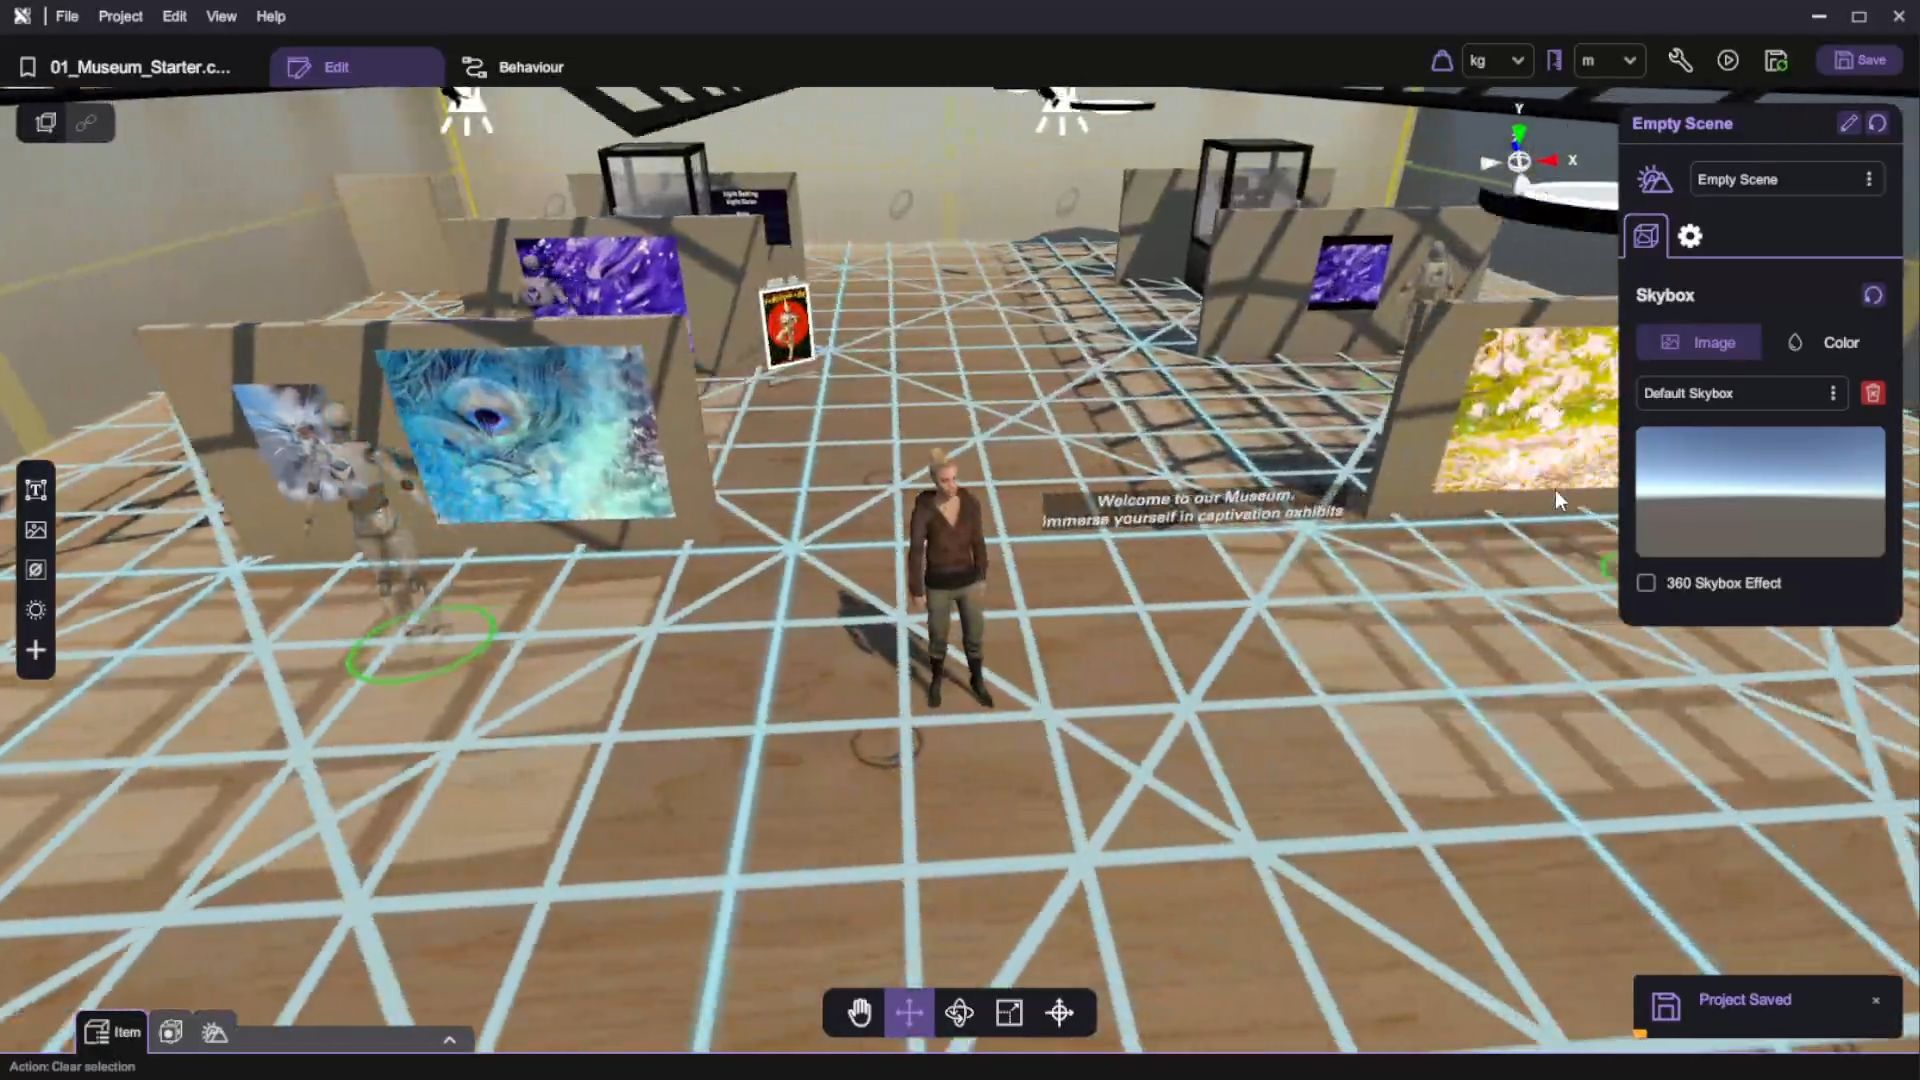
Build the Scene and Navigation Area
This section will guide you through the process of building the scene and navigation area for the museum. We will start by adding the necessary assets to the scene and then lay out the navigation area to ensure a smooth and immersive experience for the player.
Build the Scene
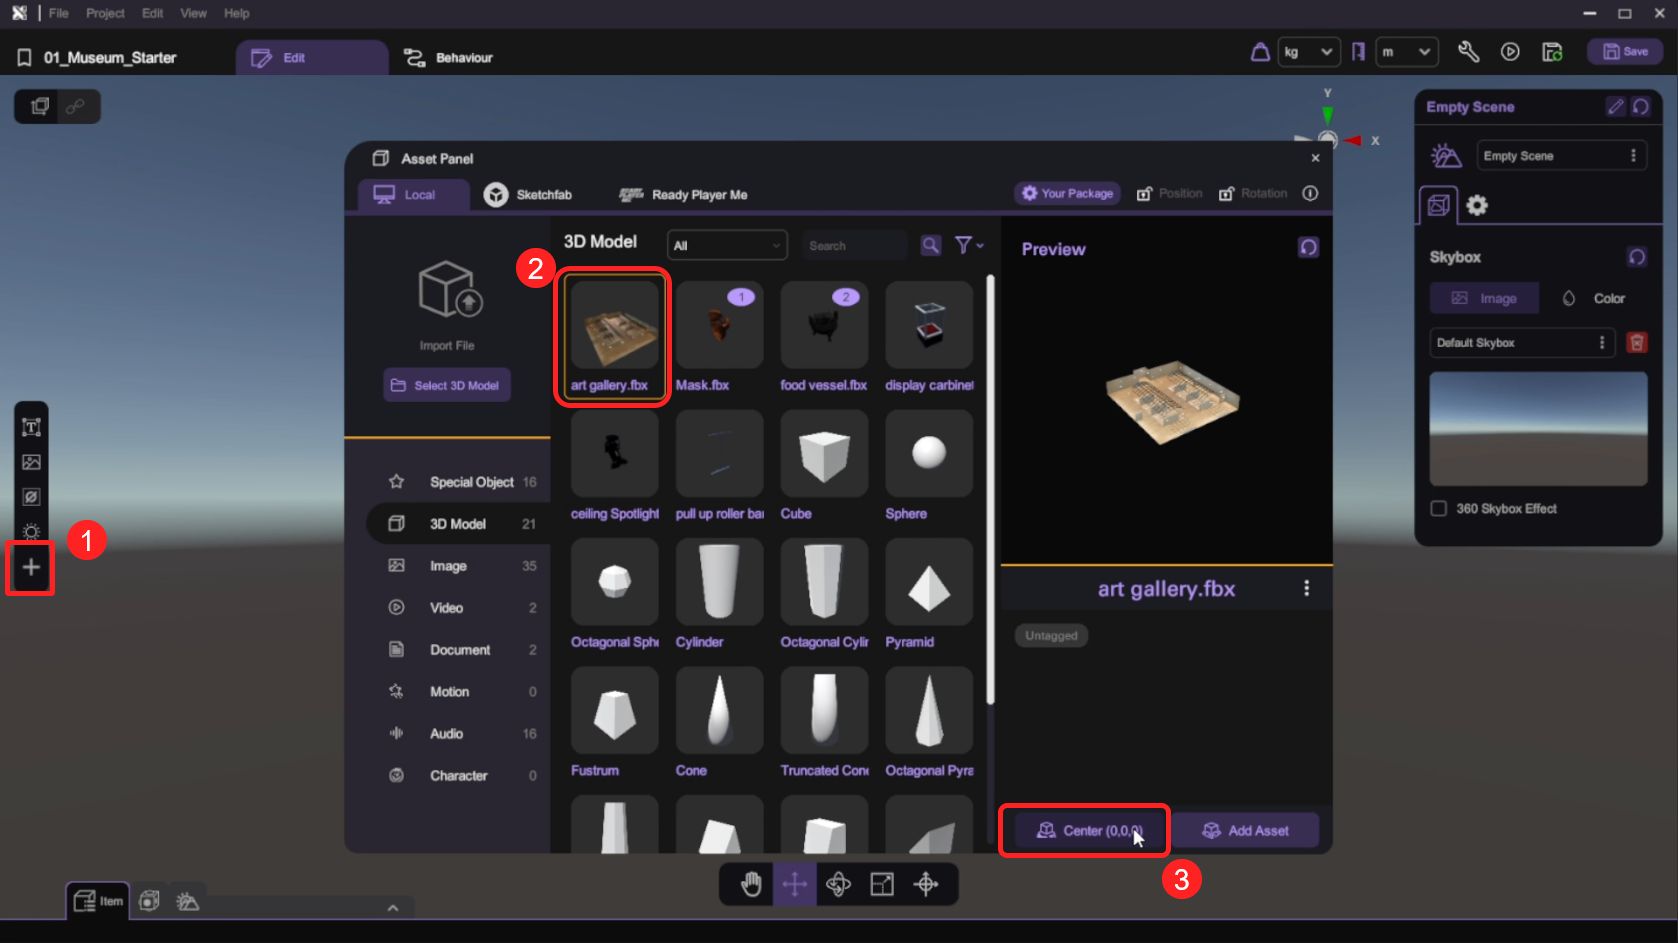
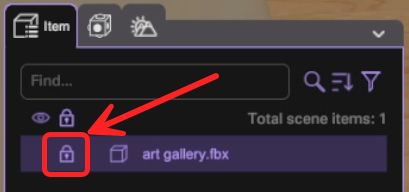
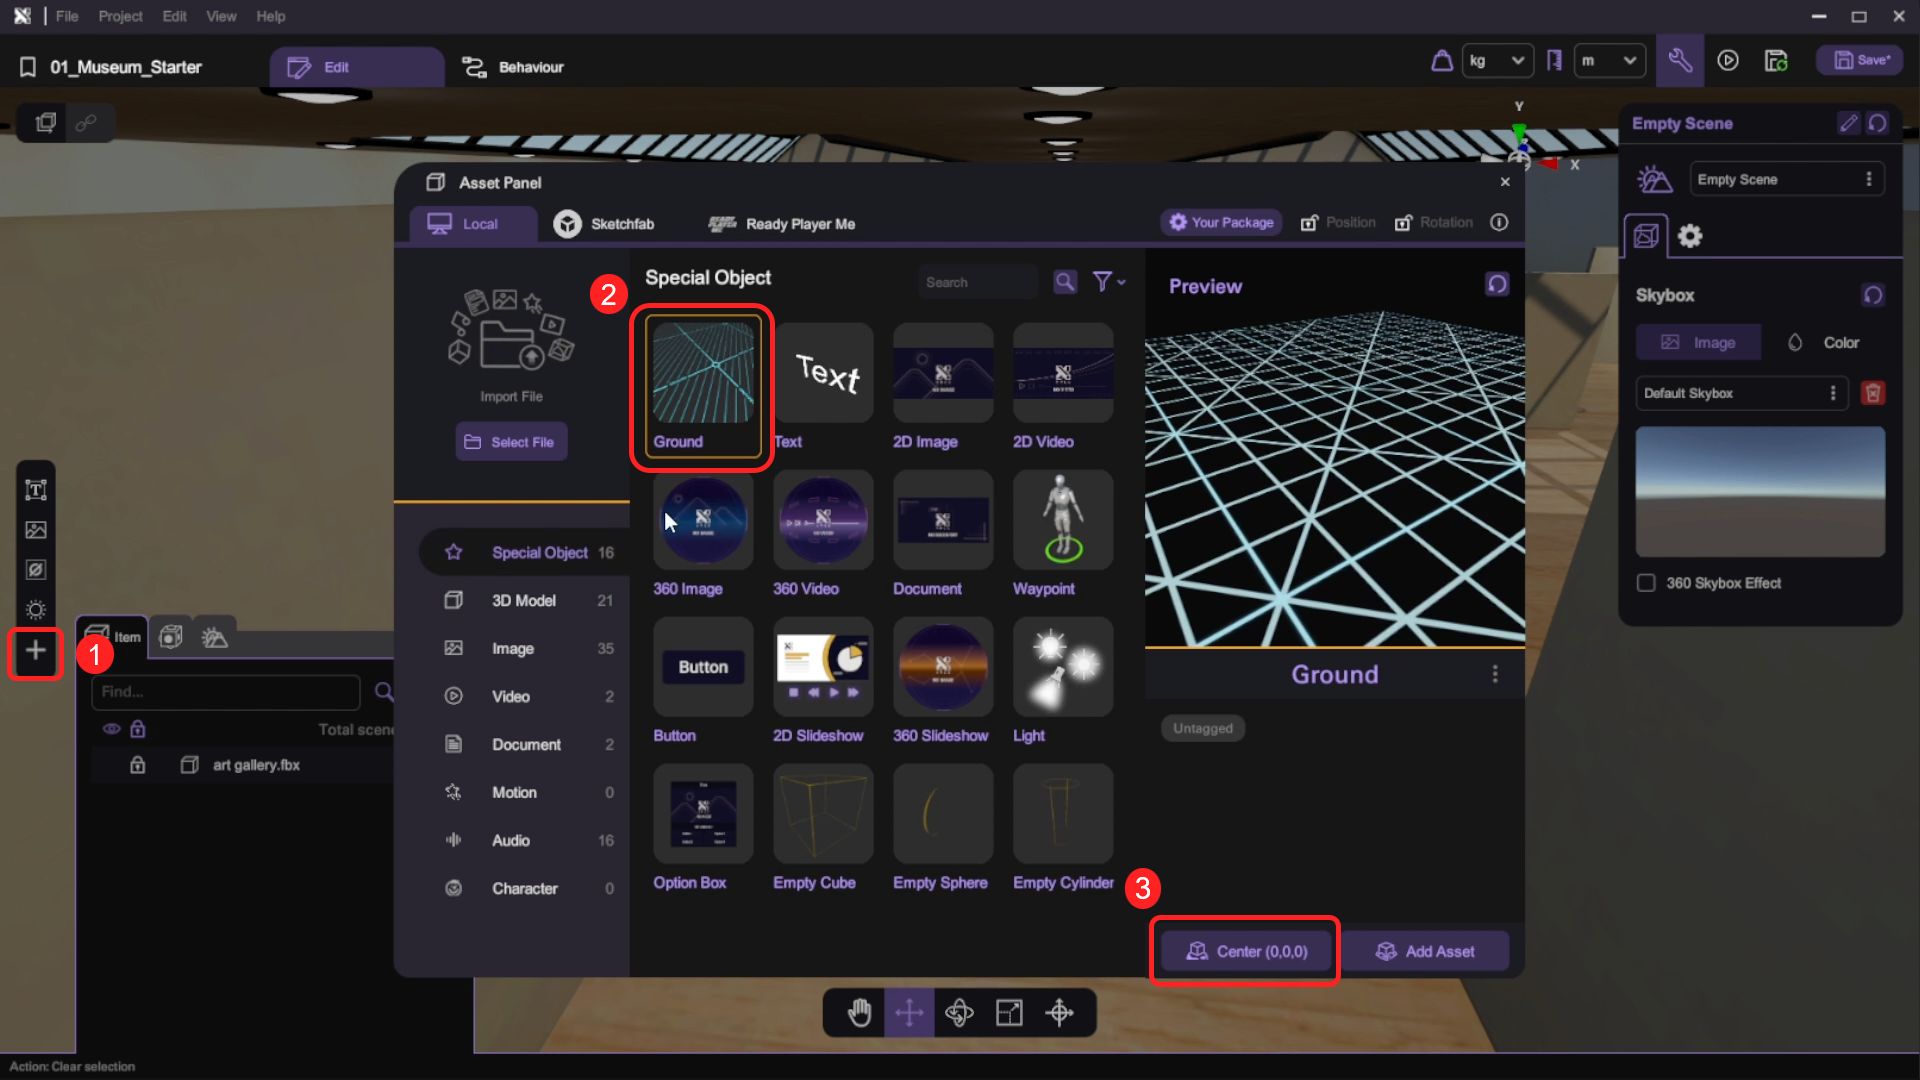
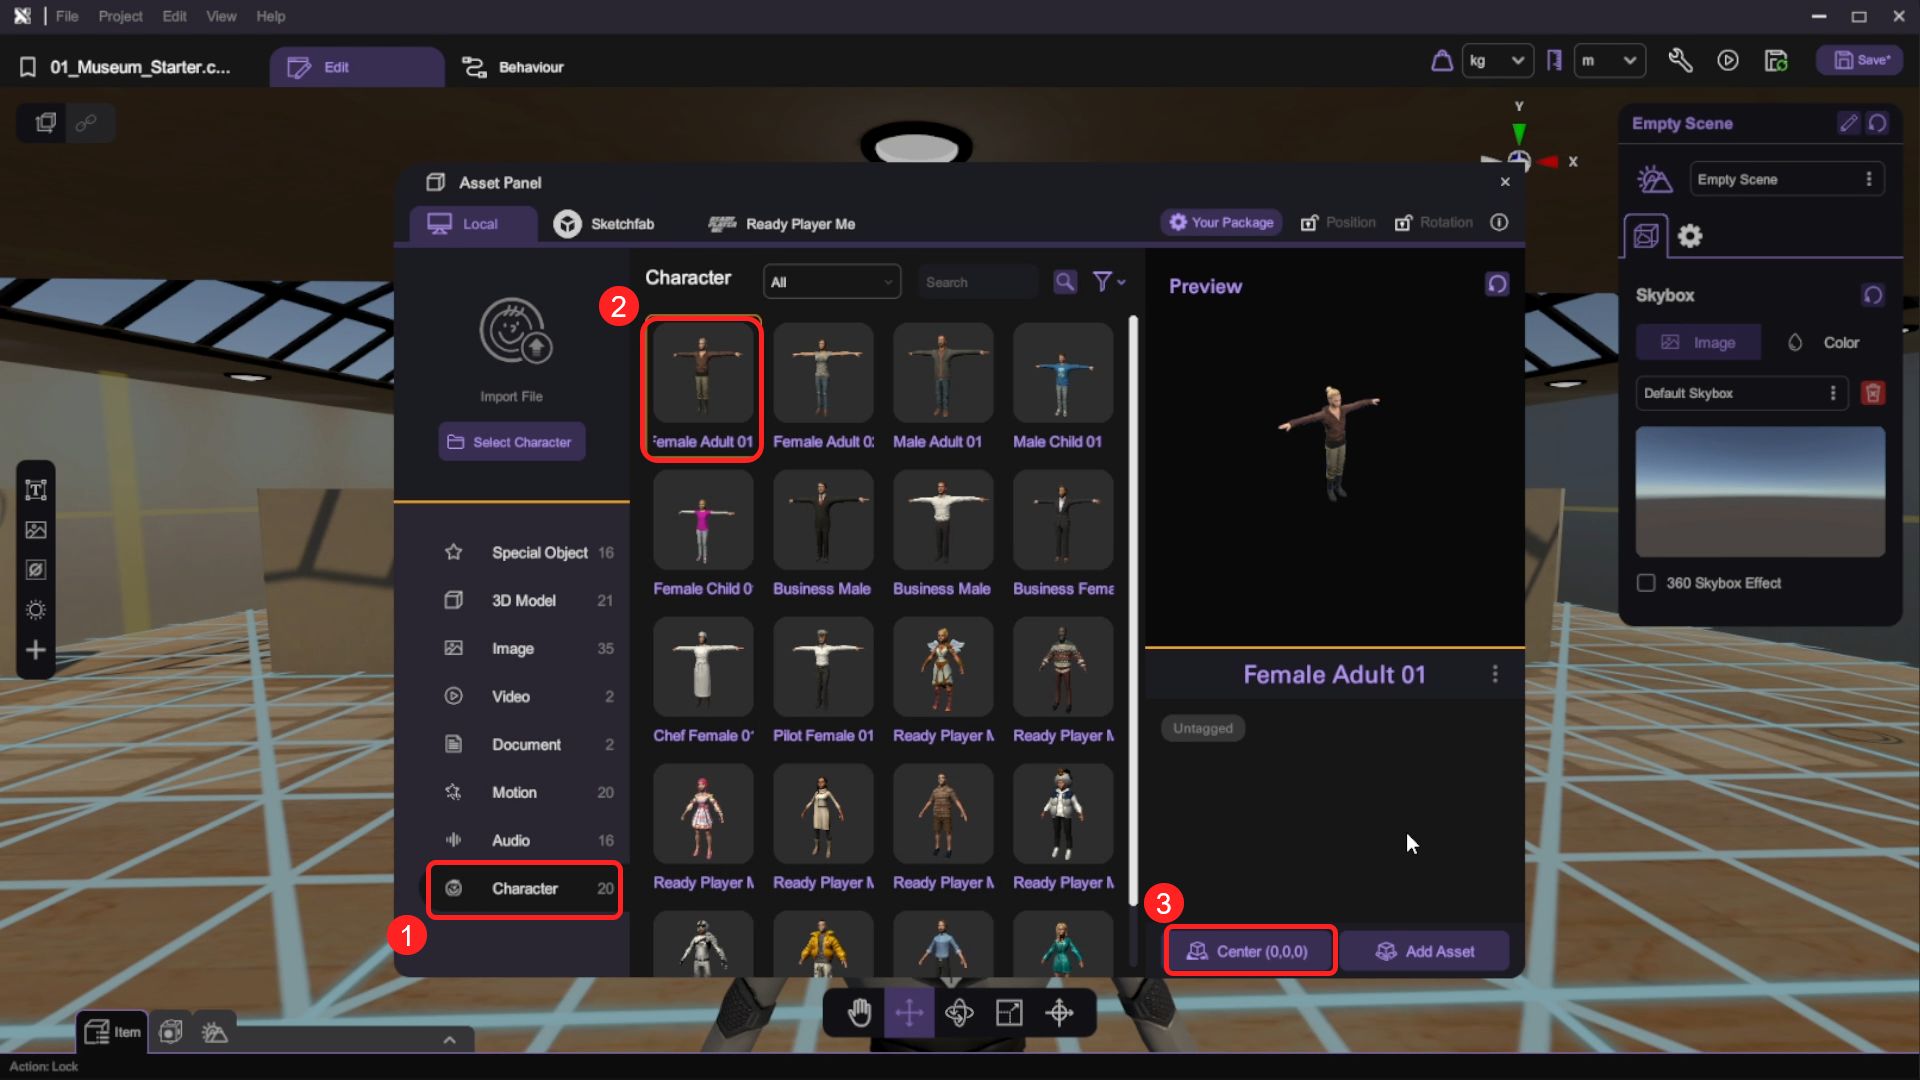
- From the Main Menu, select "File -> Assets Panel" (G) to open the Asset Panel. You can also access the panel by selecting the "More" button on the Assets toolbar on the left side of the scene view. Select the “art gallery.fbx” 3D model to add it to the world center of the scene by clicking World Center.
- Open the "Inspector" to see the detailed configuration of the asset. As the art gallery is just a background environment in the scene, deselecting Interactable prevents the VR wand from interacting with the object.
By default, the Interactable and Grabbable settings for 3D models in the inspector are disabled.
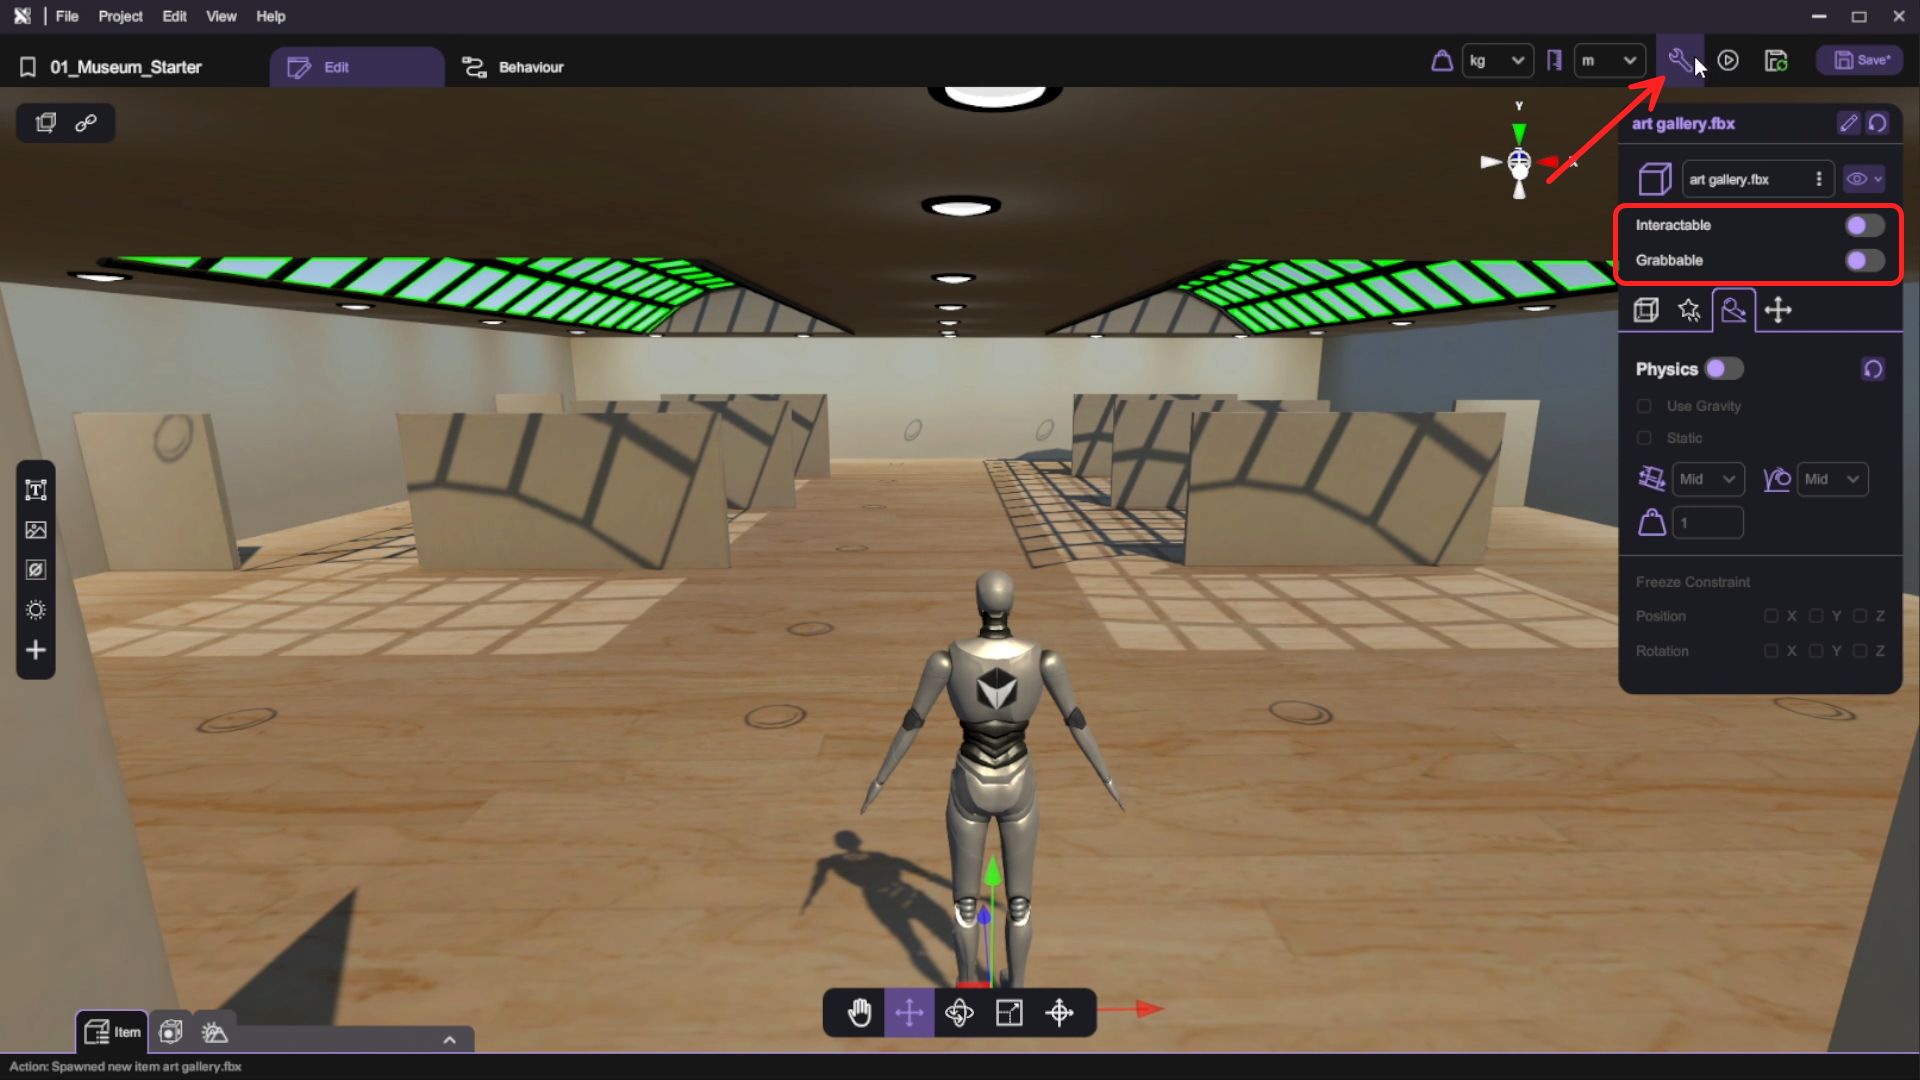
You can lock art gallery to prevent clicking on it.
Lay Out the Navigation Area
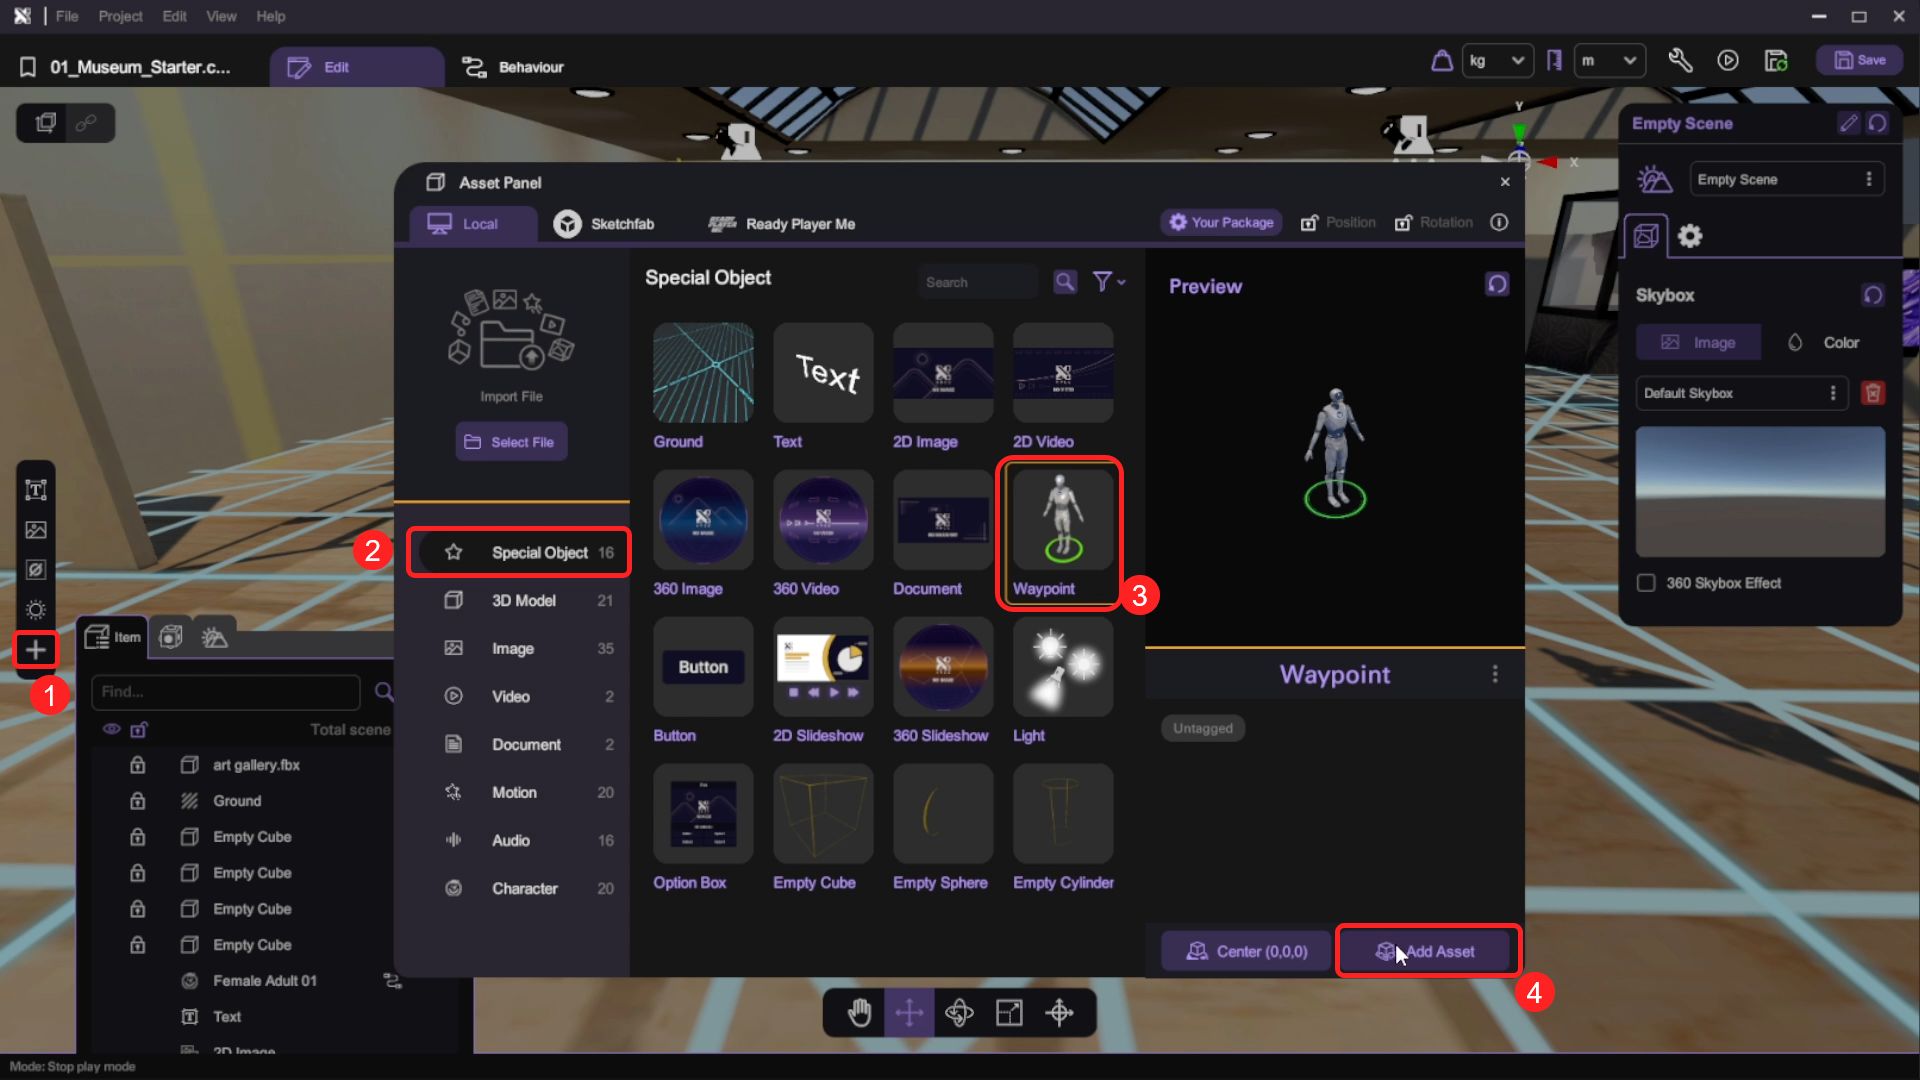
- Open the "Asset Panel" and from the "Special Objects" tab, select and add a "Ground" object to the scene.
The ground object allows the user to stand on and move/teleport on the surface.
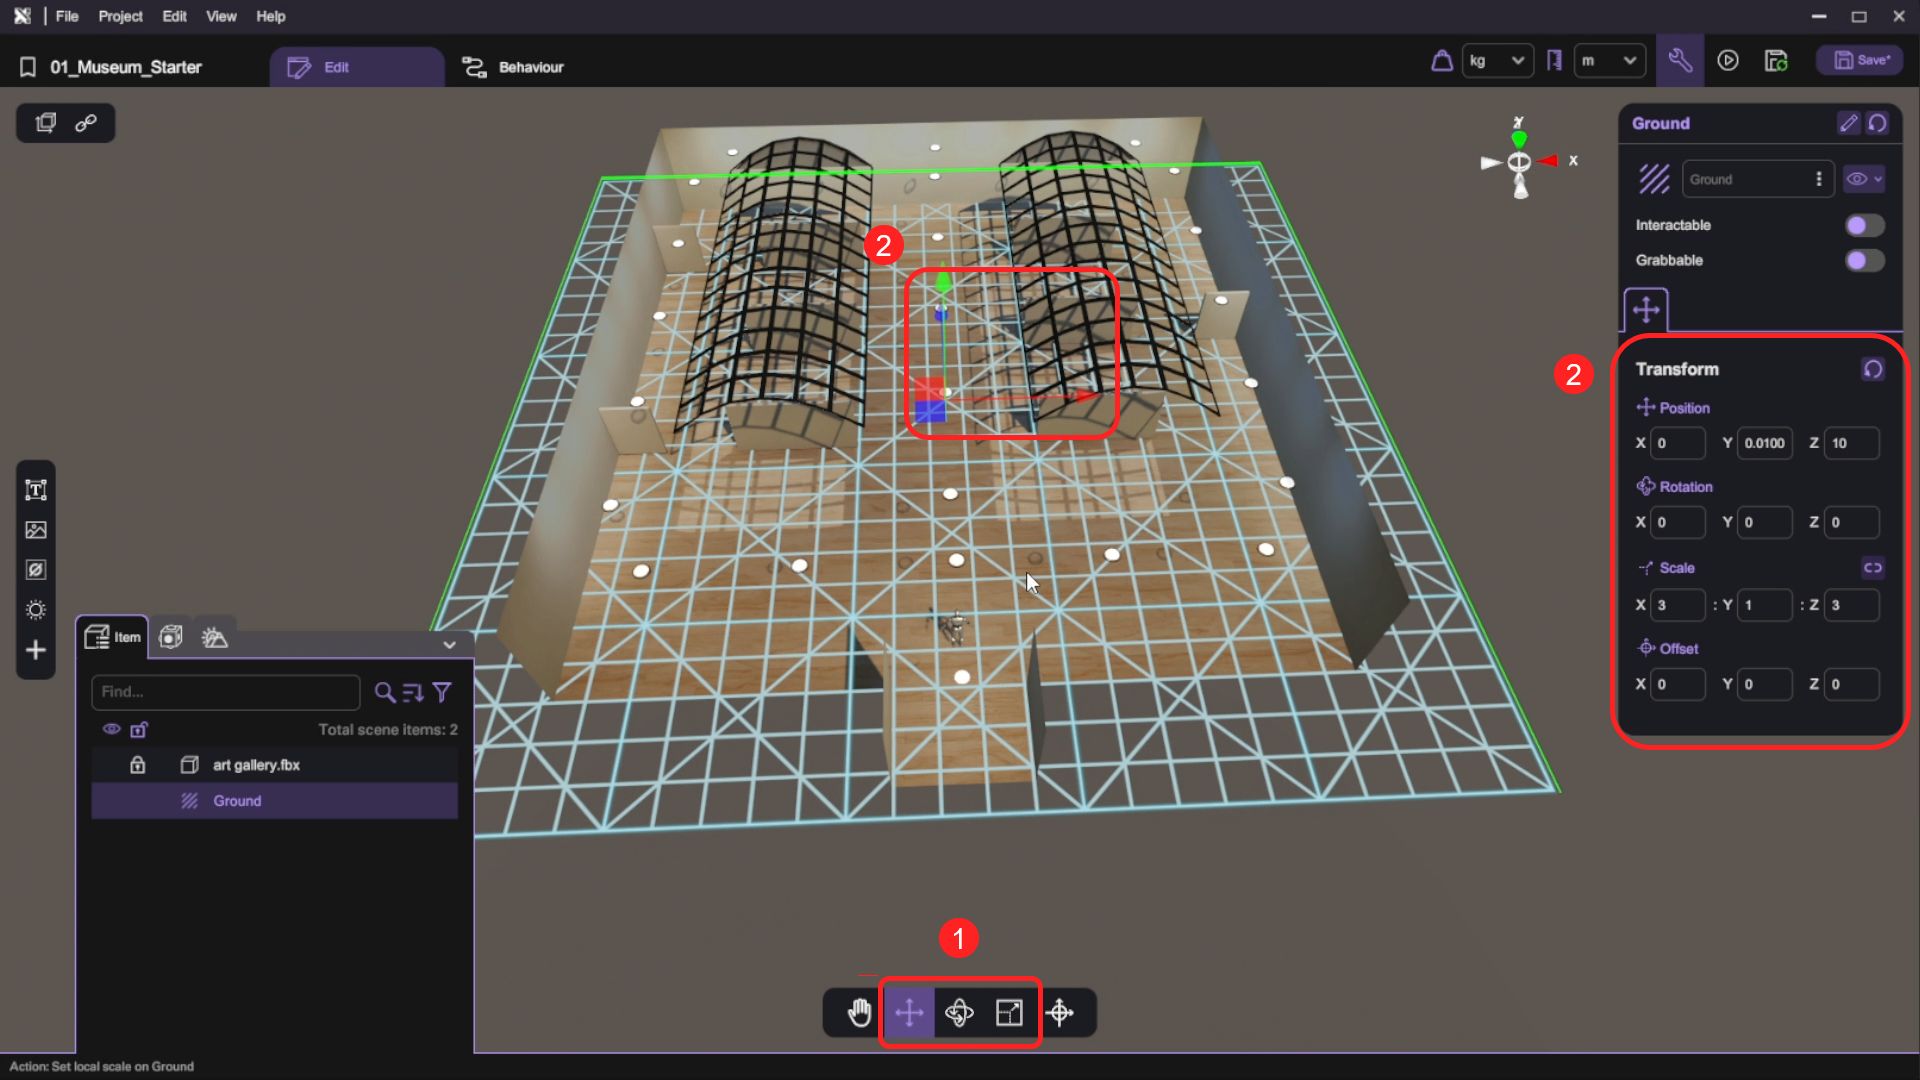
- Use the transform tools (move/rotate/scale) to adjust the size and position of the ground object
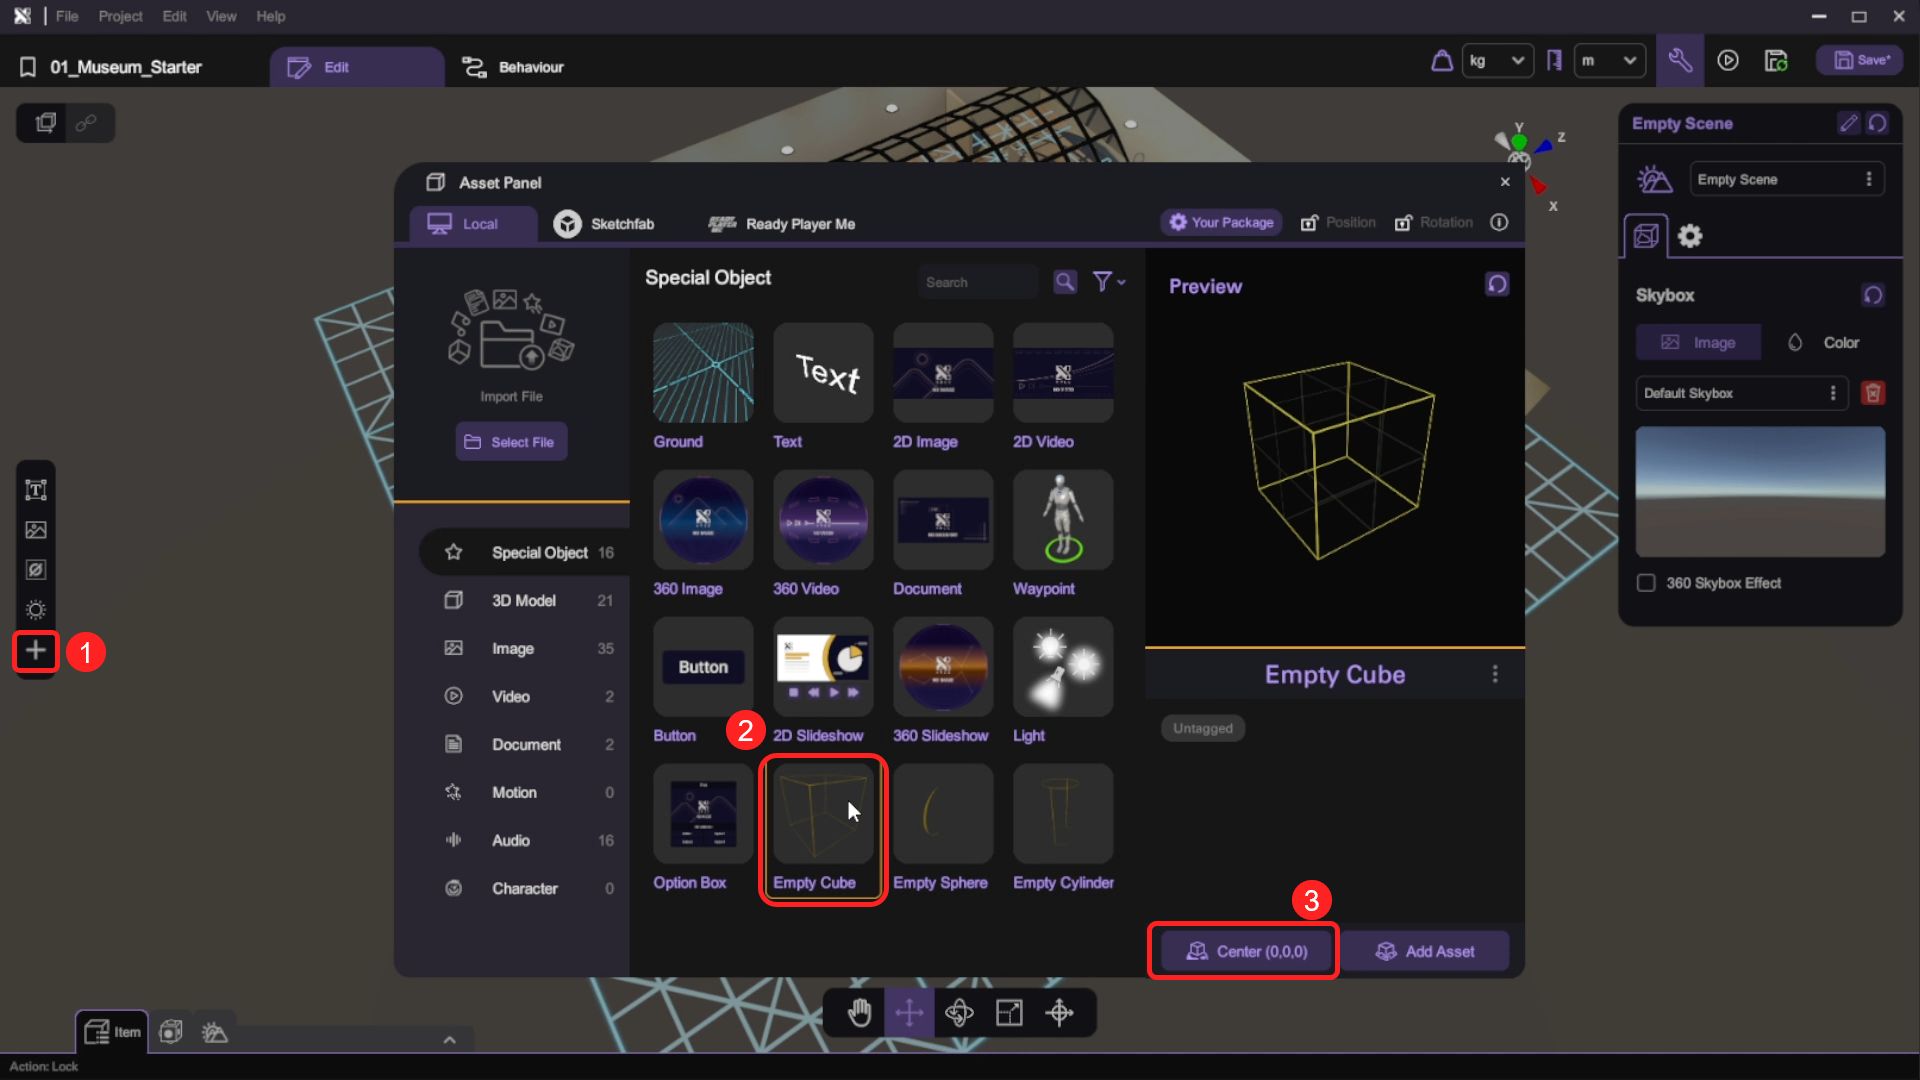
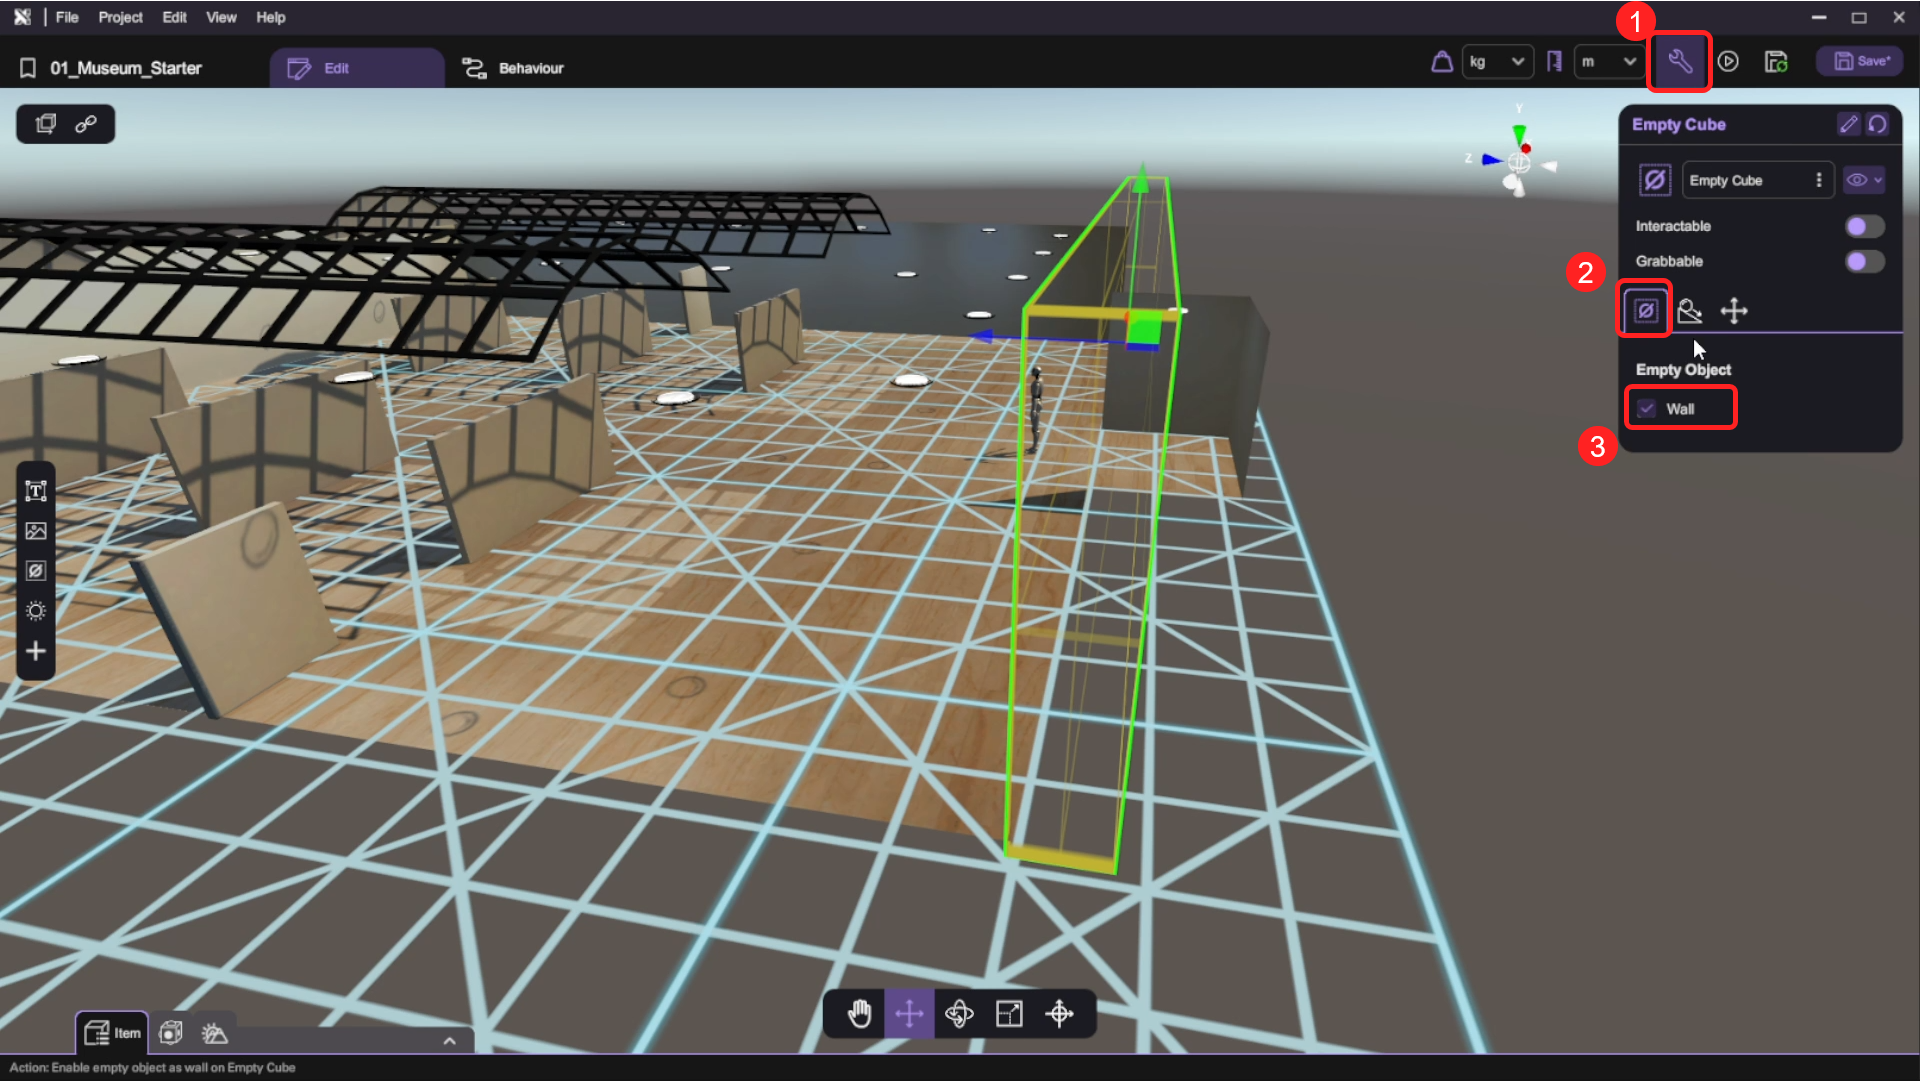
- Open the "Asset Panel" and from the "Special Objects" tab, select and add an "Empty Cube" to the scene.
We will make use of the empty objects and configure them to act as virtual walls to prevent the user from moving outside the boundaries of the art gallery.
- Use the transform tools (move/rotate/scale) to adjust the size and position of the empty object so that it completely surrounds the wall surface of the art gallery's entrance behind the user.
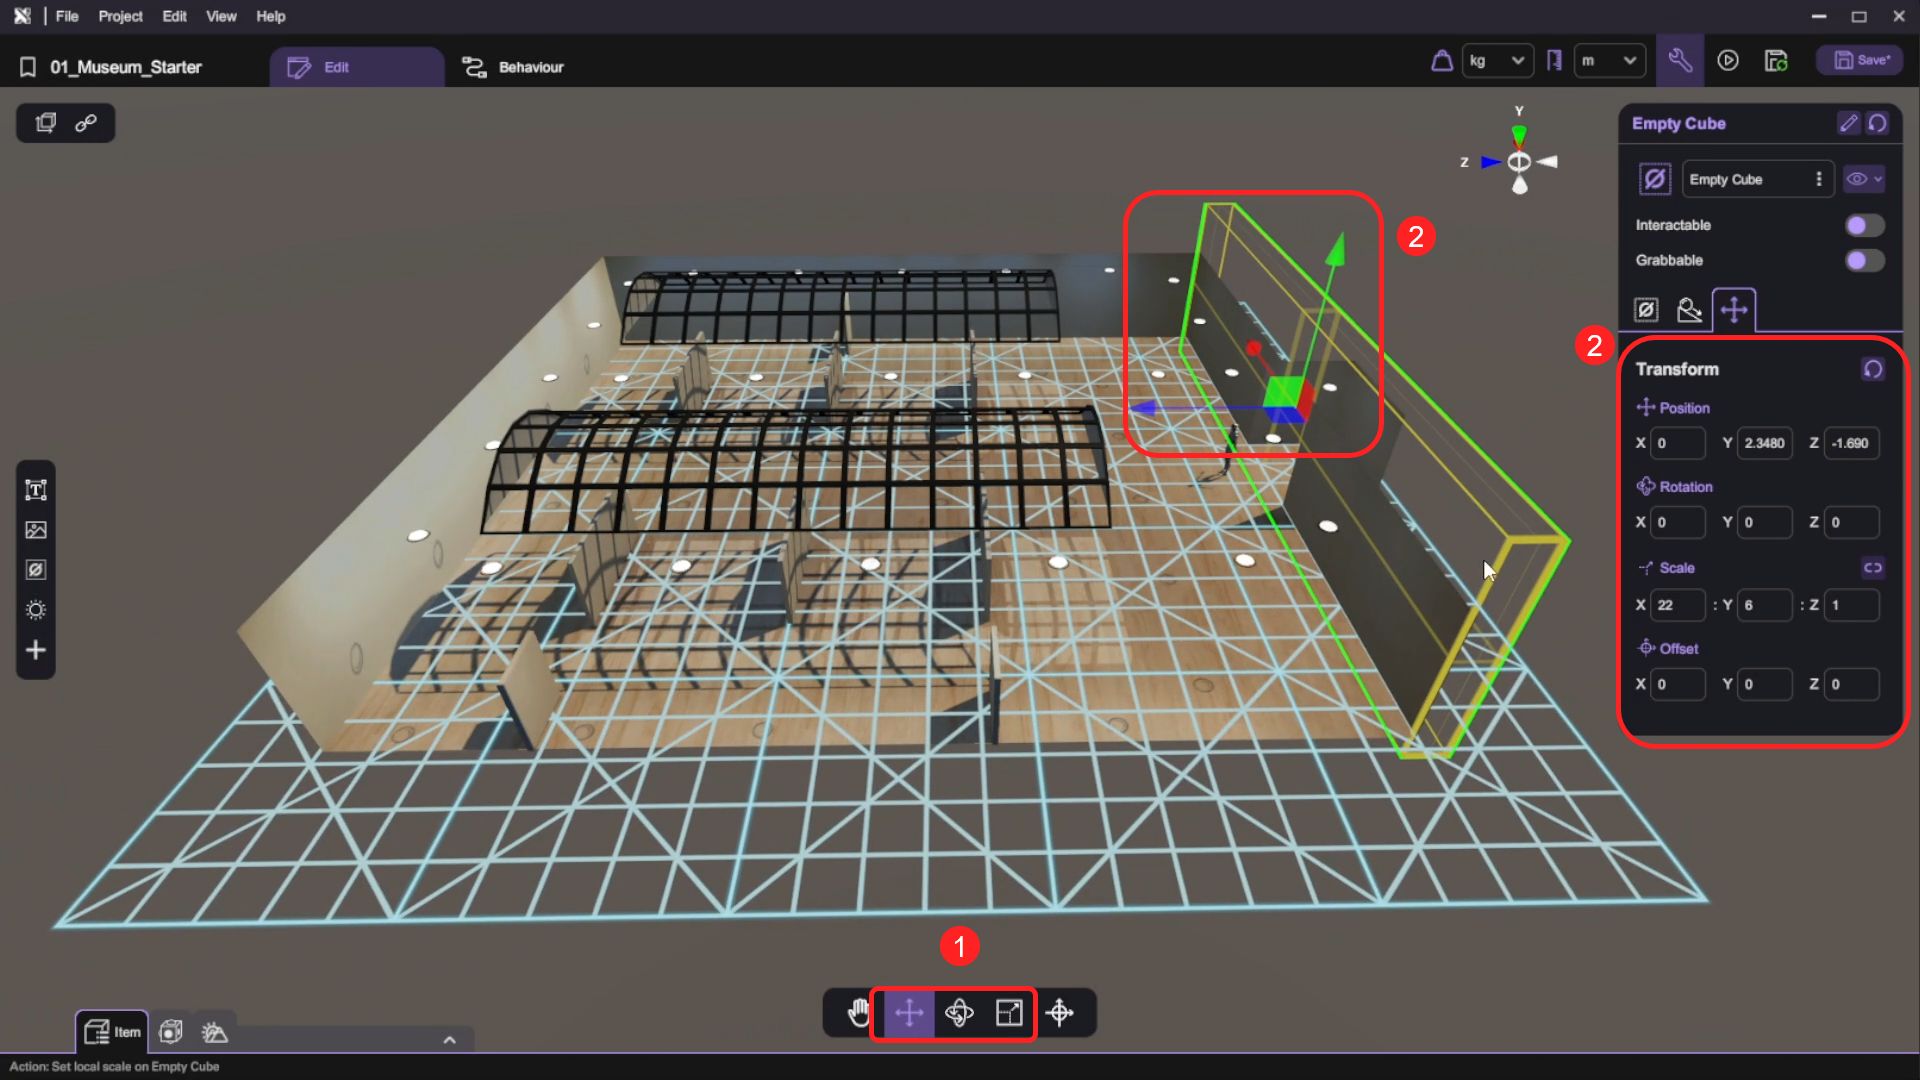
- Open the "Inspector". Then select "Empty Cube" tab to enable "Wall".
Setting the Empty Cube as a Wall object ensures the player does not walk through the wall of the scene
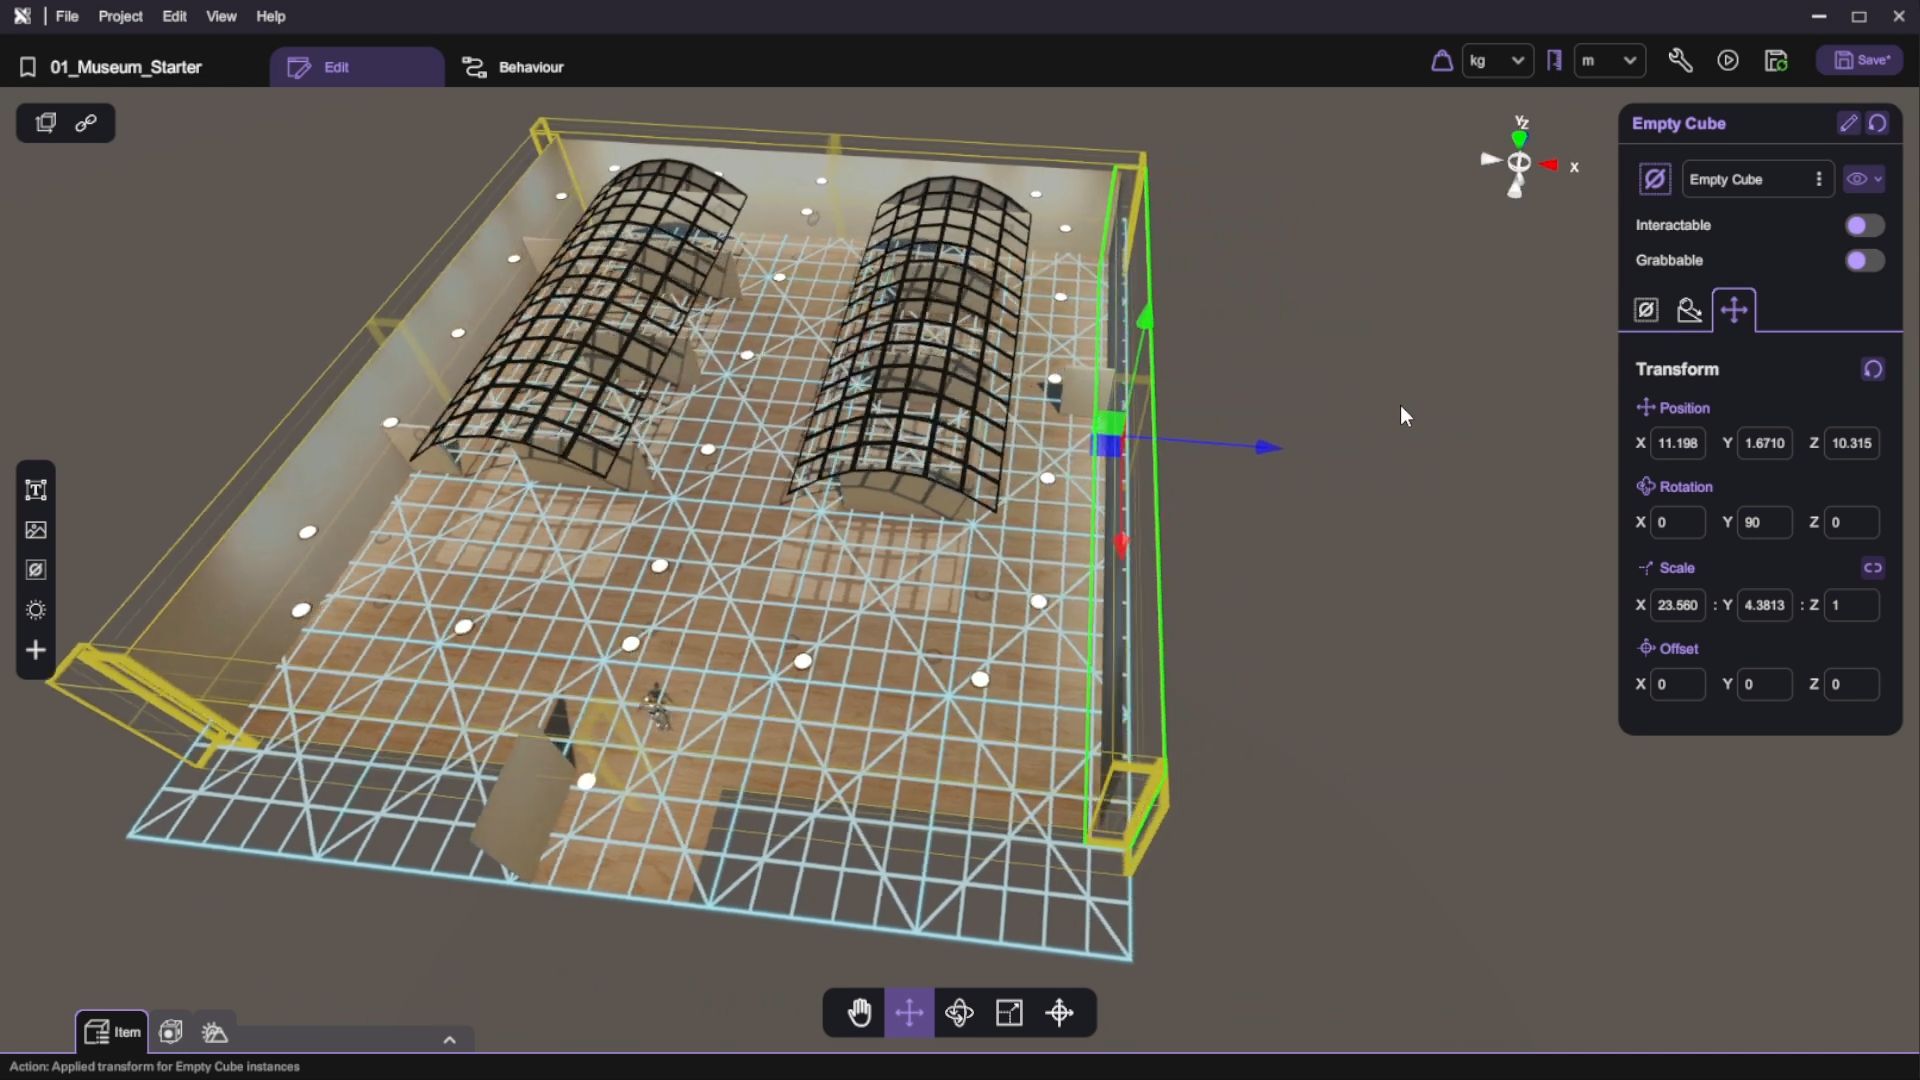
- With the empty object still selected, Copy (Ctrl + C) and Paste (Ctrl + V) or Duplicate (Ctrl + D) the configured empty object wall and use the transform tools to set up the remaining walls of the art gallery.
- You have finished configuring the navigation area of the VR museum. Press the "Play" button and test walking around in the scene. You should be able to stand on the ground and move using the WASD key, and the walls should stop you when you walk towards them.
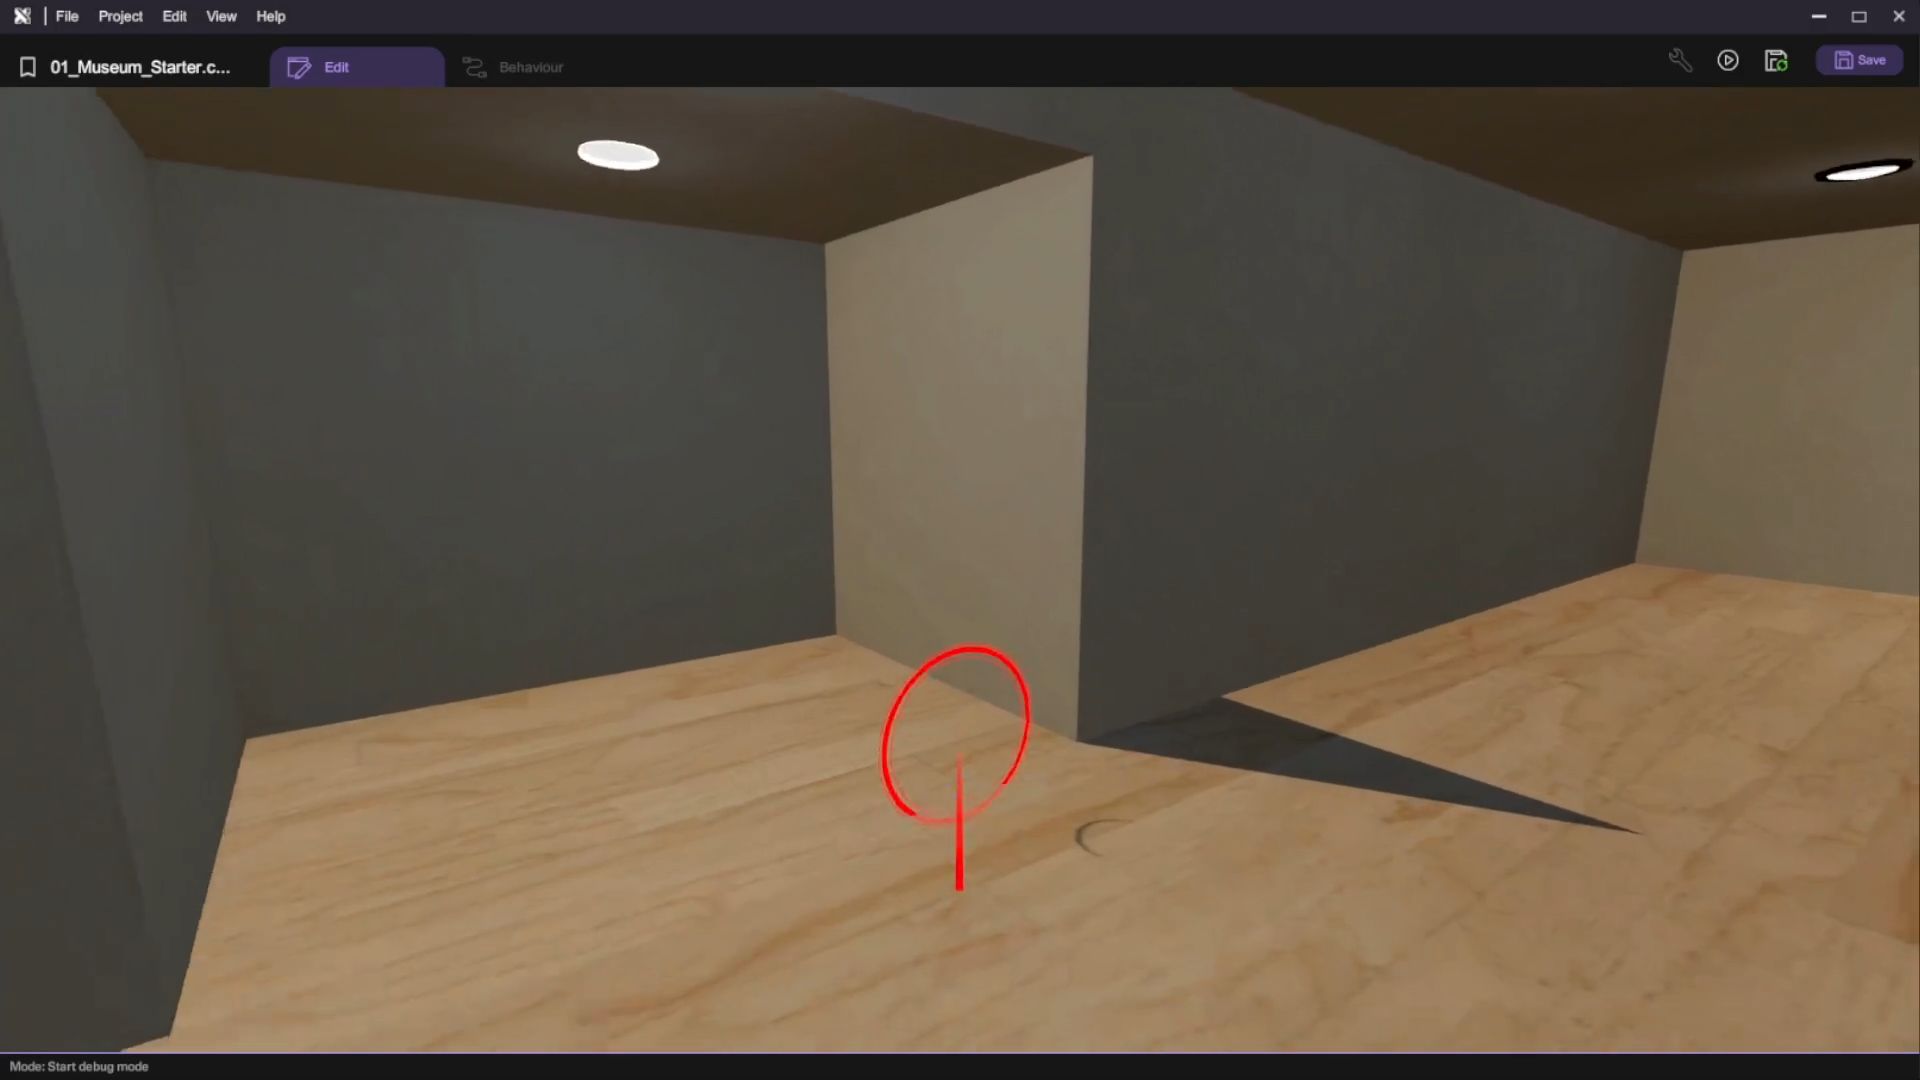
- Press "Esc" to exit play mode after you've done testing your scene.
Create the Museum Guide
In this section, we will add a character to act as a guide in the VR museum. This includes selecting and positioning the character model, and setting up interactions so the character can speak and move when the scene starts or when the user clicks on it. This will improve the immersive experience for users.
Import Package to the Project
If you already imported the "Character" model in the Asset Panel or you want to use your own character model, you can skip this part.
- Check the "Character" model in the Asset Panel, if there is null, click "Your Package".
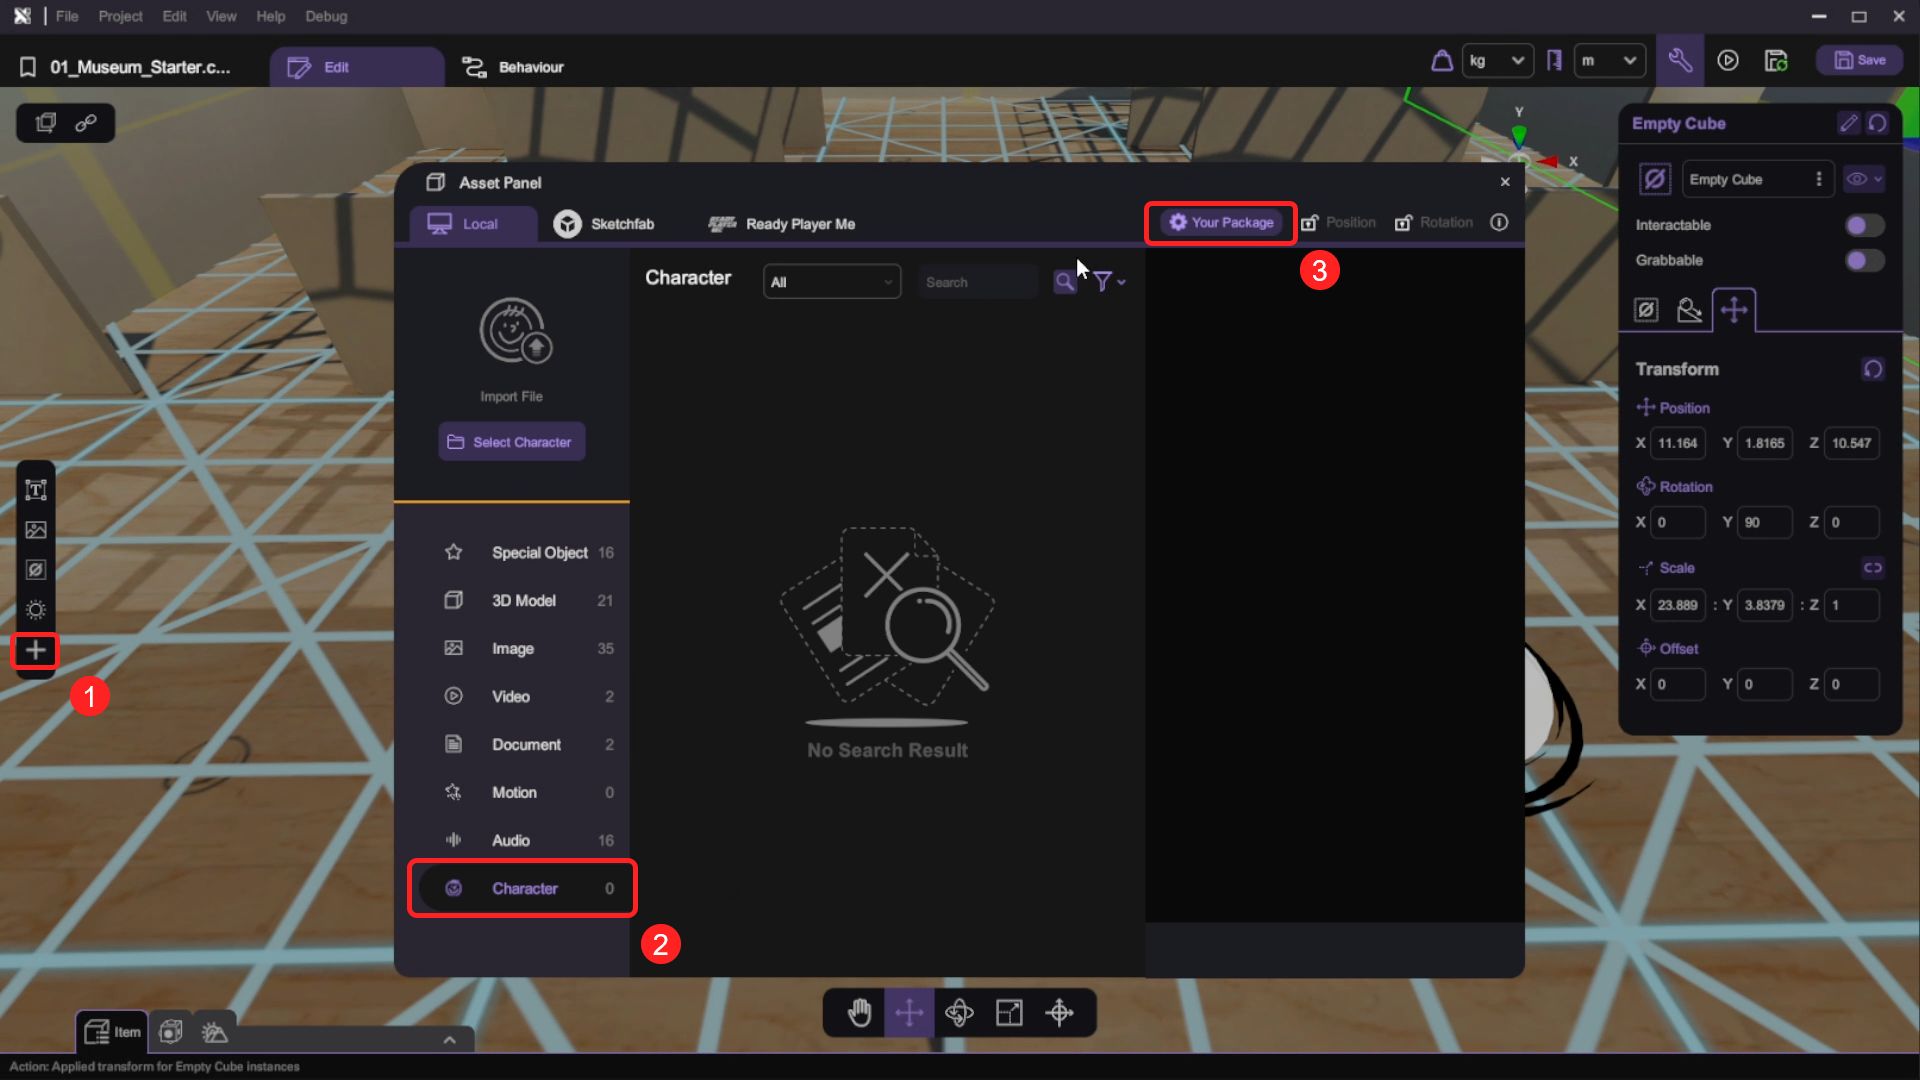
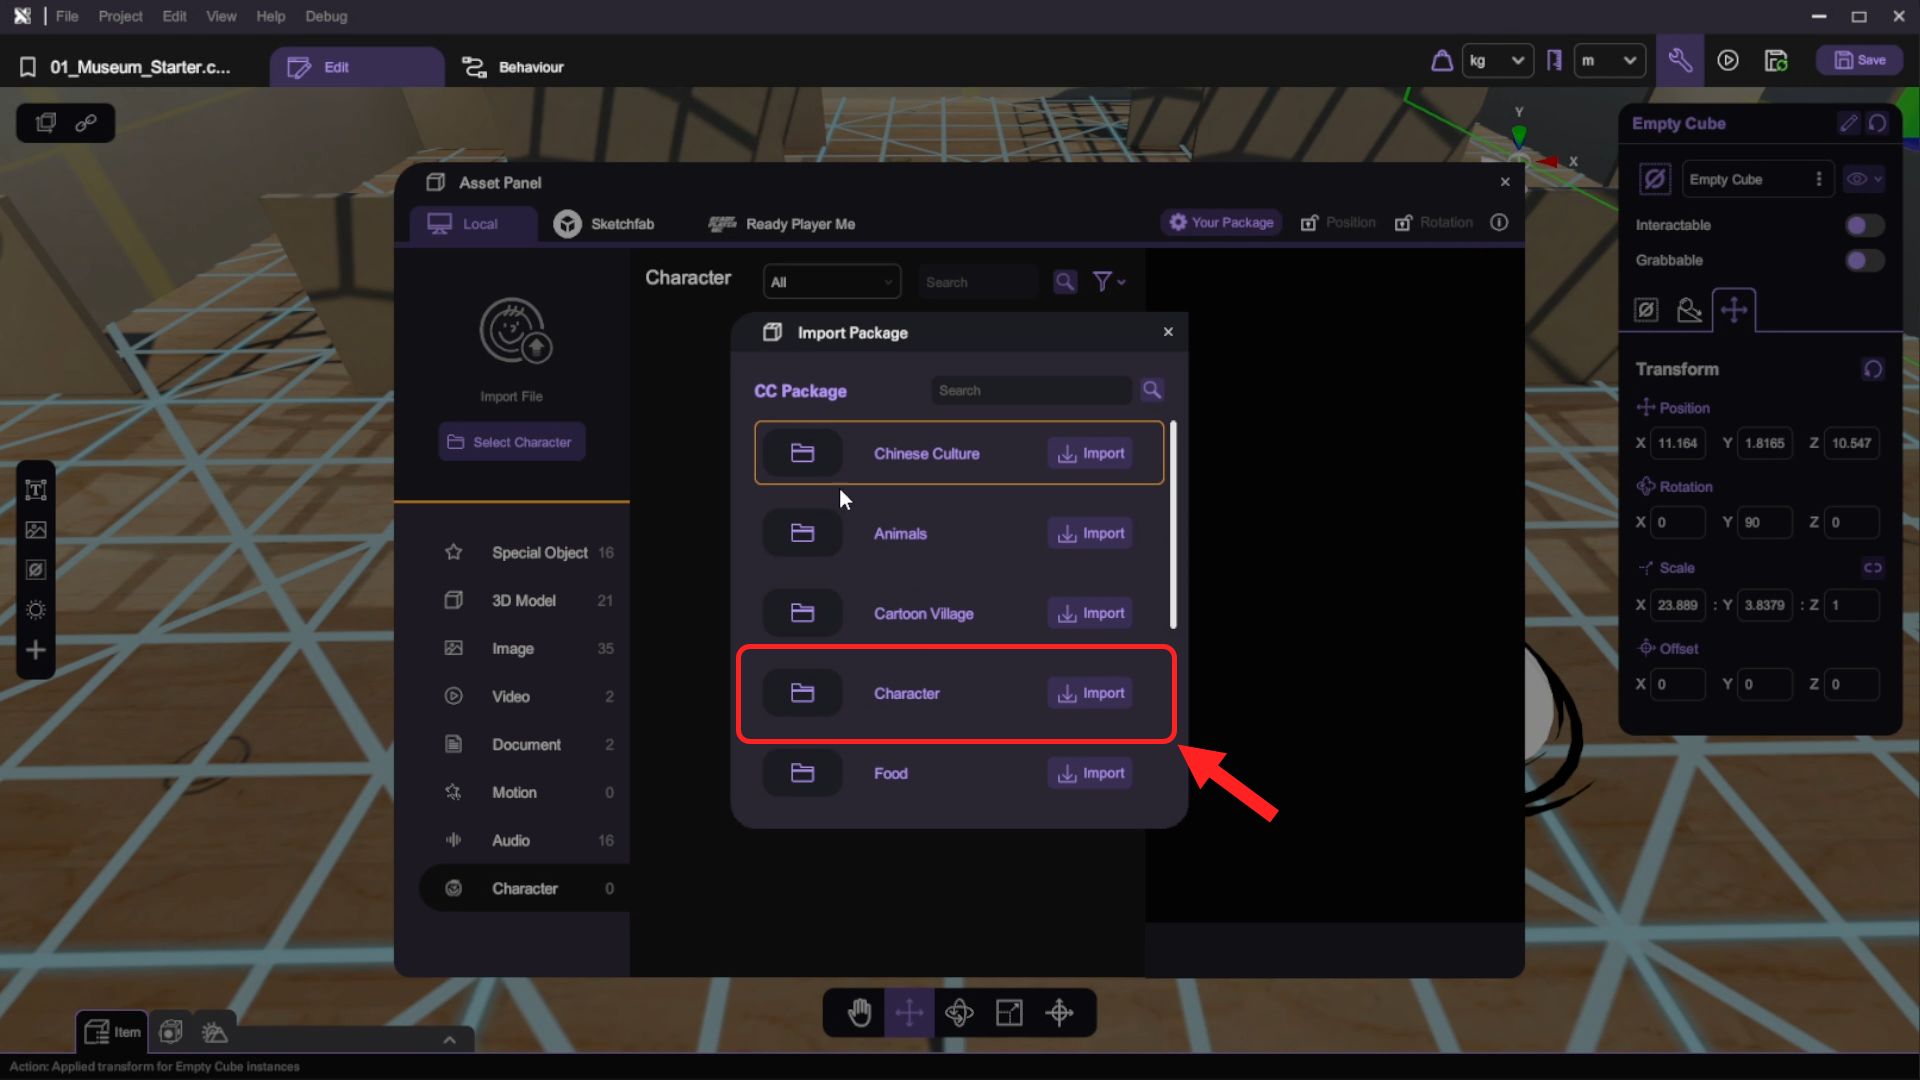
- Find the
Characterpackage, then click "Import".
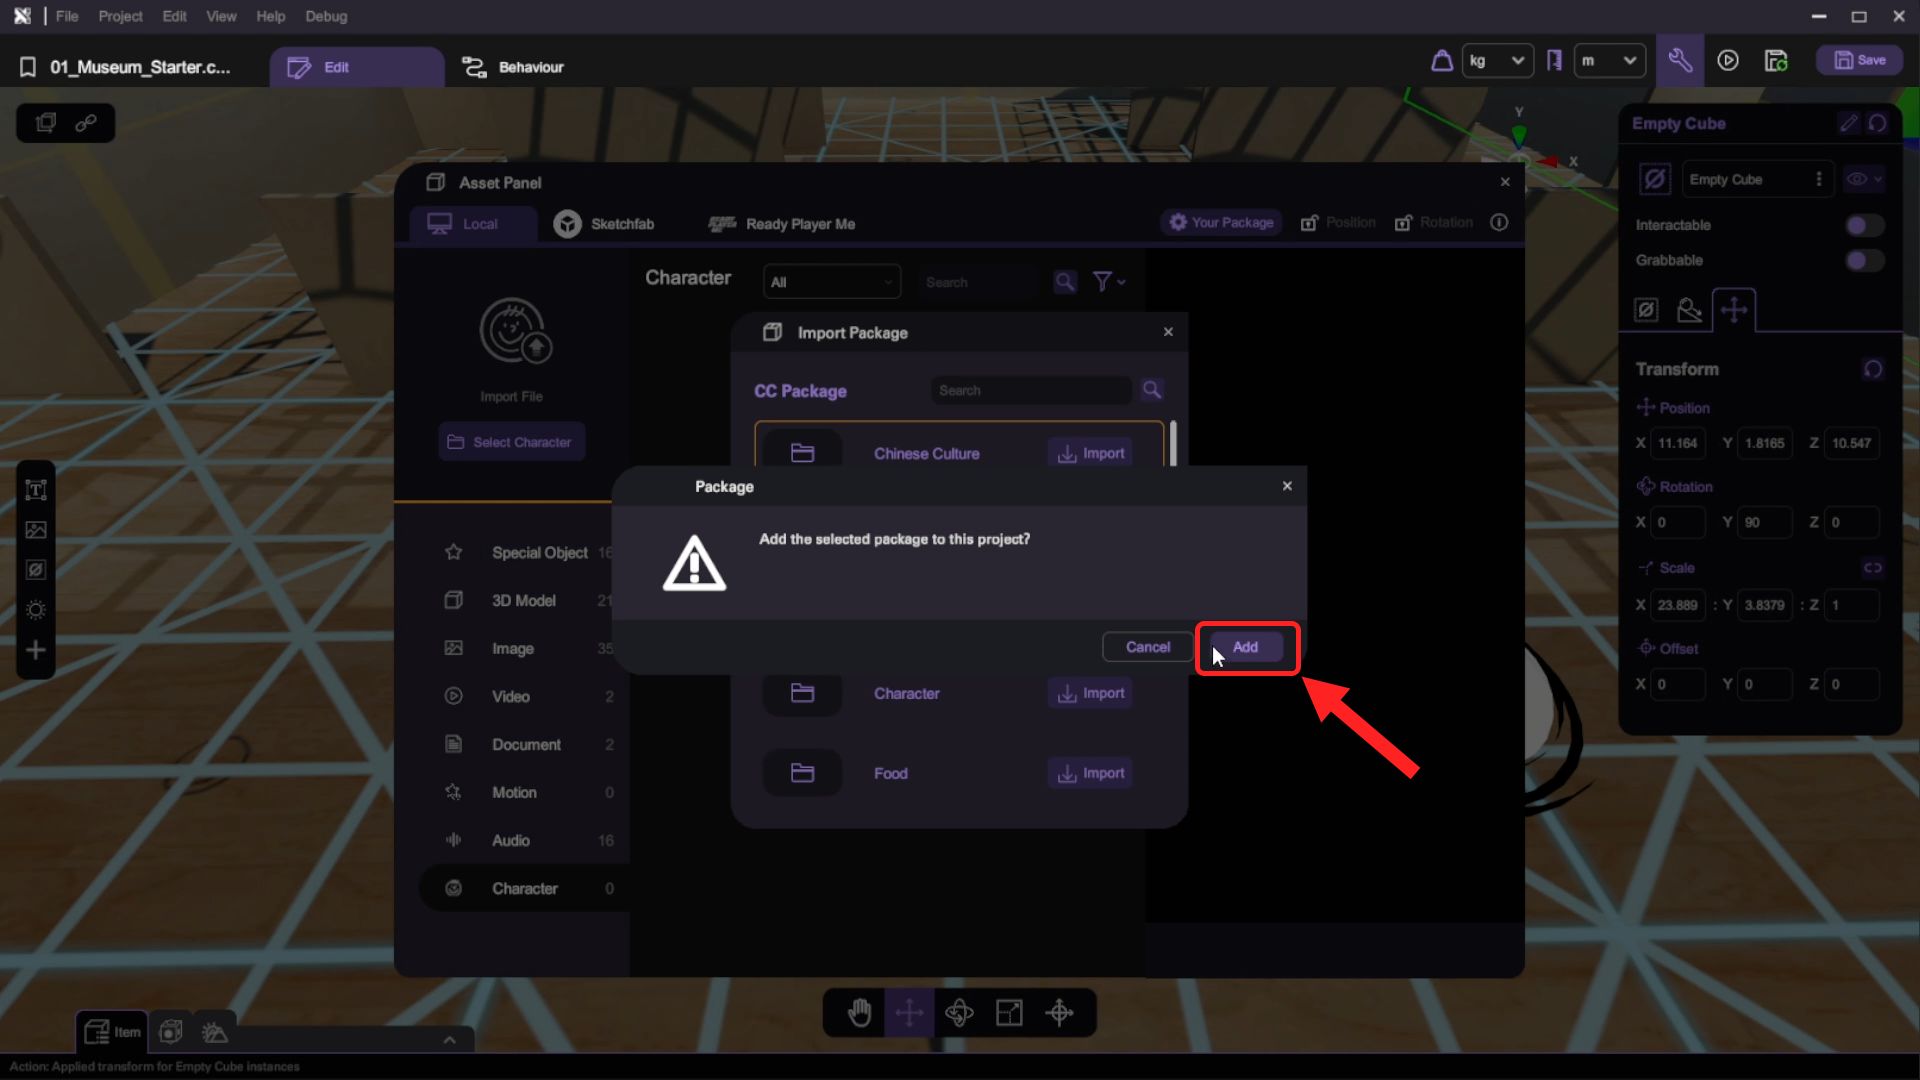
- Click
Addto add the package into this project.
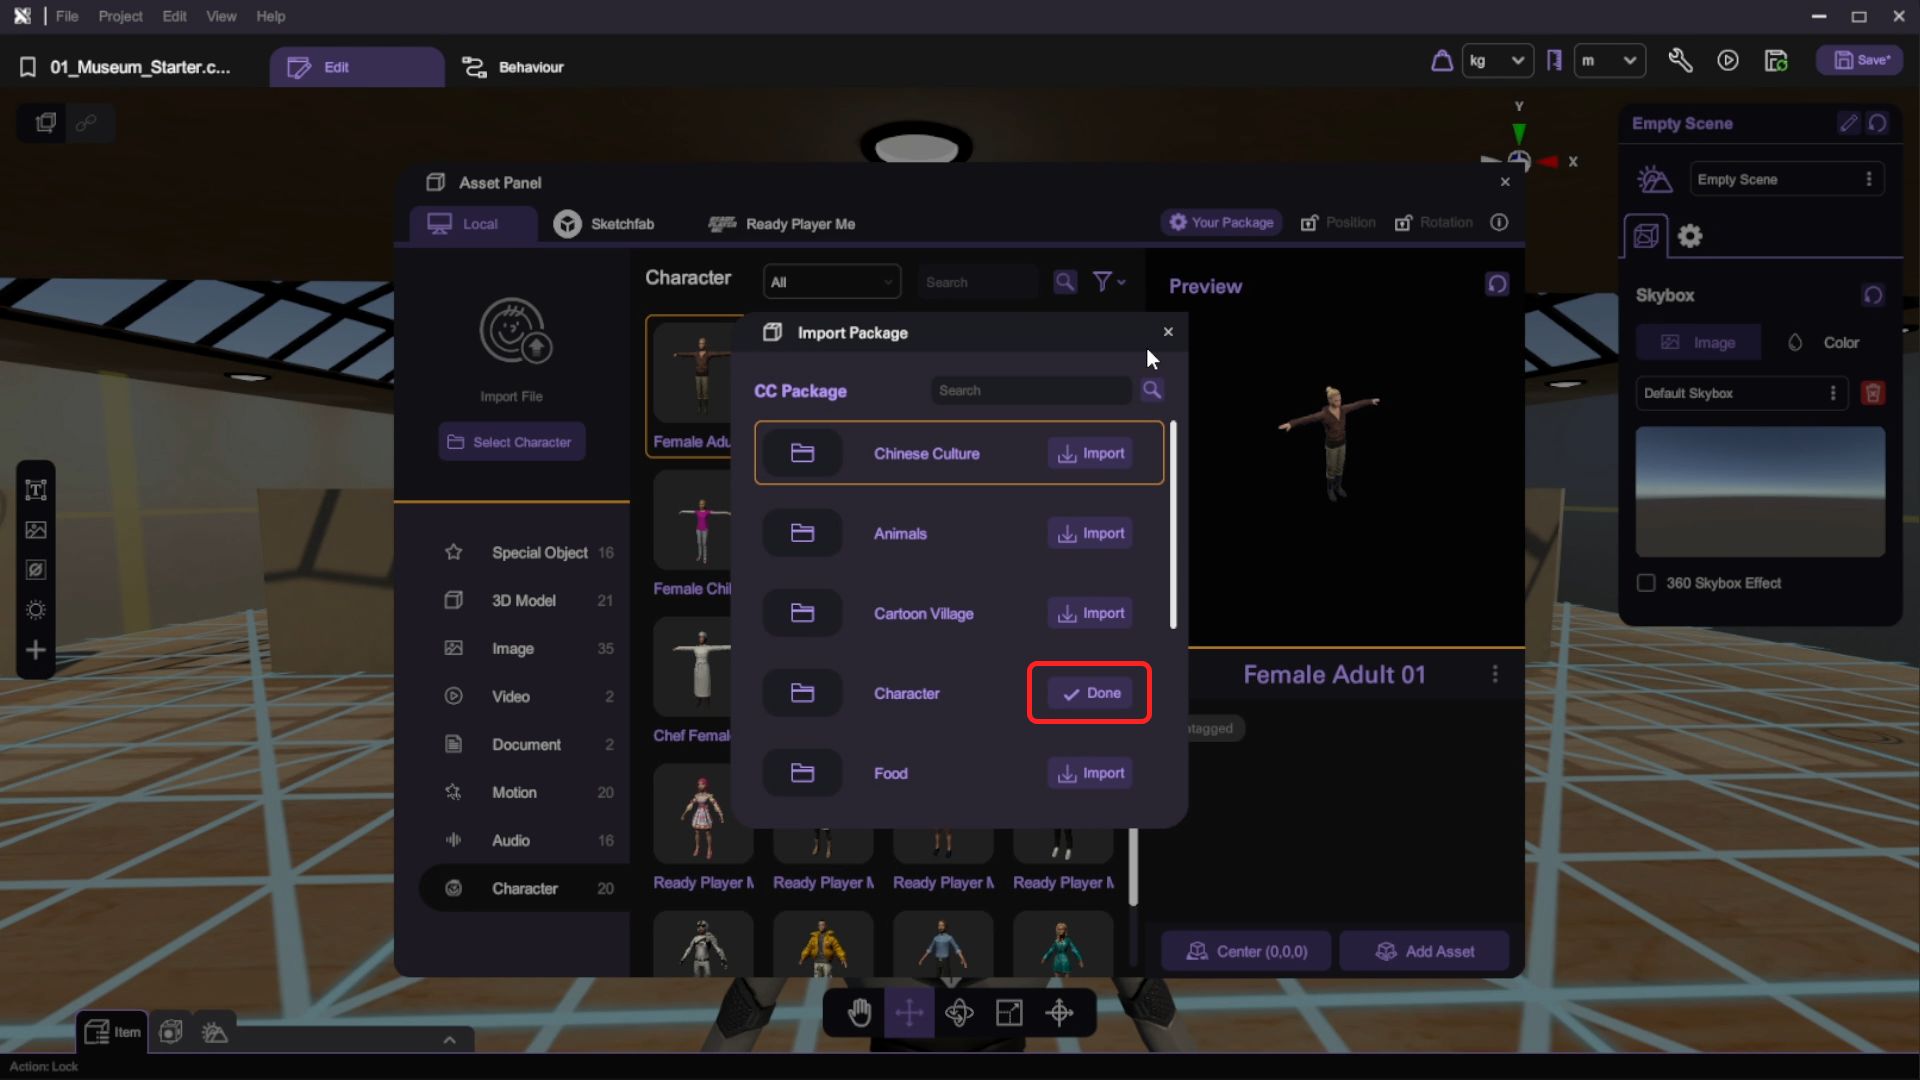
- If the package imported successfully, the button will be changed to
Done.
Add a Character as Museum Guide
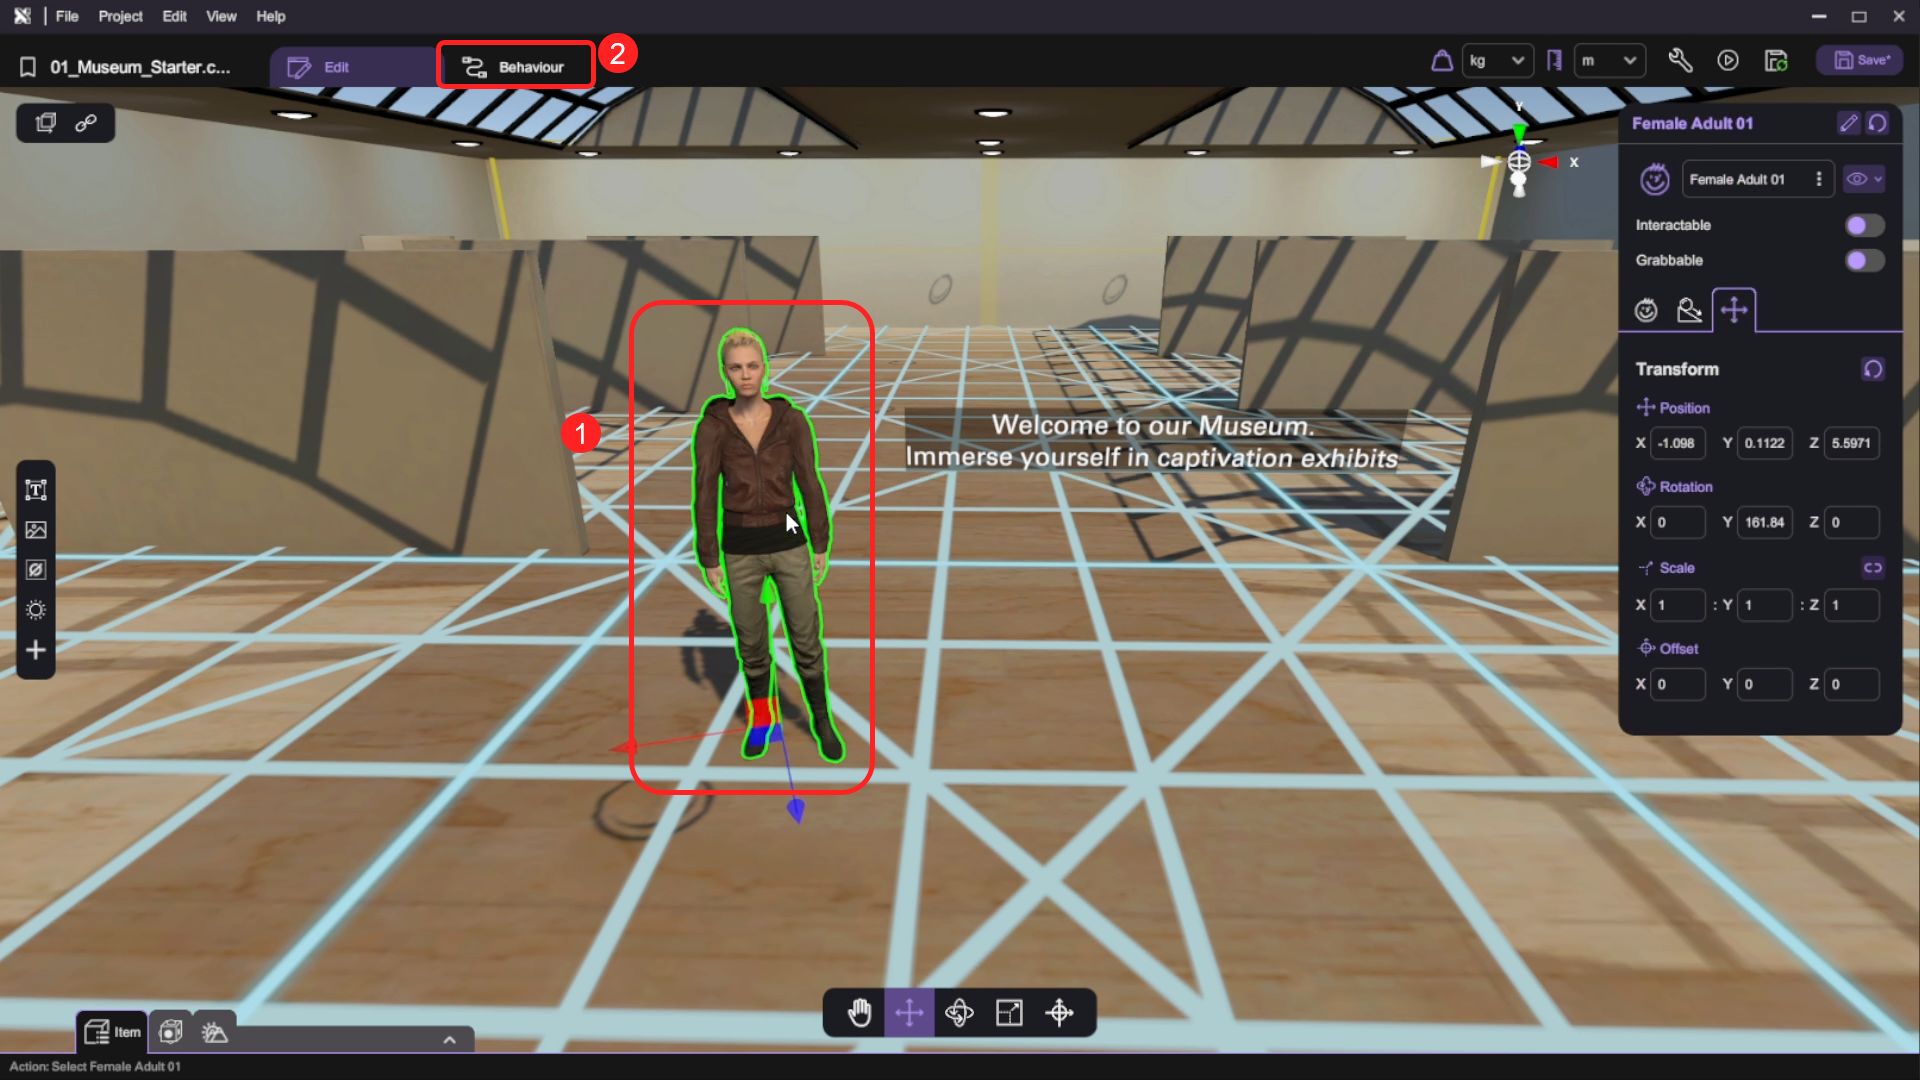
- Open the "Asset Panel" and from the "Default Assets" tab, select and add a Female Adult character model to the scene.
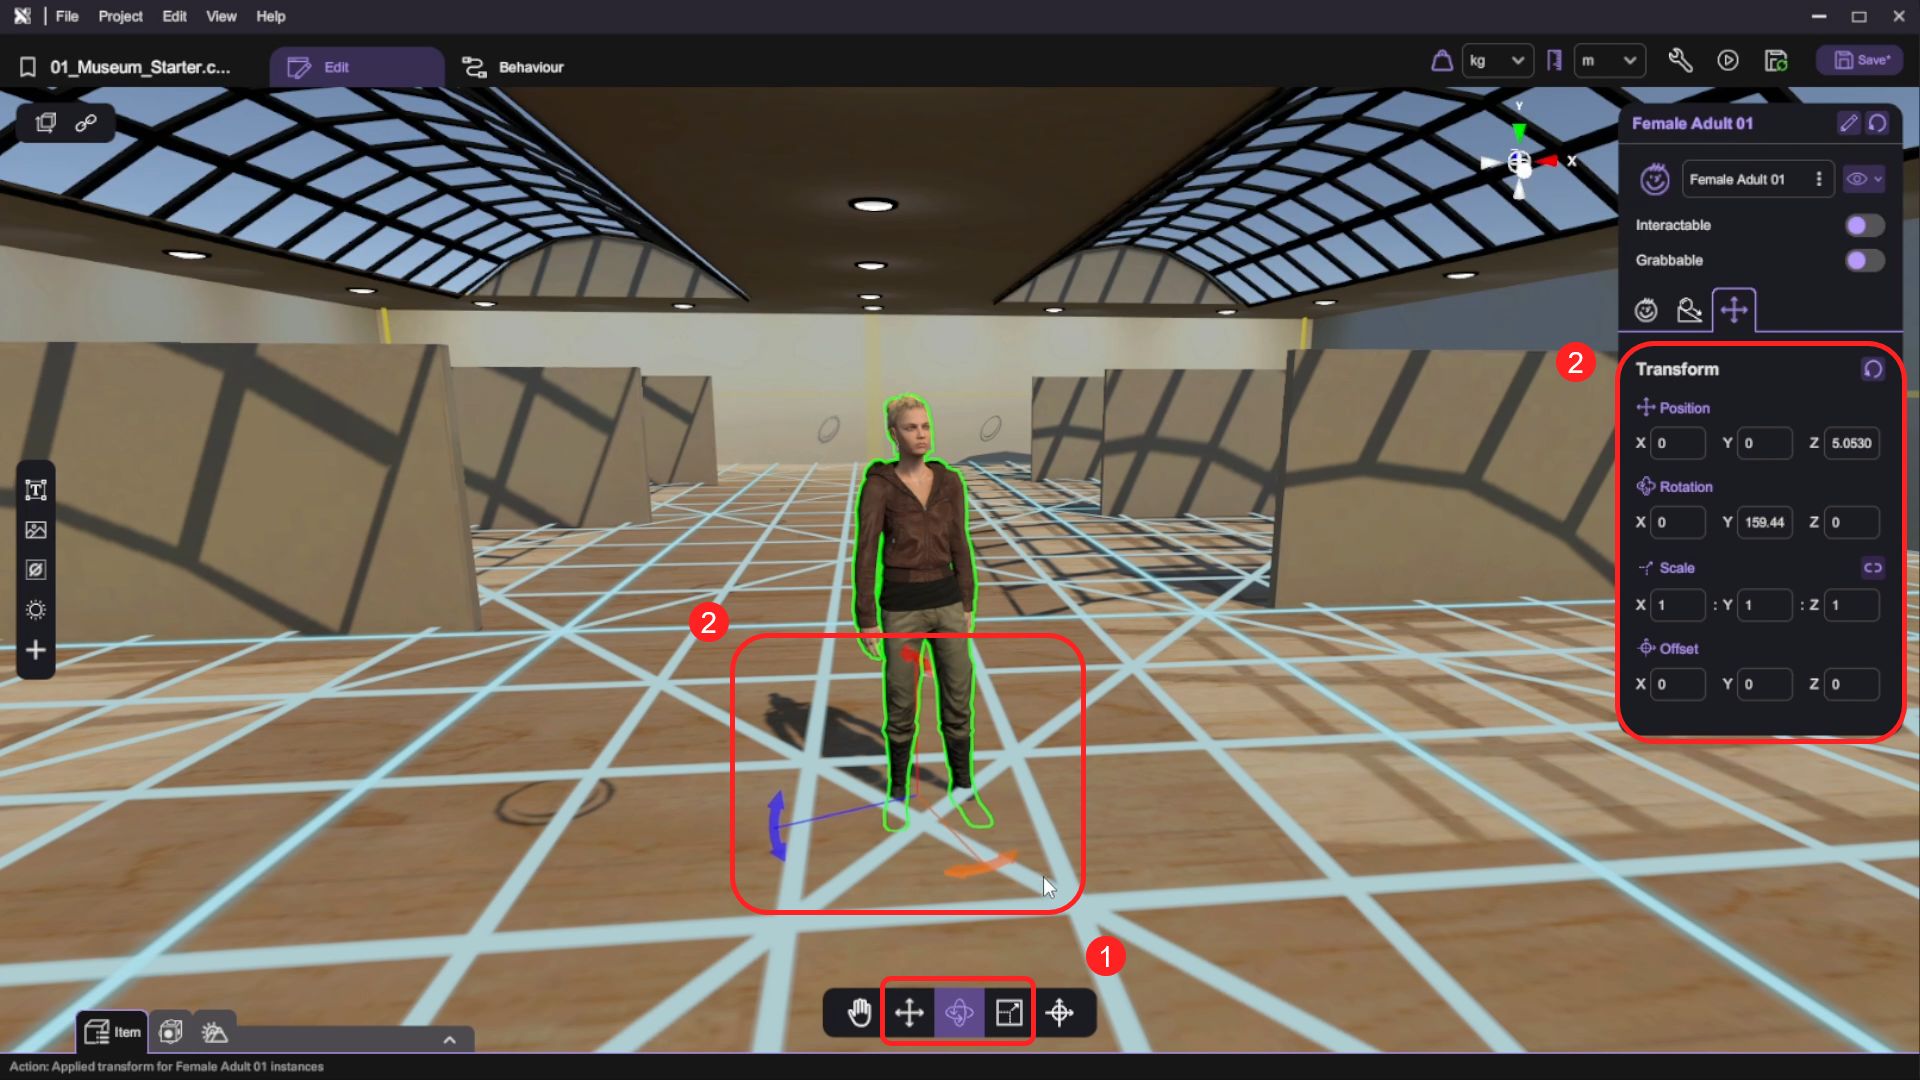
- Use the transform tools (move/rotate/scale) to reposition the character to in front of and facing the user.
- Open the "Asset Panel" and from the "Special Objects" tab, select and add a "Text Object" to the scene.
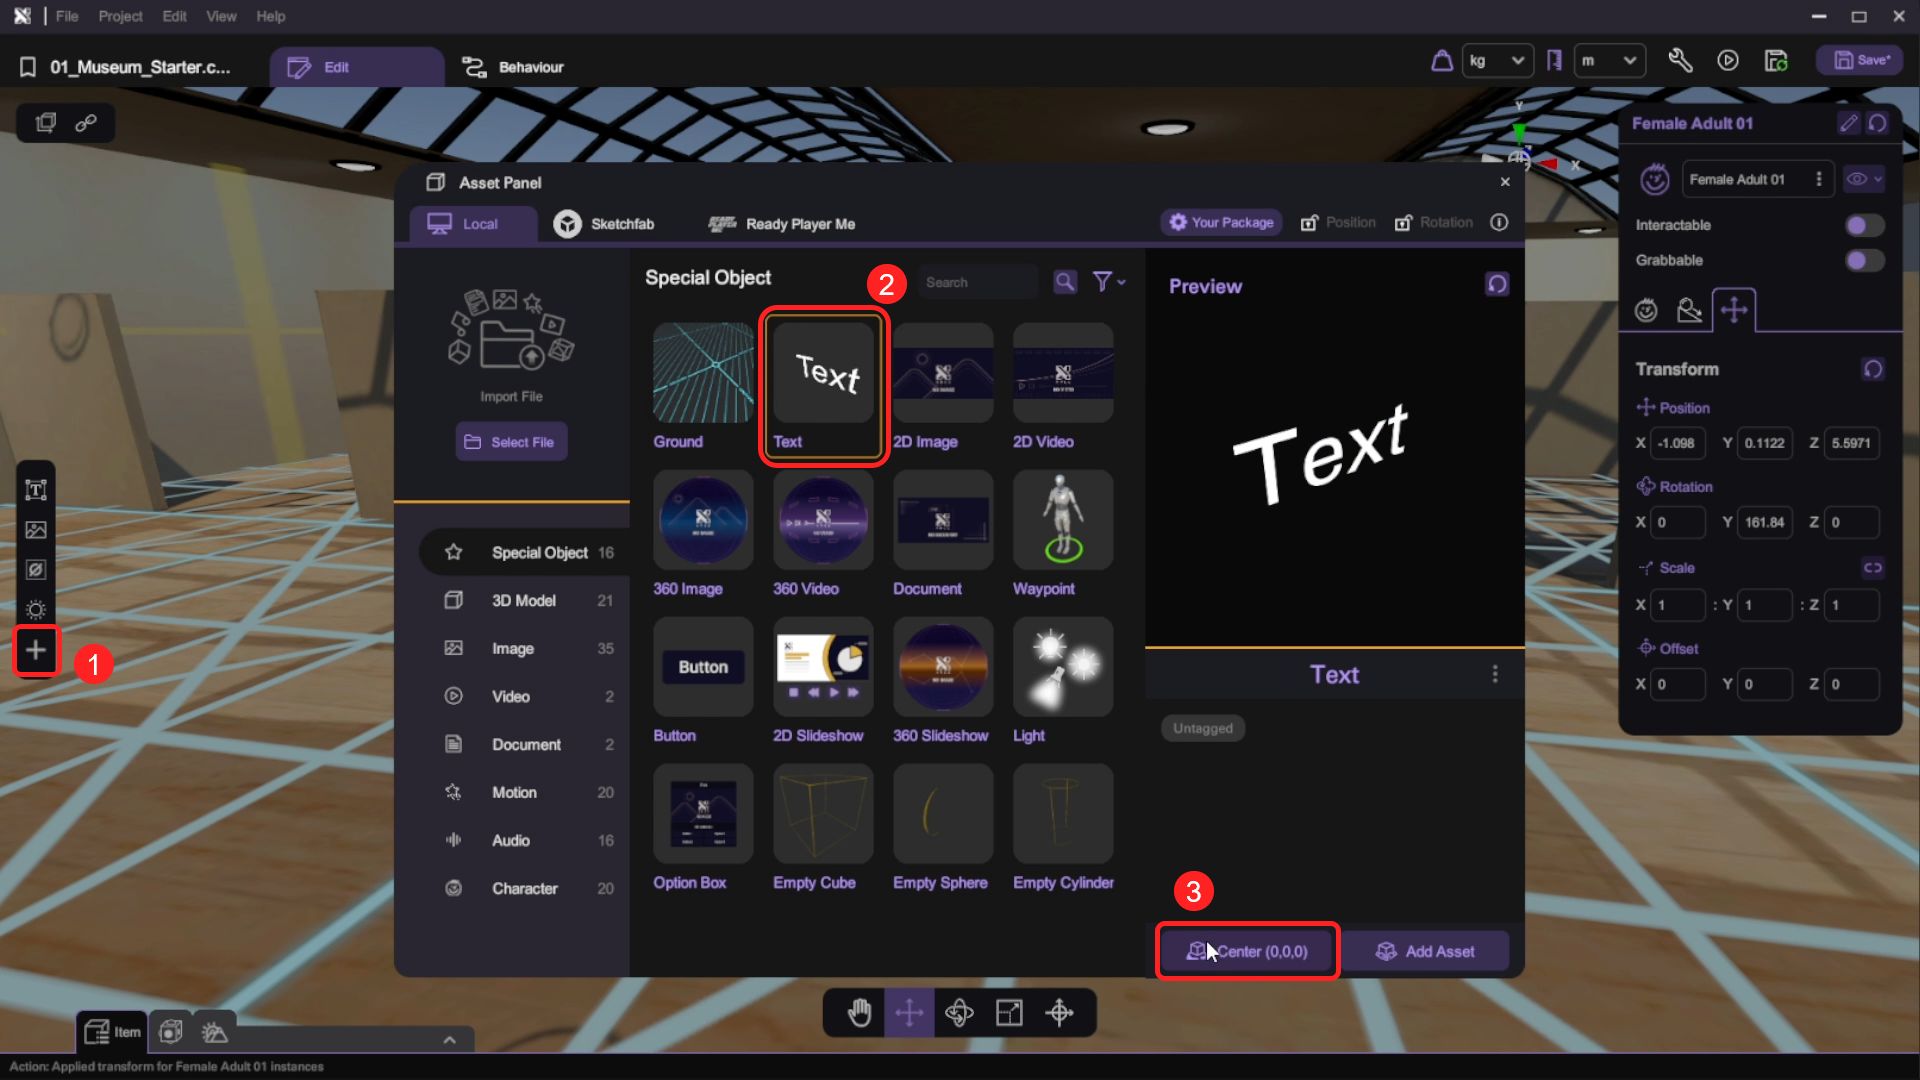
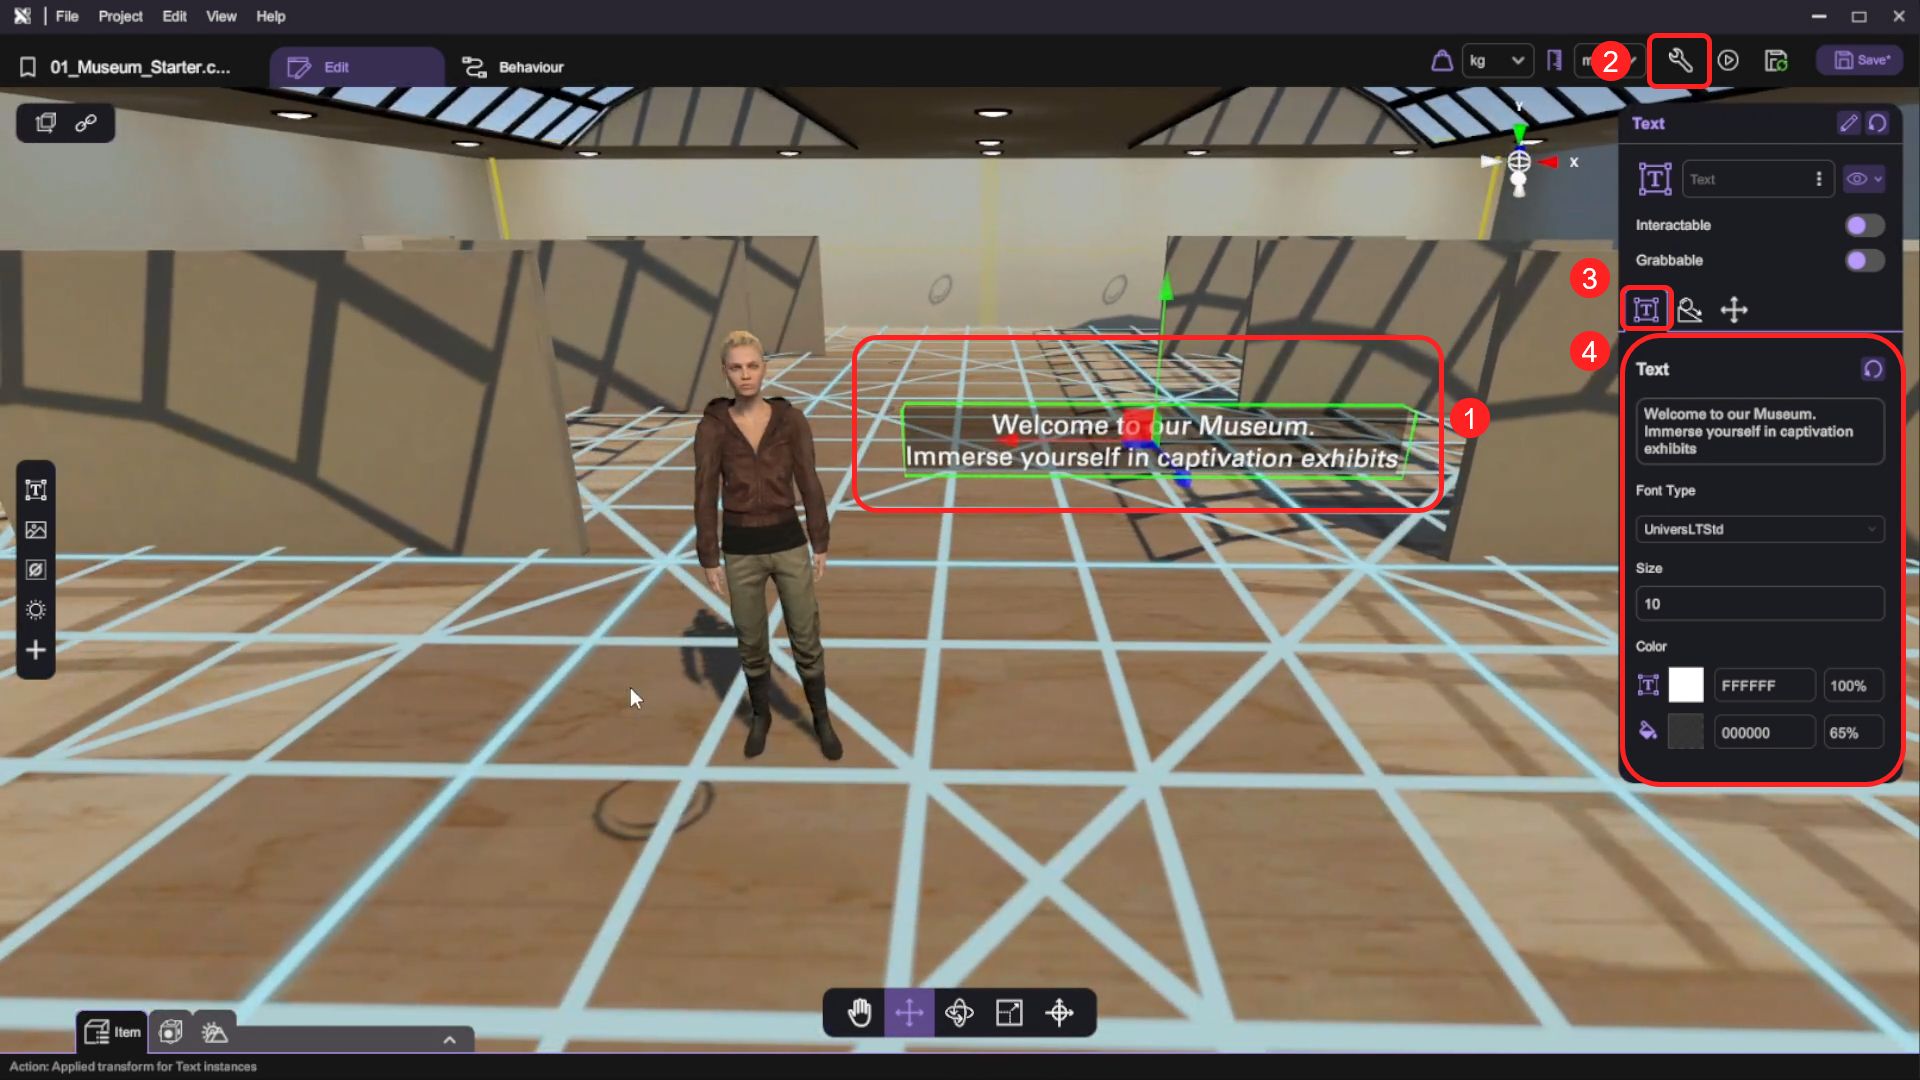
- Use the transform tools (move/rotate/scale) to reposition the text object next to the female character. Then open the "Inspector" to set up the text content, font size, and color of the text object.
Make the Character Move and Speak
Set Character to Speak and Move when Scene Starts
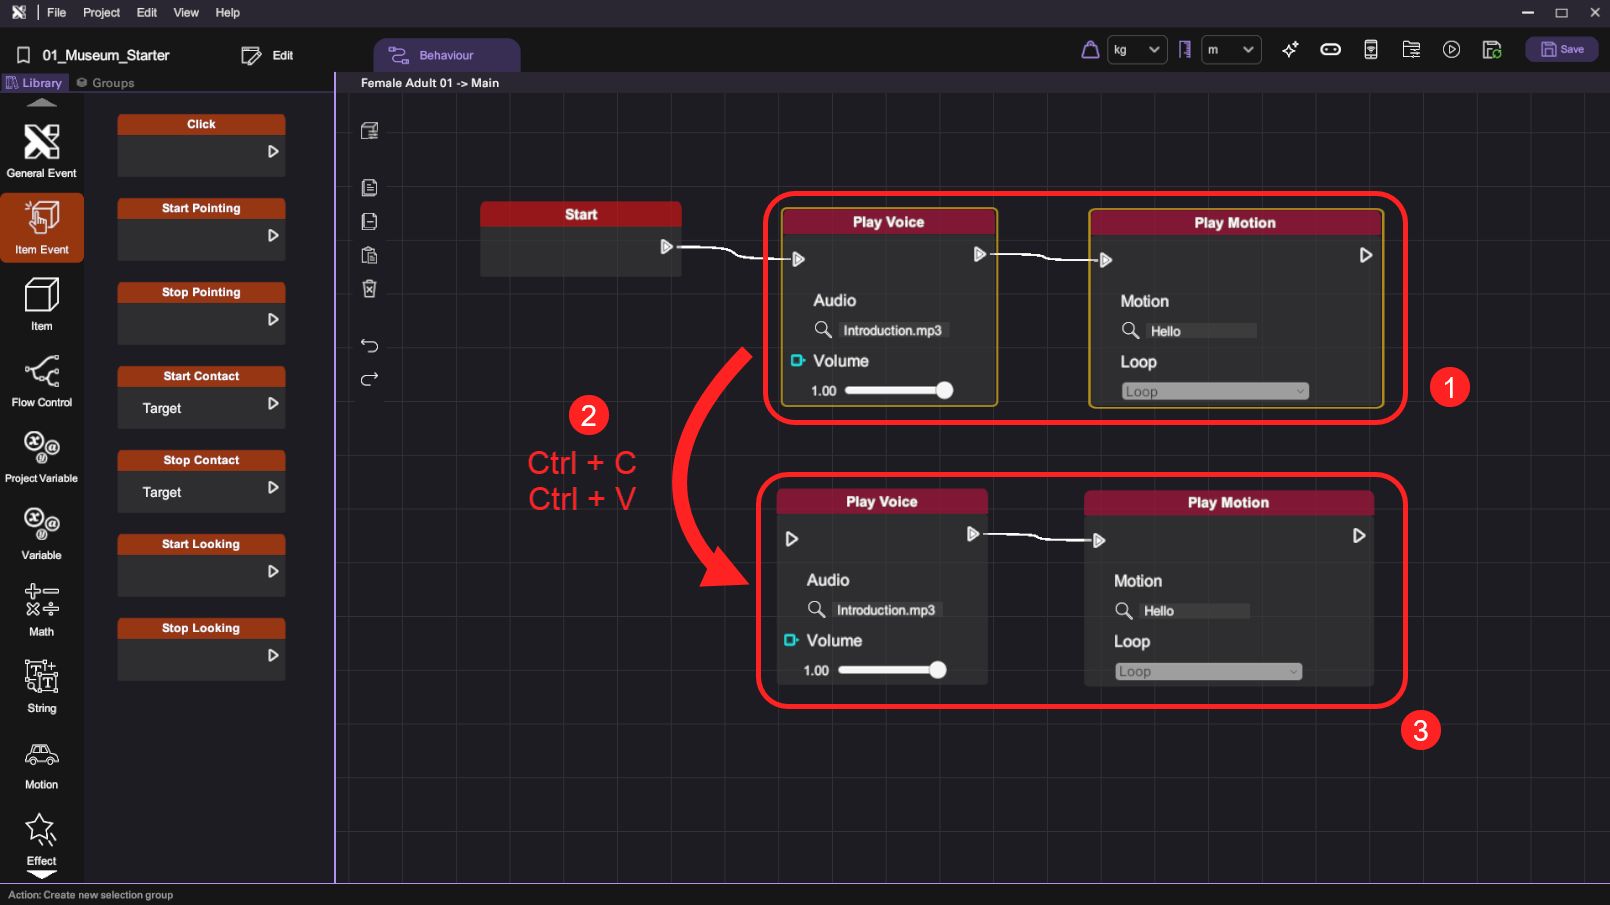
- Select the female character object and click on the "Behaviour" tab to switch to its behaviour panel.
- In the "General" category, find and drag the "Start" event trigger block onto the behaviour canvas.
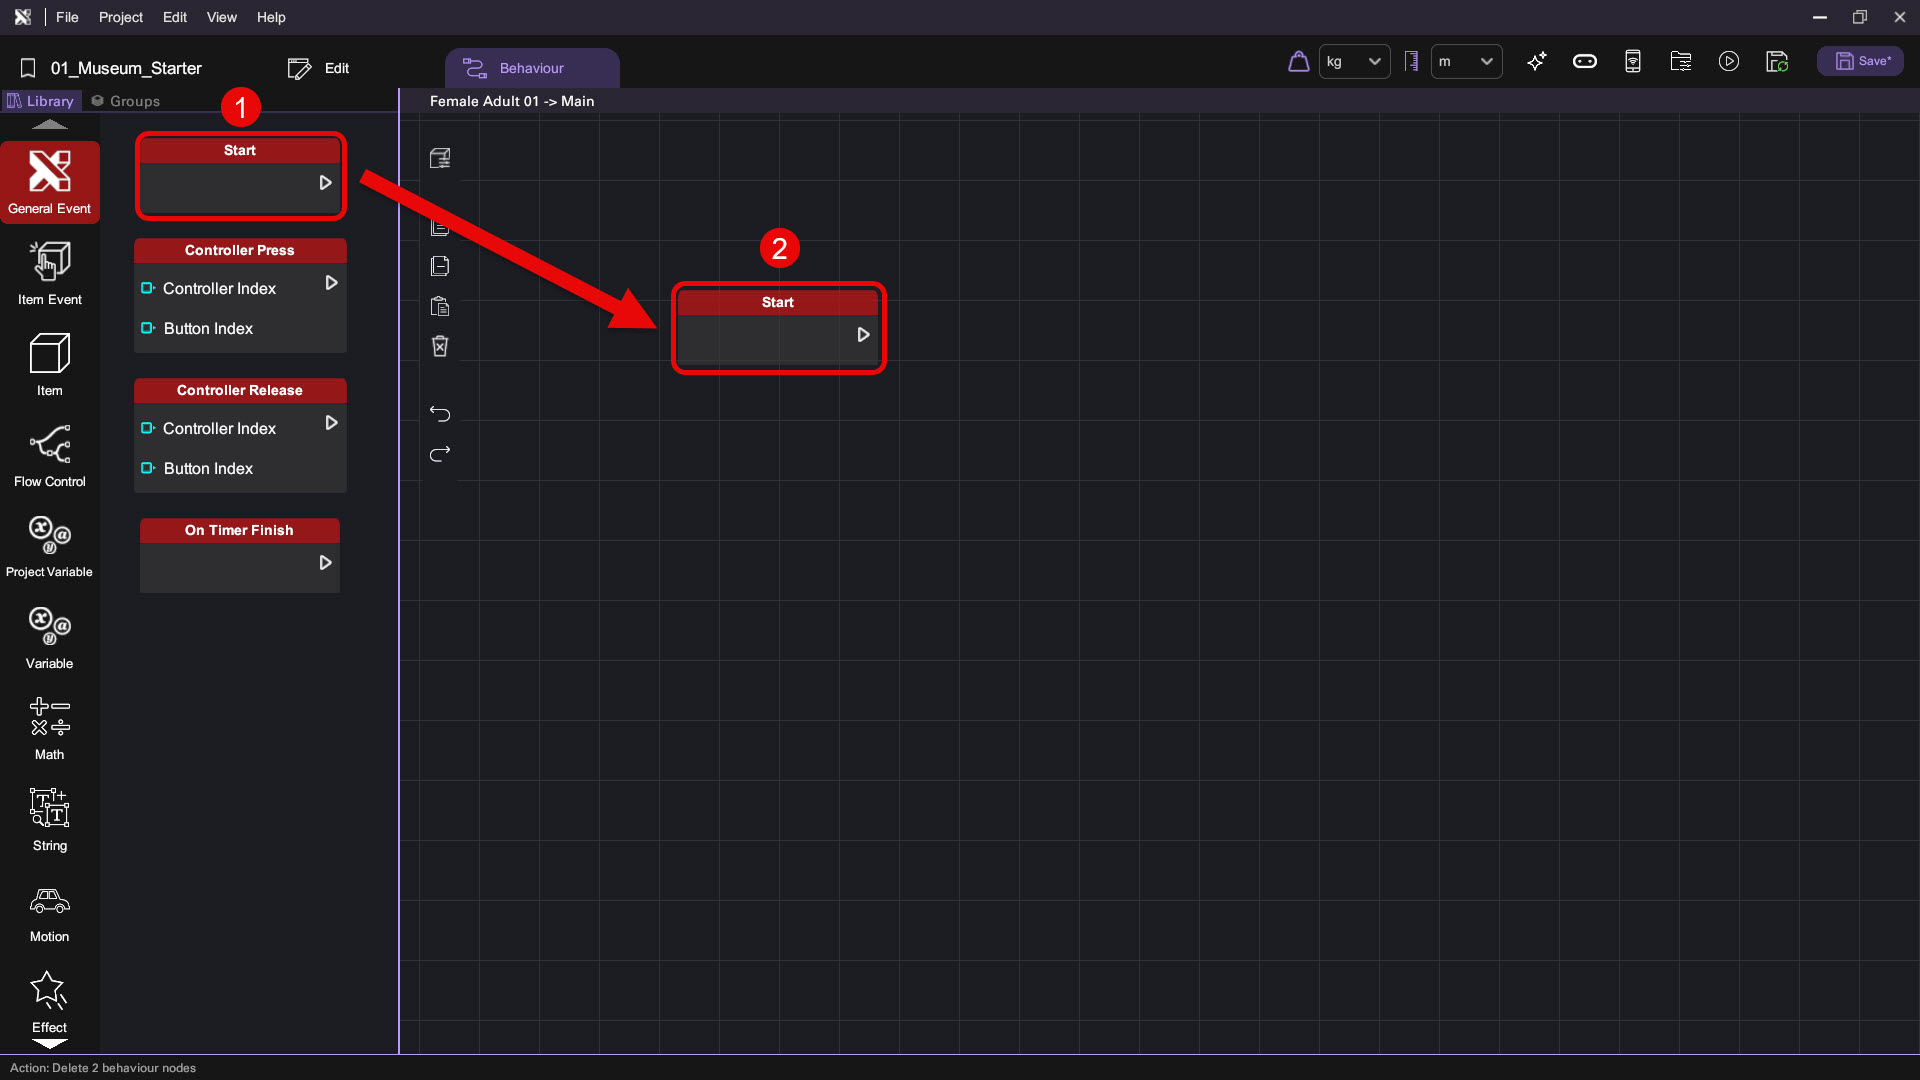
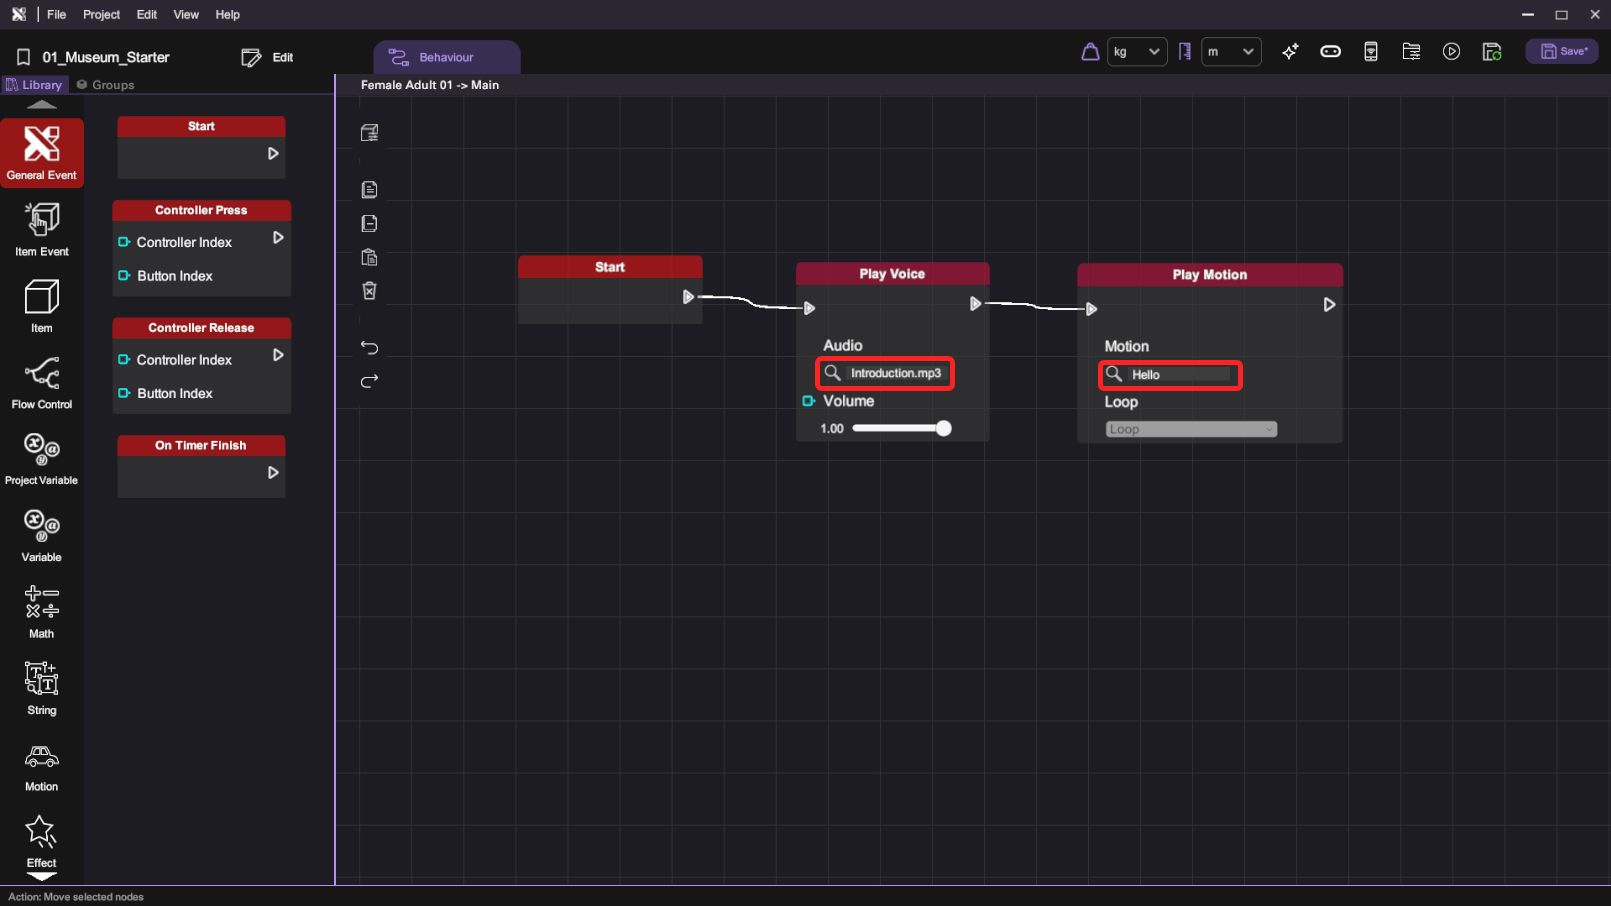
- Then switch to the "Character" category, find and drag both the "Play Voice" and "Play Motion" behaviour blocks onto the behaviour canvas. Connect the "Start" block's out flow node with the "Play Voice" block's in flow node, and "Play Voice" block's out flow node with "Play Motion" block's in flow node.
This behaviour flow defines a behaviour sequence for the character model that begins at the "Start" of the scene, it continues with the character playing a voice clip followed by a motion.
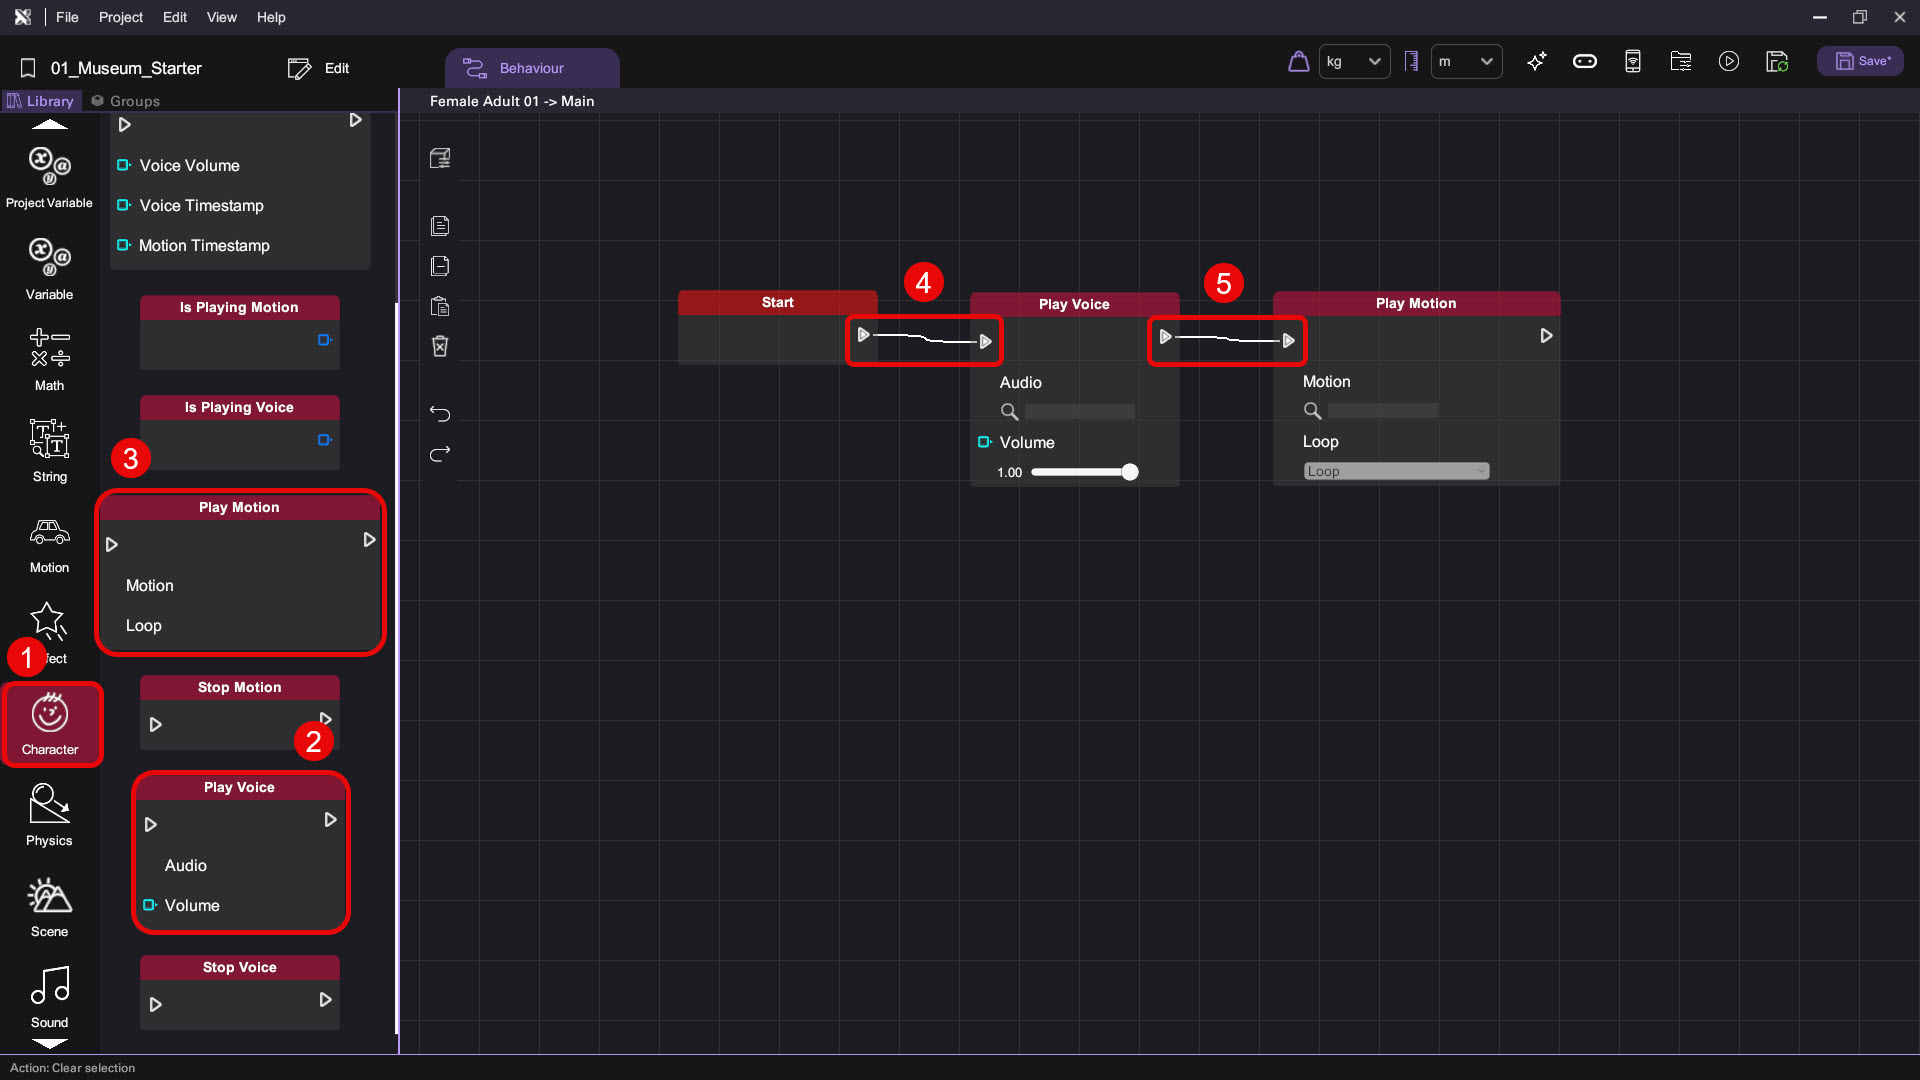
- On the "Play Voice" block, click the selector under the "Audio" option to open the Selection panel and select the "Introduction.mp3" audio clip from your asset library. For the "Play Motion" block, click the selector under the "Motion" option to open the Selection panel and select the "Hello" motion from the asset library.
Click 🔍 (selector) to select the Audio and Motion

Set Character to Move and Speak when Clicked
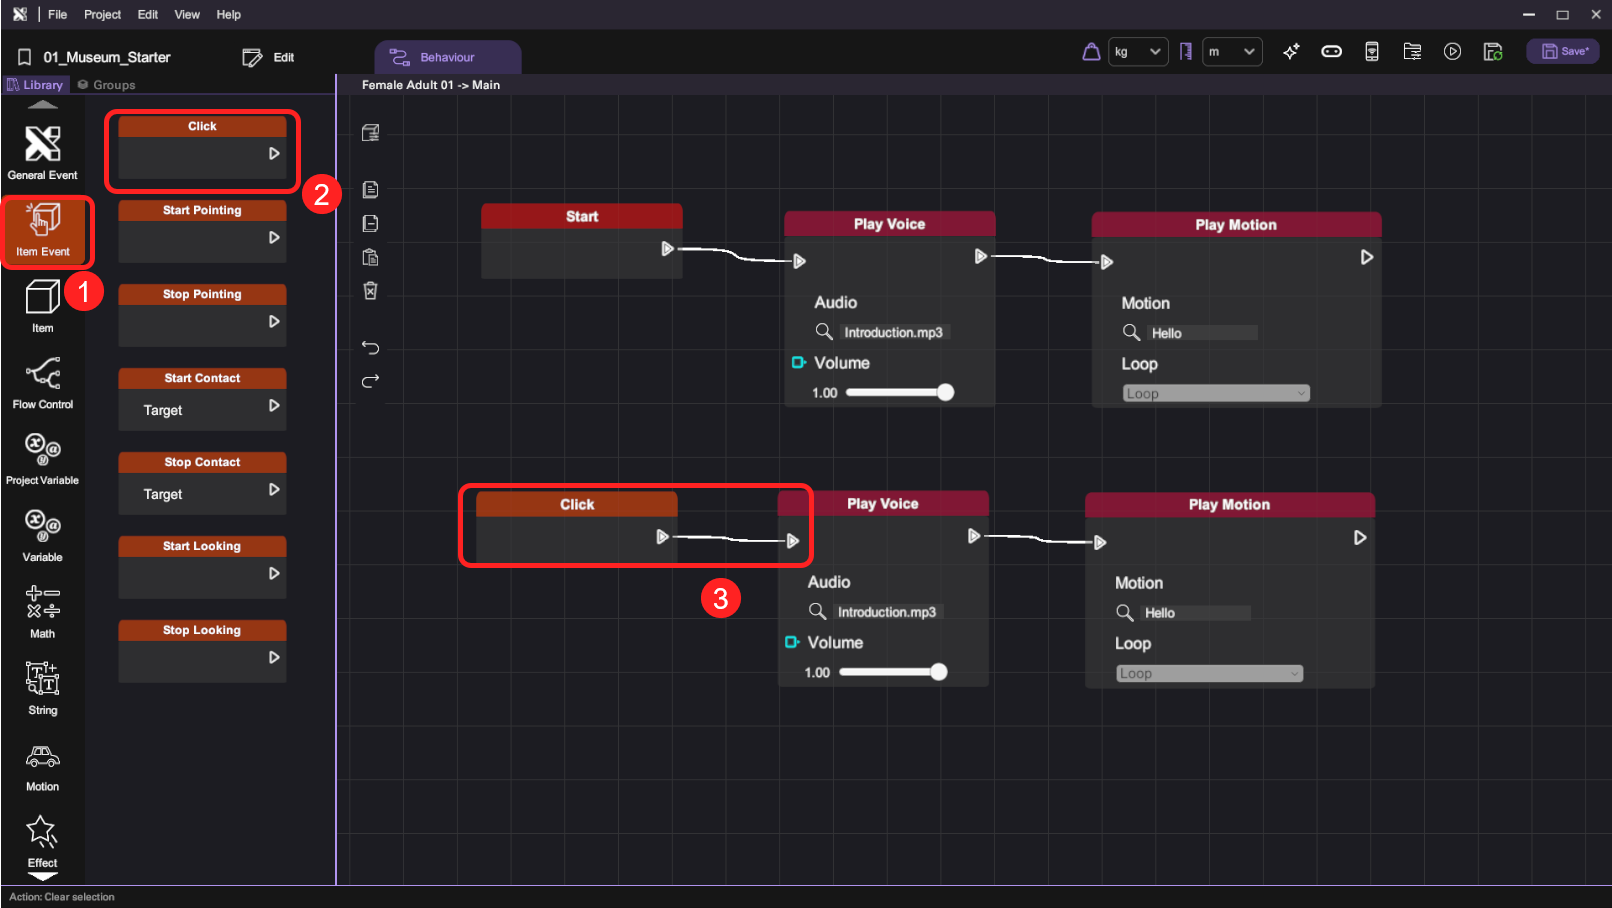
- On the female character's behaviour canvas, select both the "Play Voice" and "Play Motion" blocks on the canvas, Copy (Ctrl + C) and Paste (Ctrl + V) or Duplicate (Ctrl + D) the block and move them to a lower position on the canvas.
- Switch to the "Item Event" category, find and drag the "Click" event trigger block onto the behaviour canvas. Connect the "Click" block's out flow node with the "Play Motion" block's in flow node, and "Play Motion" block's out flow node with "Play Voice" block's in flow node.
This behaviour flow defines a behaviour sequence for the character model that begins when user "Click" the character using the wand, it continues with the character playing a motion followed by a voice clip.
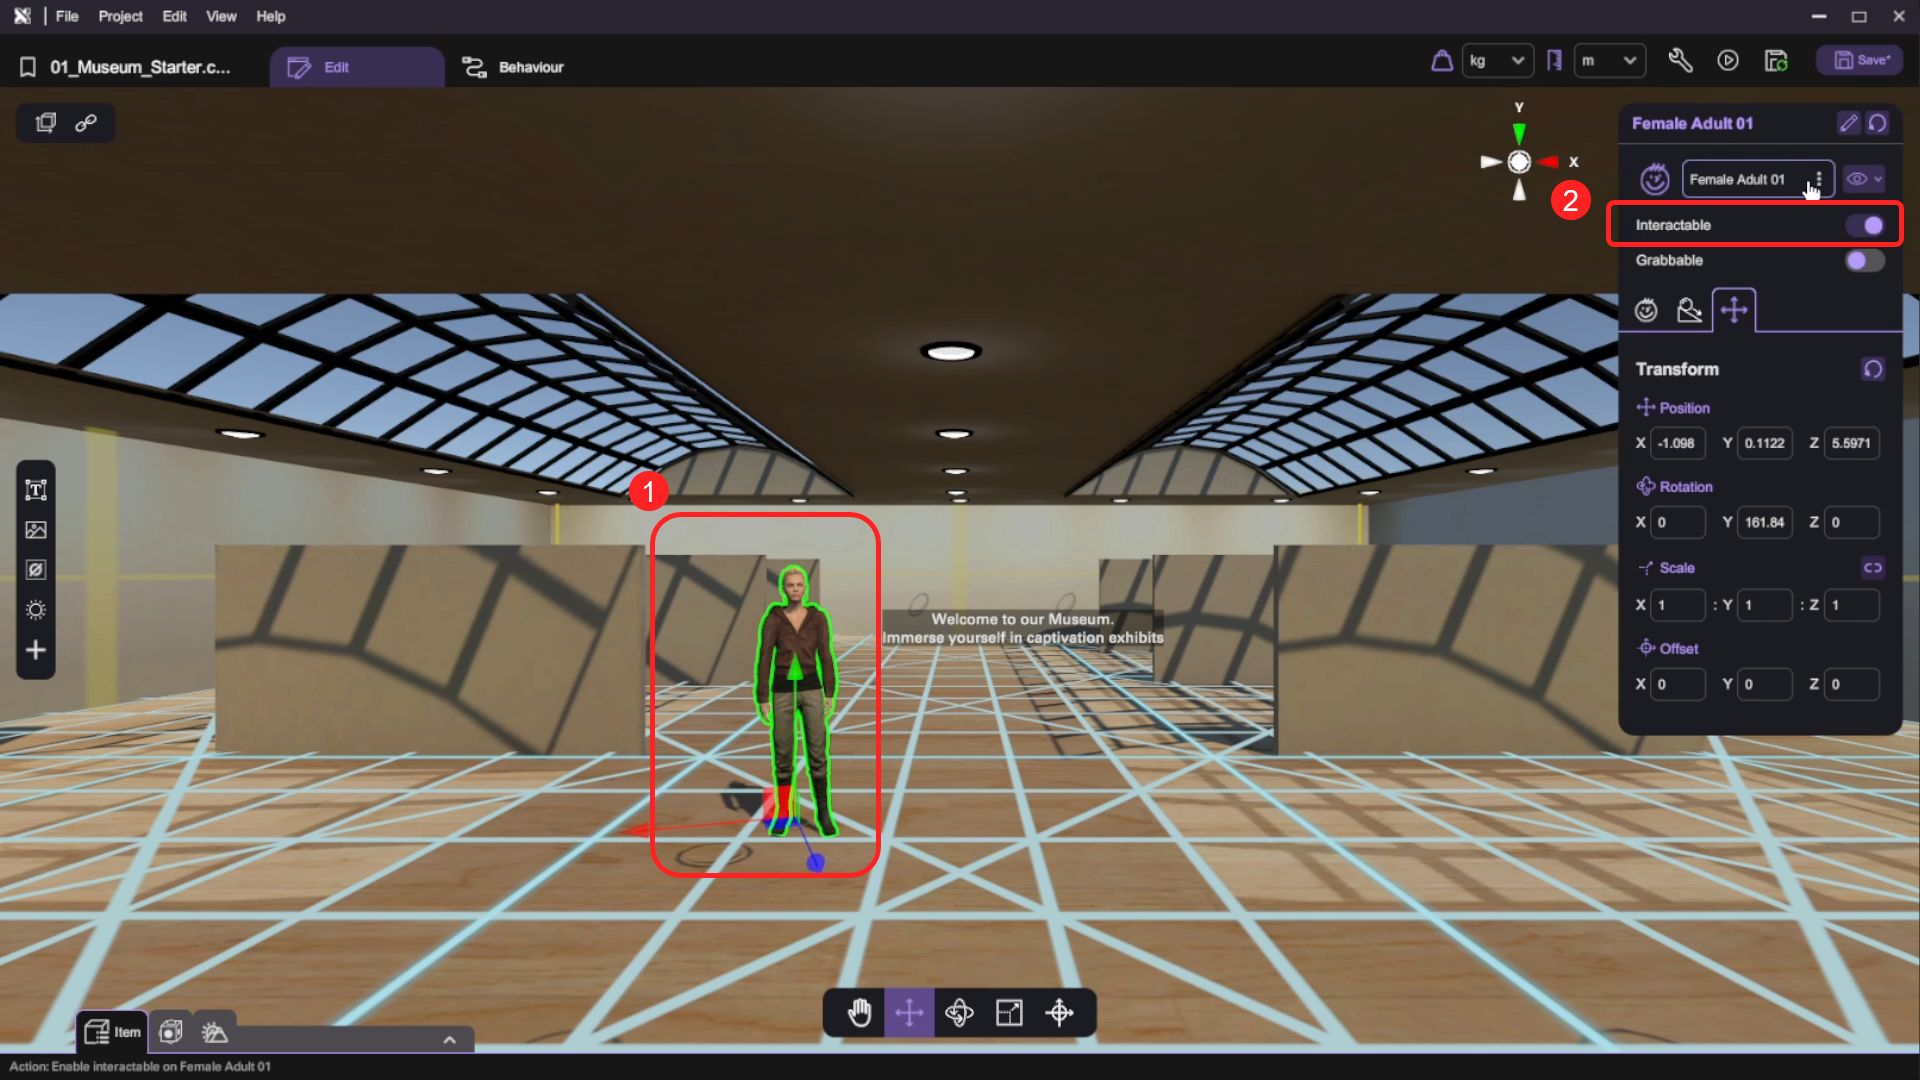
Set Character to Interactable
- Open the "Inspector", switch on the "Interactable" to allow player to interact (click) with it.
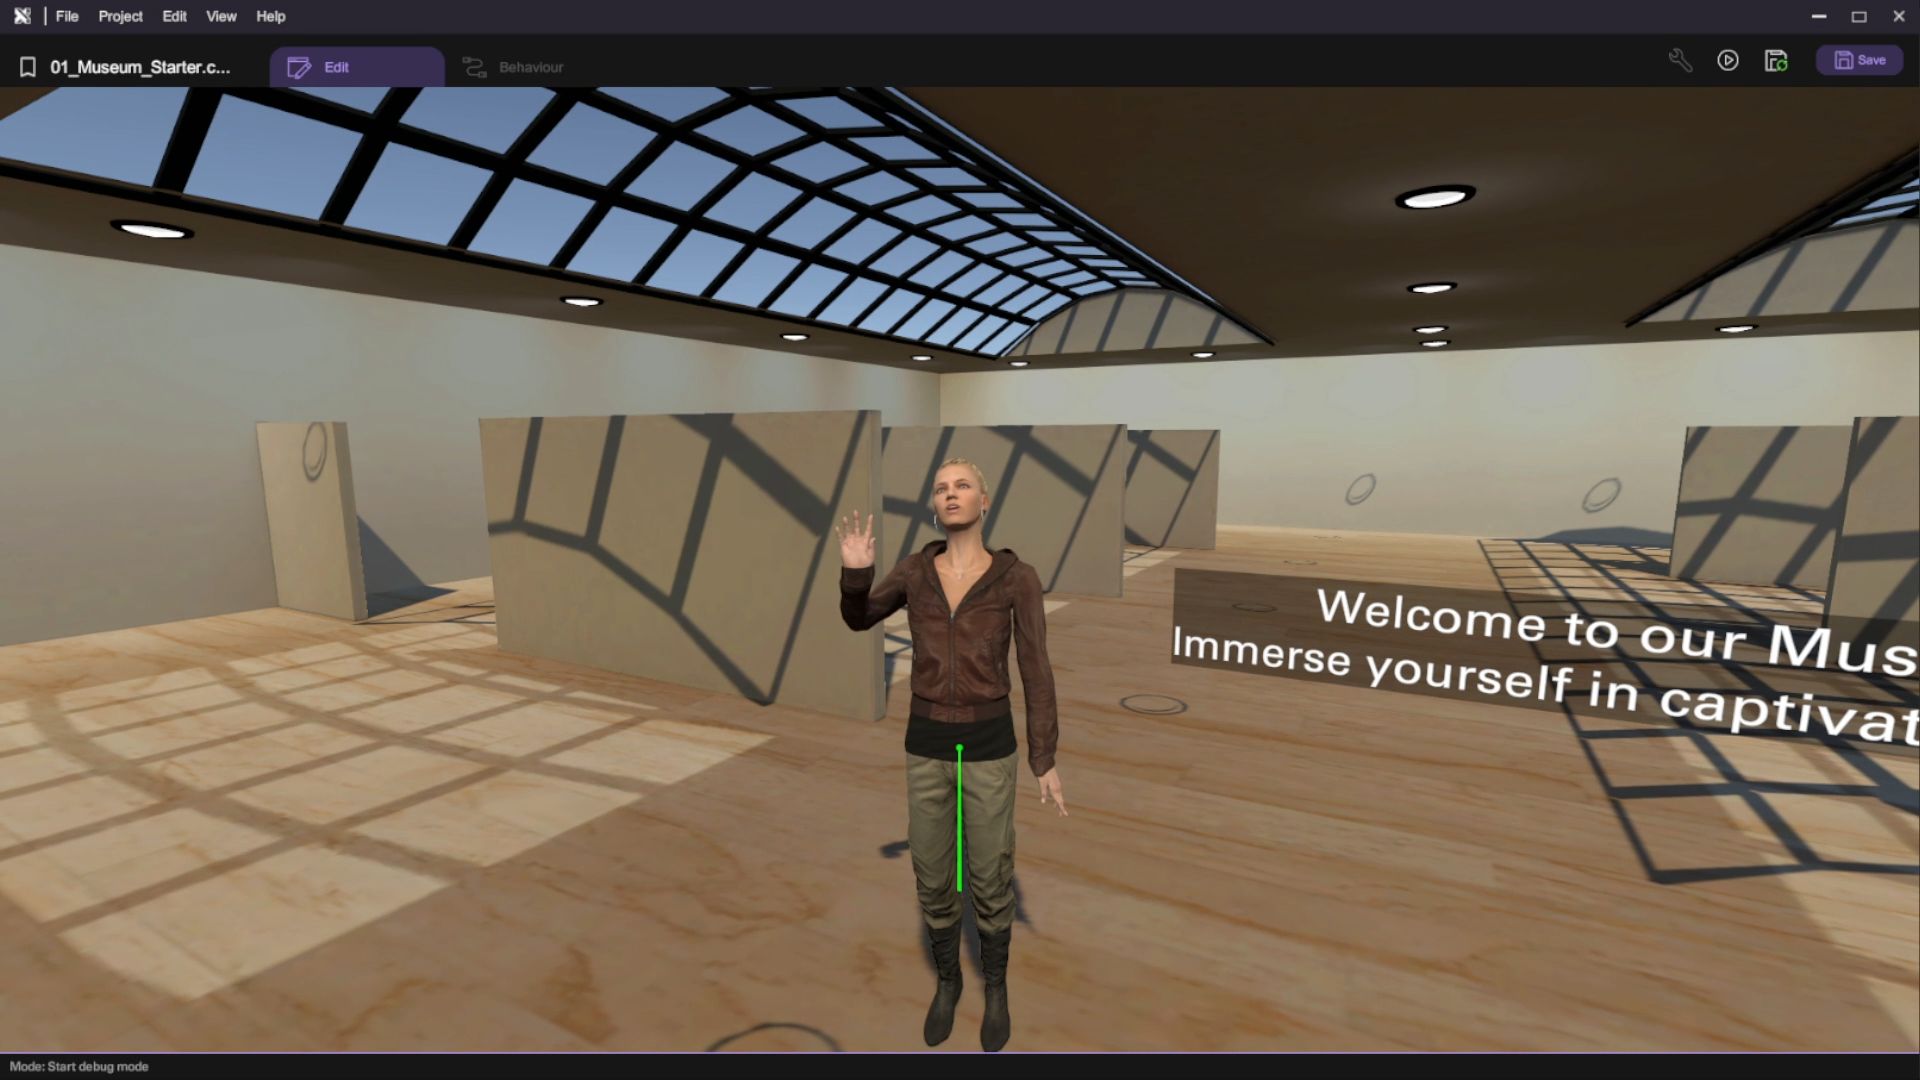
- You have now finished setting up the behaviours for the character model. Press the "Play" button () and watch the character greet you when the scene starts, and when clicked at.
- Press "Esc" to exit play mode after you've done testing your scene.
Add the 2D Exhibits
In the next section, we will incorporate 2D images, videos, and PDF documents into the VR museum to enhance the user experience and provide more information.
Add 2D Image
- Open the "Asset Panel" and from the "Special Objects" tab, select and add a "2D Image" to the scene.
This time, use the spawn object button at the center to spawn the 2D image object at the front of the user.
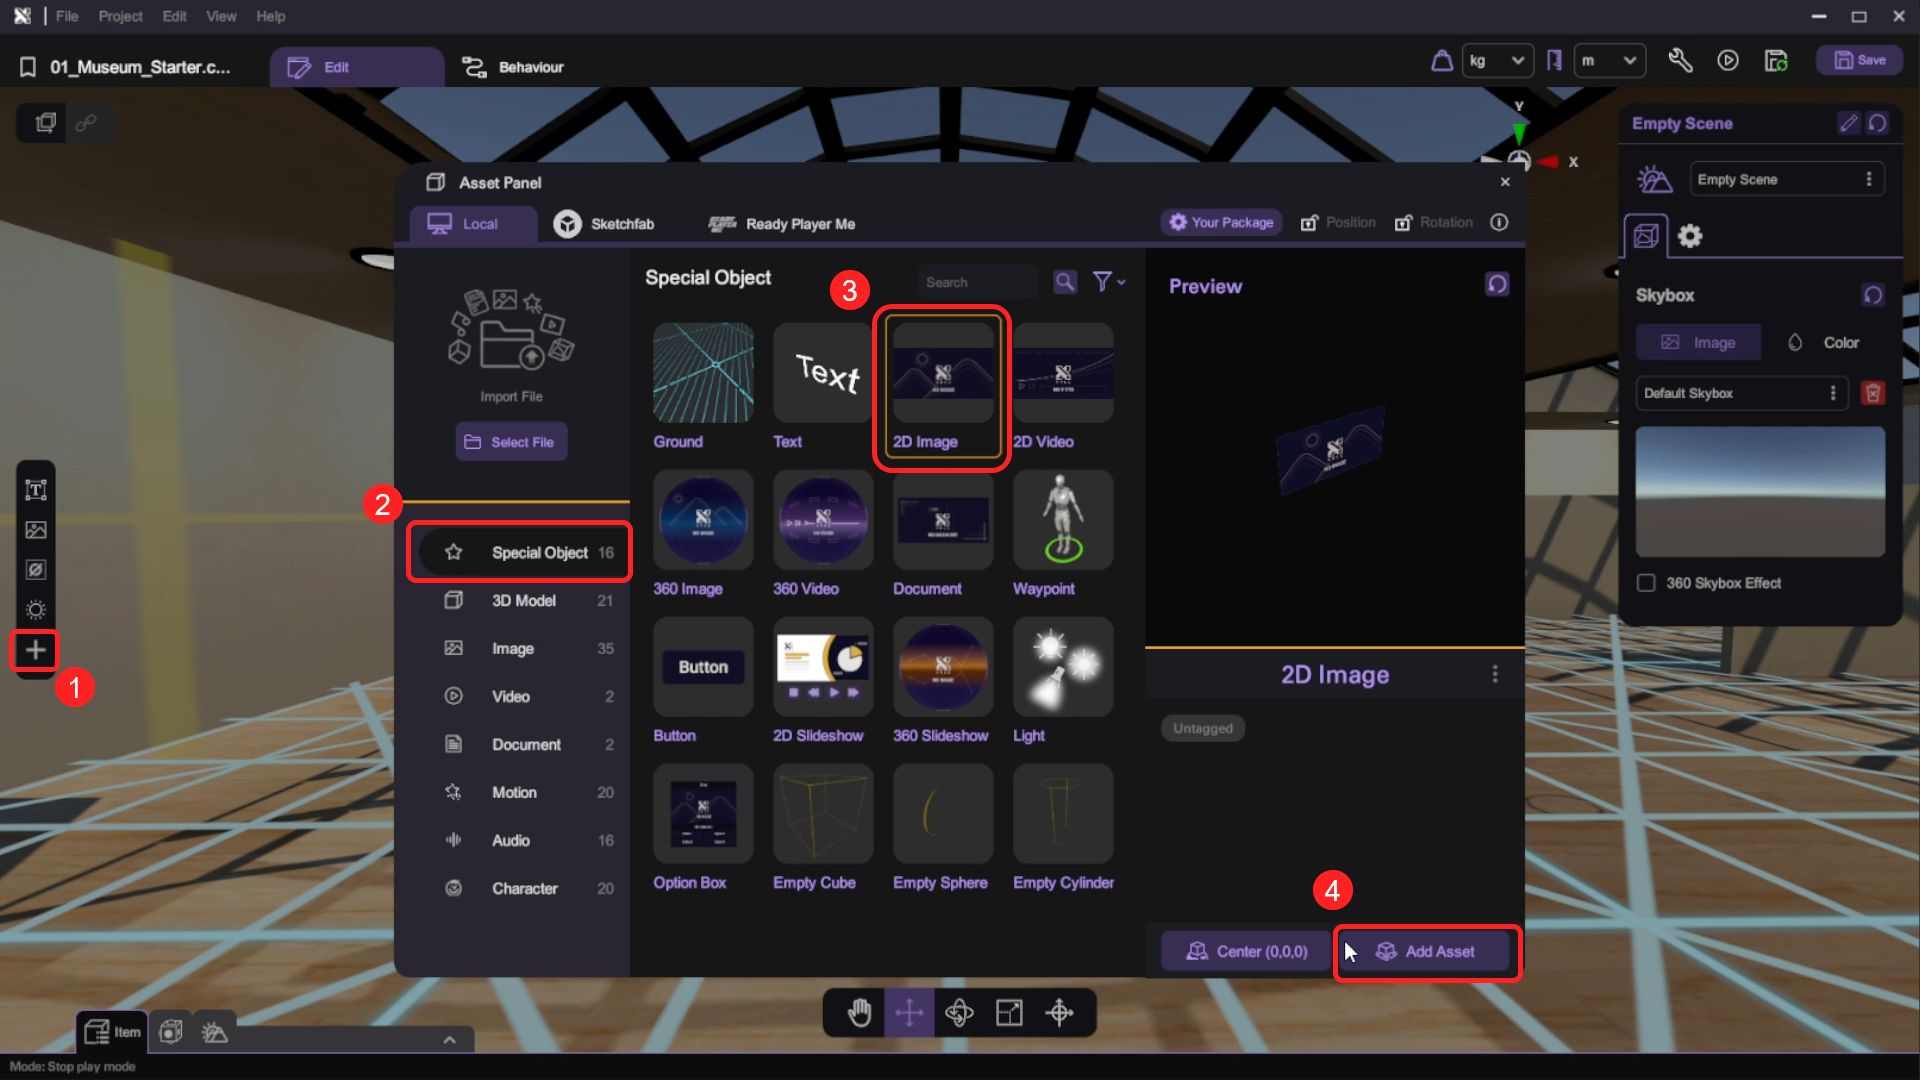
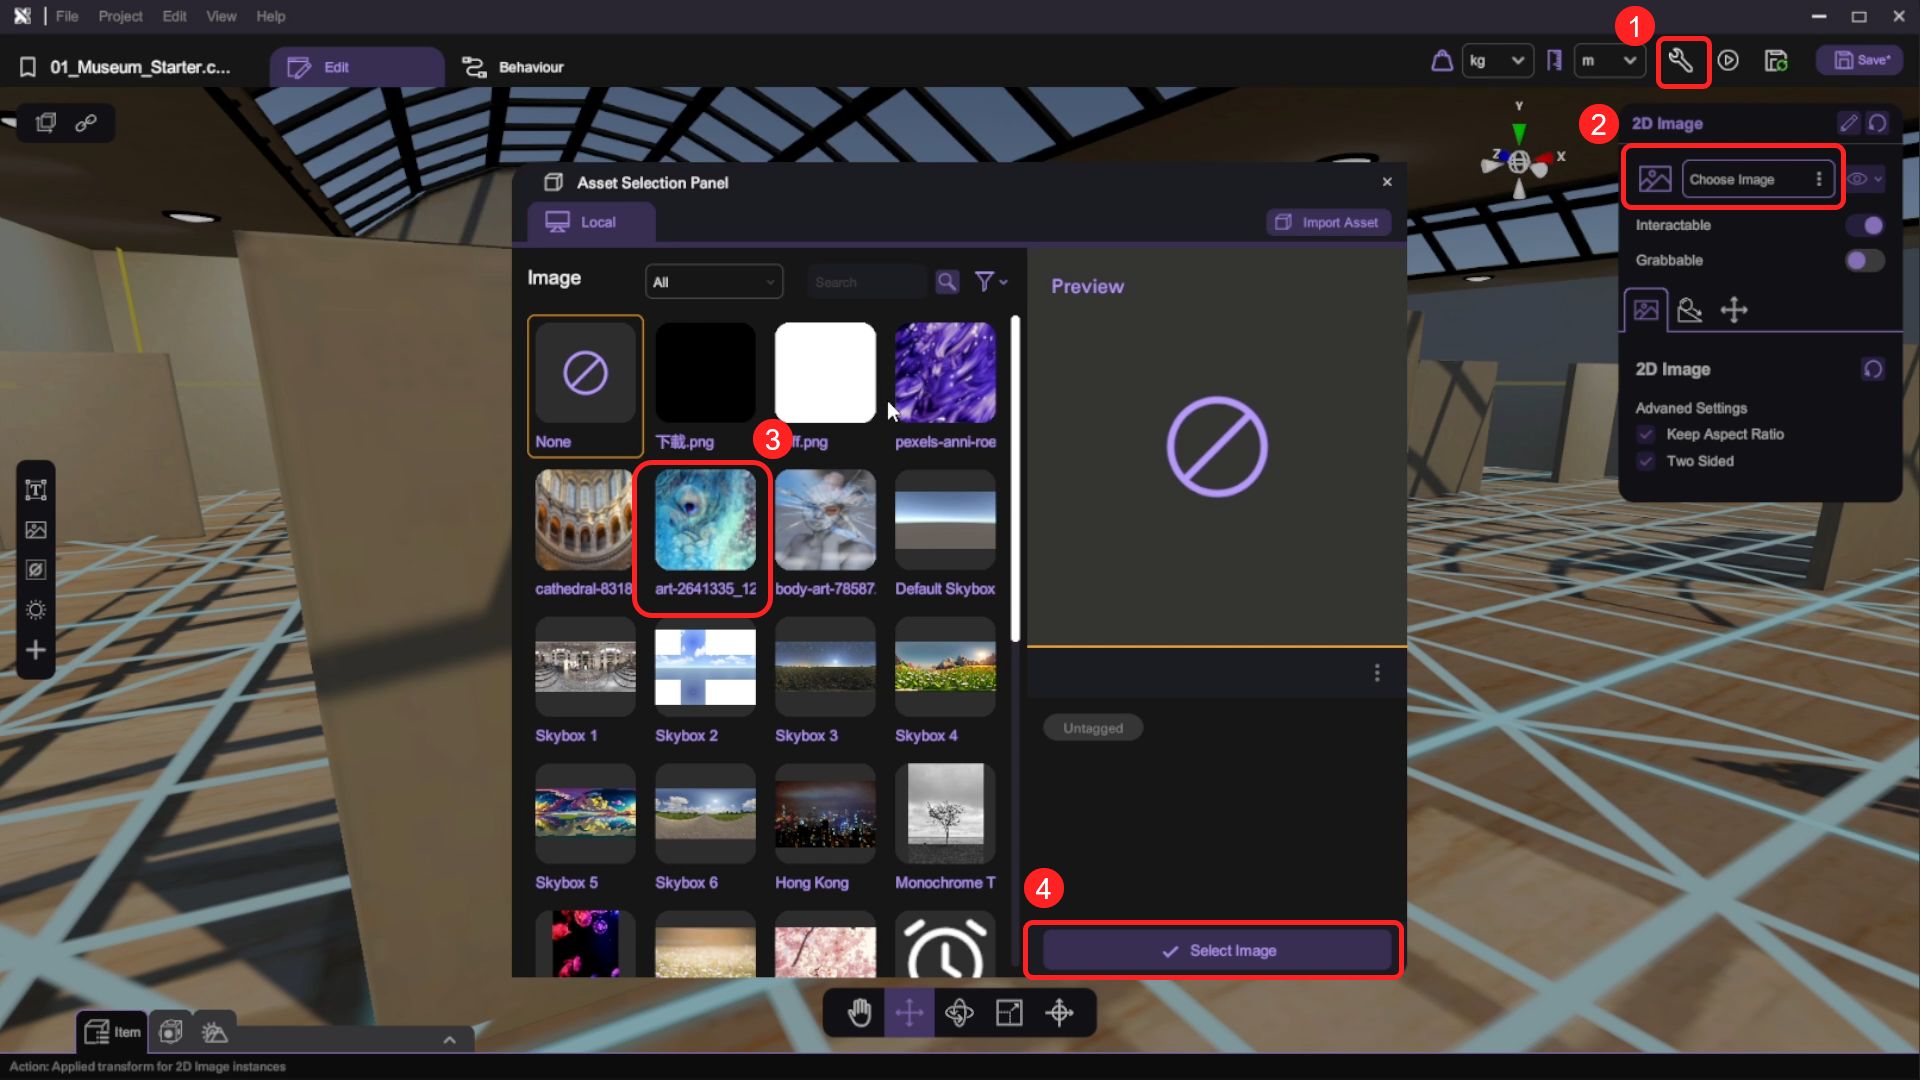
- Open the "Inspector", click the selector next to the "Image Asset" option to open the Selection panel and select an image in your asset library to display the image in scene.
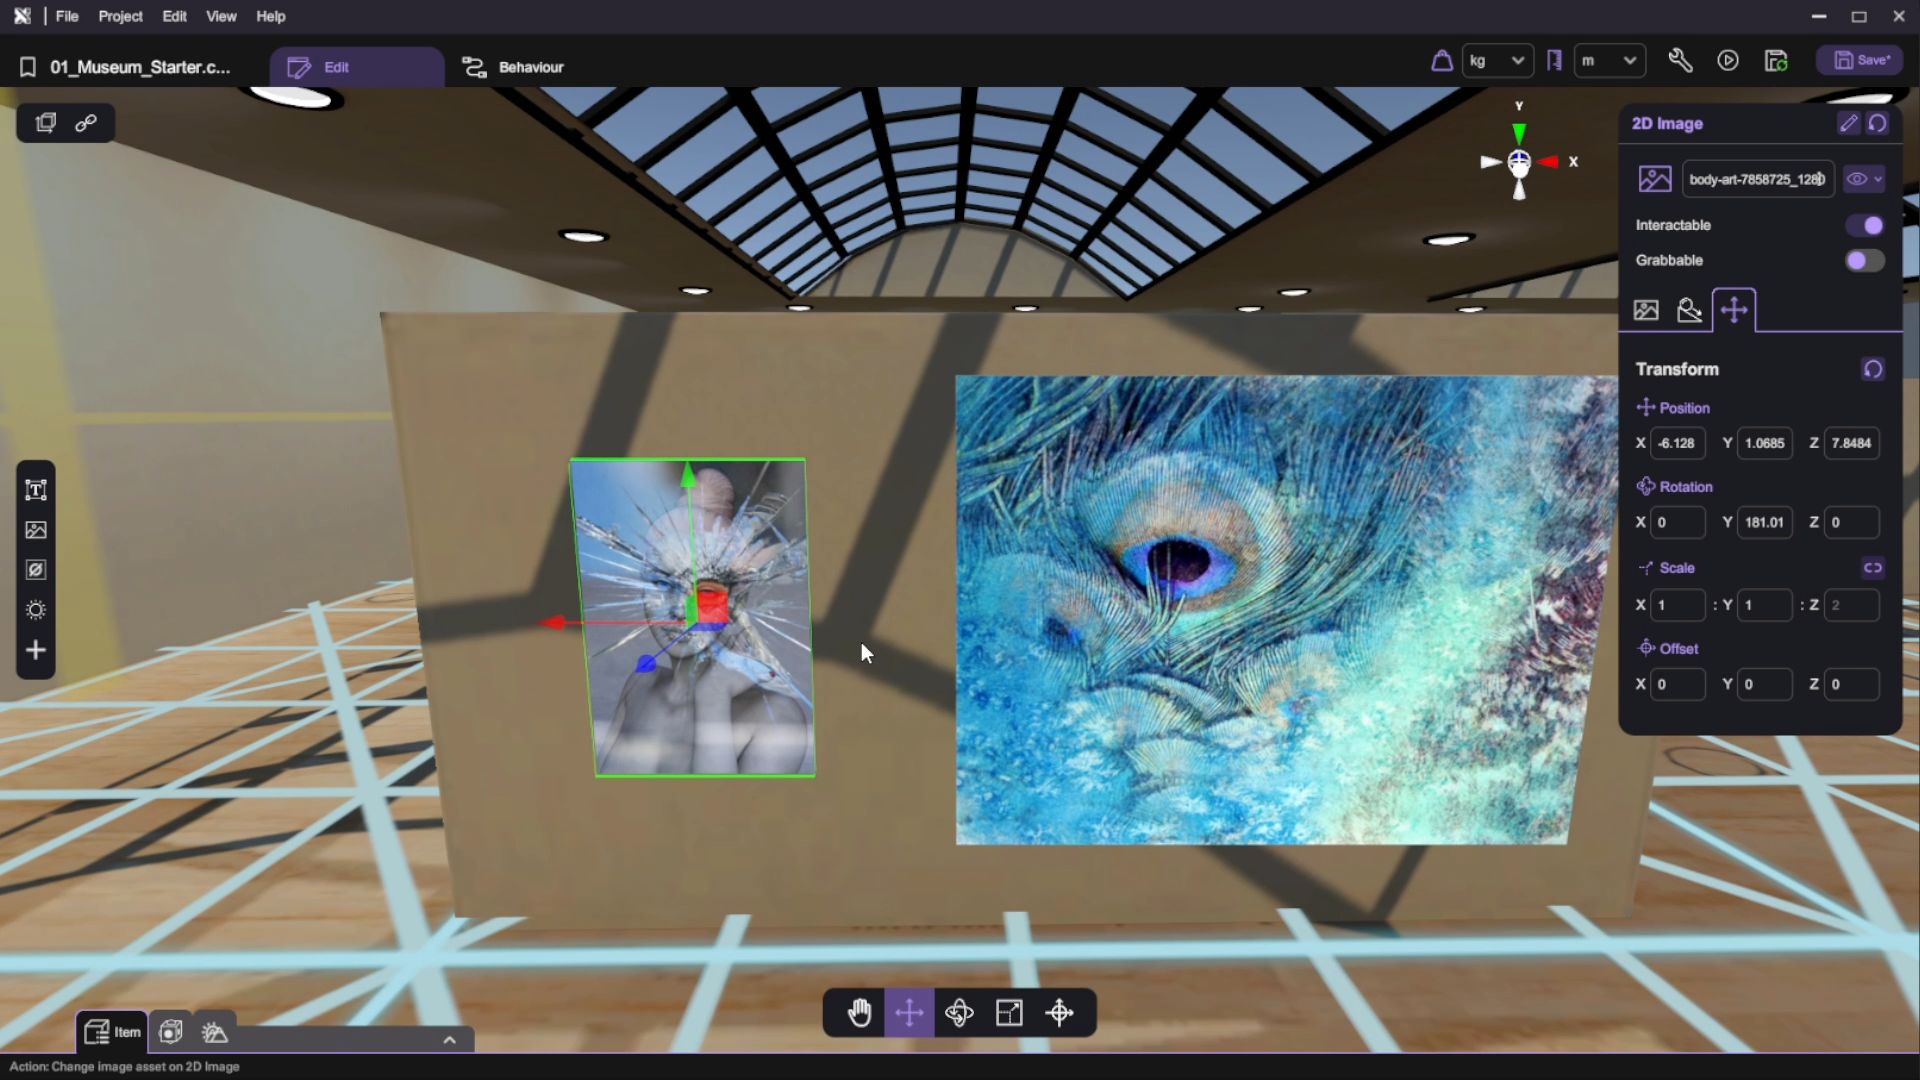
- Use the transform tools (move/rotate/scale) to reposition the 2D image object to the wall on the front row.

- Make a few copies of the 2D Image objects and change their Image Assets, then place the objects to the empty areas on the front wall.
Add 2D Video
- Open the "Asset Panel" and from the "Special Objects" tab, select and add a "2D Video" to the scene.
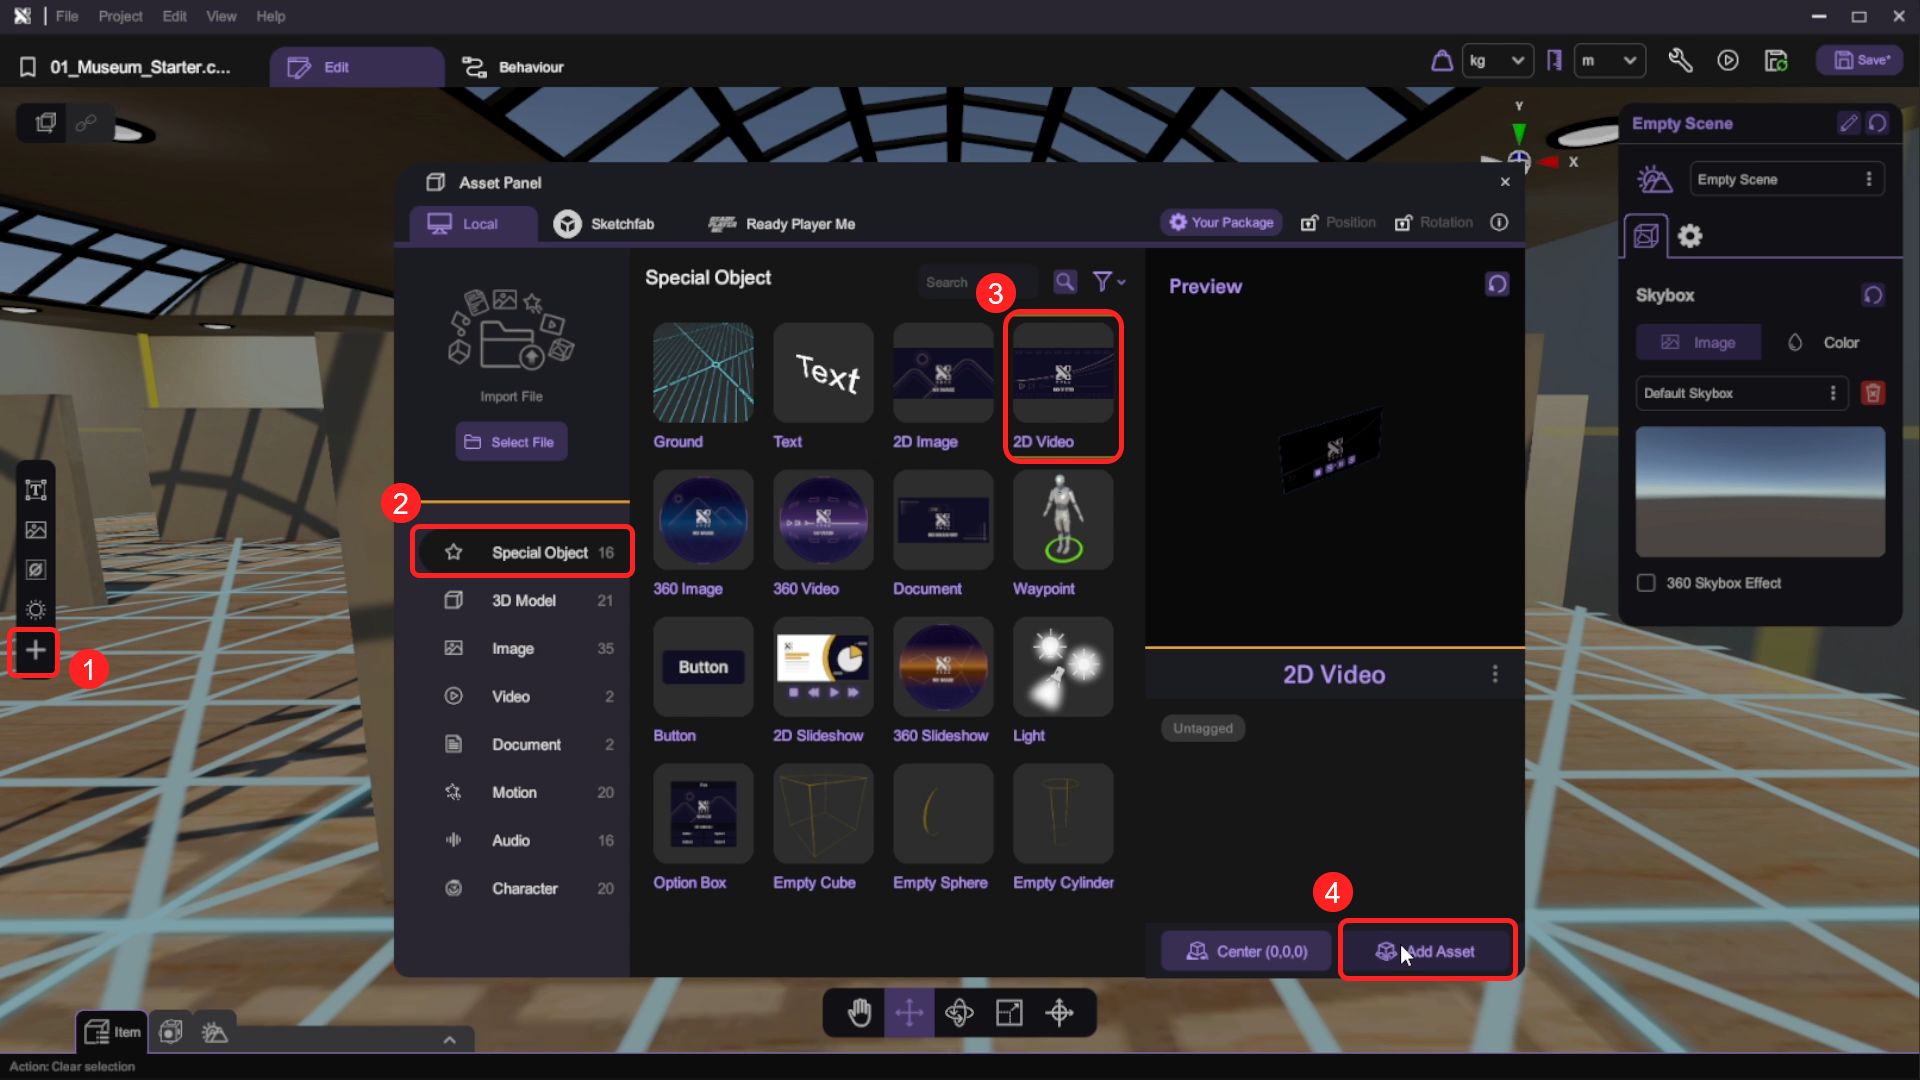
- Open the "Inspector", click the selector next to the "Video Asset" option to open the Selection panel and select a video in your asset library to play the video in scene.
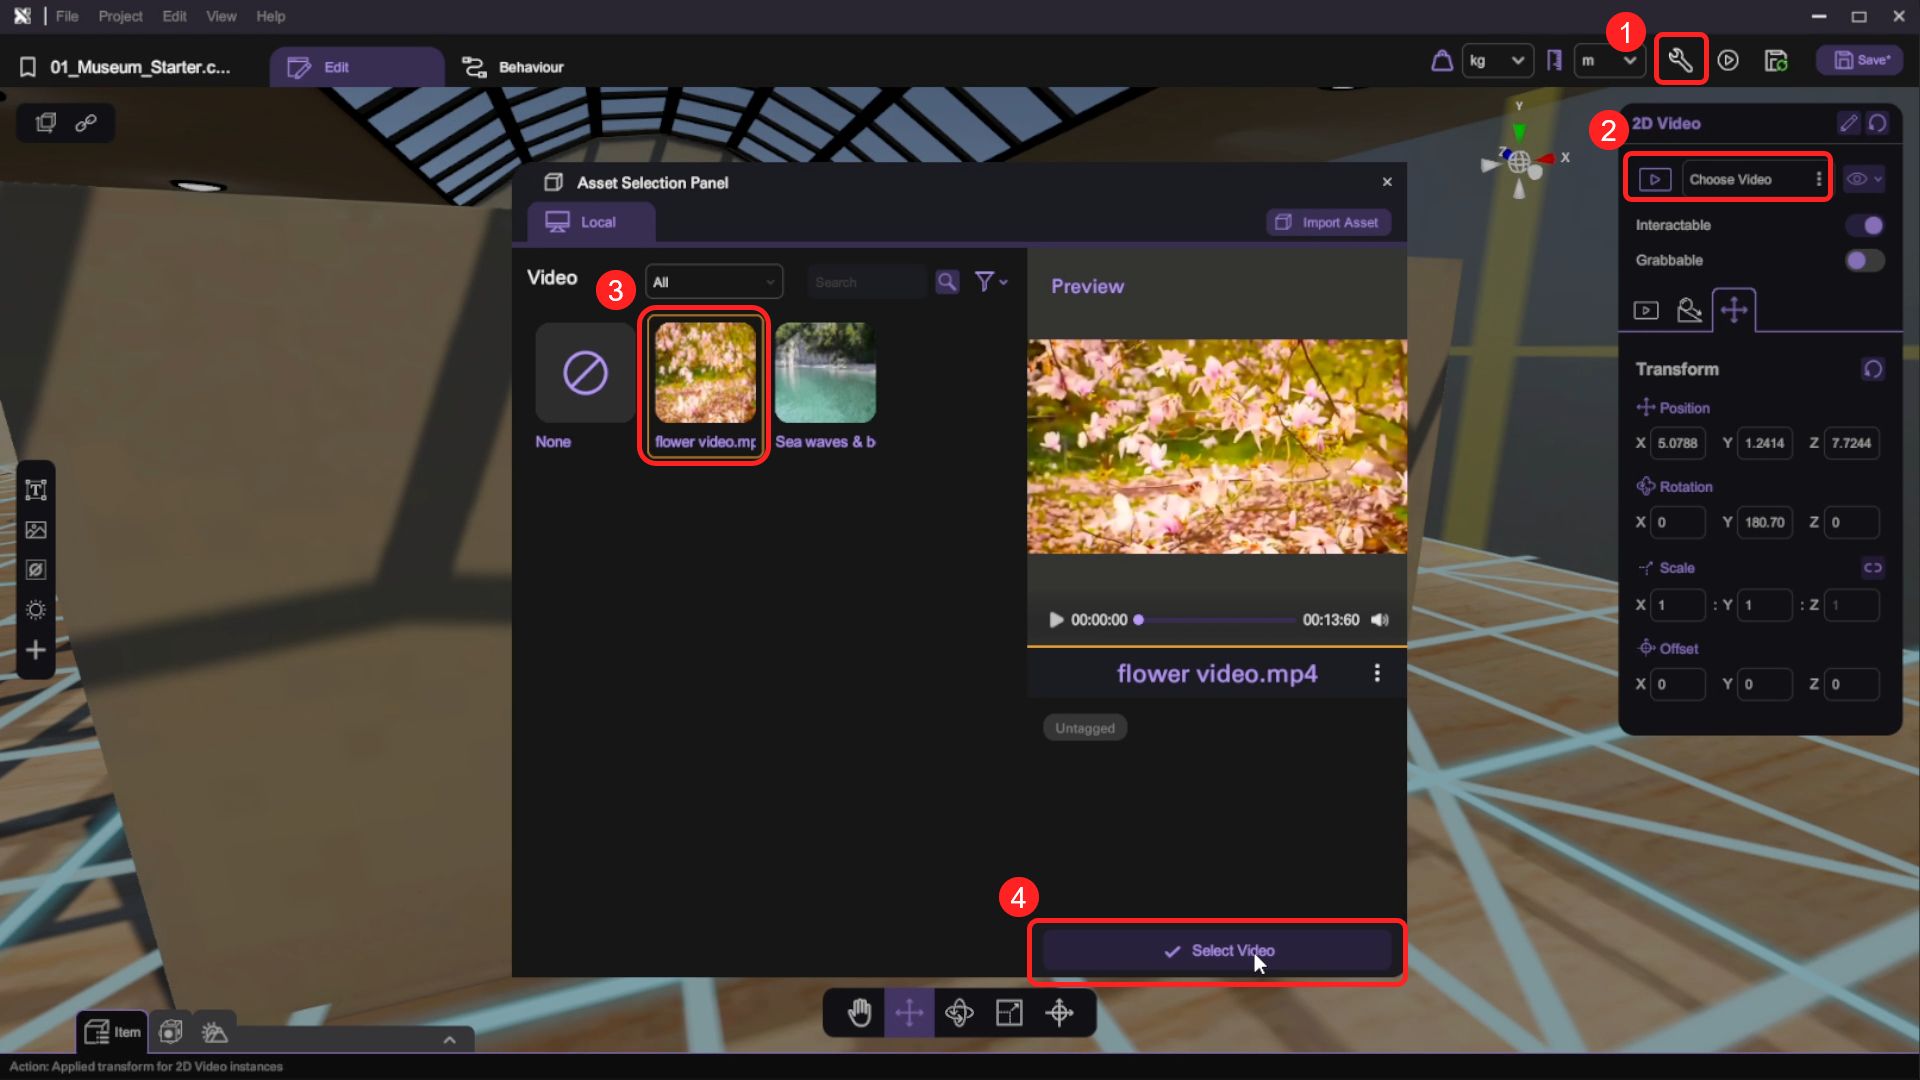
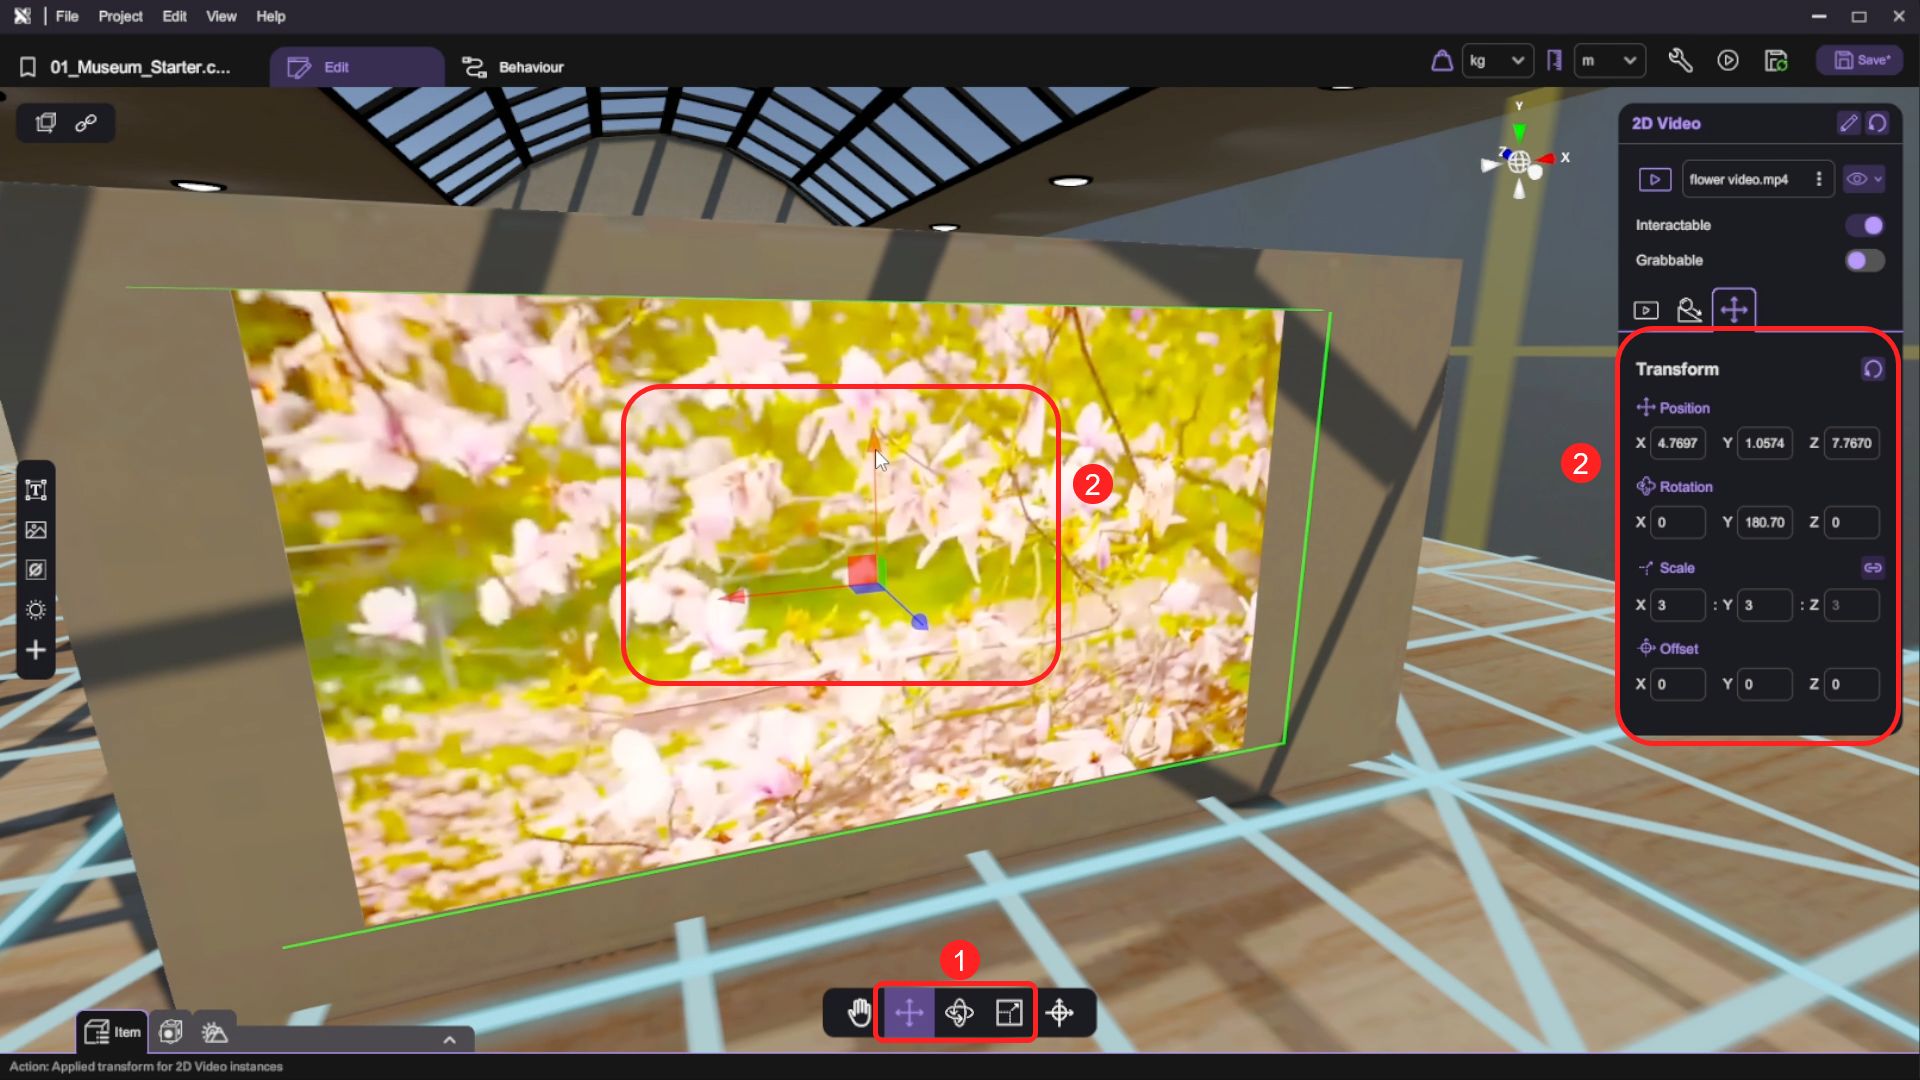
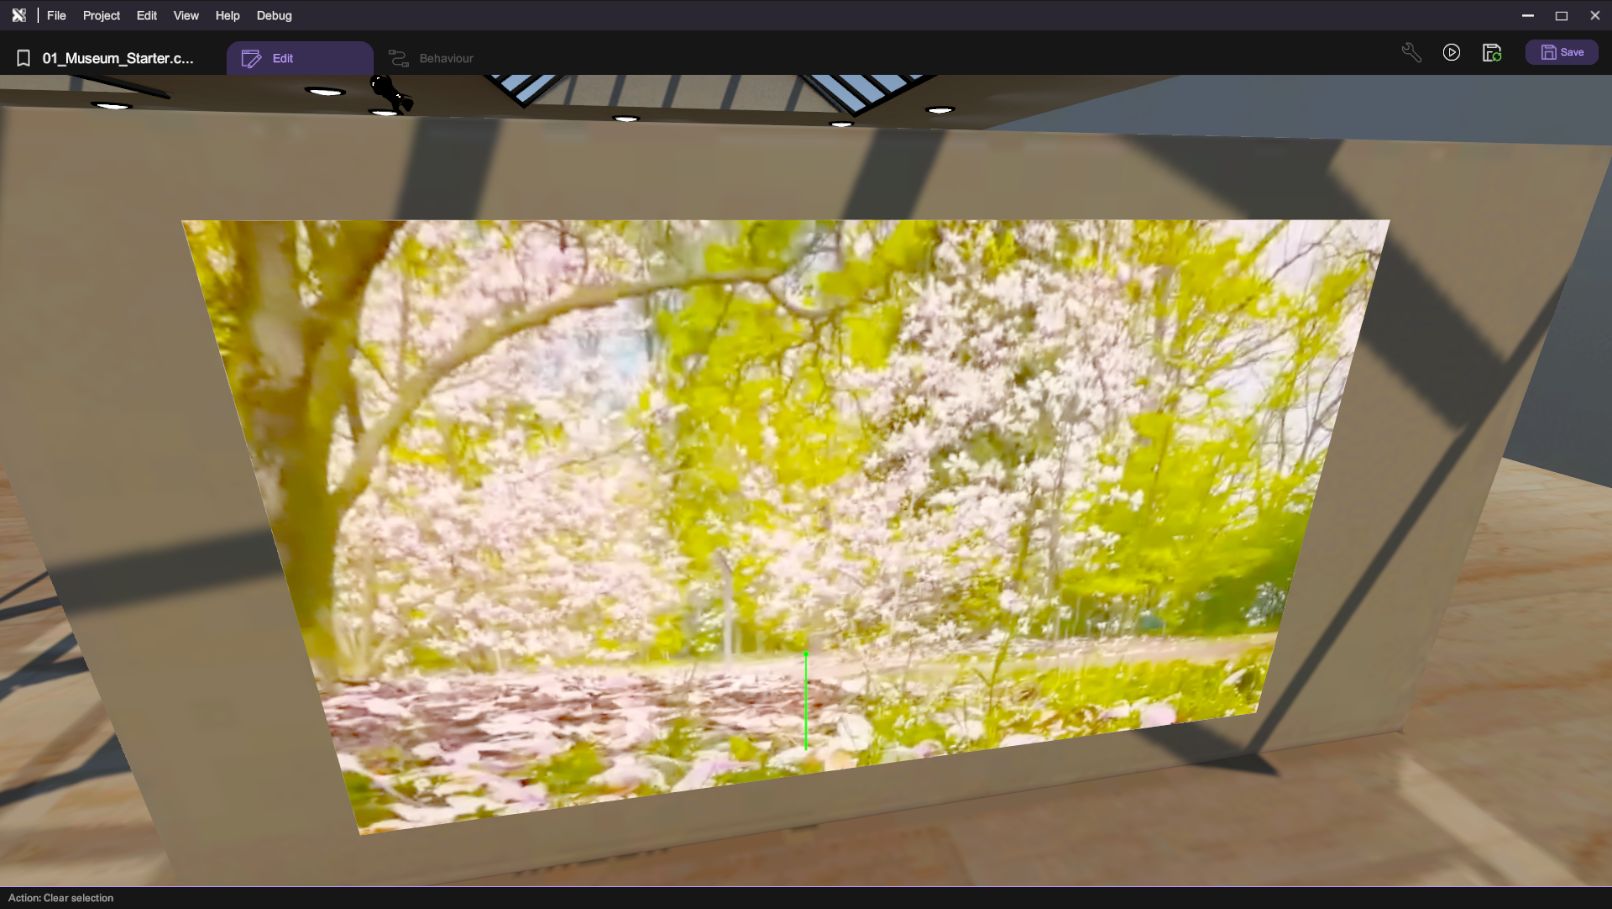
- Use the transform tools (move/rotate/scale) to reposition the 2D video object to the wall on the middle row.
- Duplicate the 2D Video object and place it to the other display wall in the middle row, use another video in your asset library for this video asset.
Add PDF Document
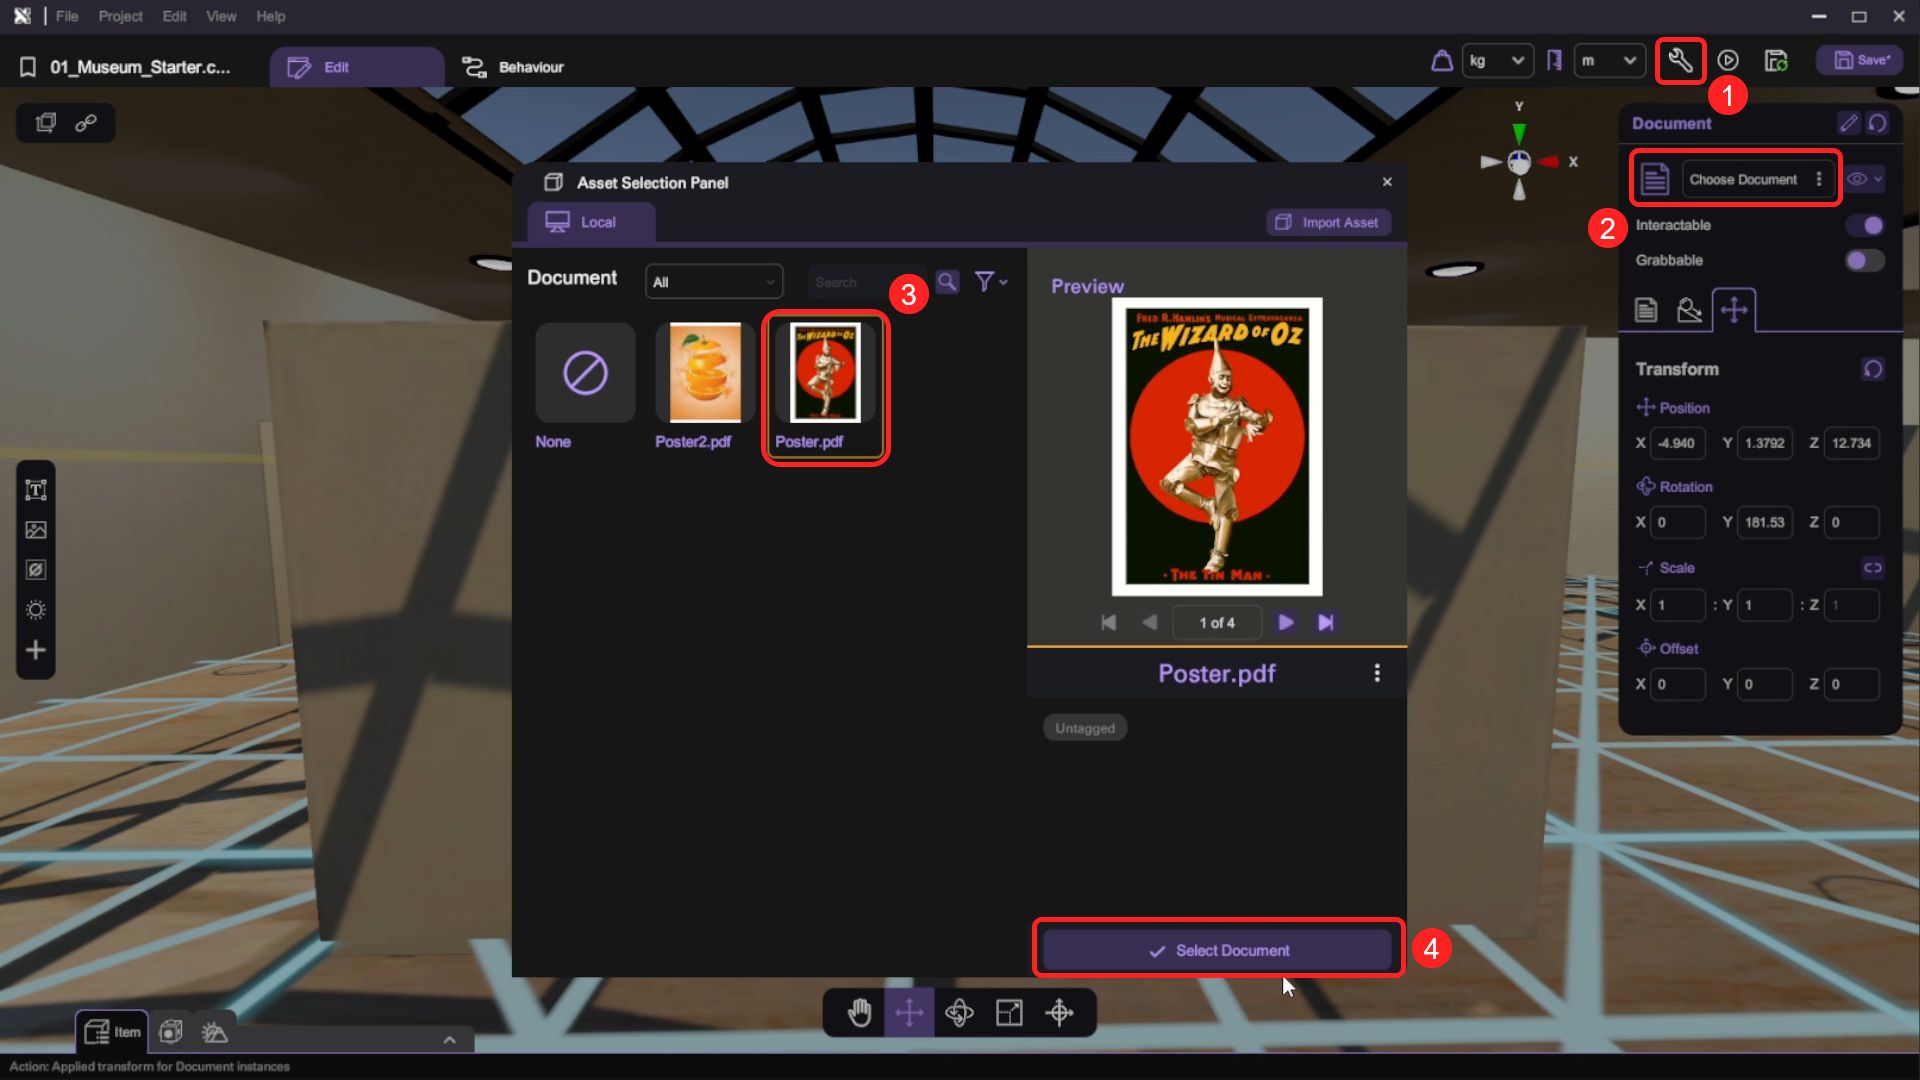
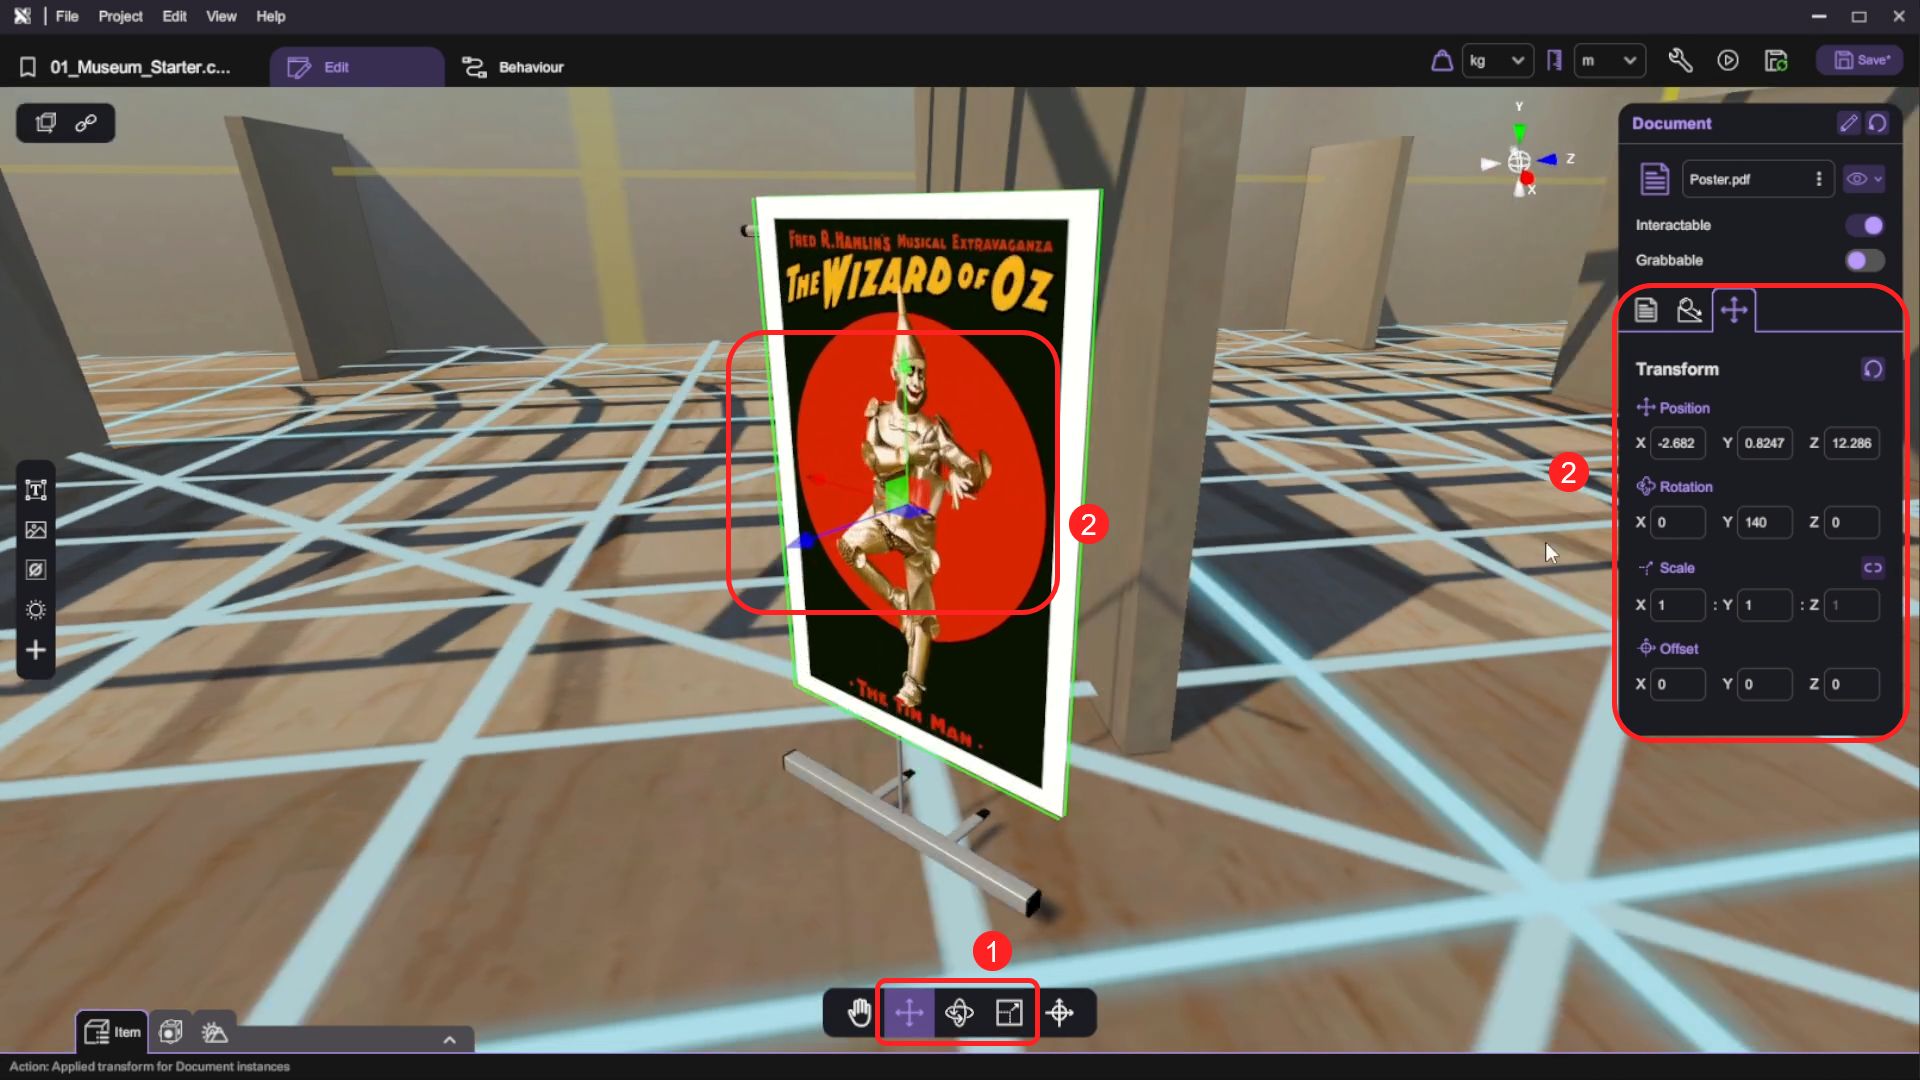
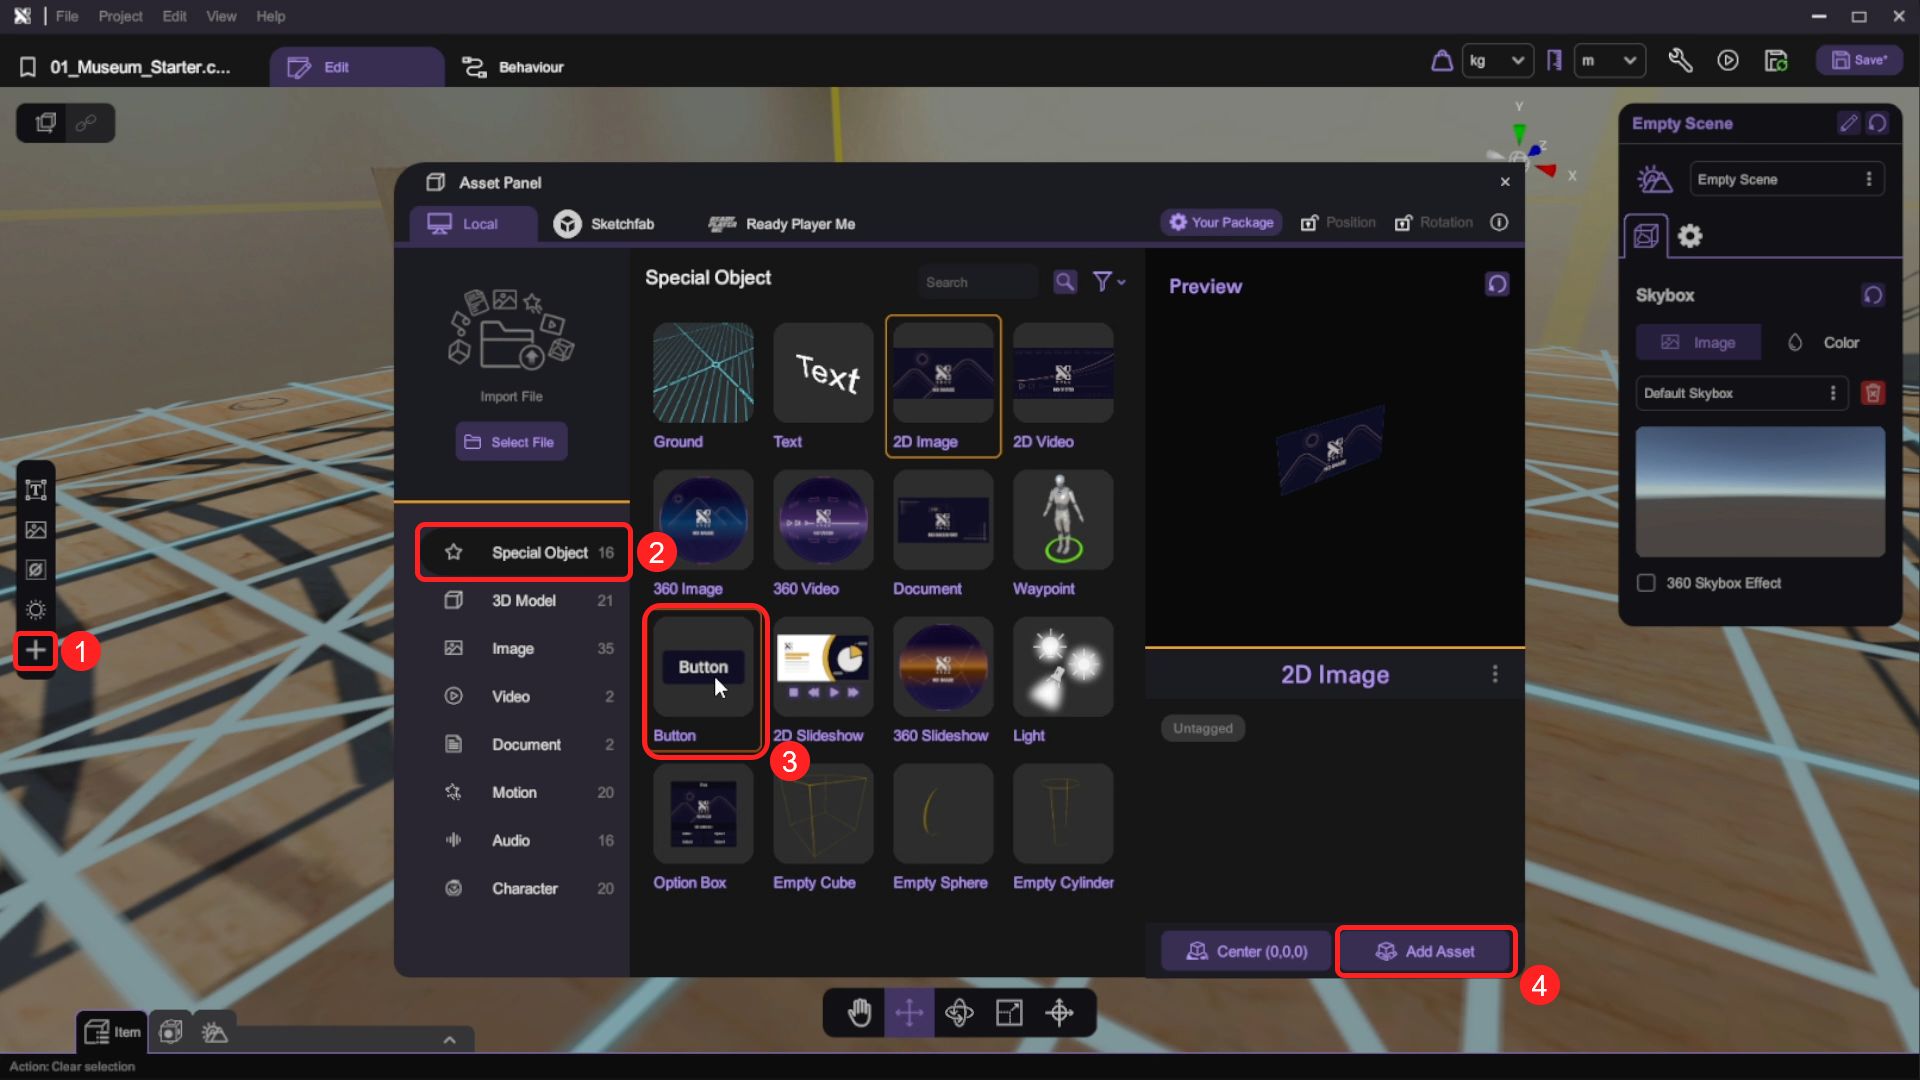
- Open the "Asset Panel" and from the "Special Objects" tab, select and add a "Document" to the scene.

- Open the "Inspector", click the selector next to the "Document Asset" option to open the Selection panel and select a pdf document in your asset library to show the document in scene.
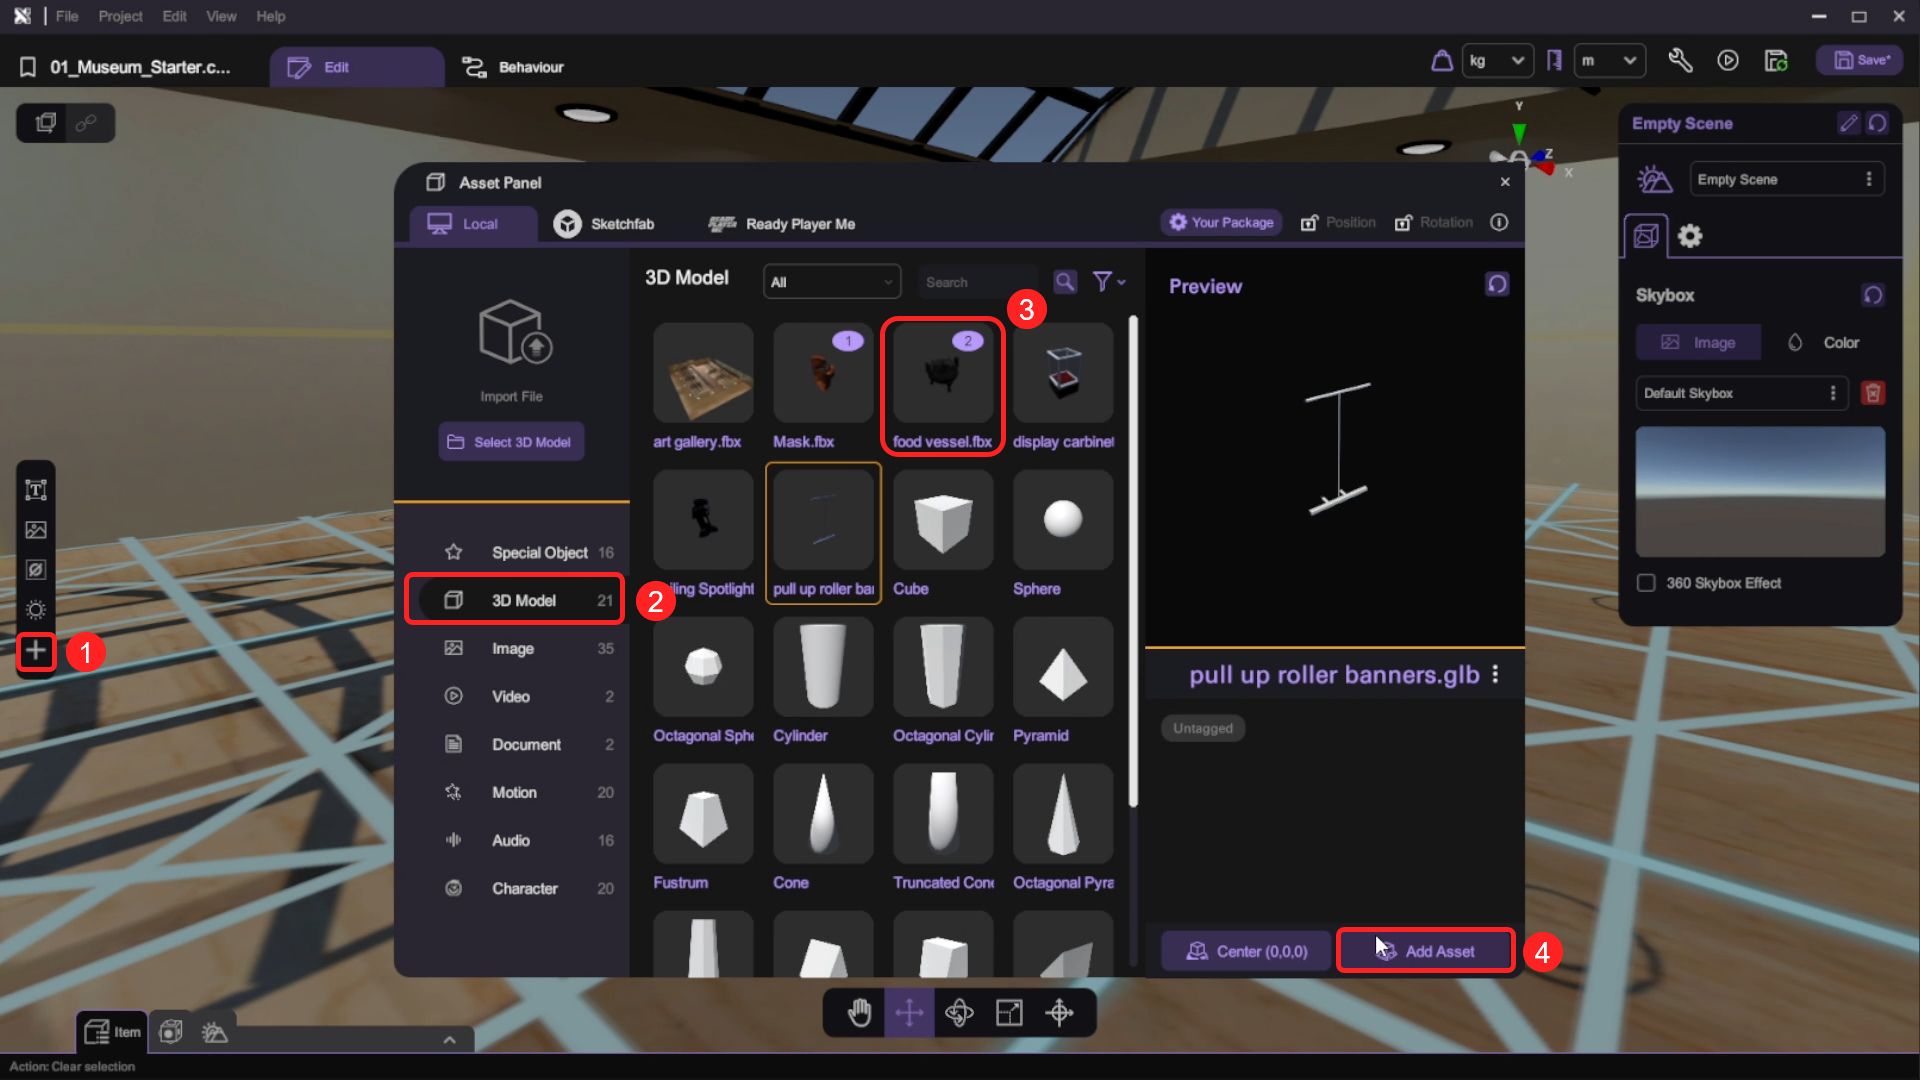
- Open the "Asset Panel" and from the "3D Model" tab, select and add the "pull up banners.glb" 3D model to the scene.
- Use the transform tools (move/rotate/scale) to place the document object in front of the pull up banners 3D model object. Then select both objects and position them at the left side of the back row wall.
- Select the document object and open its behaviour panel. Under "Groups", add two new behaviour group named "PreviousPage" and "NextPage", and toggle the "Action" button to make it an action that can be called by other objects. An "Action Start" event trigger block will appear on the canvas.
In the following task, we will going to use "Button" to control the page of the PDFDocument
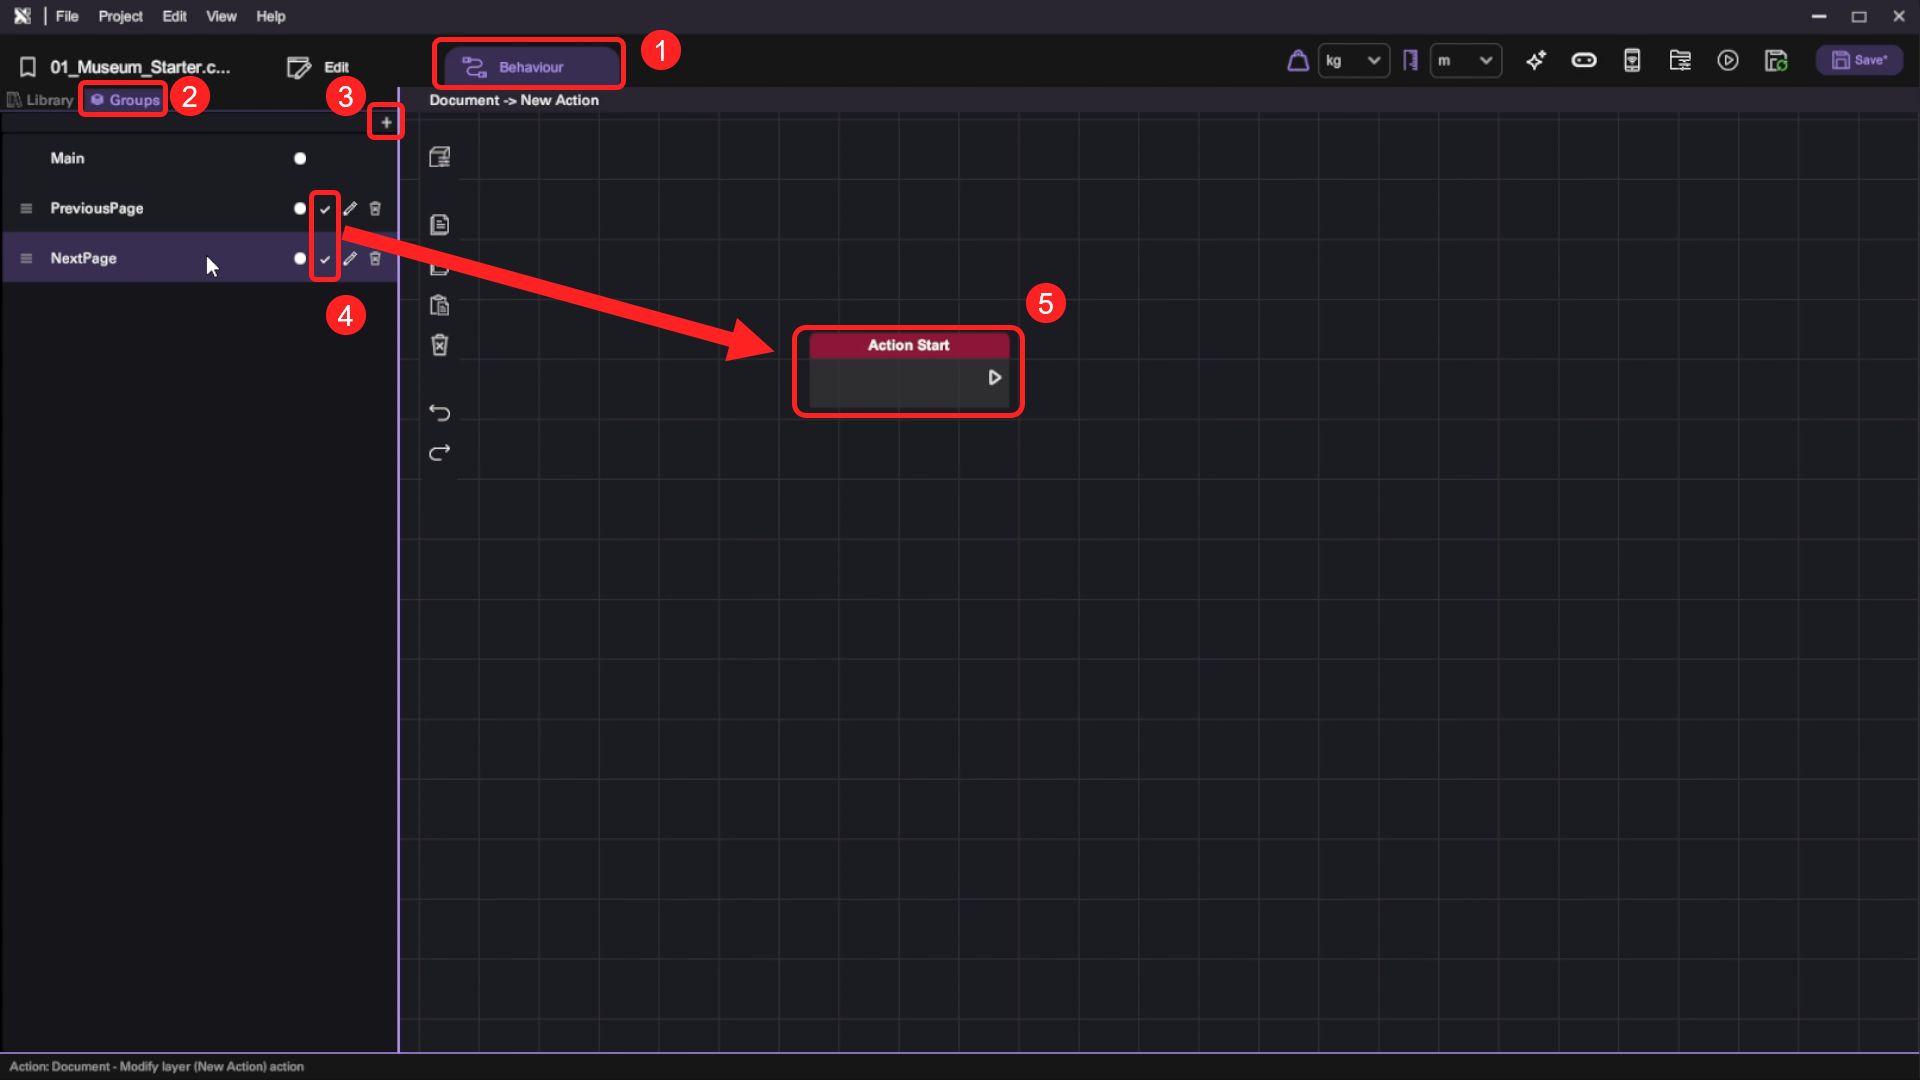
- Switch to behaviour Library, under the "Document" category drag the "Set Previous Page" block and append it behind the "Action Start" block. Then connect the "Action Start" block and the "Set Previous Page" block. When this action is called, the document display will be set to the previous page.
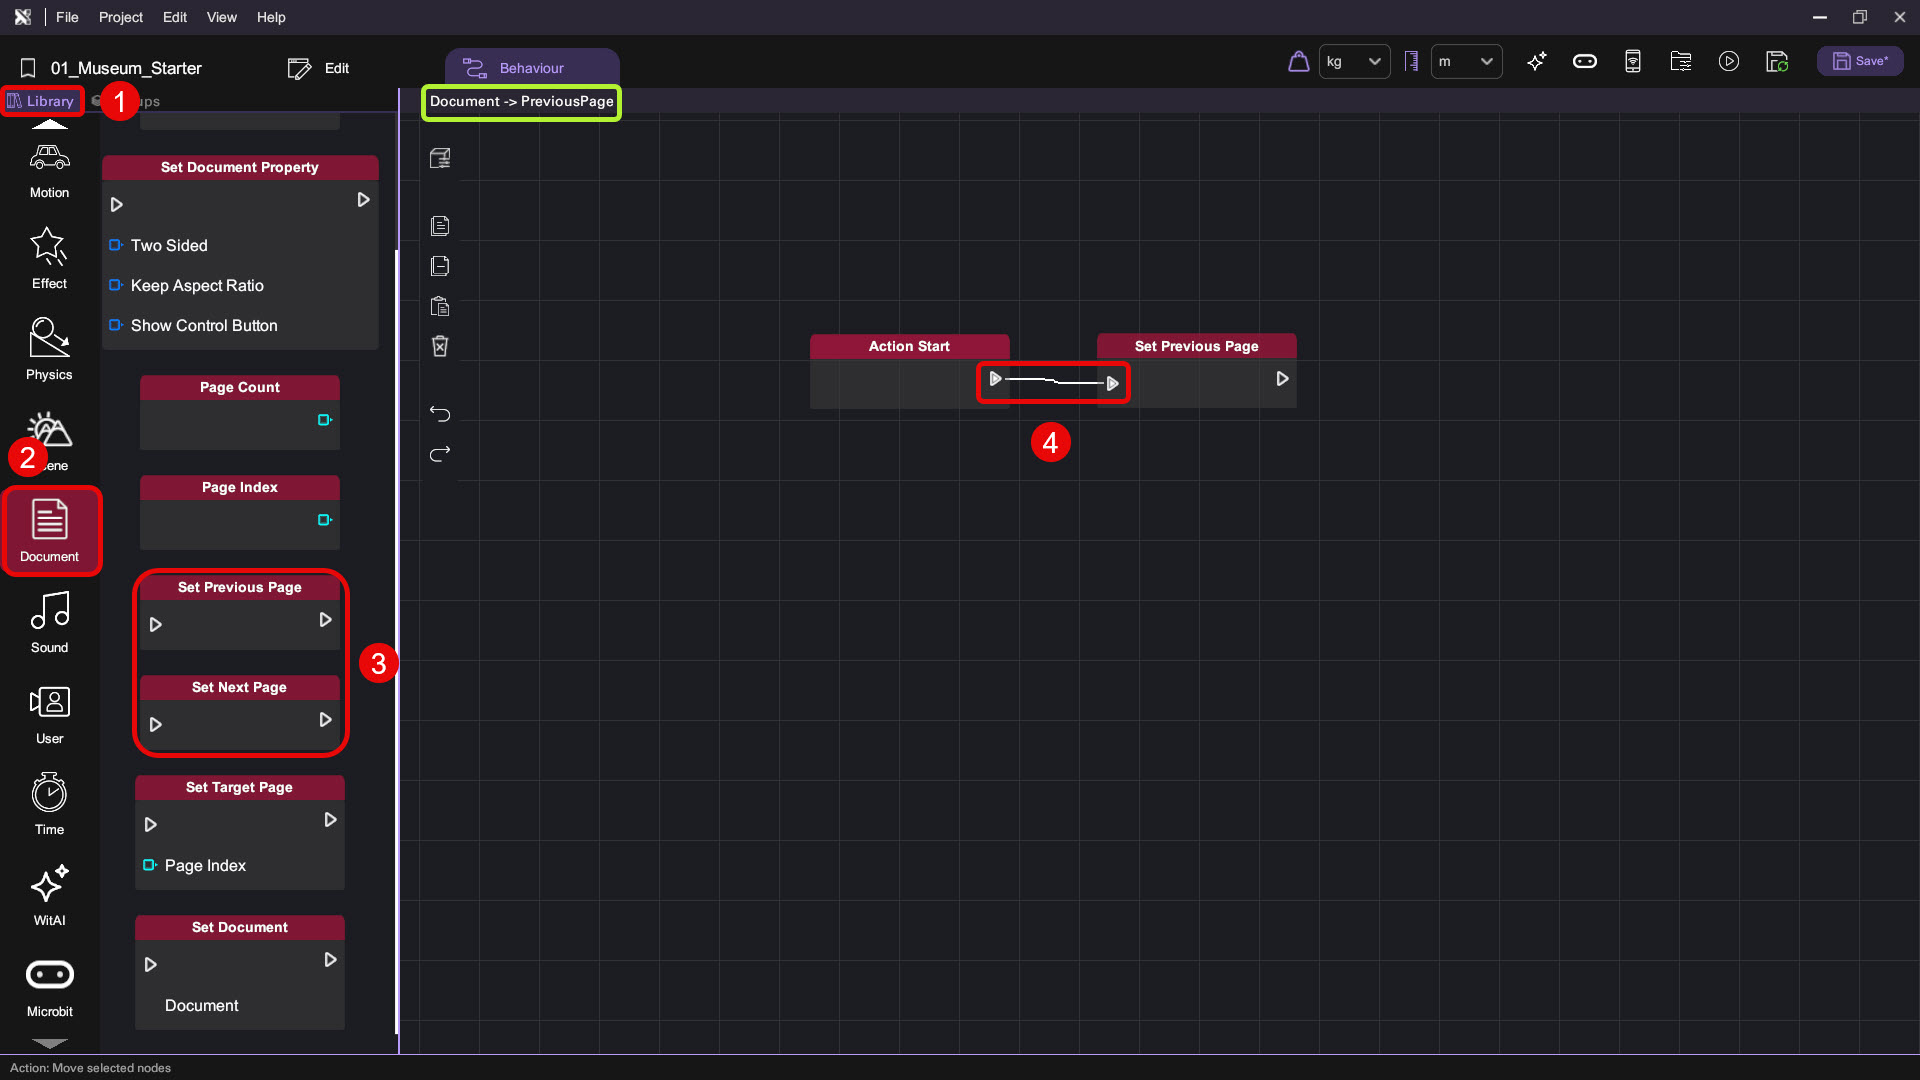
- Repeat the same procedure to create the "NextPage" action.
Add Buttons
- Open the "Asset Panel" and from the "Special Objects" tab, select and add a "Button" to the scene. Use the transform tools to position the button object on the wall next to the document object.
- Open the "Inspector" and set up the content and style of the text object. Optionally, you can add some sound effects when user interacts with the button.
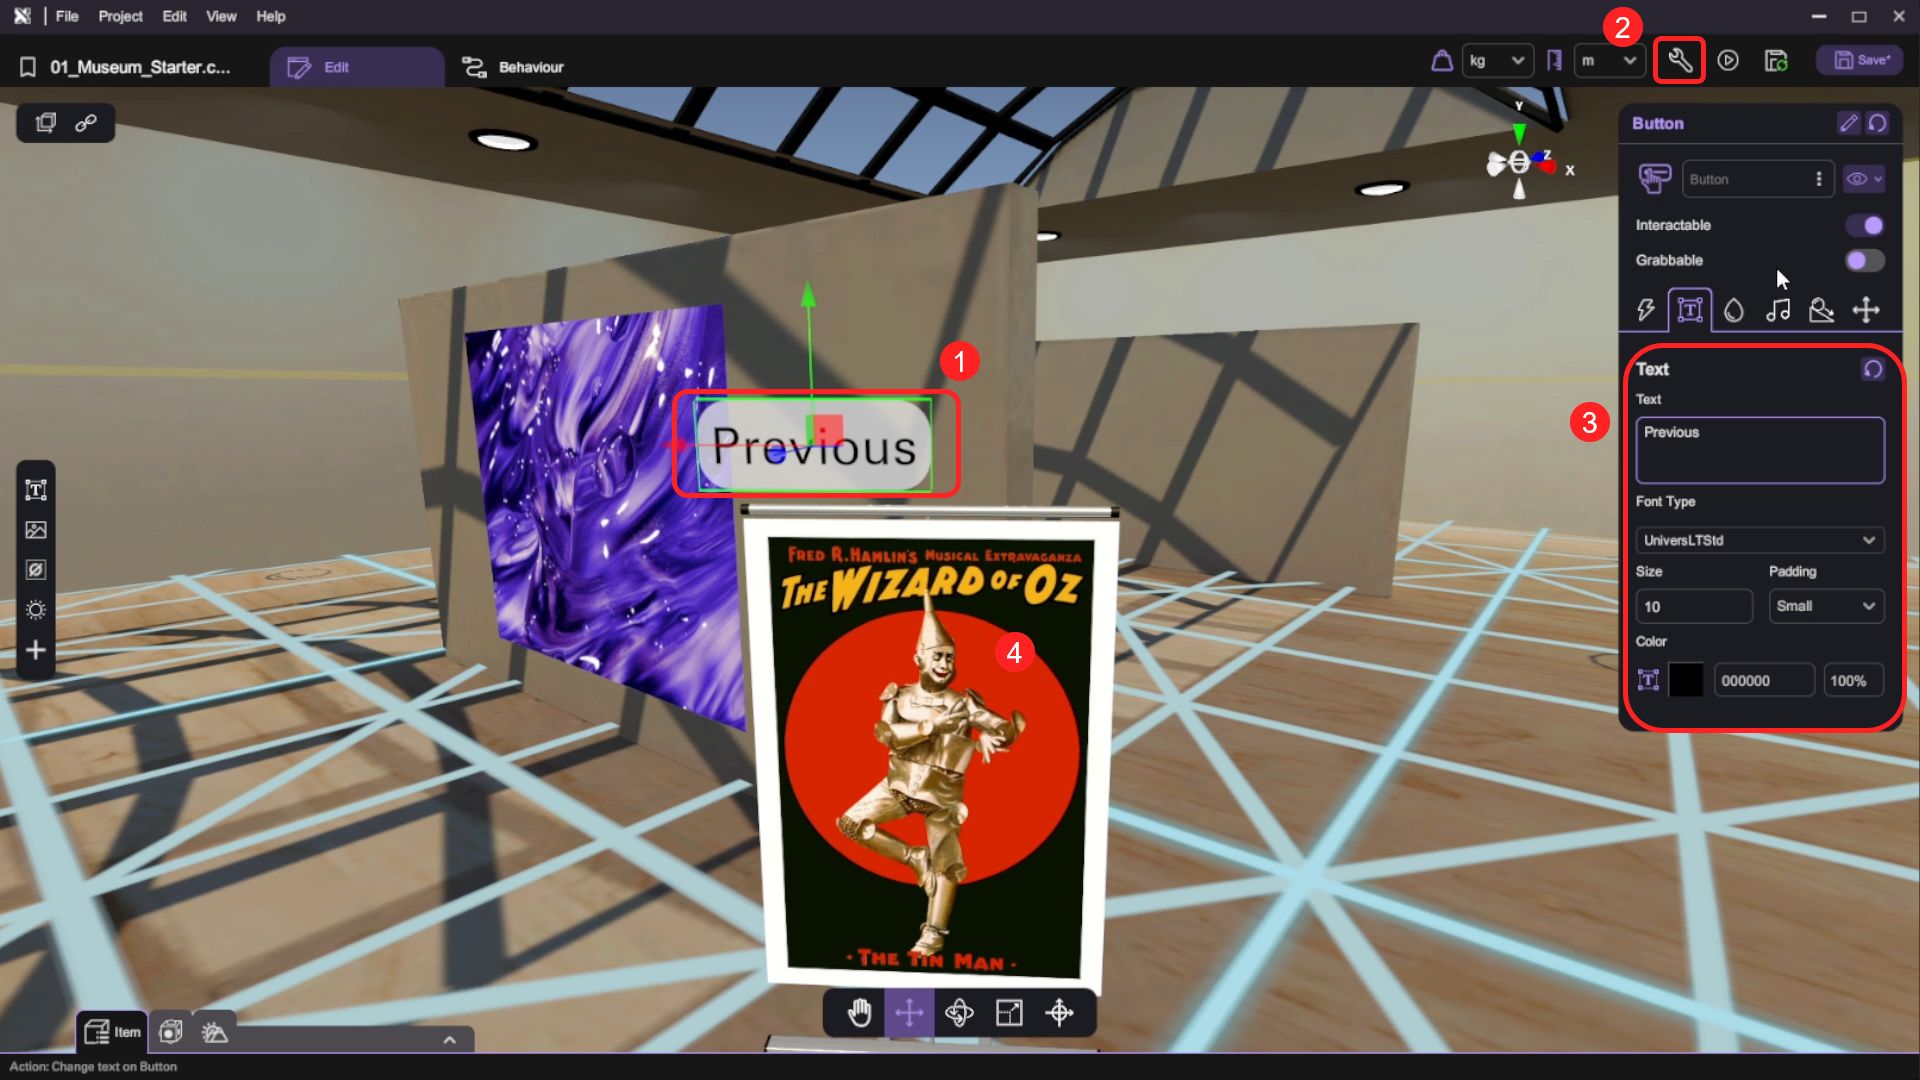
- Click the selector next to the "Action" option to open the selection panel to set up the action call. On the selection panel, select the document object from the item list on the left side, then choose the "PreviousPage" action on the right and select the action. This will set up the "Previous" button object to call the "PreviousPage" action when the button is clicked.
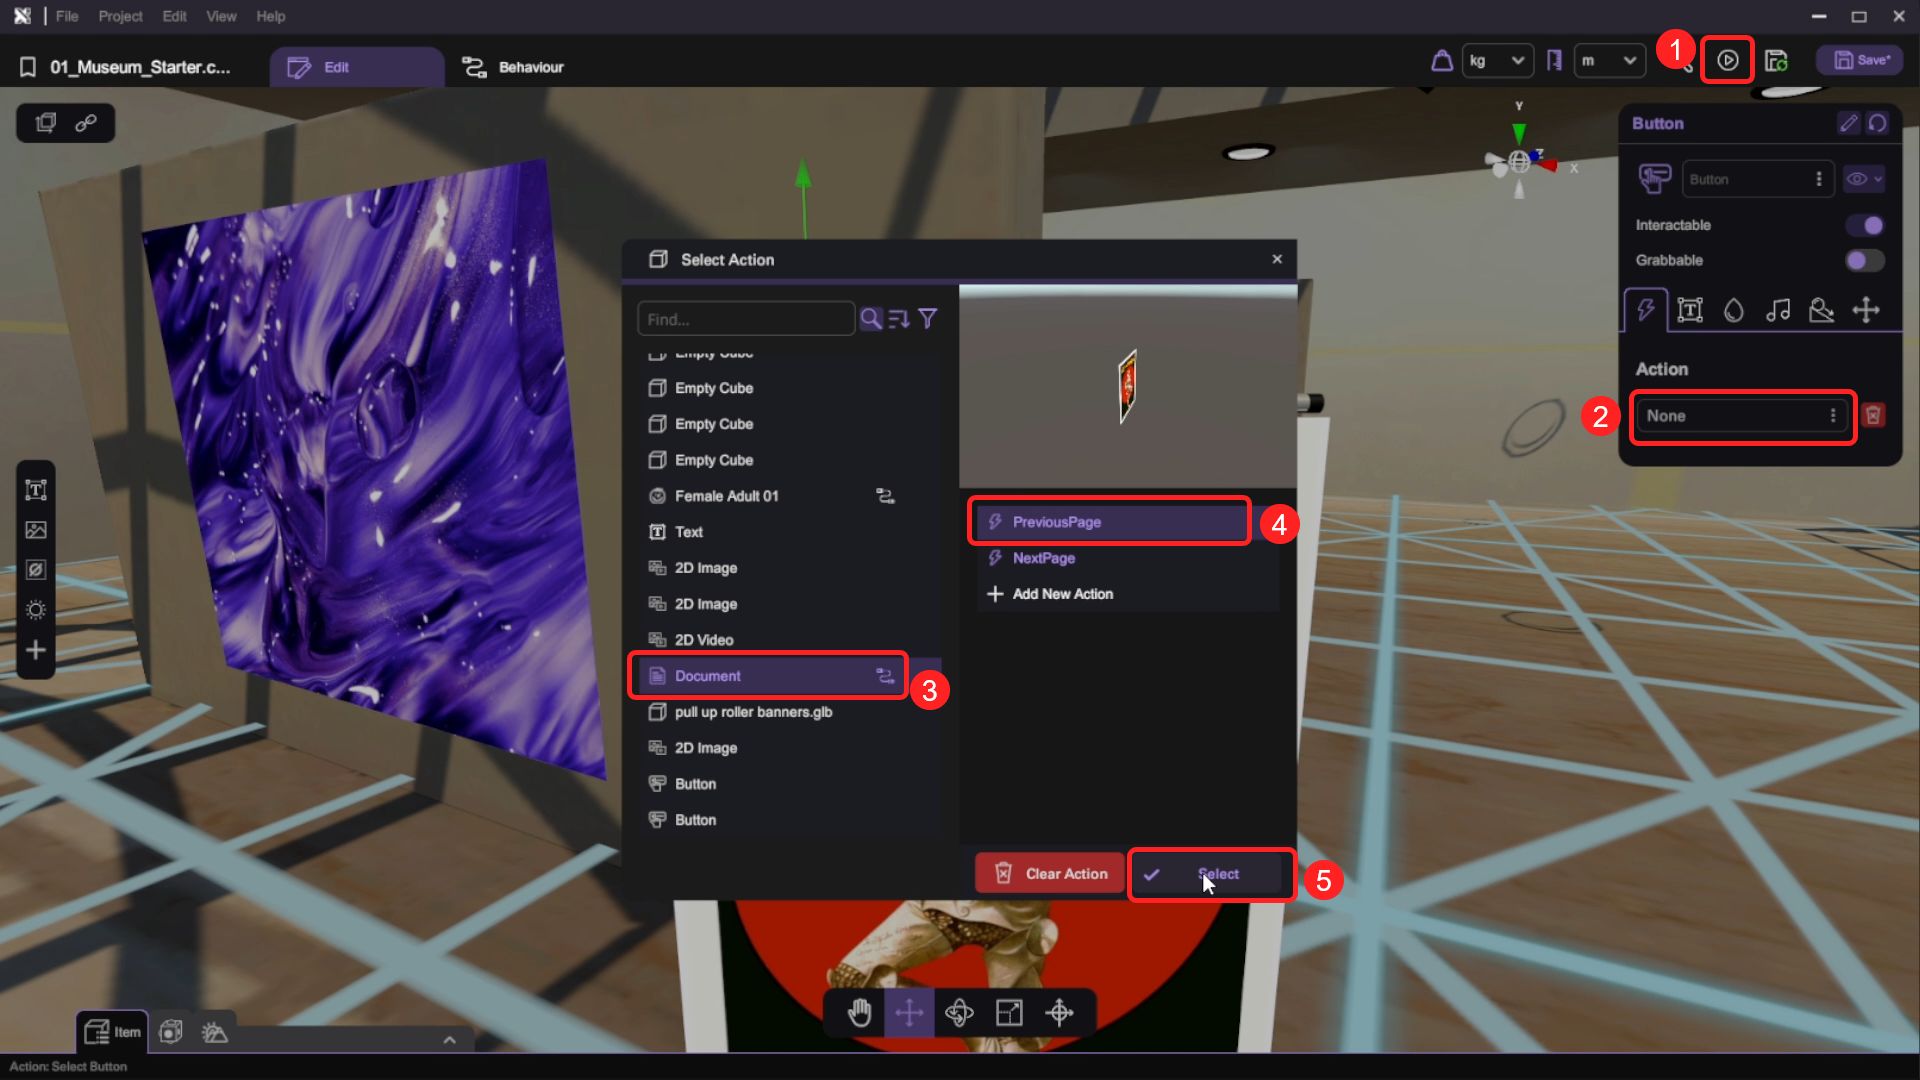
-
Repeat the above process to add and configure the "Next" button to the scene.
-
Duplicate the document and button objects and set them up on the right-side wall.
Add Slideshow
- Open the "Asset Panel" and from the "Special Objects" tab, select and add a "2D Slideshow" to the scene.
A slideshow object allows you to display up to 10 images in the form of a playlist, and configure the duration /transition effects of each image individually.
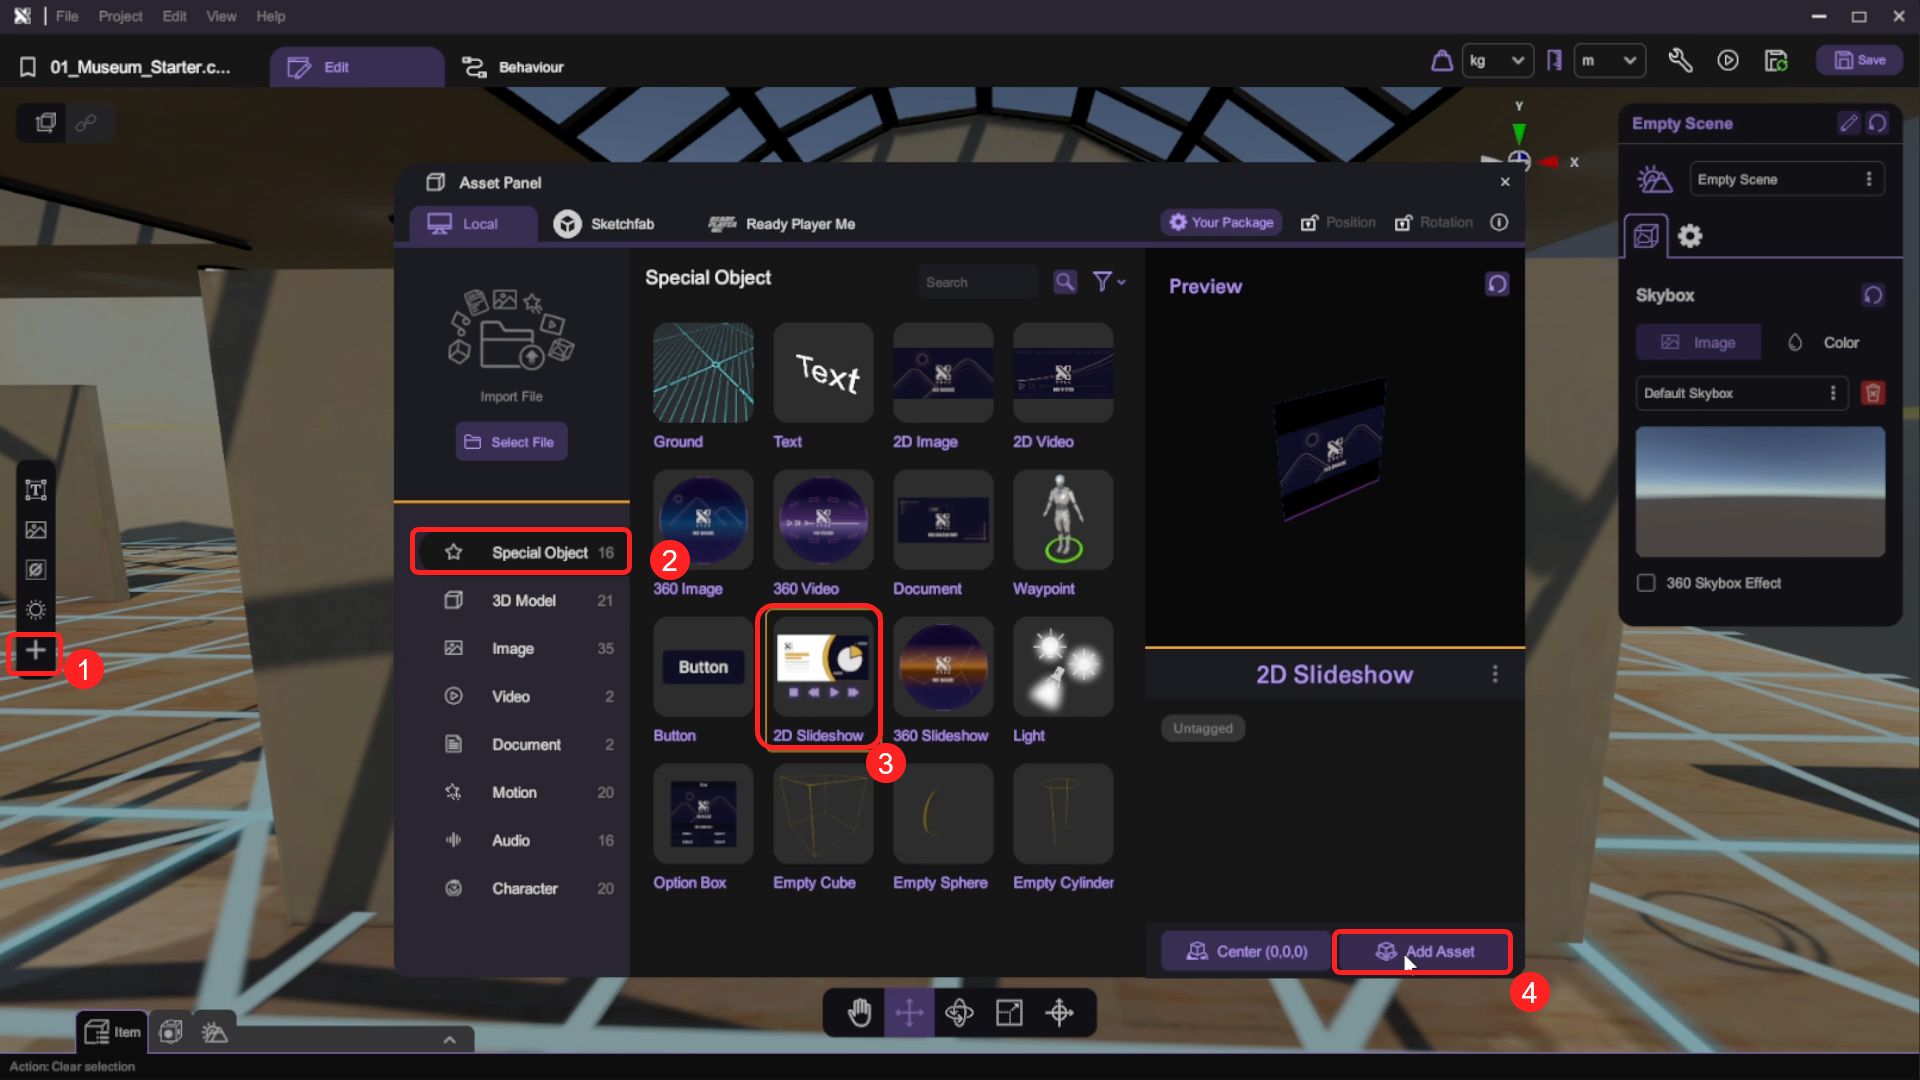
- Use the transform tools (move/rotate/scale) to place the 2D slideshow object on the left wall of the art gallery.
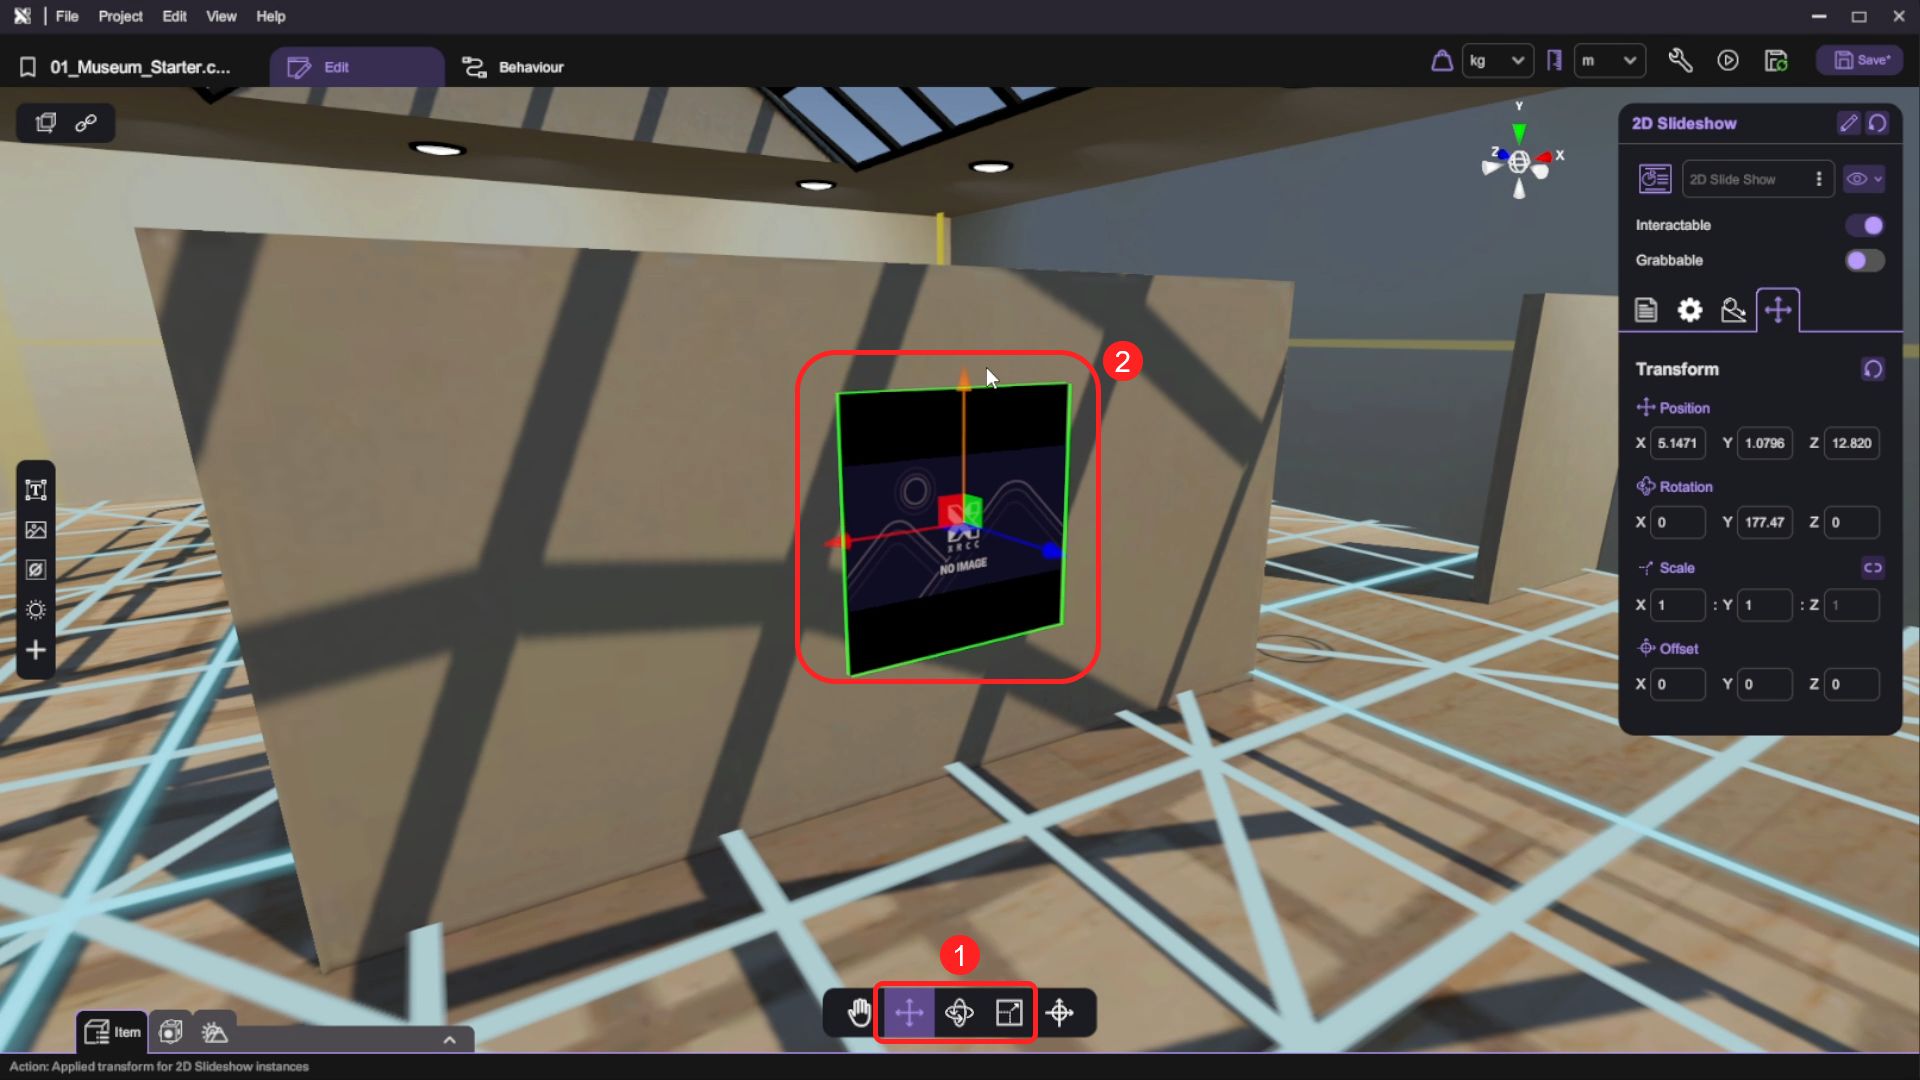
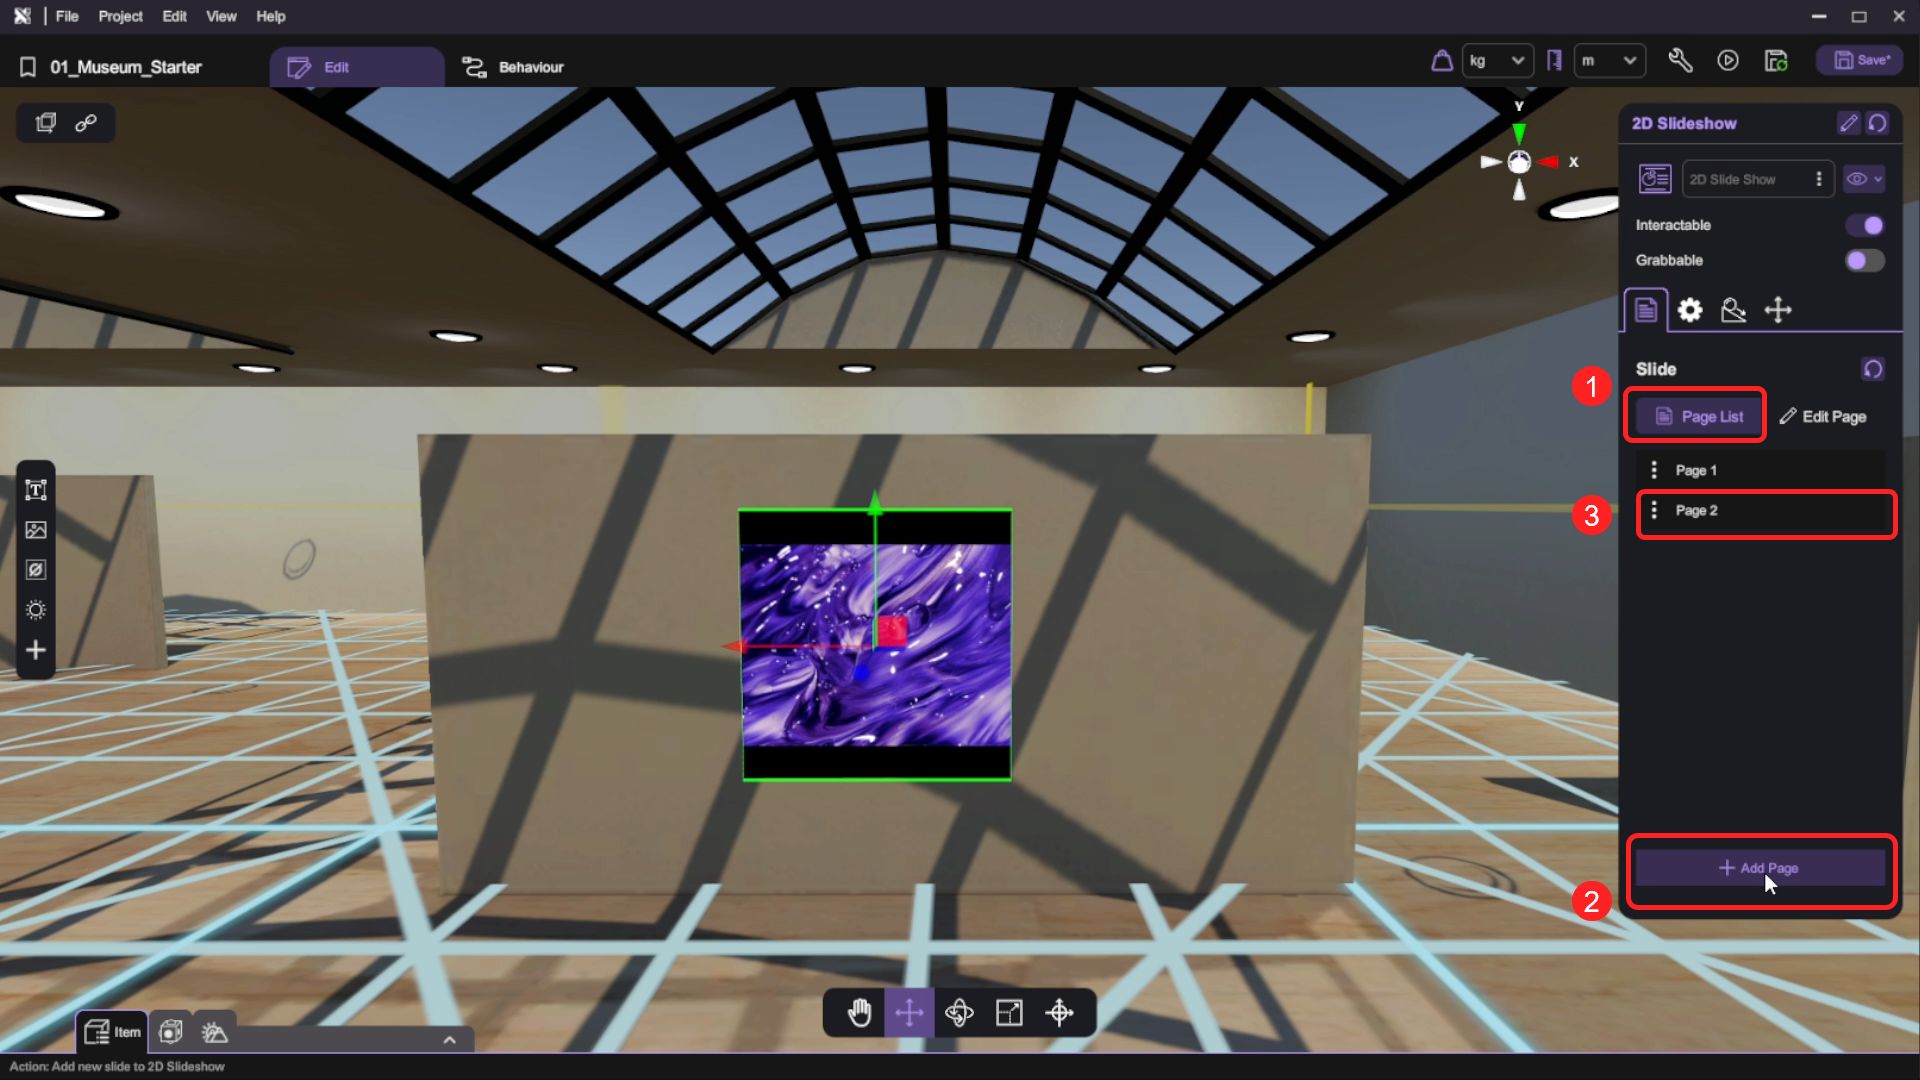
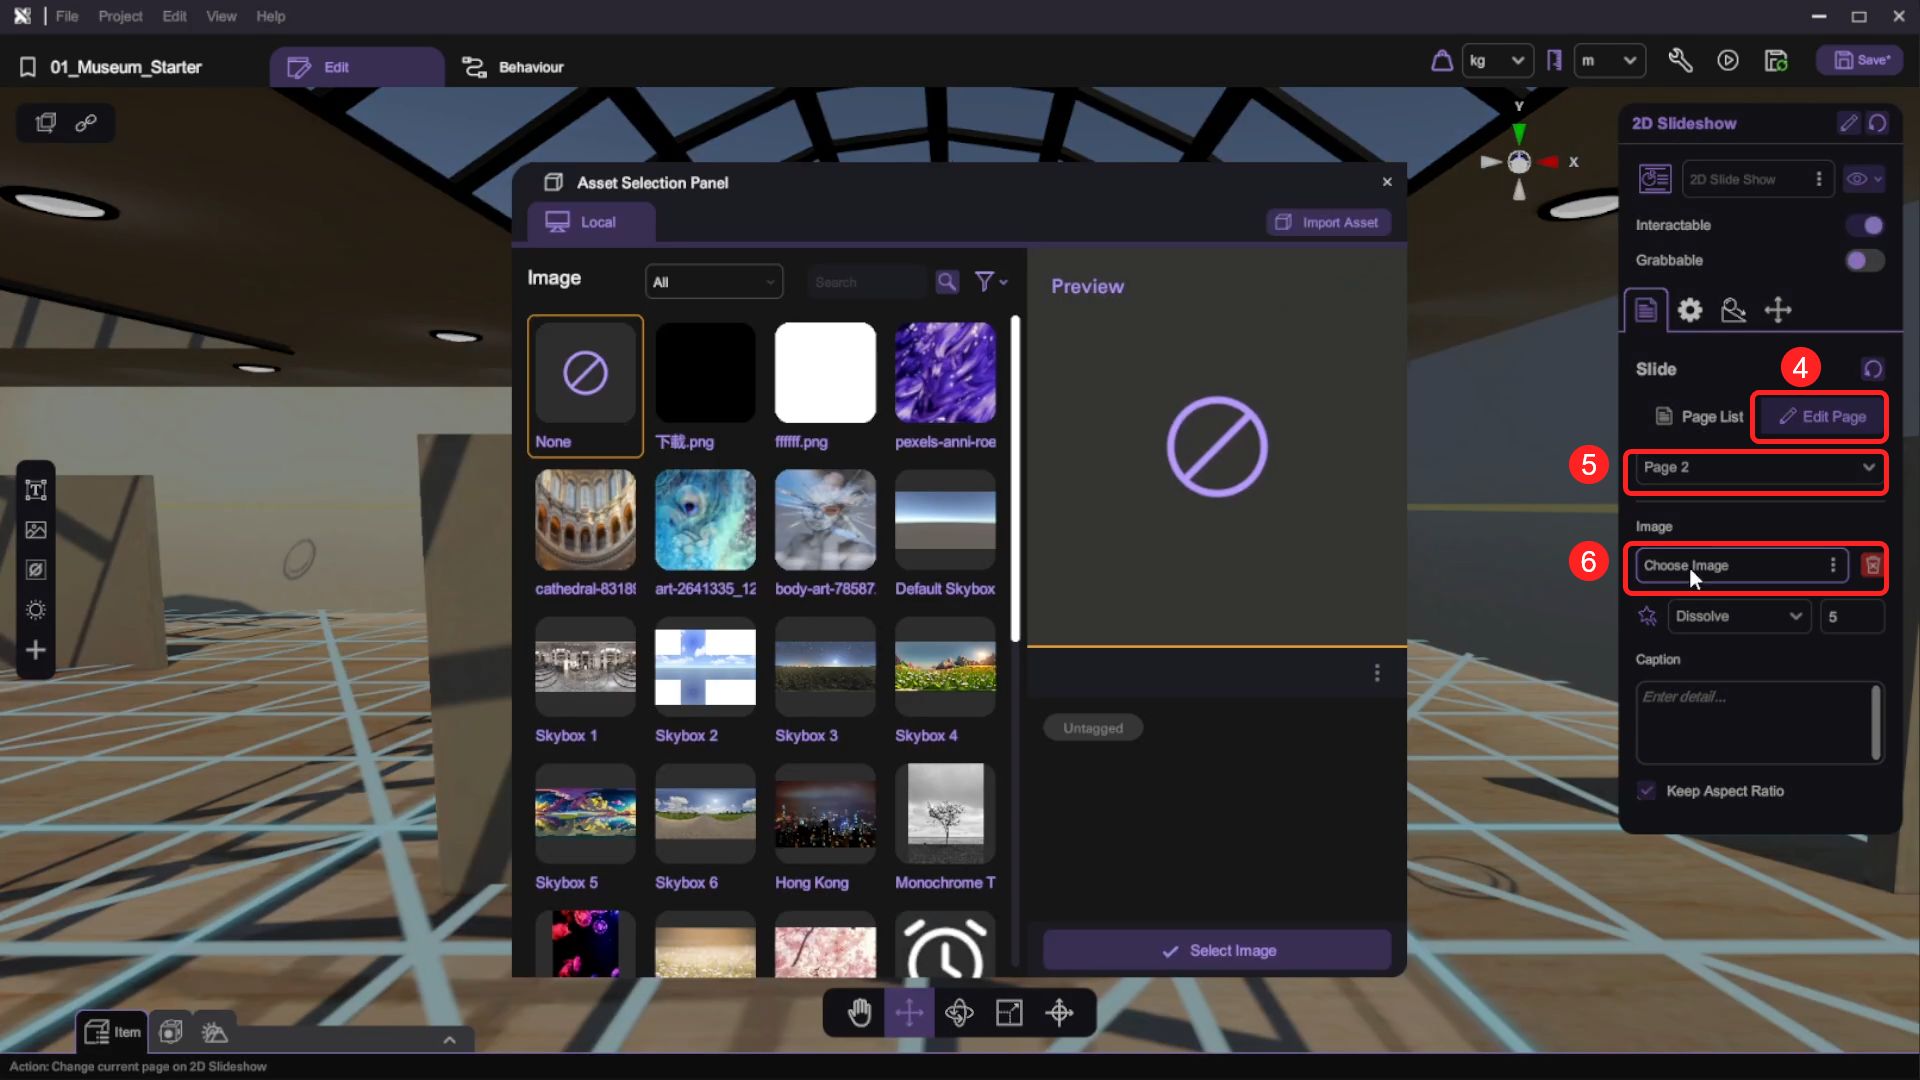
- Open the "Inspector" and set up the first slide of the 2D slideshow object by clicking the selector next to the "Slide Image" option, select an image from your asset library to add the image to slideshow.

- Click the "+" button on the right-hand side of the "Slide" option to add a new image to the slide show. Use the ">" button to change to the newly added image slide and select another image to use for that image slide. Optionally, you can configure the duration, caption text, and transition effects for the slide.
-
Repeat the process to add more images to the slide show.
-
Press the "Play" button and test your scene, then use the "Esc" button to return to scene editing.
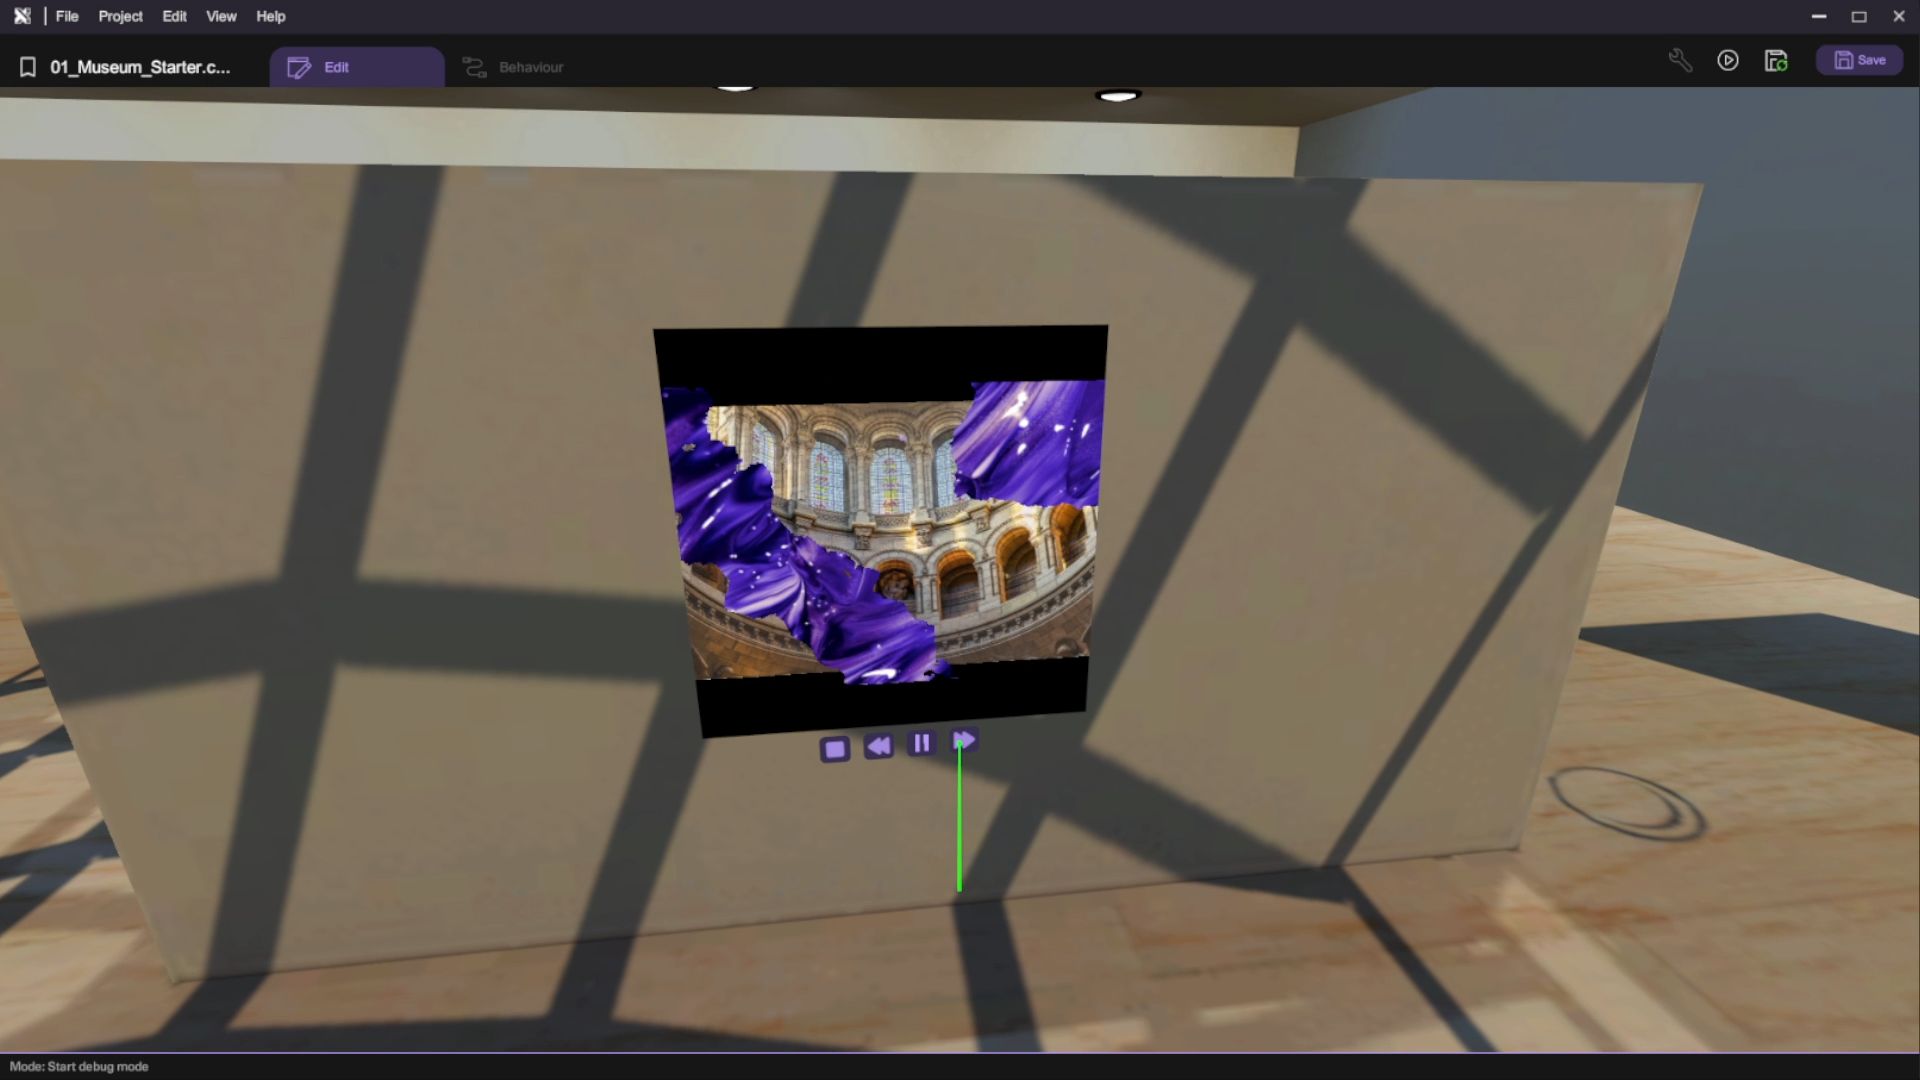
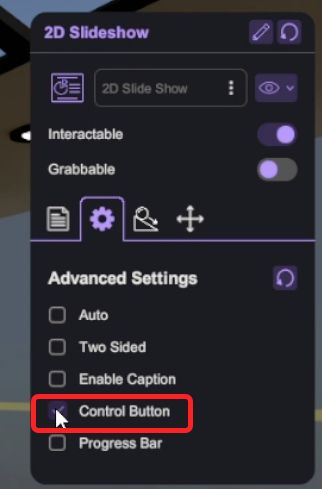
If you missing the control navigation, you can go to the "Slideshow object -> Advanced Setting" to switch on the "Control Button"
Add the 3D Exhibits
We will introduce 3D models into the museum. This will involve adding various 3D objects to the scene, enhancing the visual experience and interactivity for users.
Add 3D Model
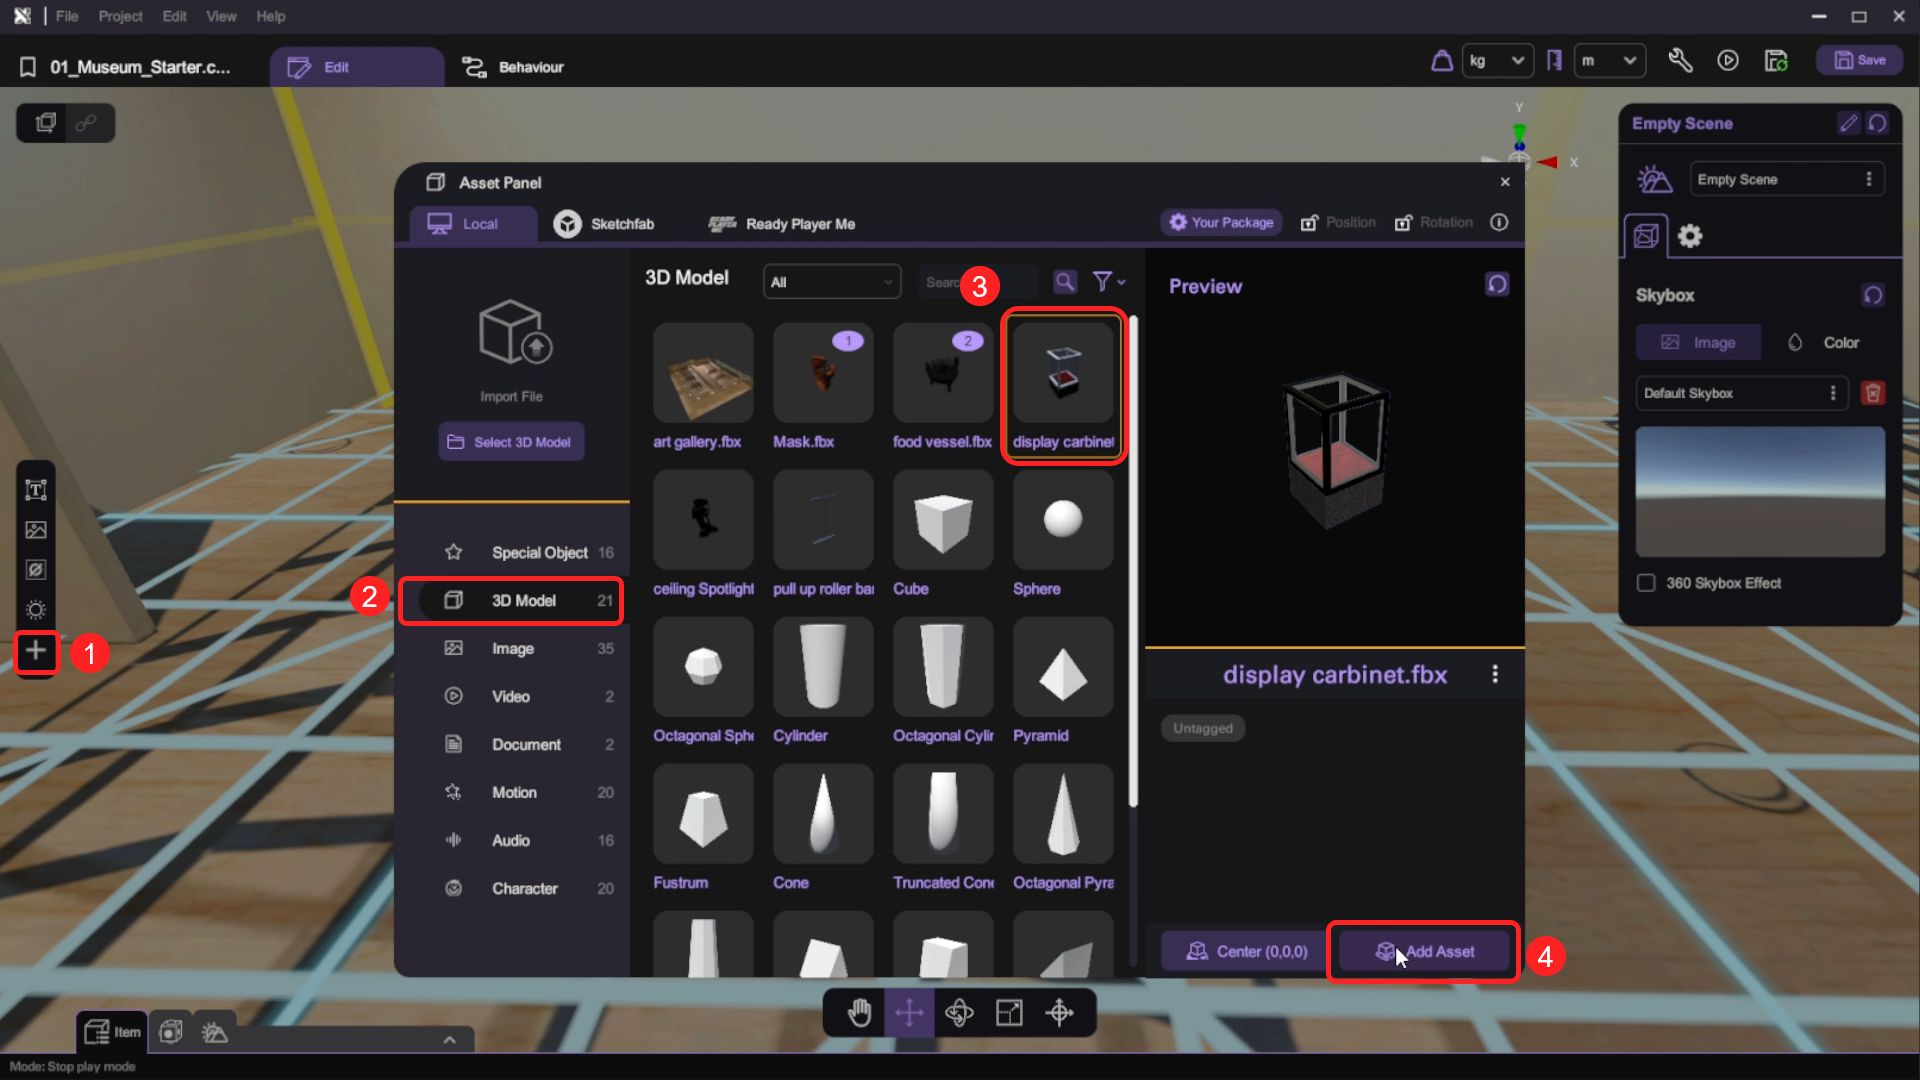
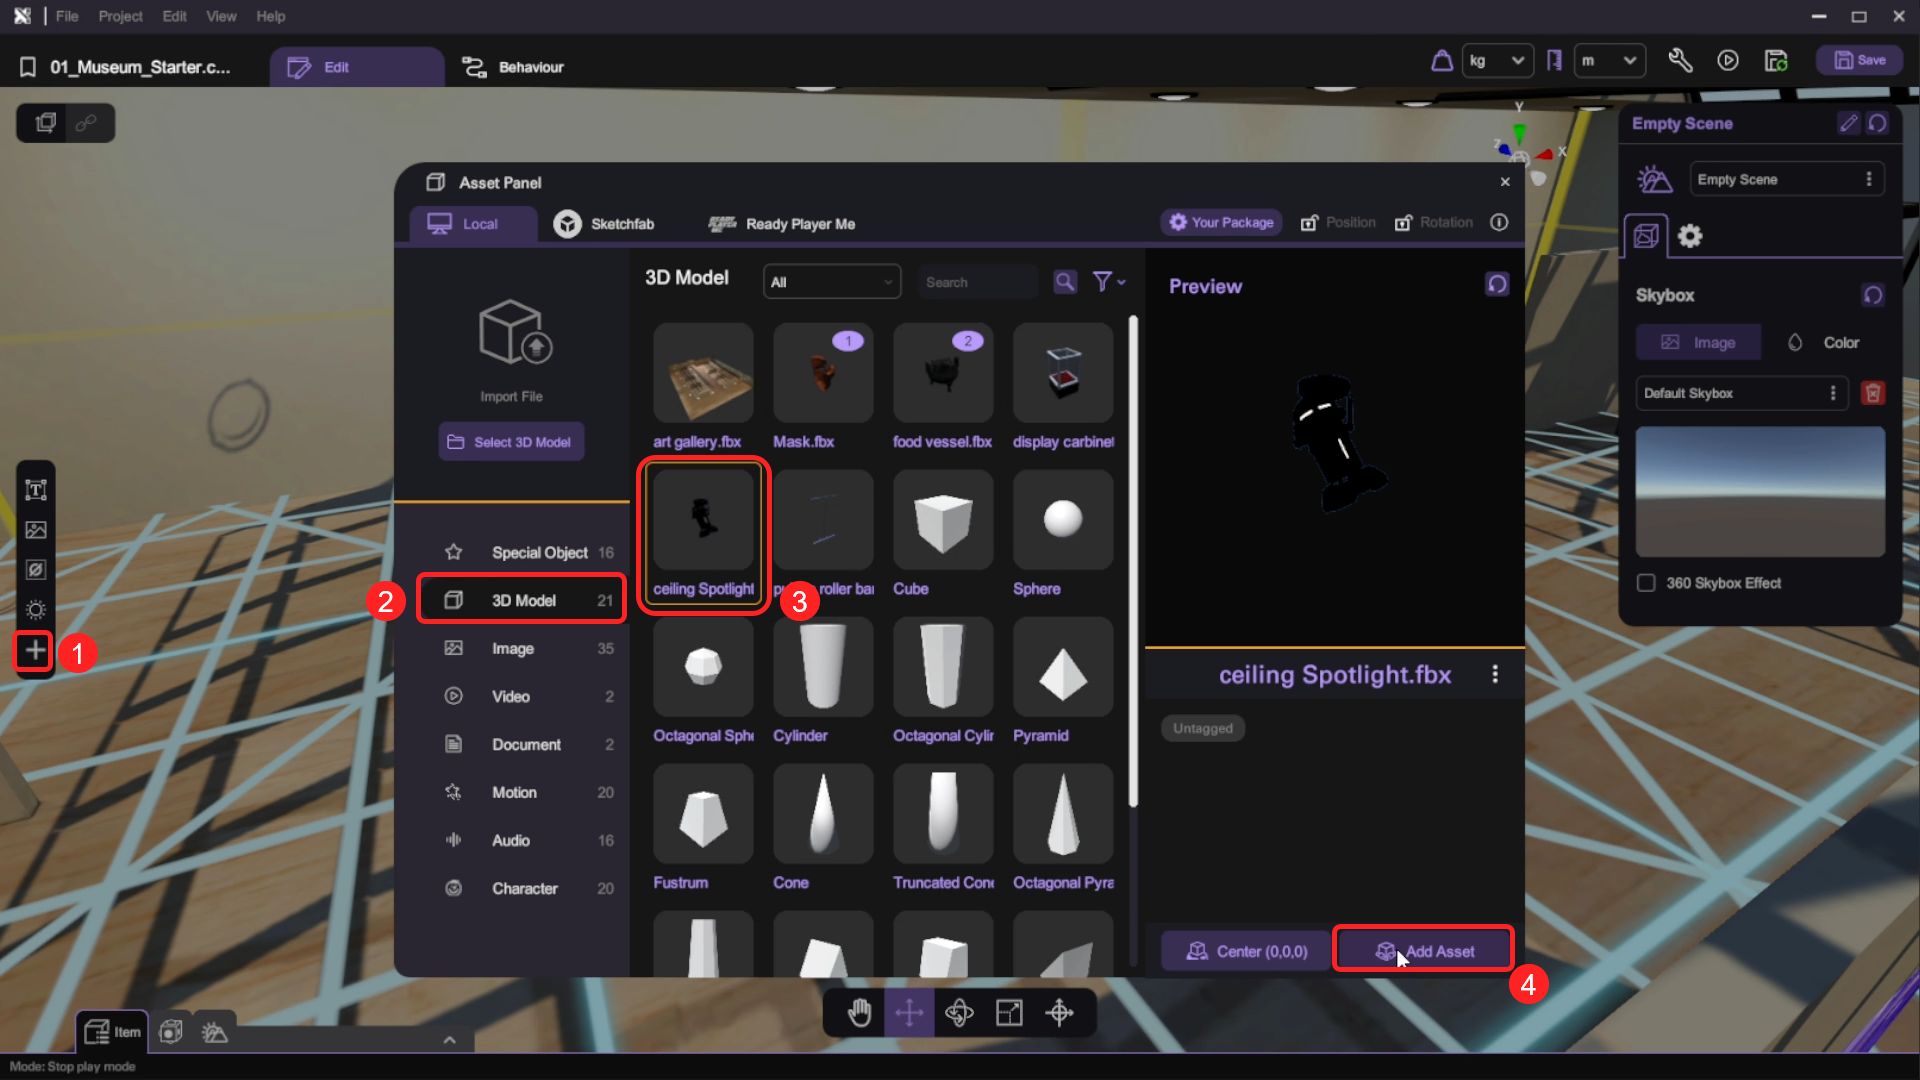
- Open the "Asset Panel" and select "3D Model" tab, select and add the "display cabinet.fbx" 3D model to the scene.
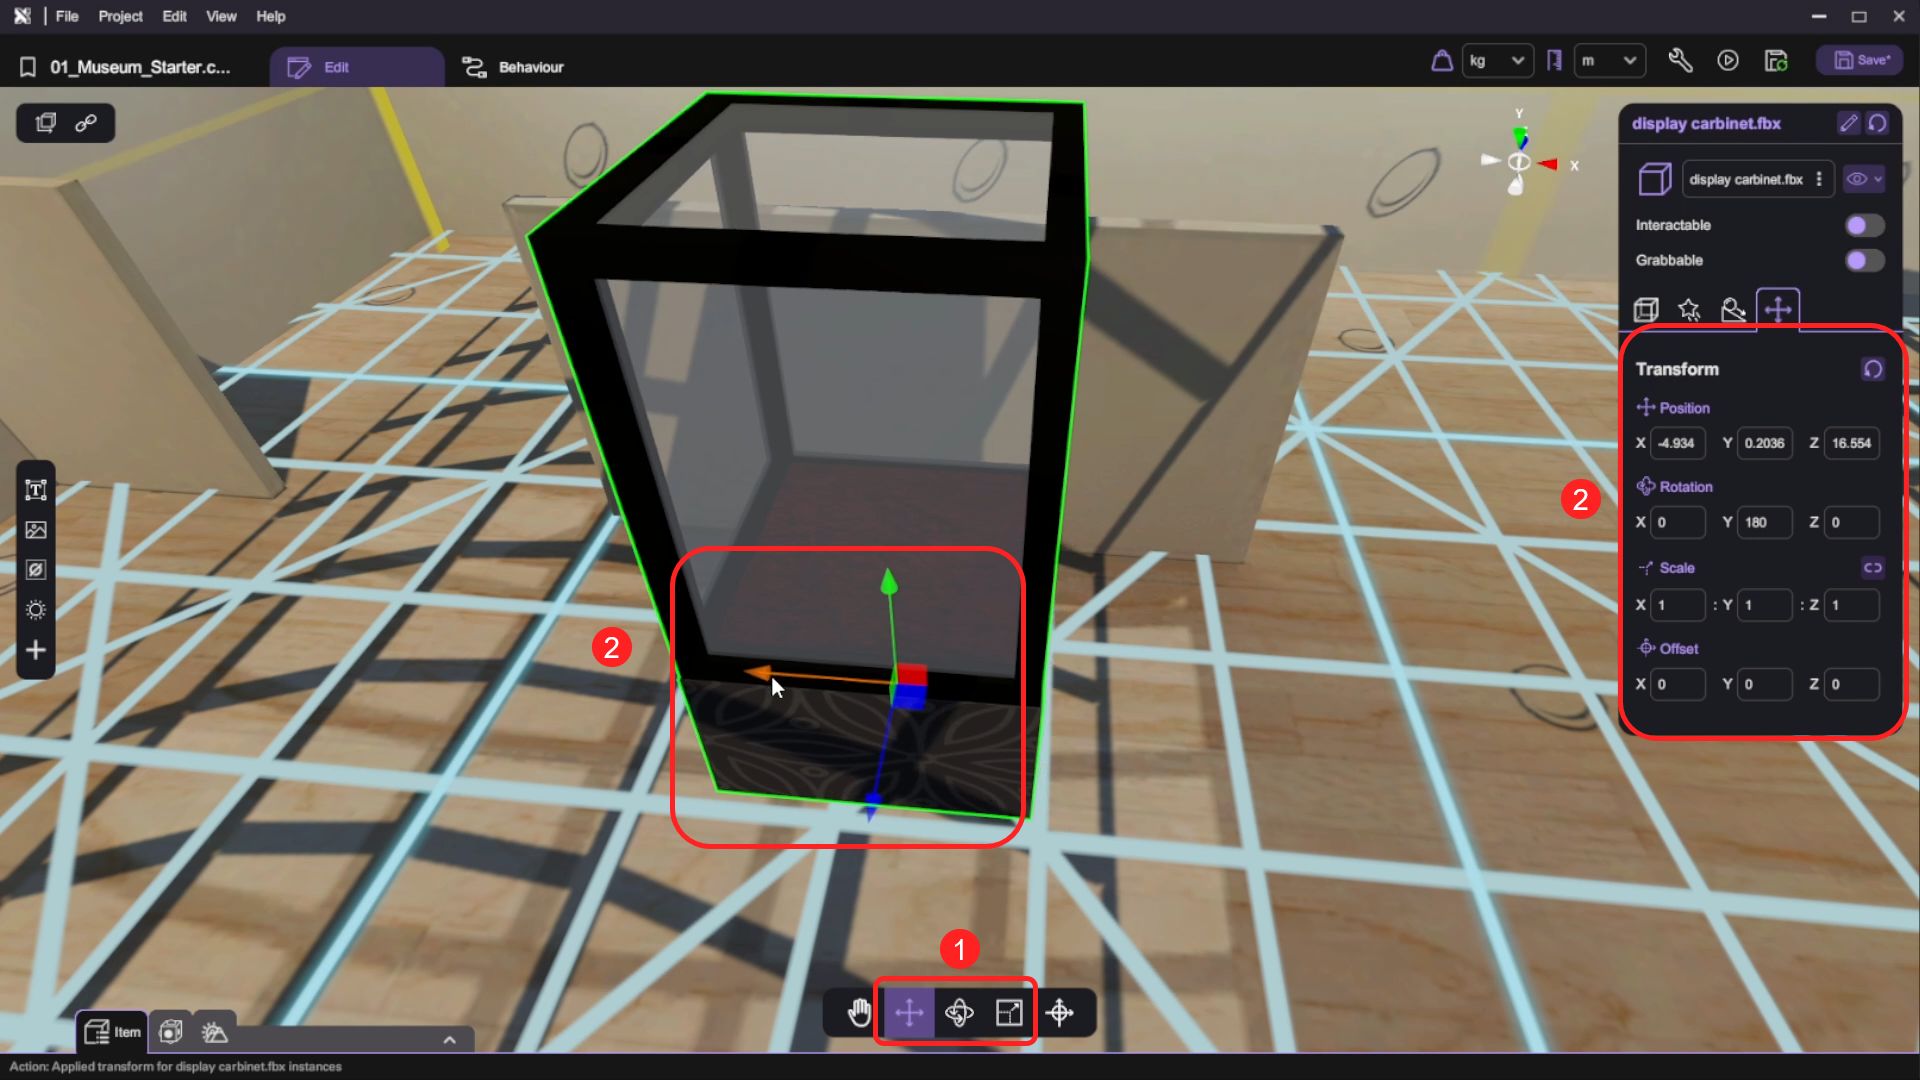
- Use the transform tools (move/rotate/scale) to place the display cabinet object to the front of the art gallery near the front wall.
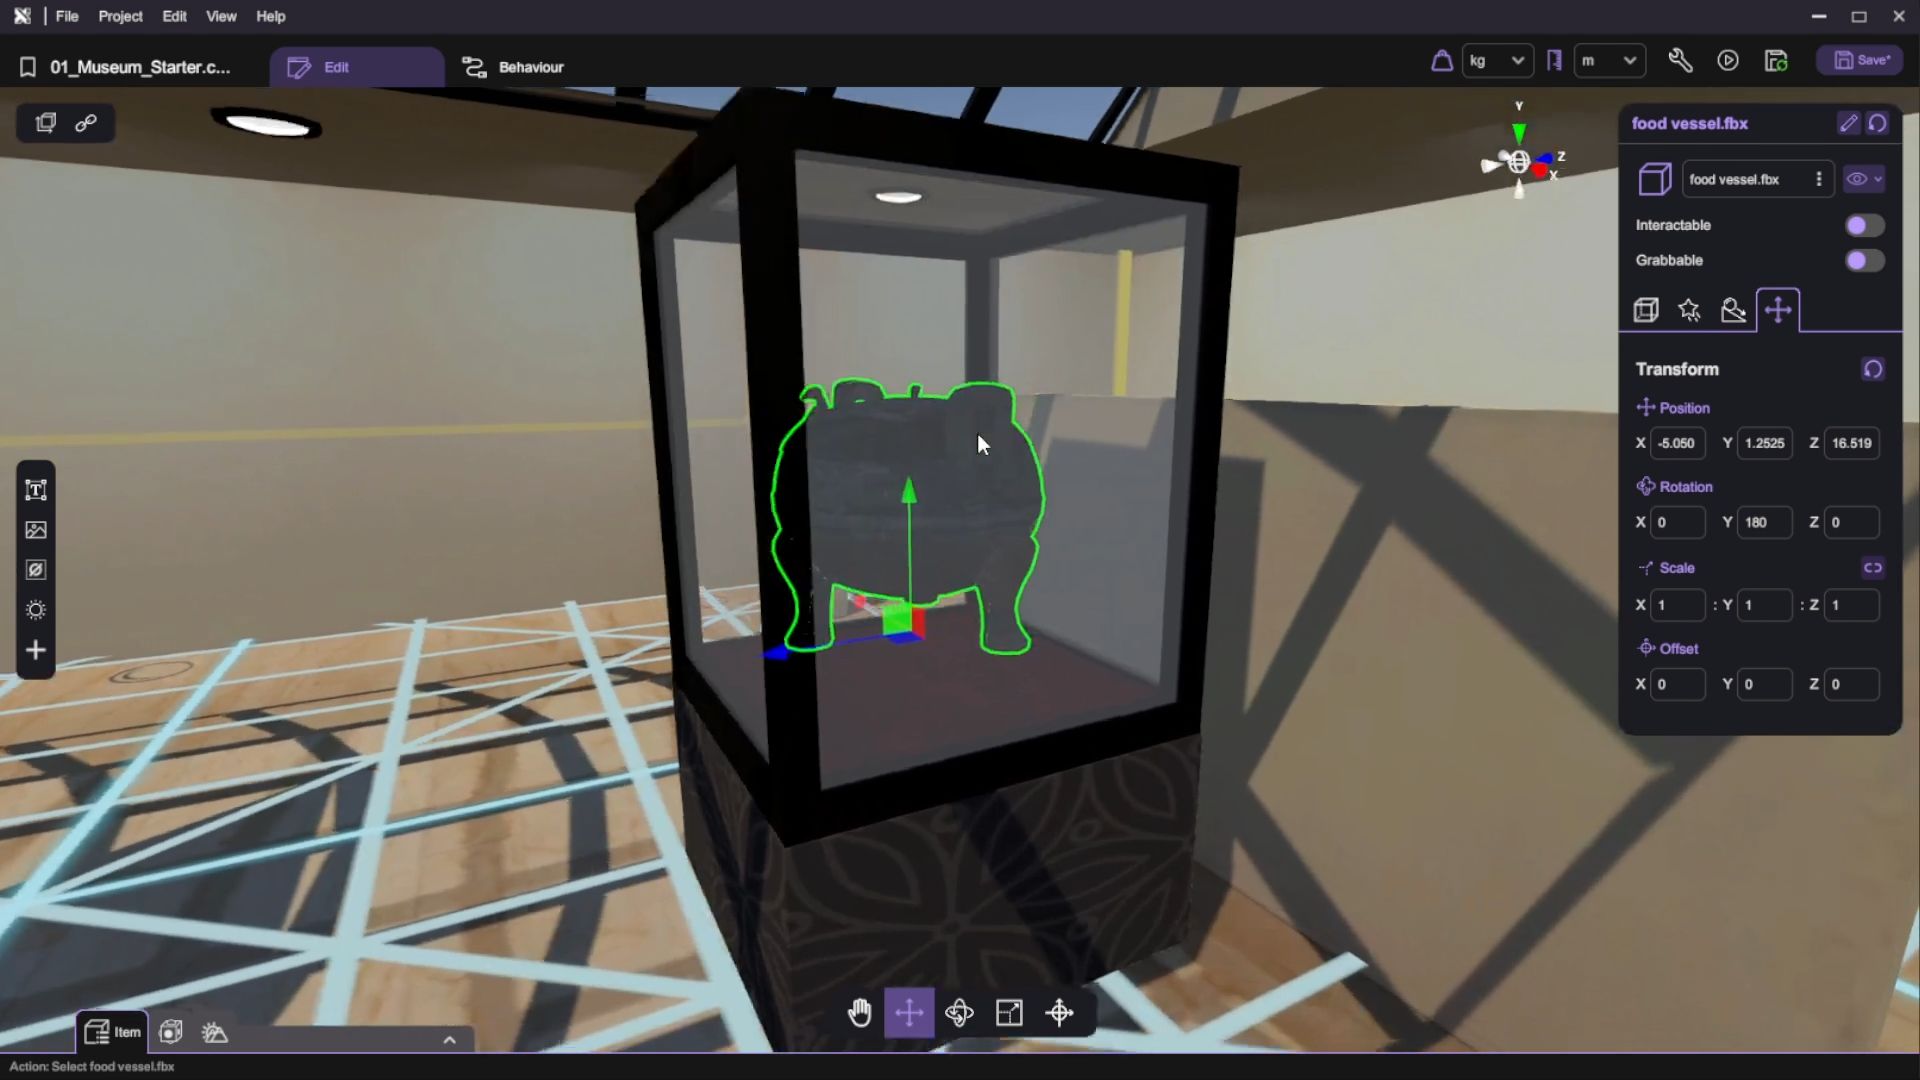
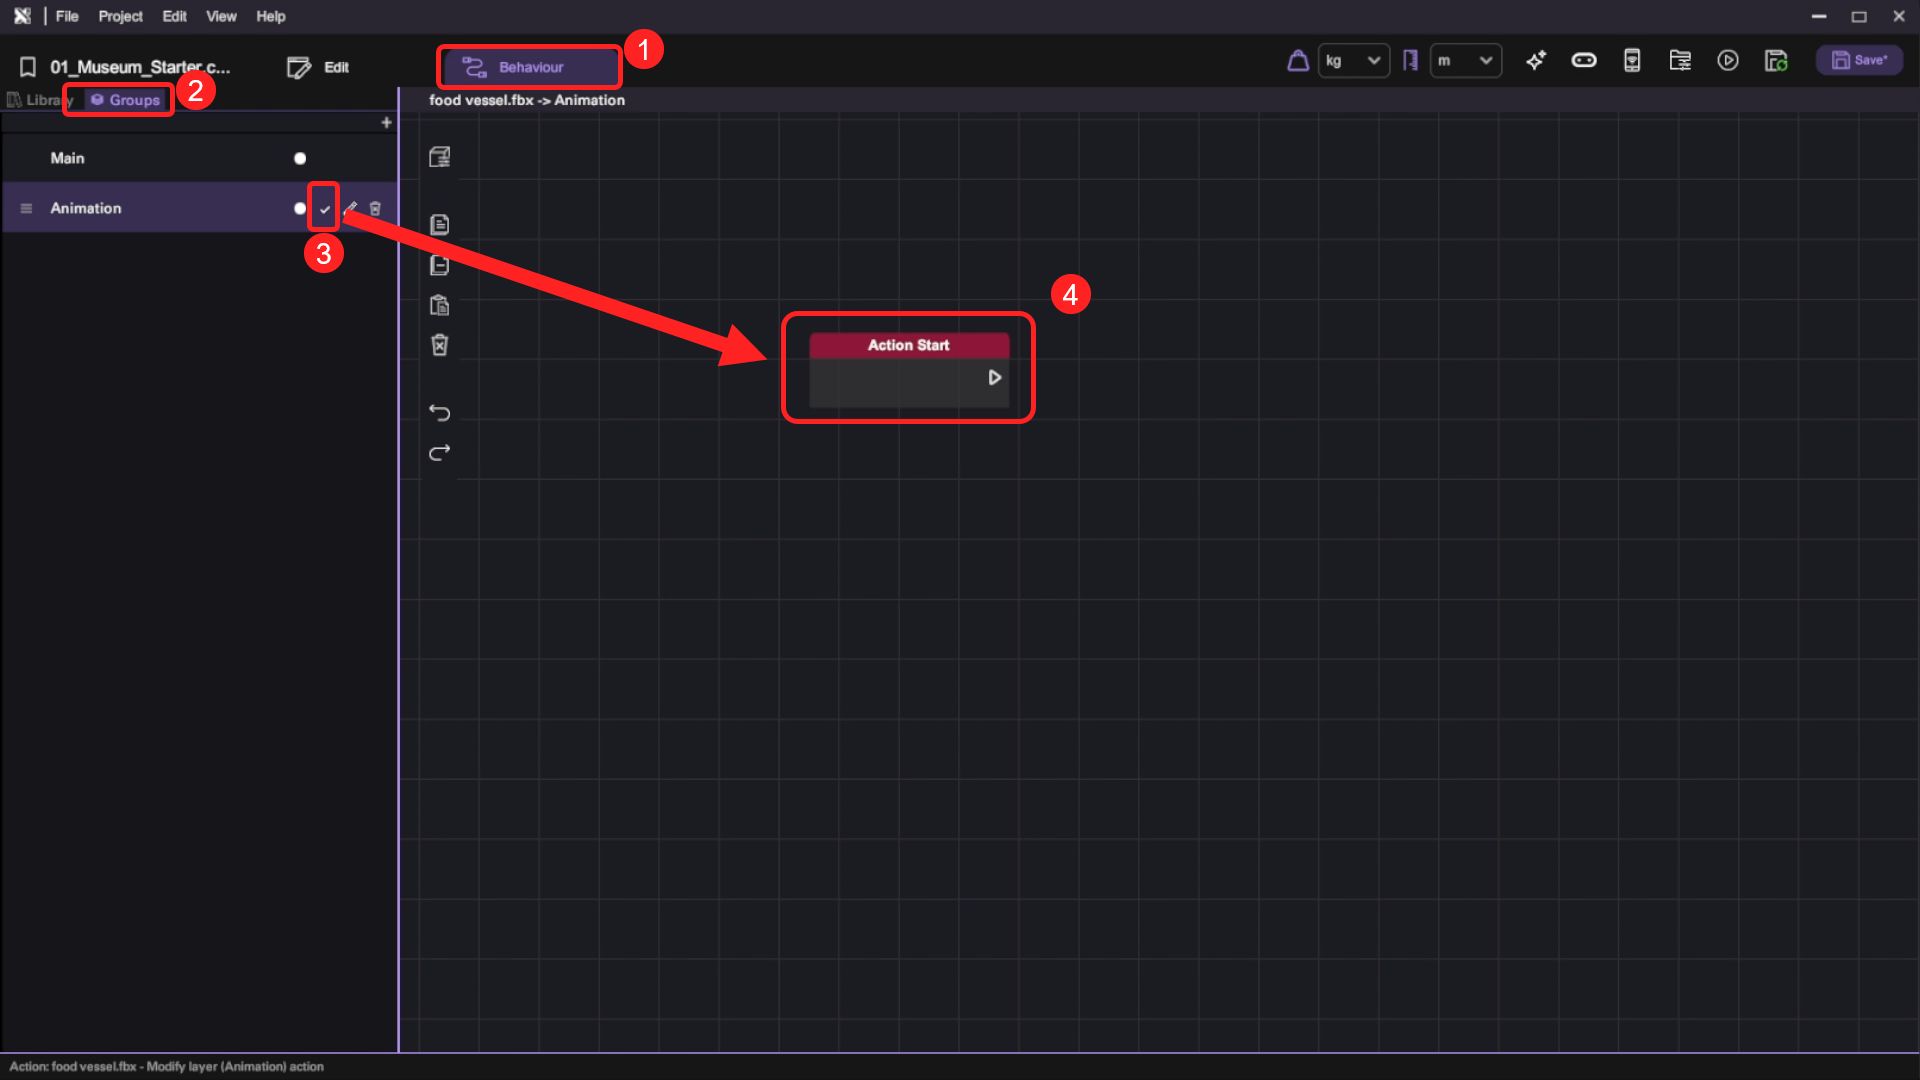
- Repeat the same procedure to add the food vessel 3D model object to the scene and place it inside the display cabinet.
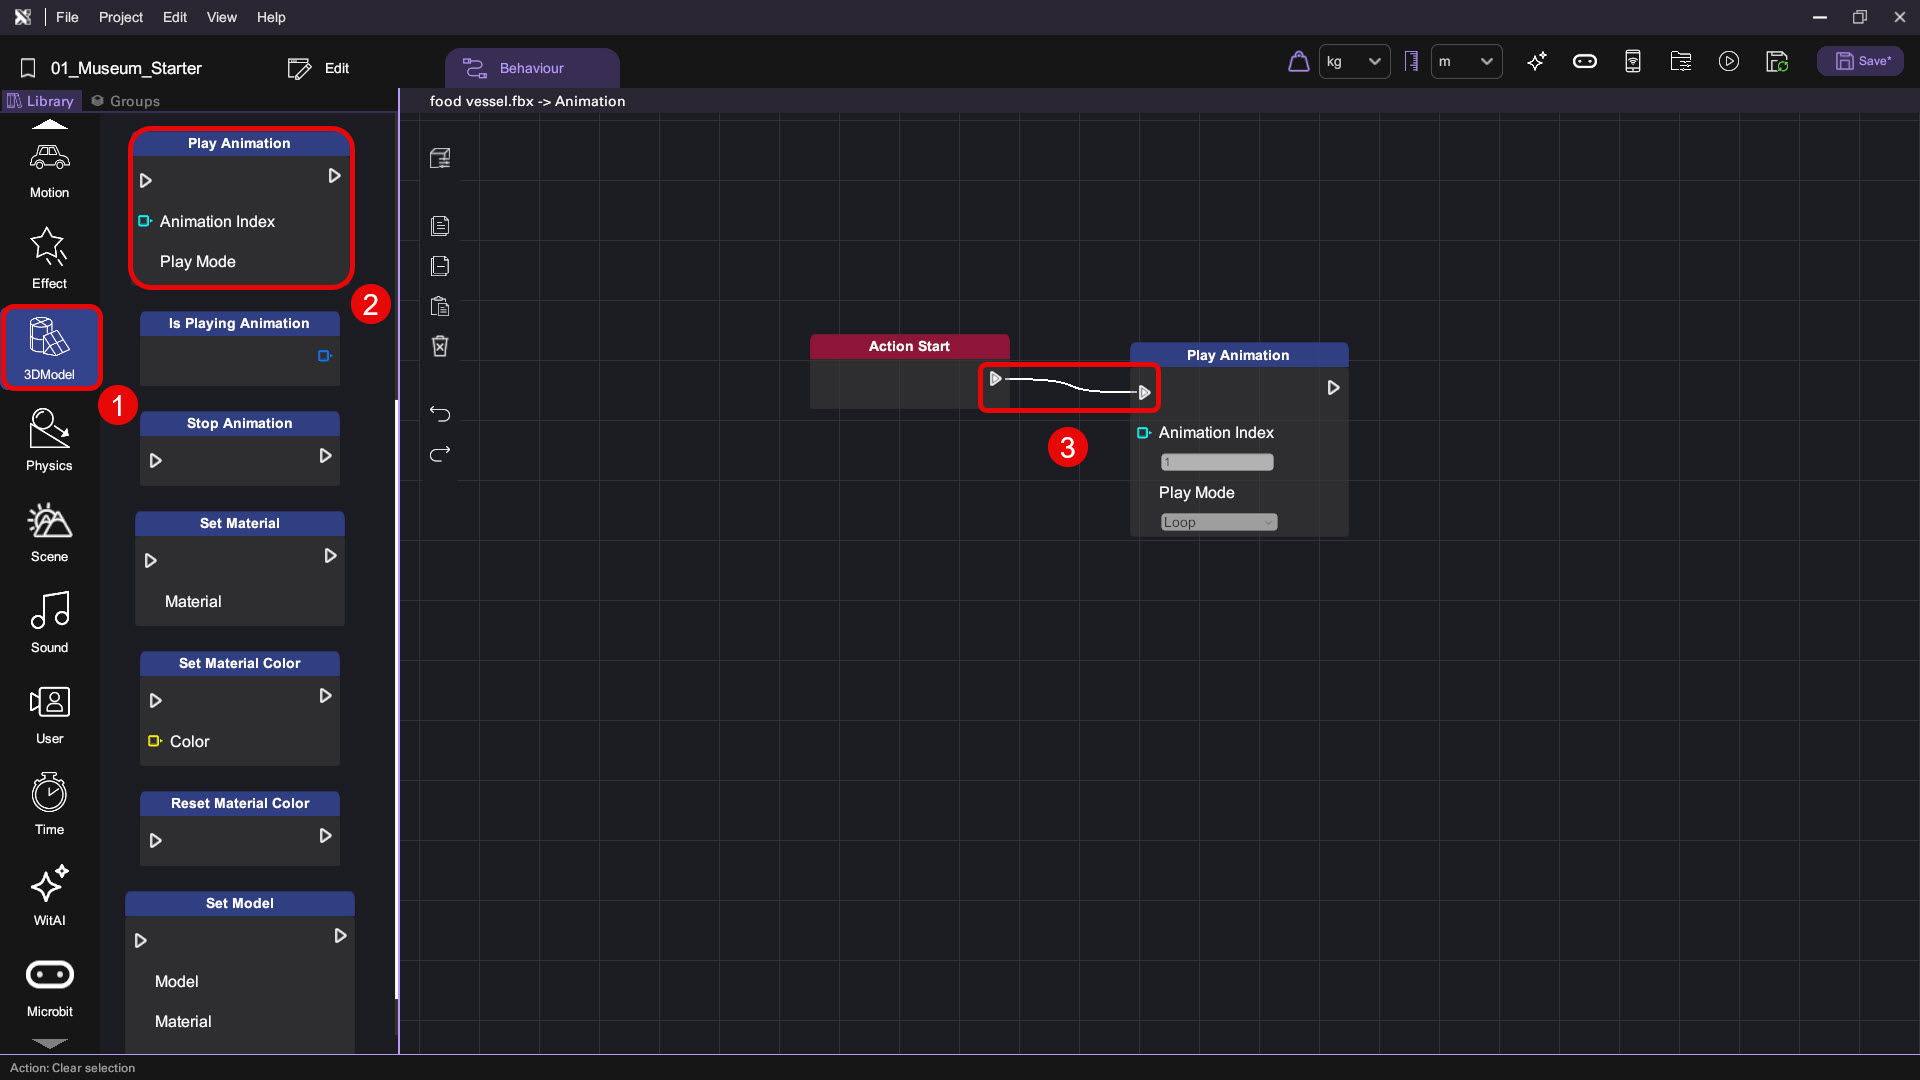
- Select the food vessel object and open its behaviour panel. Add a new action called "Animation" under the behaviour "Groups". Switch to behaviour library and select the "3D Model" category, drag the "Play Animation" behaviour block and append it behind the "Action Start" block in the canvas.
When the "Animation" action is called on, the food vessel object will play the animation that's embedded in the 3D model.
Invoke the 3D Model Animation
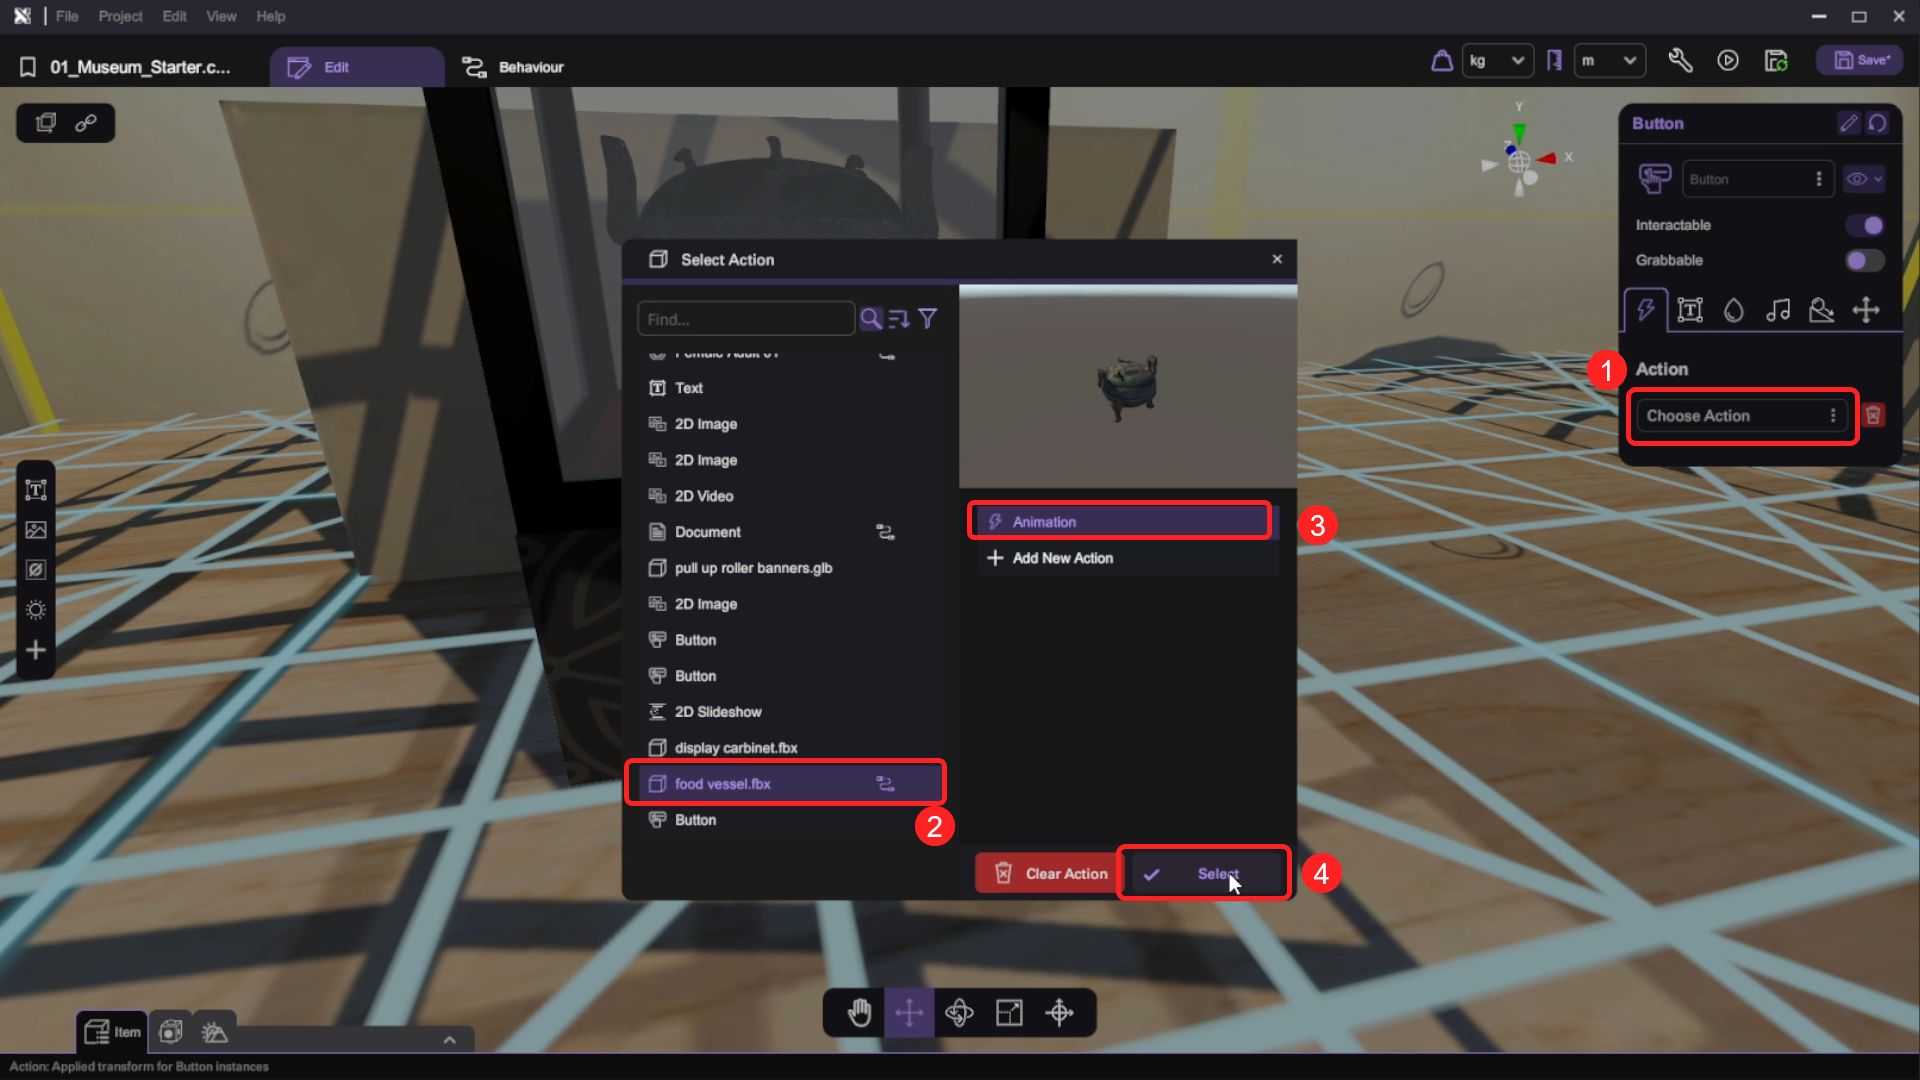
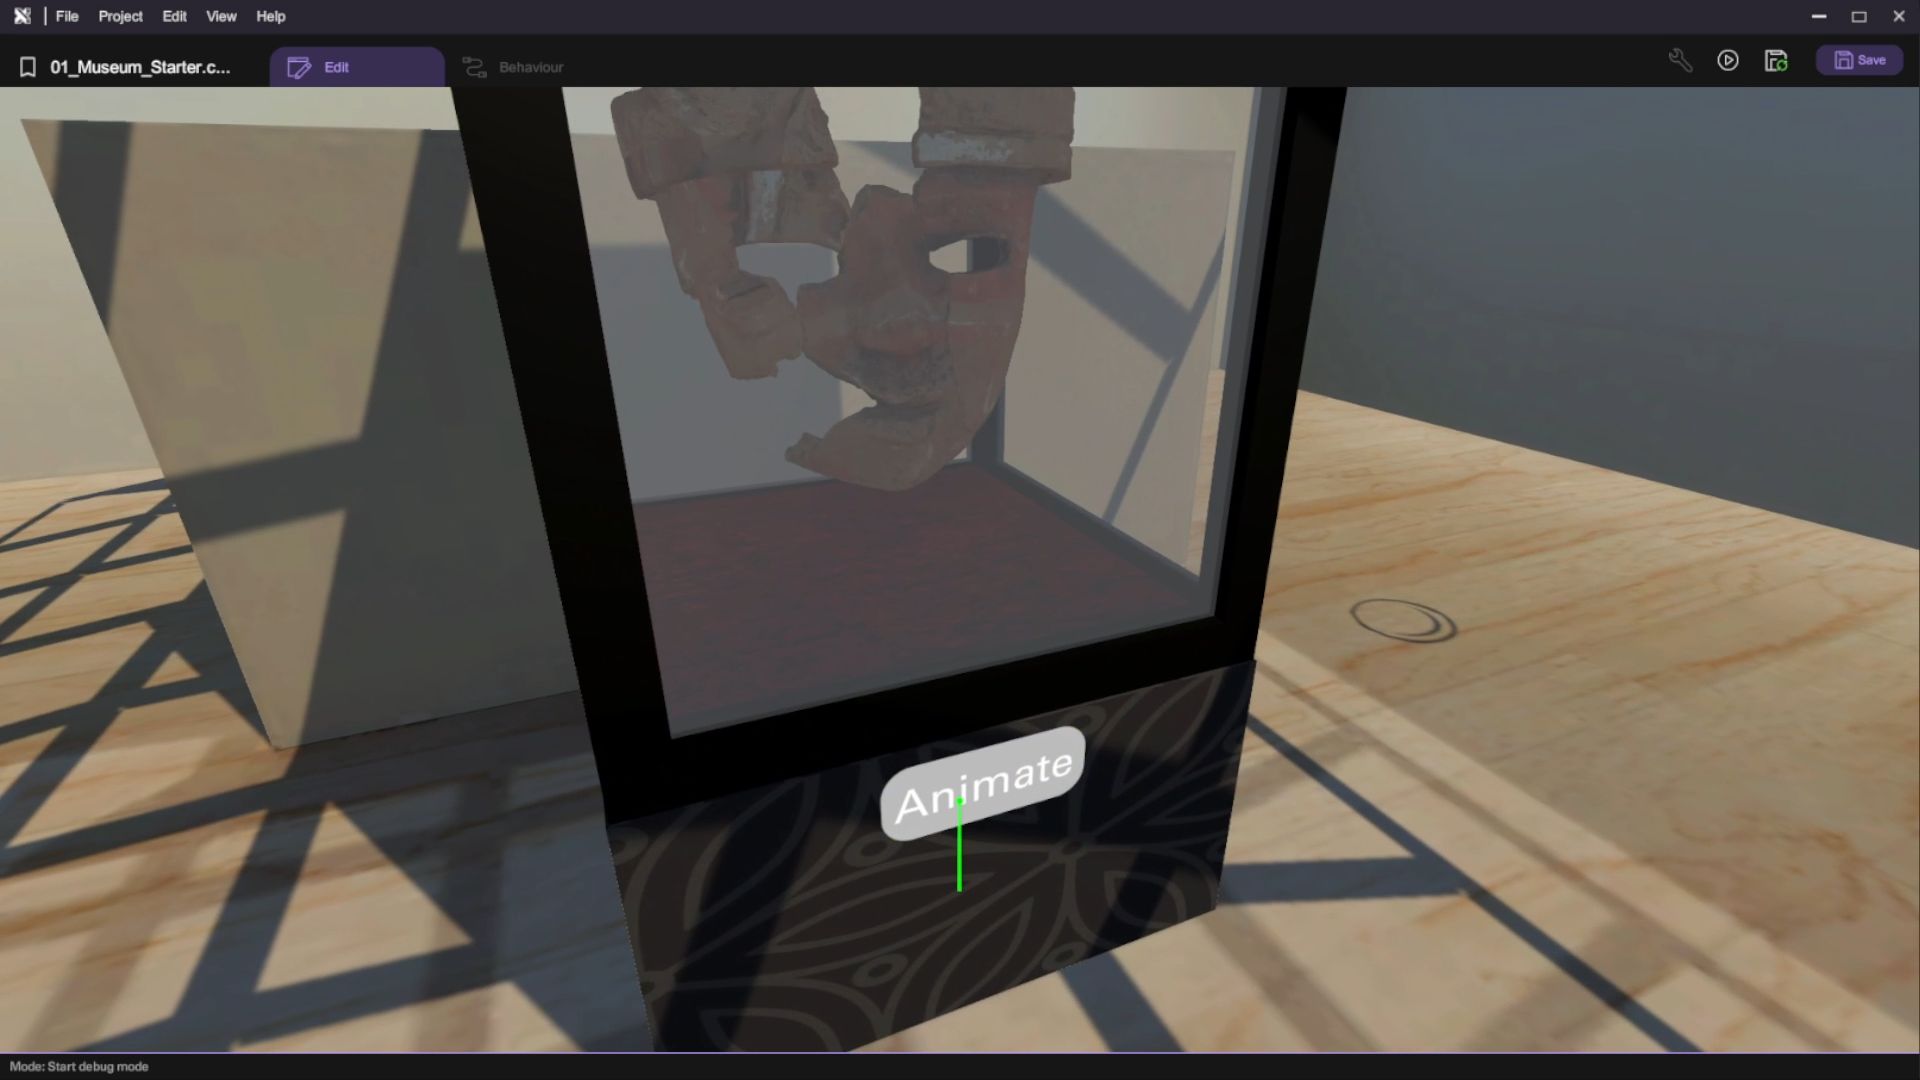
- Add a new "Button" to the scene. In the "Inspector", change the text of the button into "Animate". Then set up the action call on the "Animation" action created in the last step.
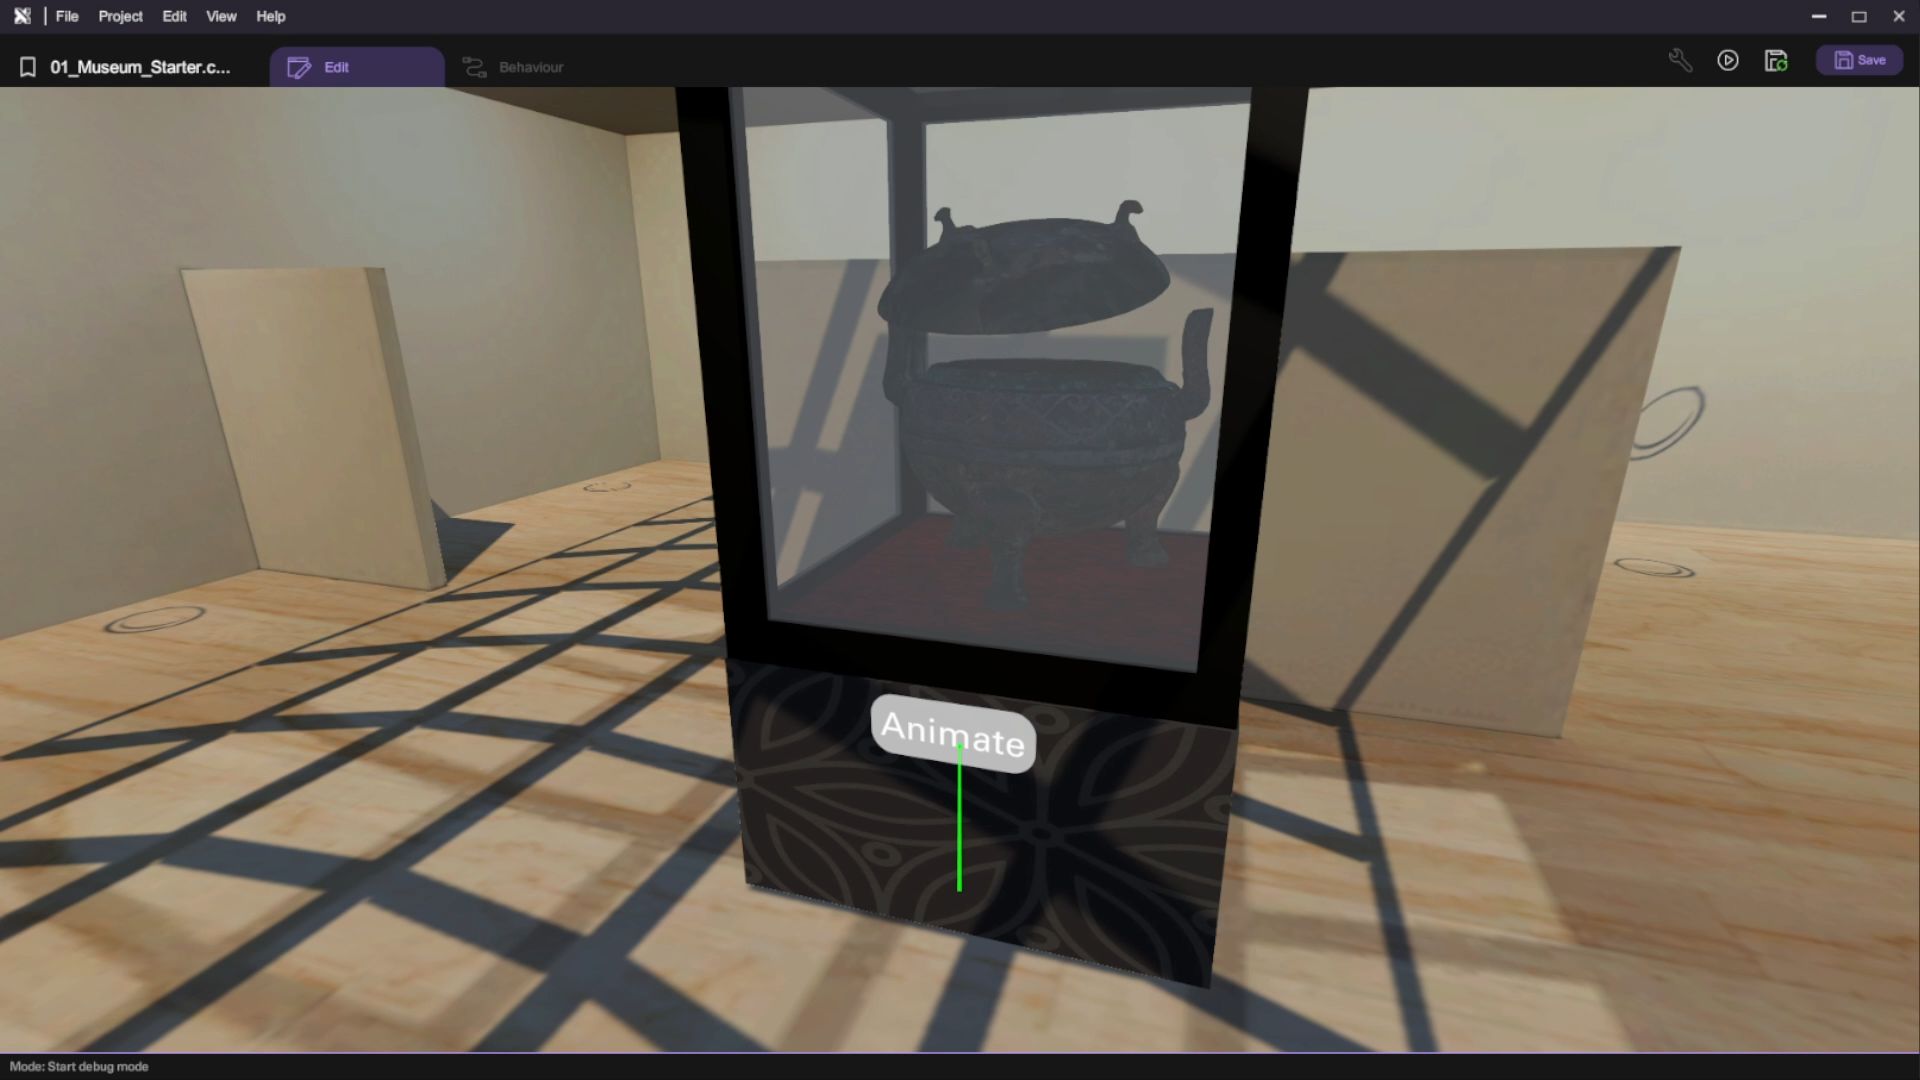
- Press the "Play" button and test your scene, the food vessel will play an animation to open its lid when the "Animate" button is clicked. Use the "Esc" button to return to scene editing after your testing.

- Duplicate the display cabinet, food vessel, and button and place them to the right-side of the art gallery. Select the duplicated food vessel 3D model and open the "Inspector", click the selector next to the "Model Asset" option and choose the "mask.fbx" in the selection panel. Use the transform tools to adjust the position of the mask 3D model.
The action set up on the duplicated button object will automatically update to connect to the mask 3D model's "Animate" option.
Create the Spotlight and Control Panel
In this section, we will add lighting elements to the VR museum. We will also create a control panel using an option box that allows users to change the light colors, enhancing the ambiance and interactivity of the scene.
Add Spotlight
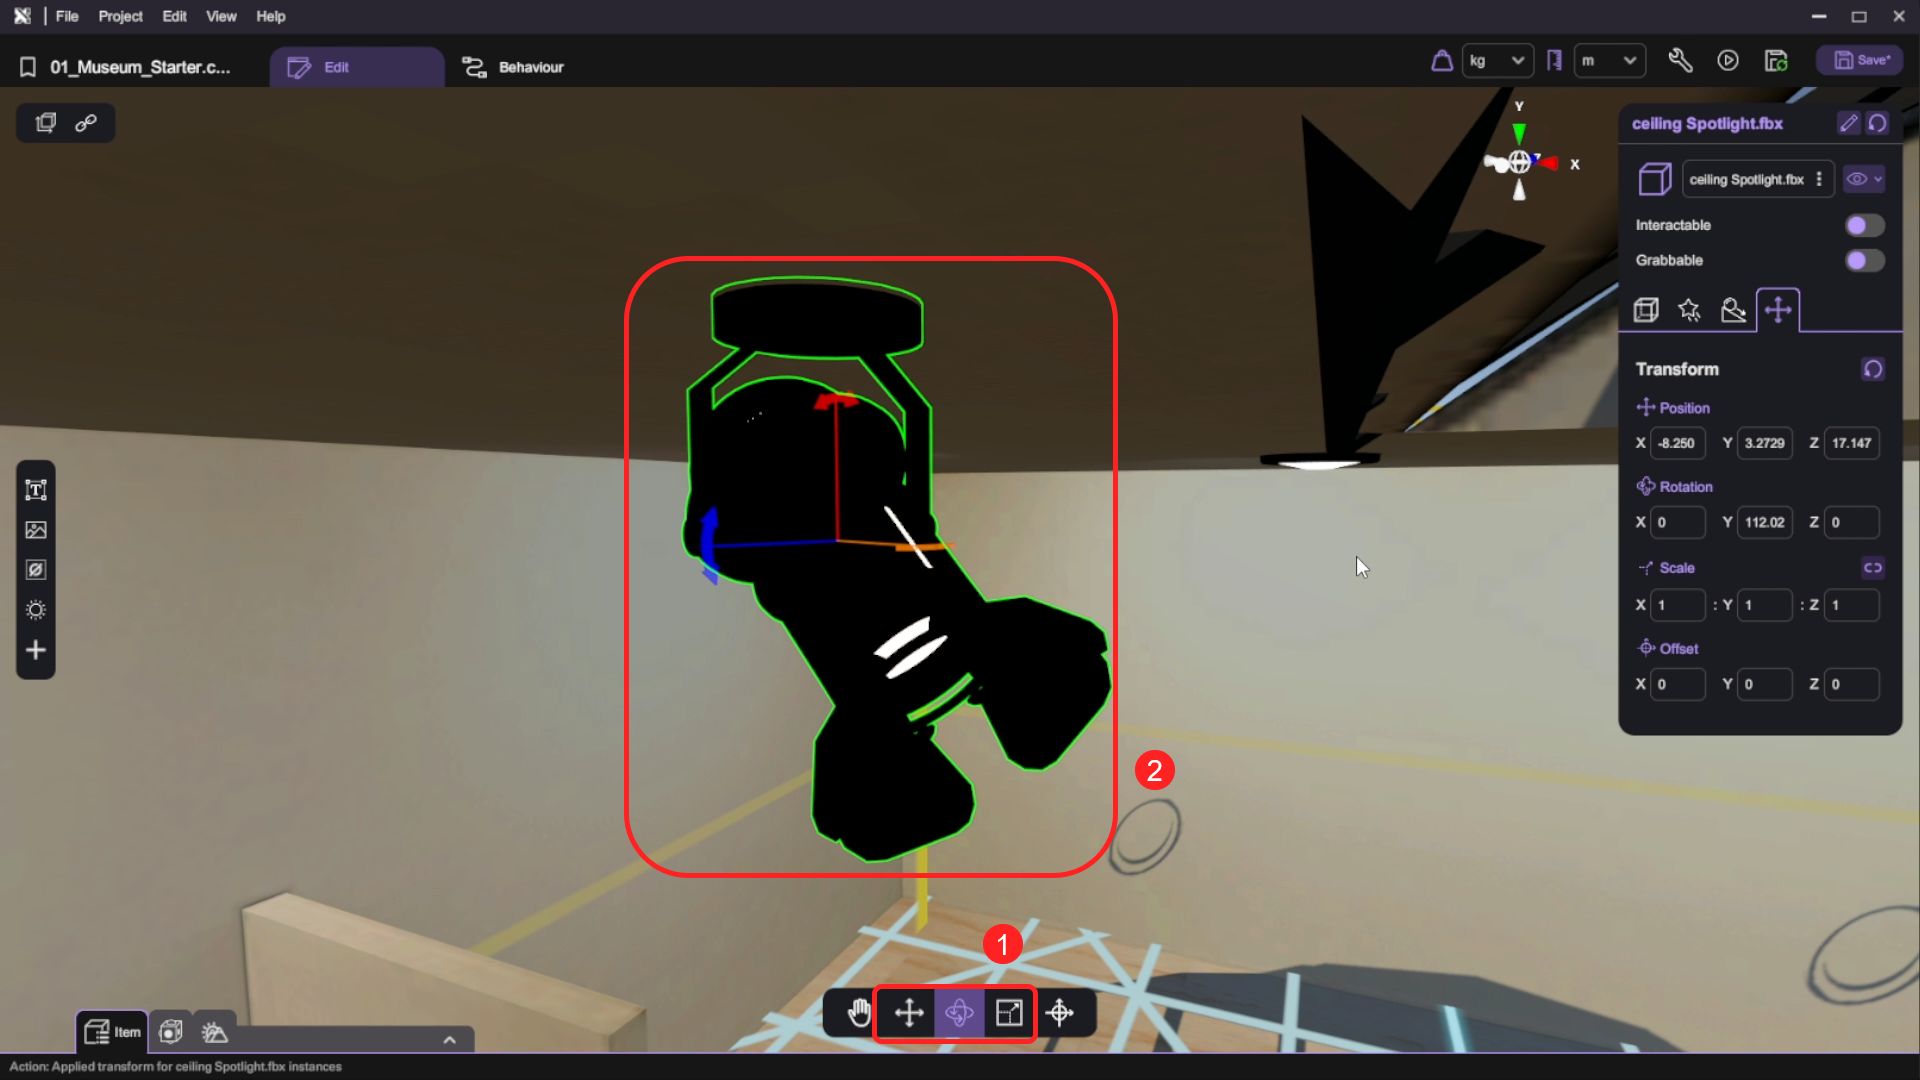
- Open the "Asset Panel" and from the "3D Model" tab, select and add the "ceiling Spotlight.fbx" 3D model to the scene.
- Use the transform tools (move/rotate/scale) to place the spotlight object at the ceiling facing the display cabinet.
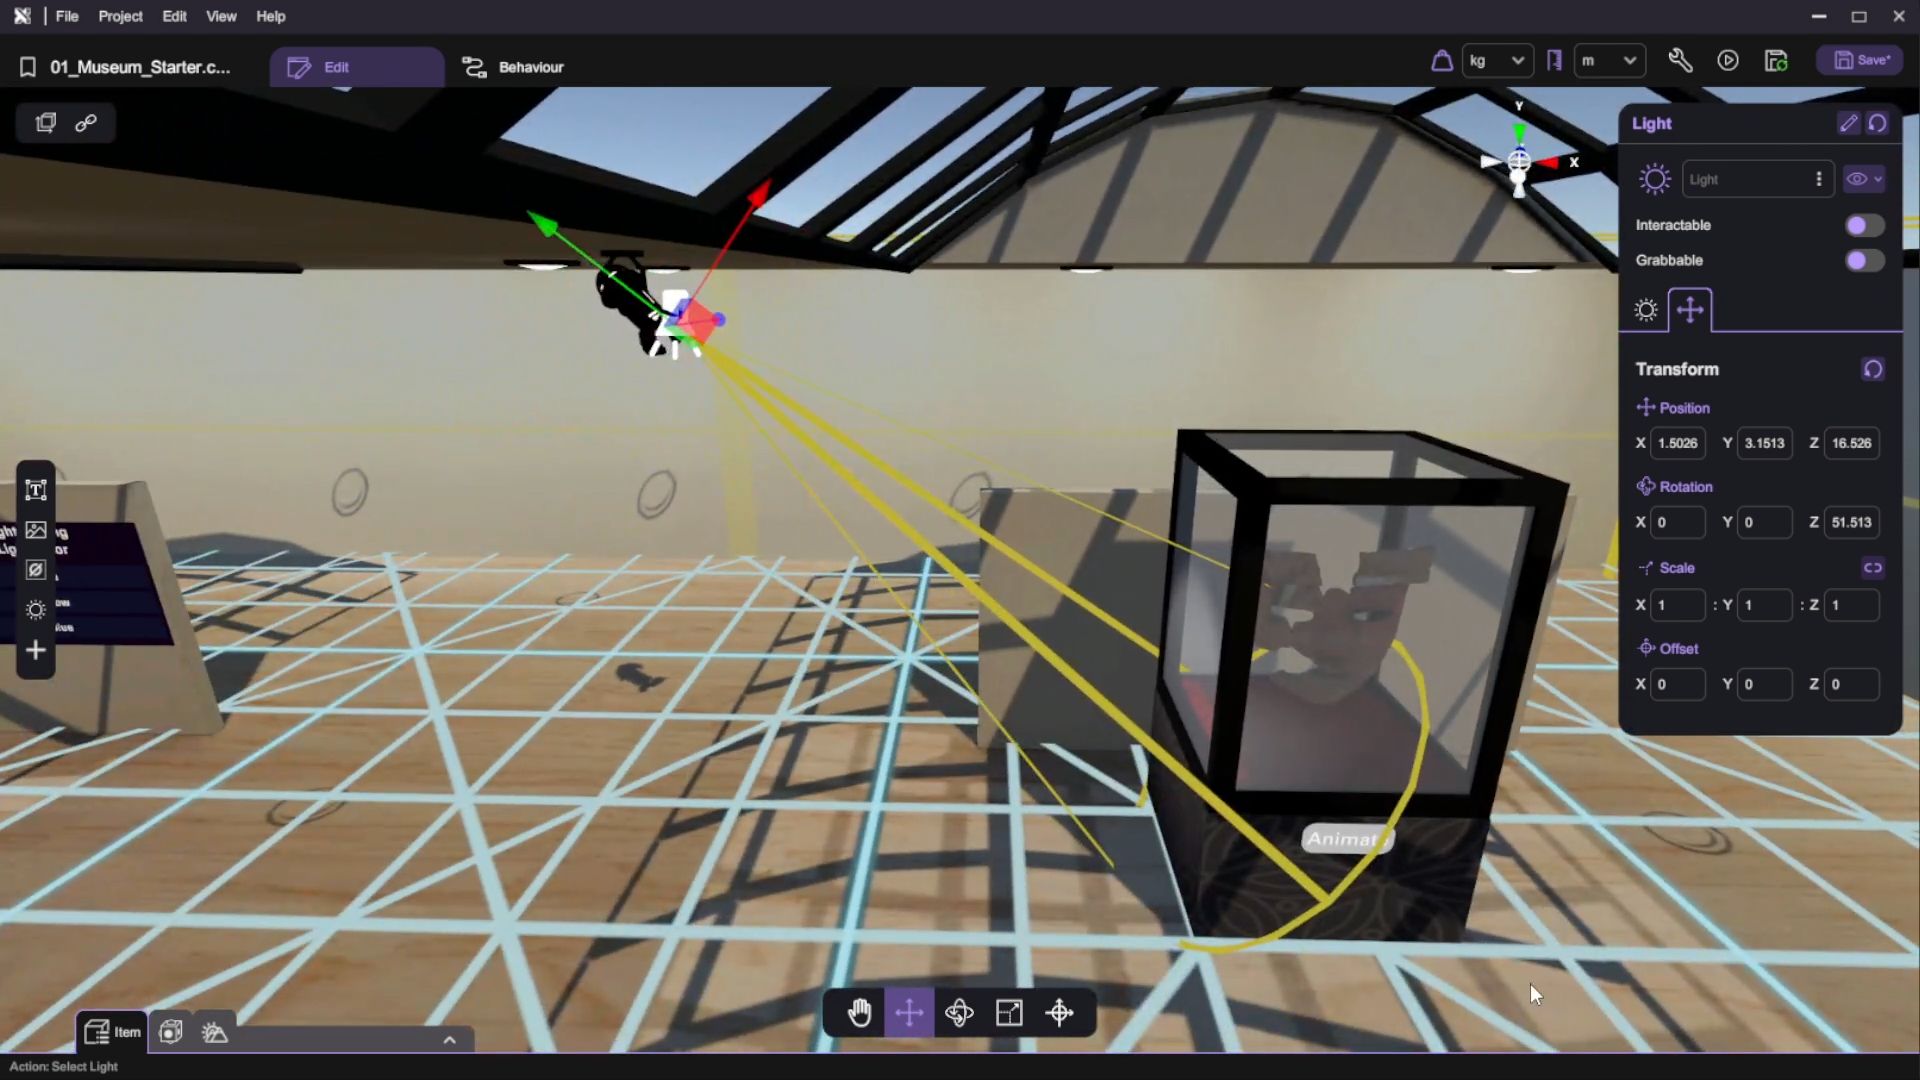
- Open the "Asset Panel" and from the "Special Objects" tab, select and add a "Light" to the scene.
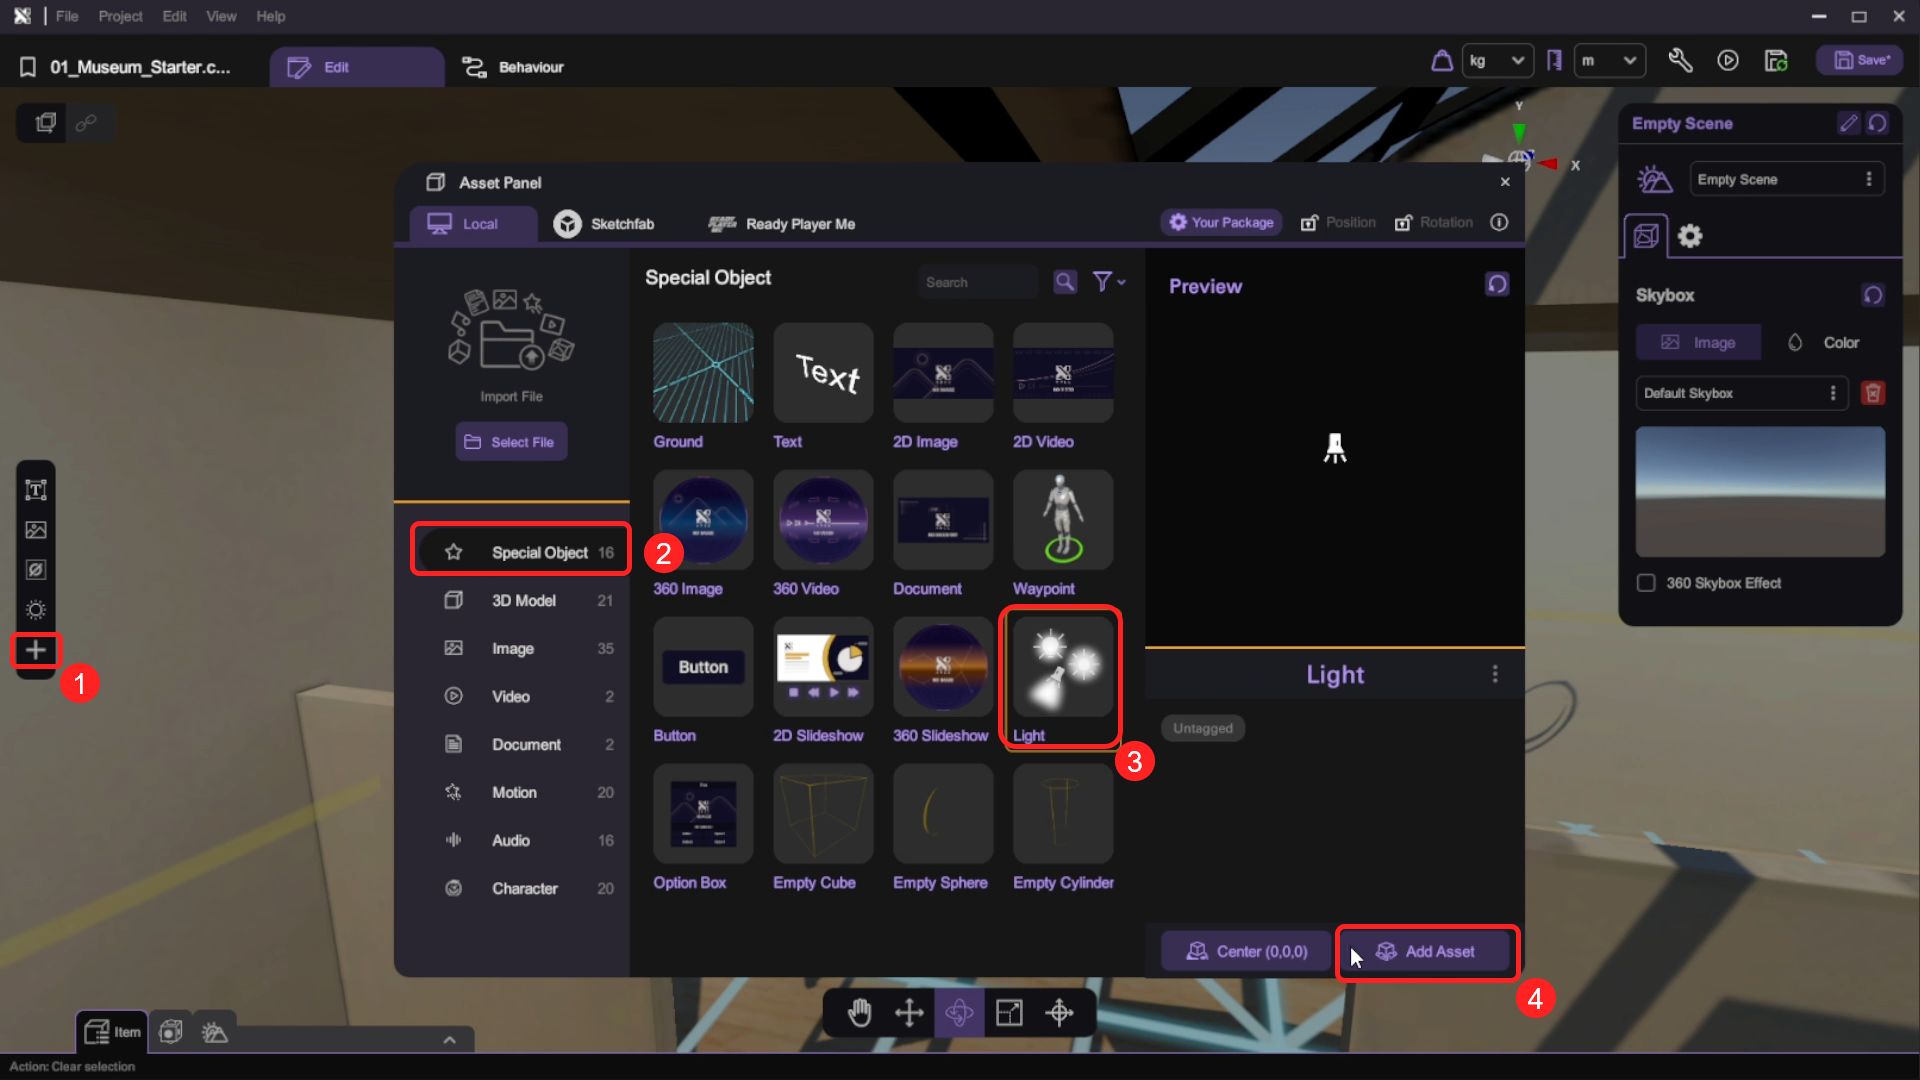
- Use the transform tools (move/rotate/scale) to place the light object inside the spotlight 3D model object.
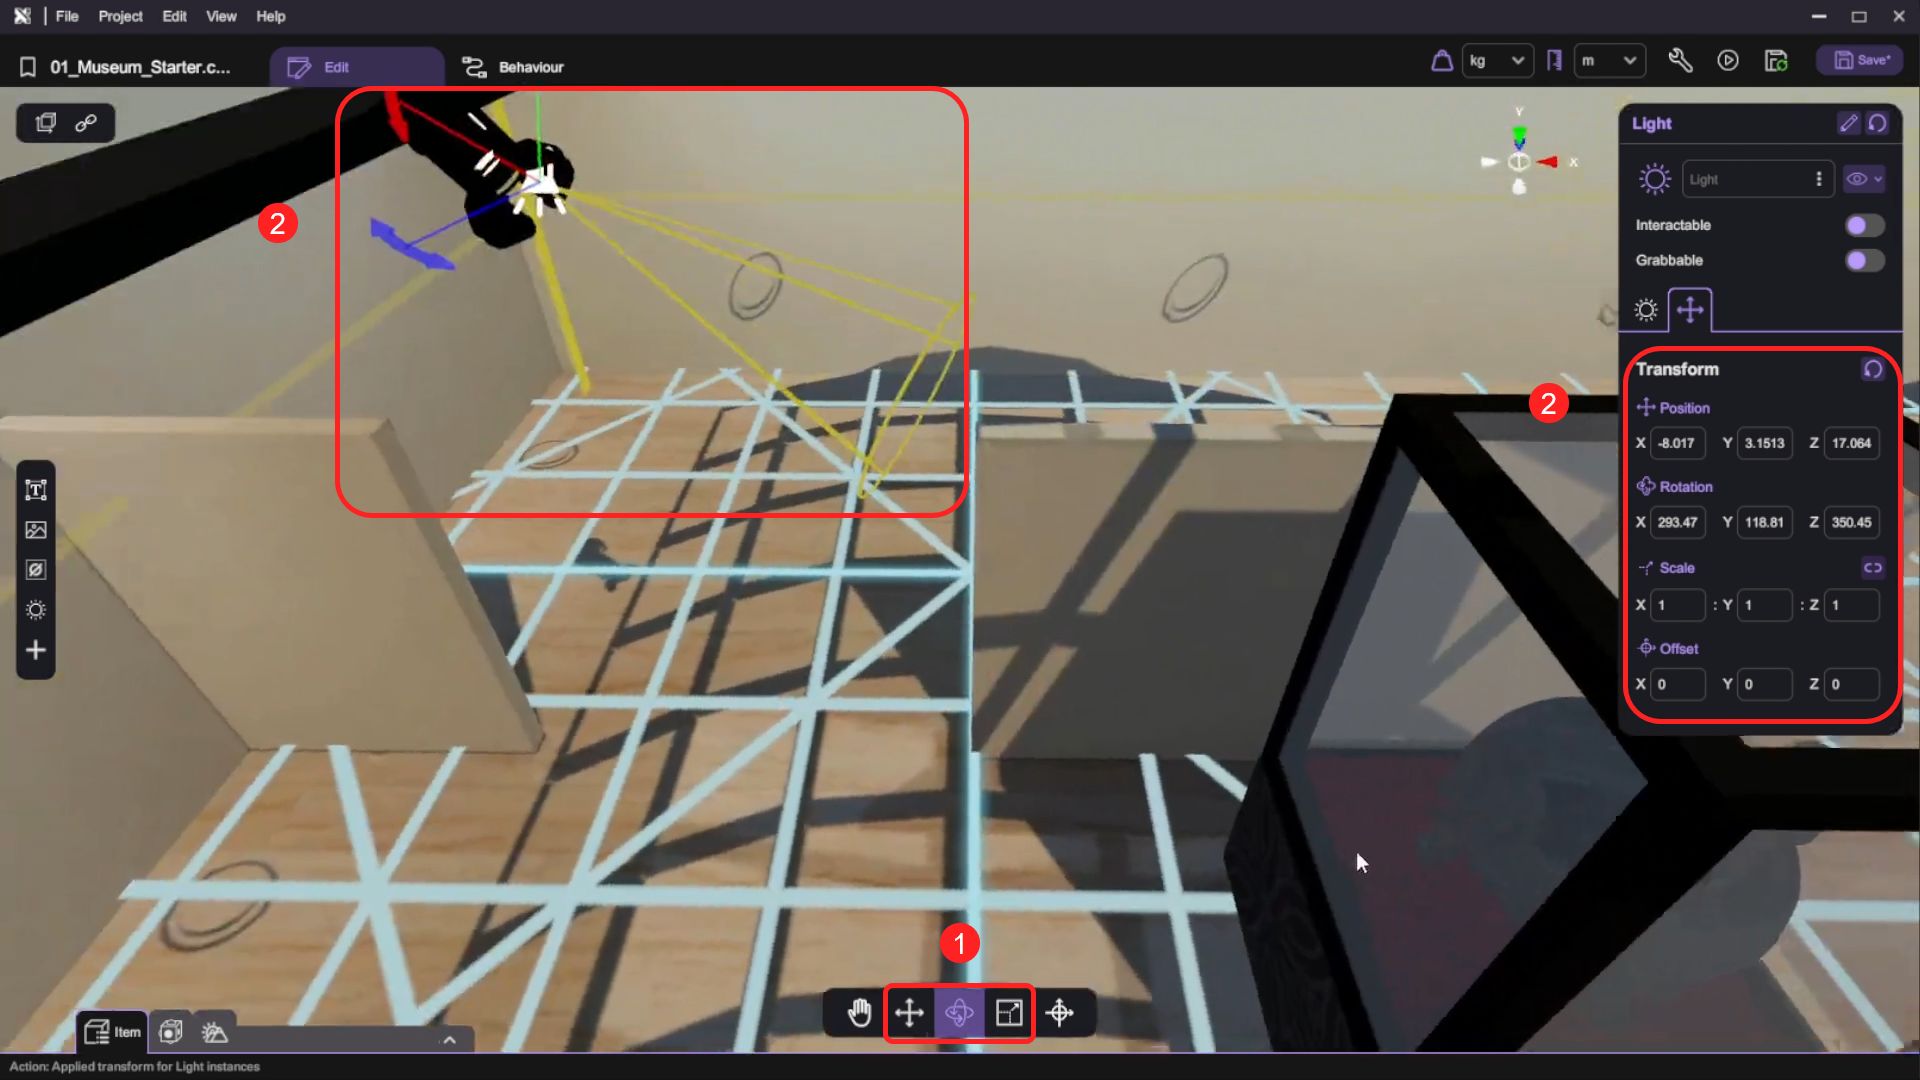
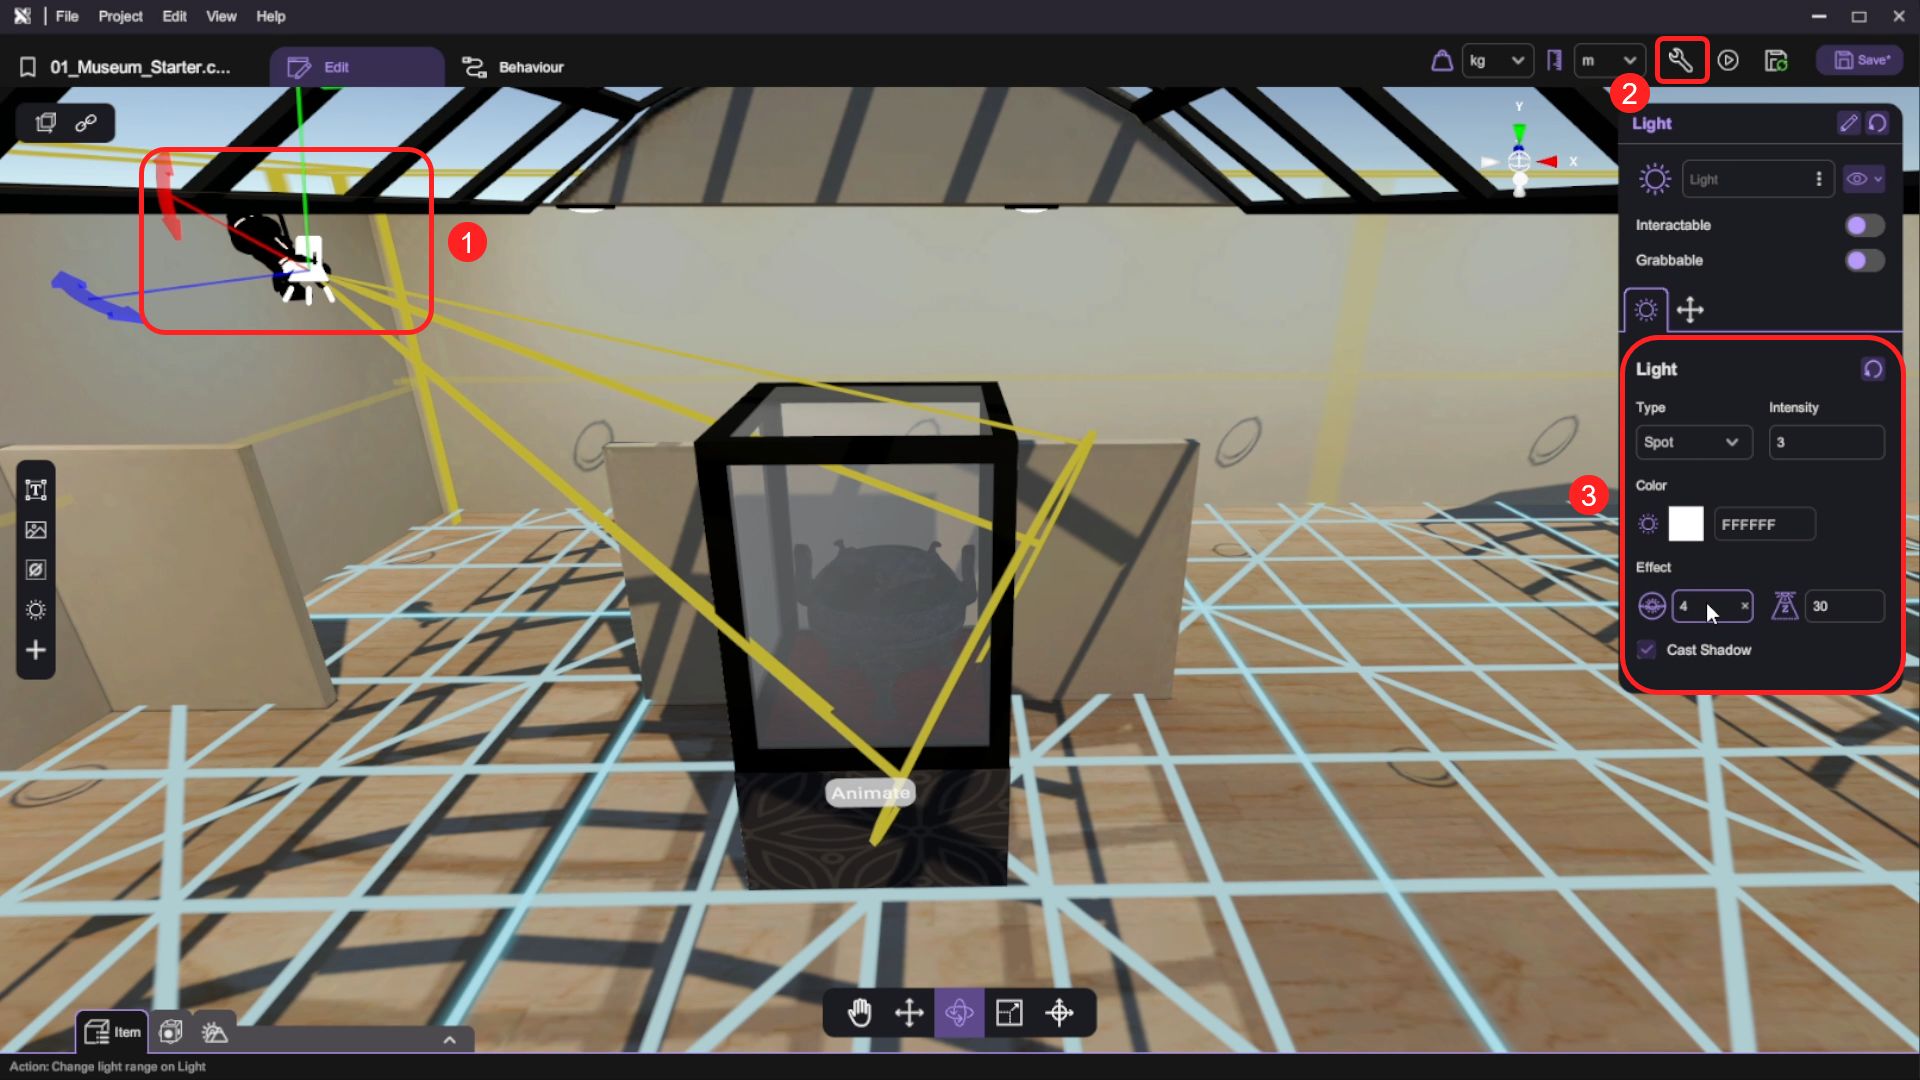
- Open the "Inspector" and set the light type to "Spot", increase the Light Intensity, Light Angle values and set the Light Color to white.
Add Light Control Panel using Option Box Object
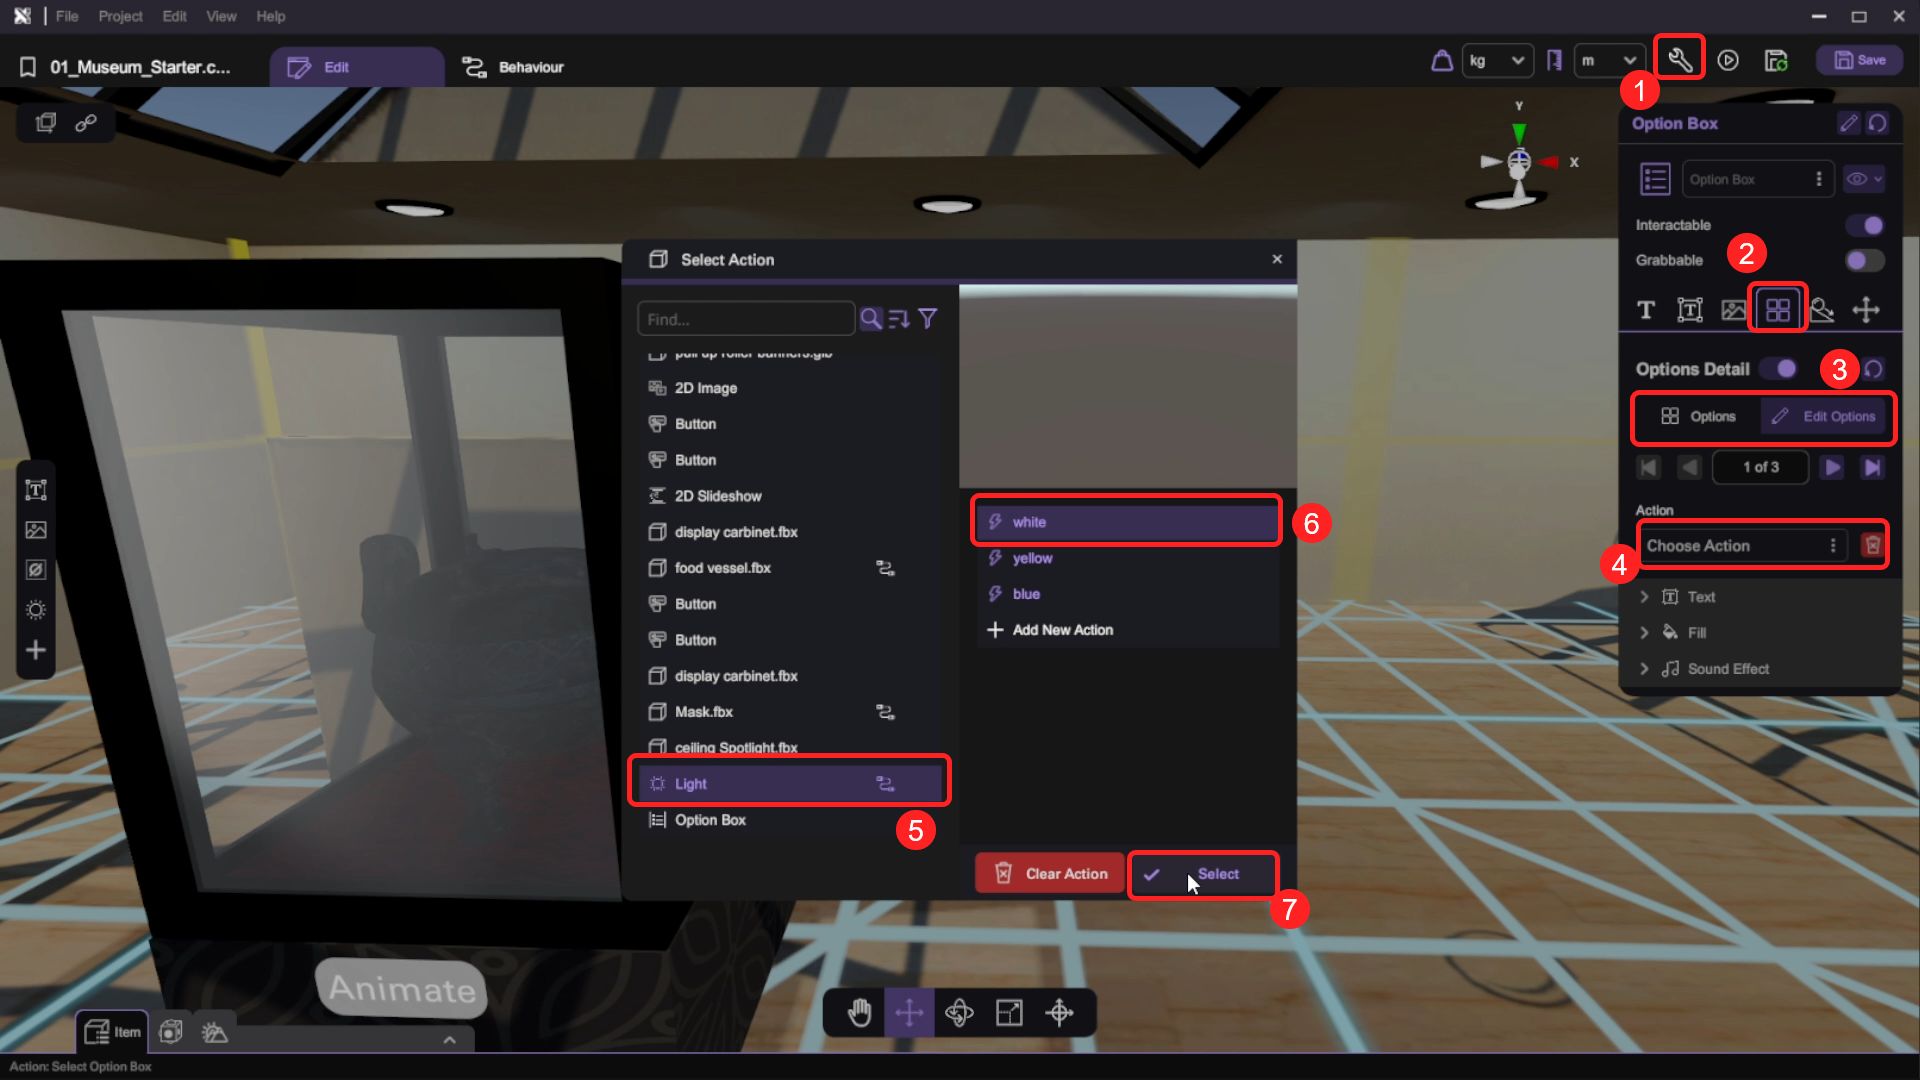
- Open the "Asset Panel" and from the "Special Objects" tab, select and add a "Option Box" to the scene.

- Use the transform tools (move/rotate/scale) to place the option box to the center of the front wall between the two display cabinet objects. Open the "Inspector" and set up the details of the option box object. Under "Options" section in "Options Detail" tab, delete one option to make the "Total Options" to "3" to create 3 buttons on the option box, and click the Edit Options buttons next to the "Options" to switch between different option details.
We added 3 options to this option box object, each will be set up to call an action to change the light color of the light object.
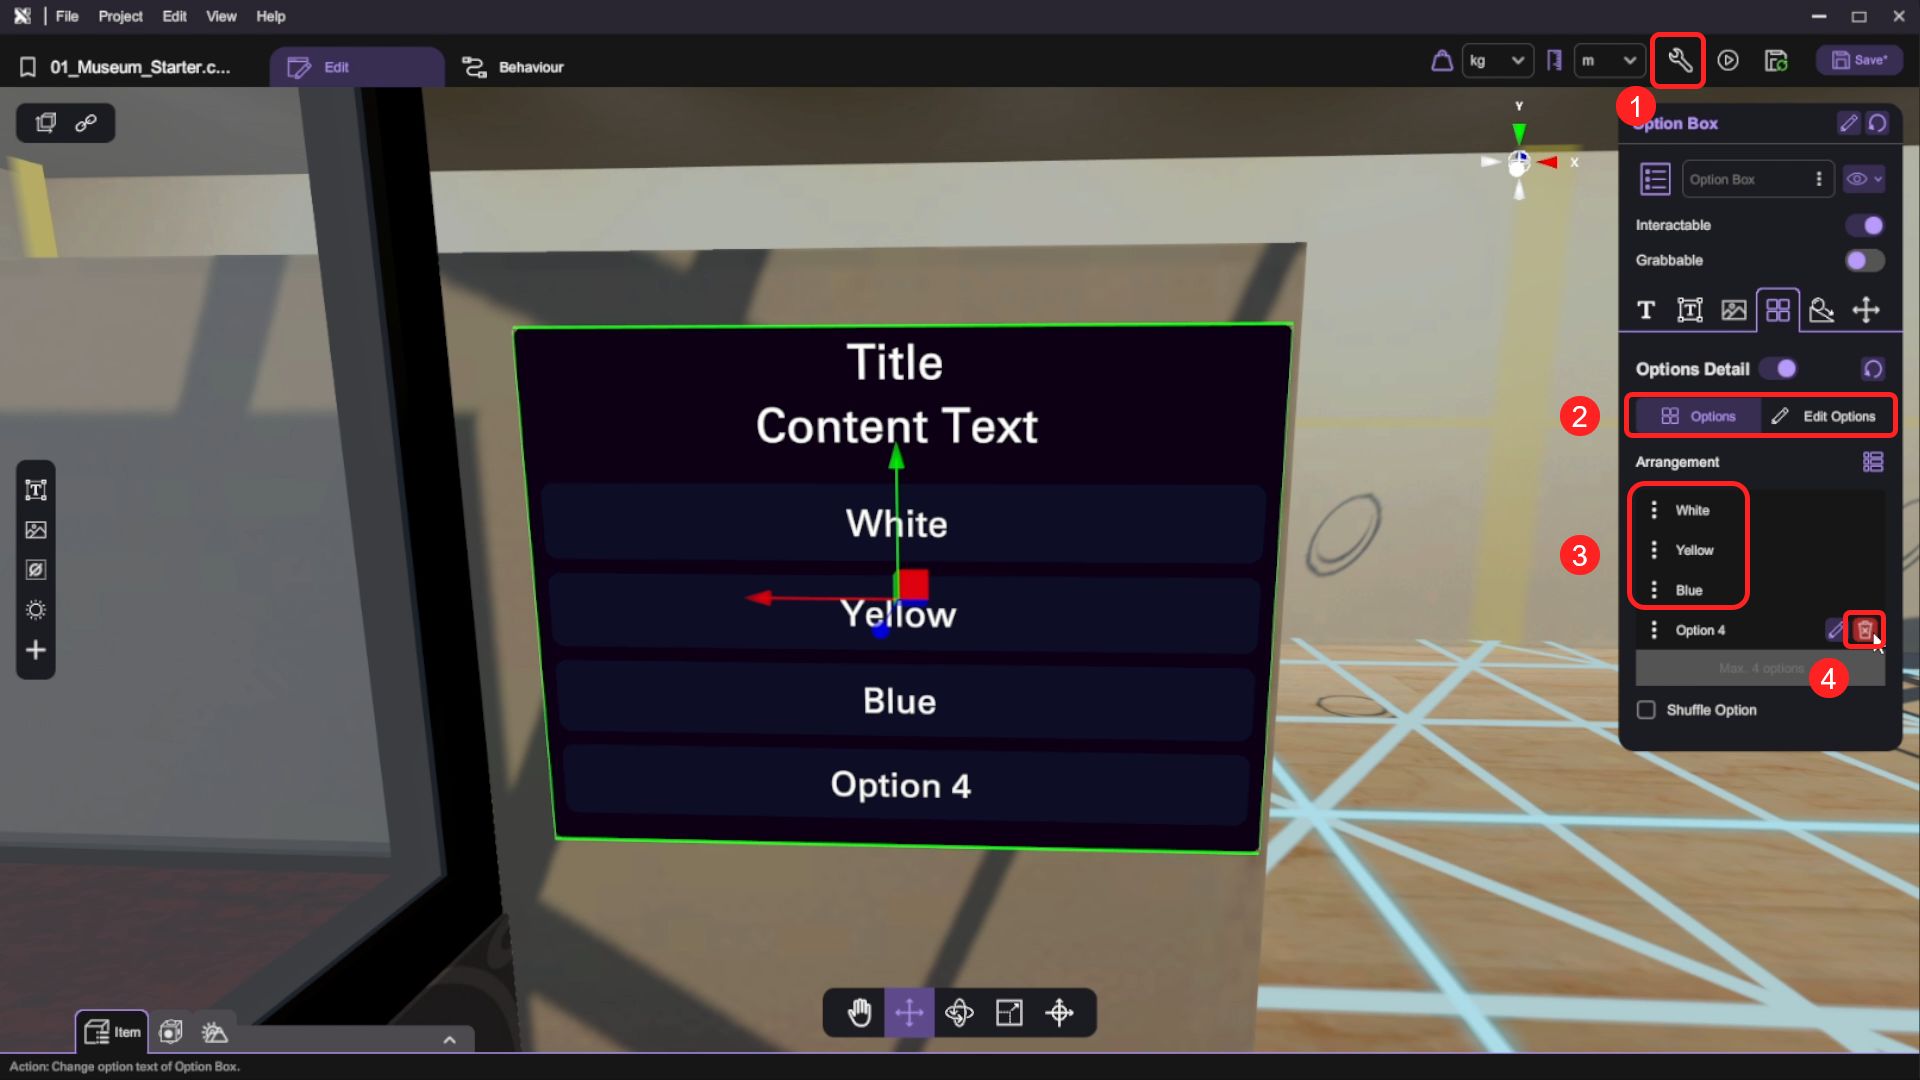
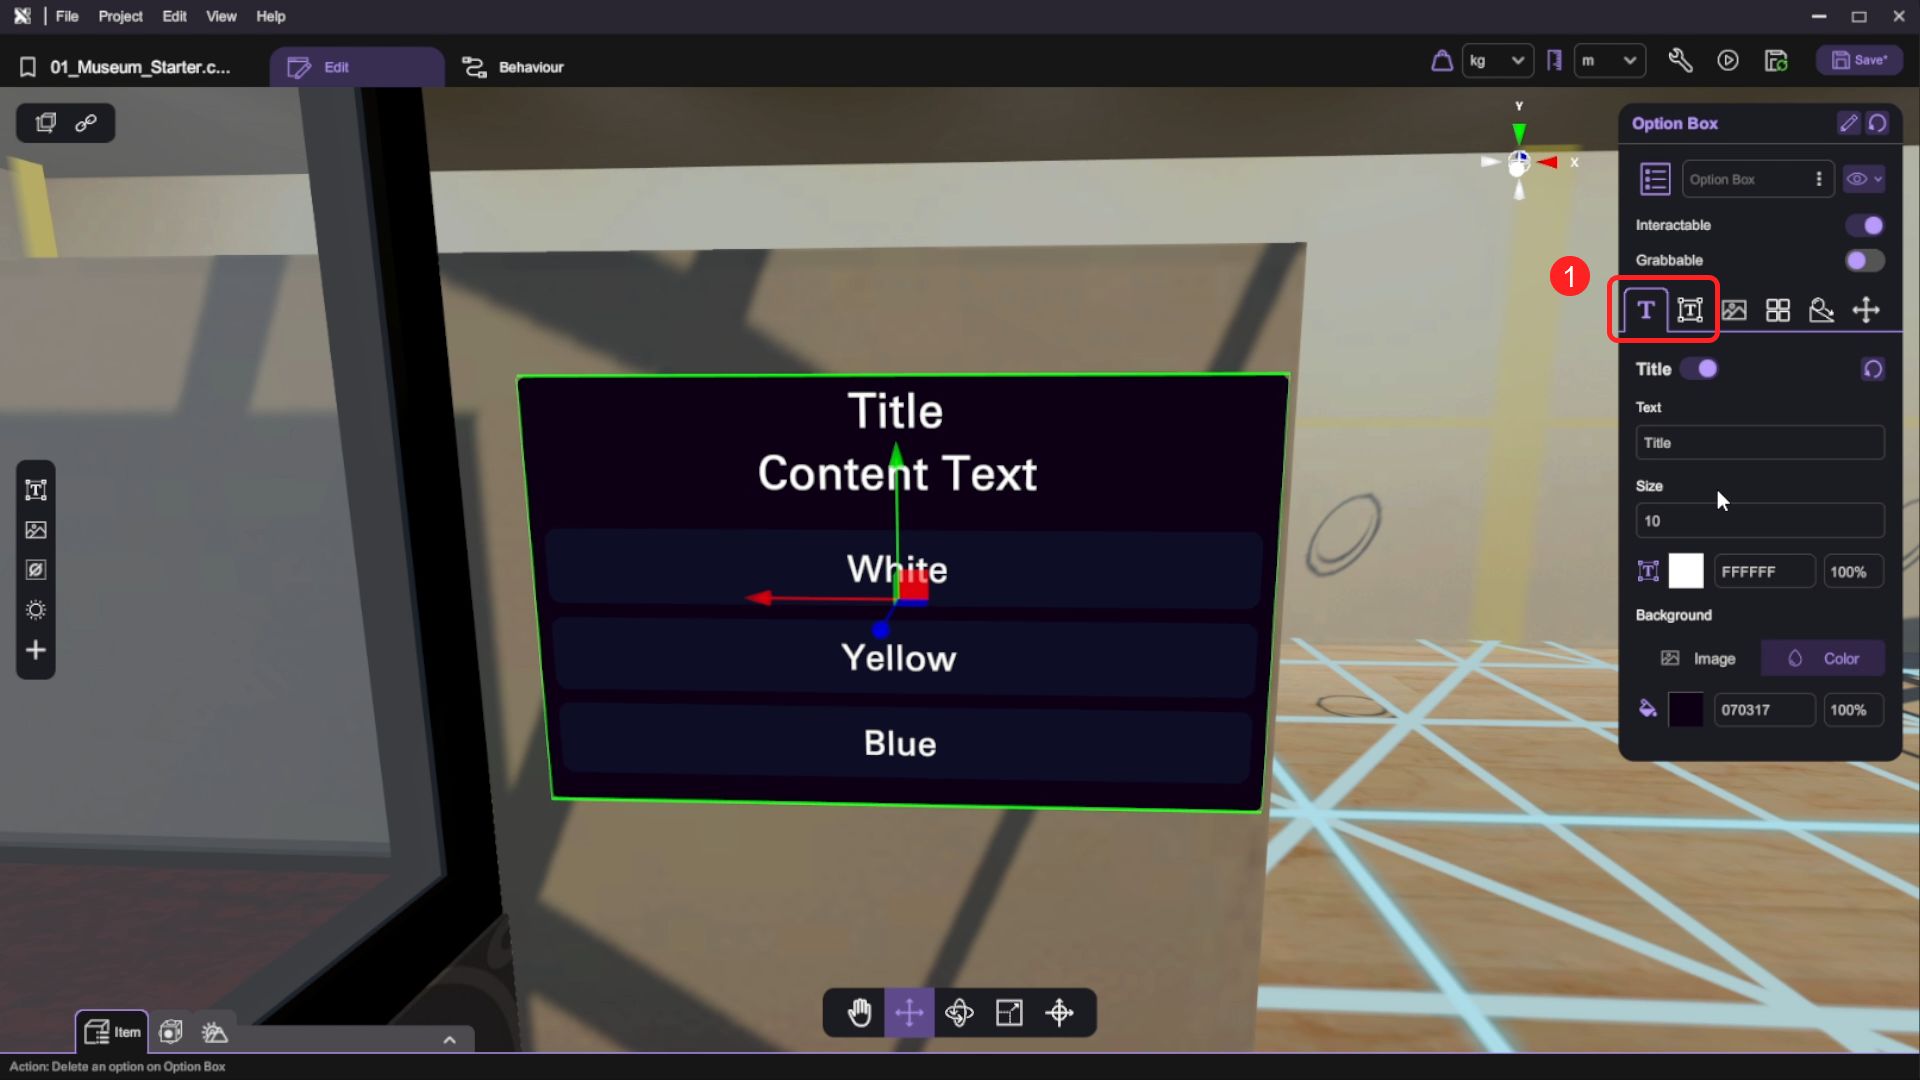
- Set the Title and Content Text in the "Inspector".
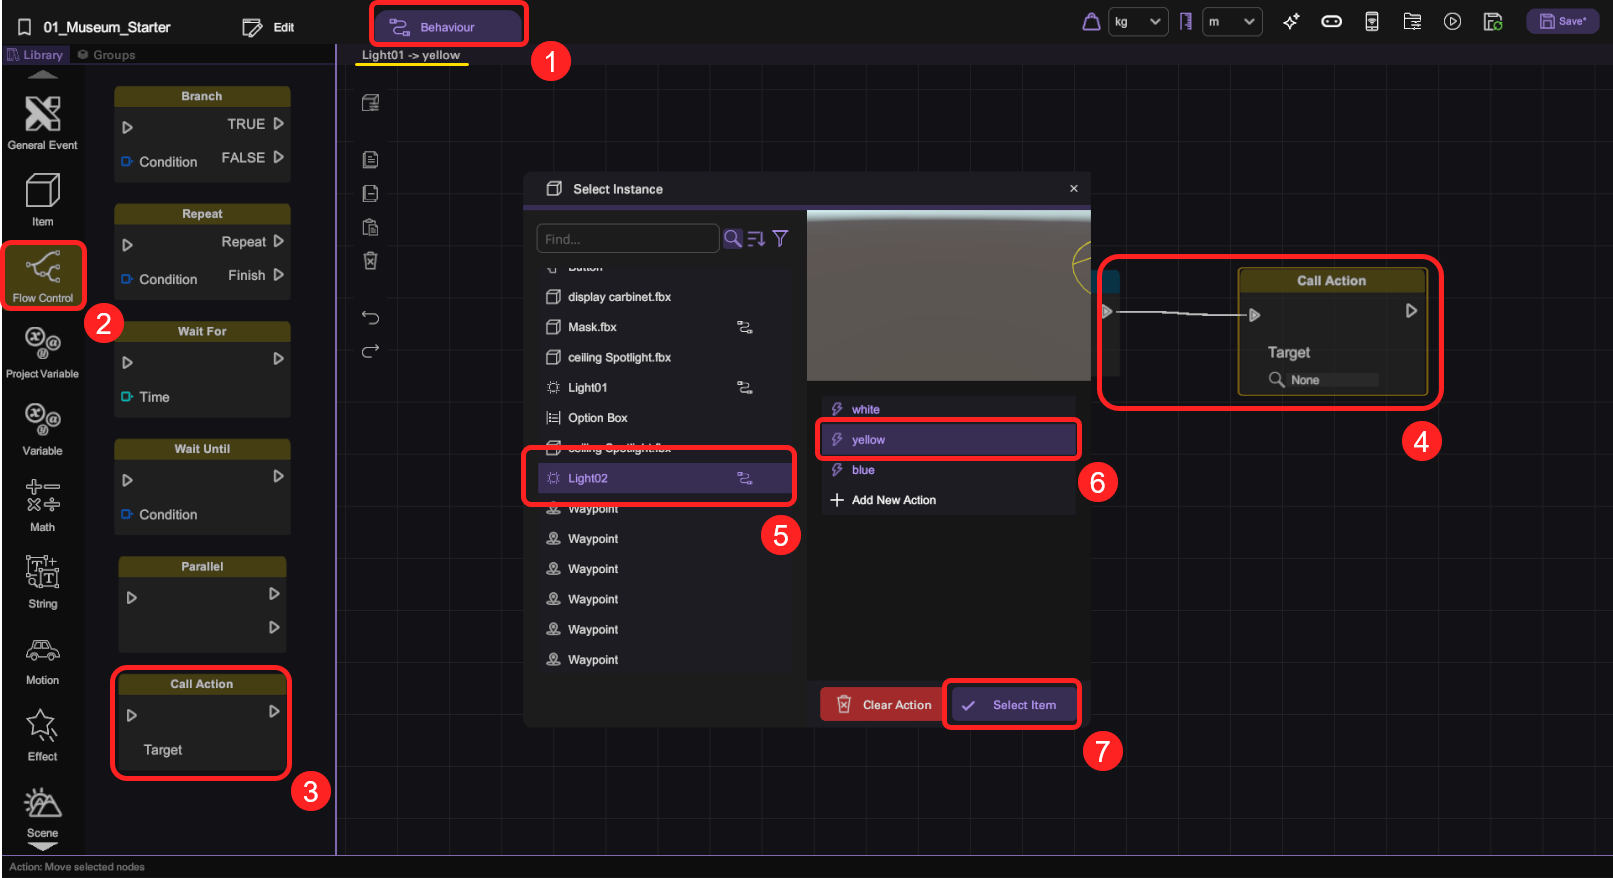
- Select the light and open its behaviour panel. Create 3 new actions and name them "white", "yellow", and "blue".
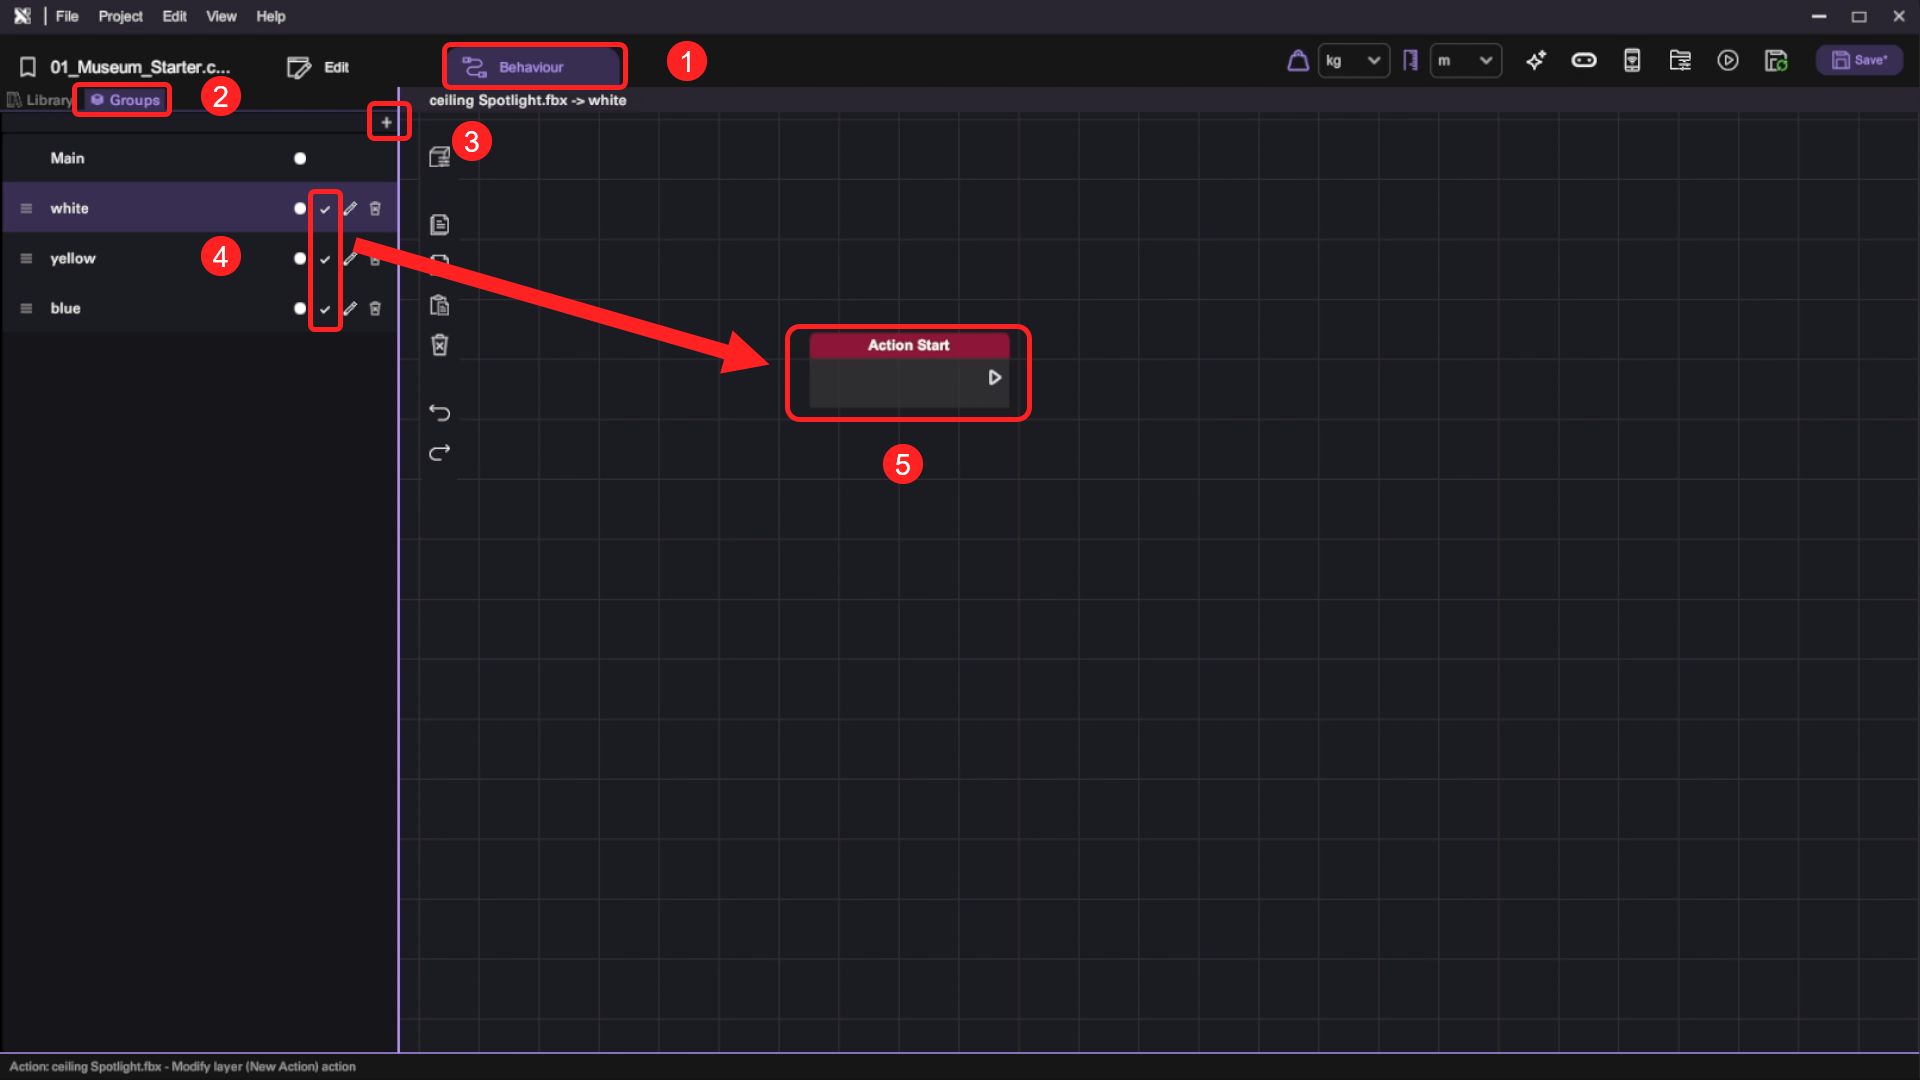
- Select the "yellow" action, then switch to the behaviour library, drag and drop a "Color" block under the "Math" category to the behaviour canvas under the "Action Start" block. Set the "B" (blue) value of the Color block to 0, the color preview under the "Output" node should show a yellow color.
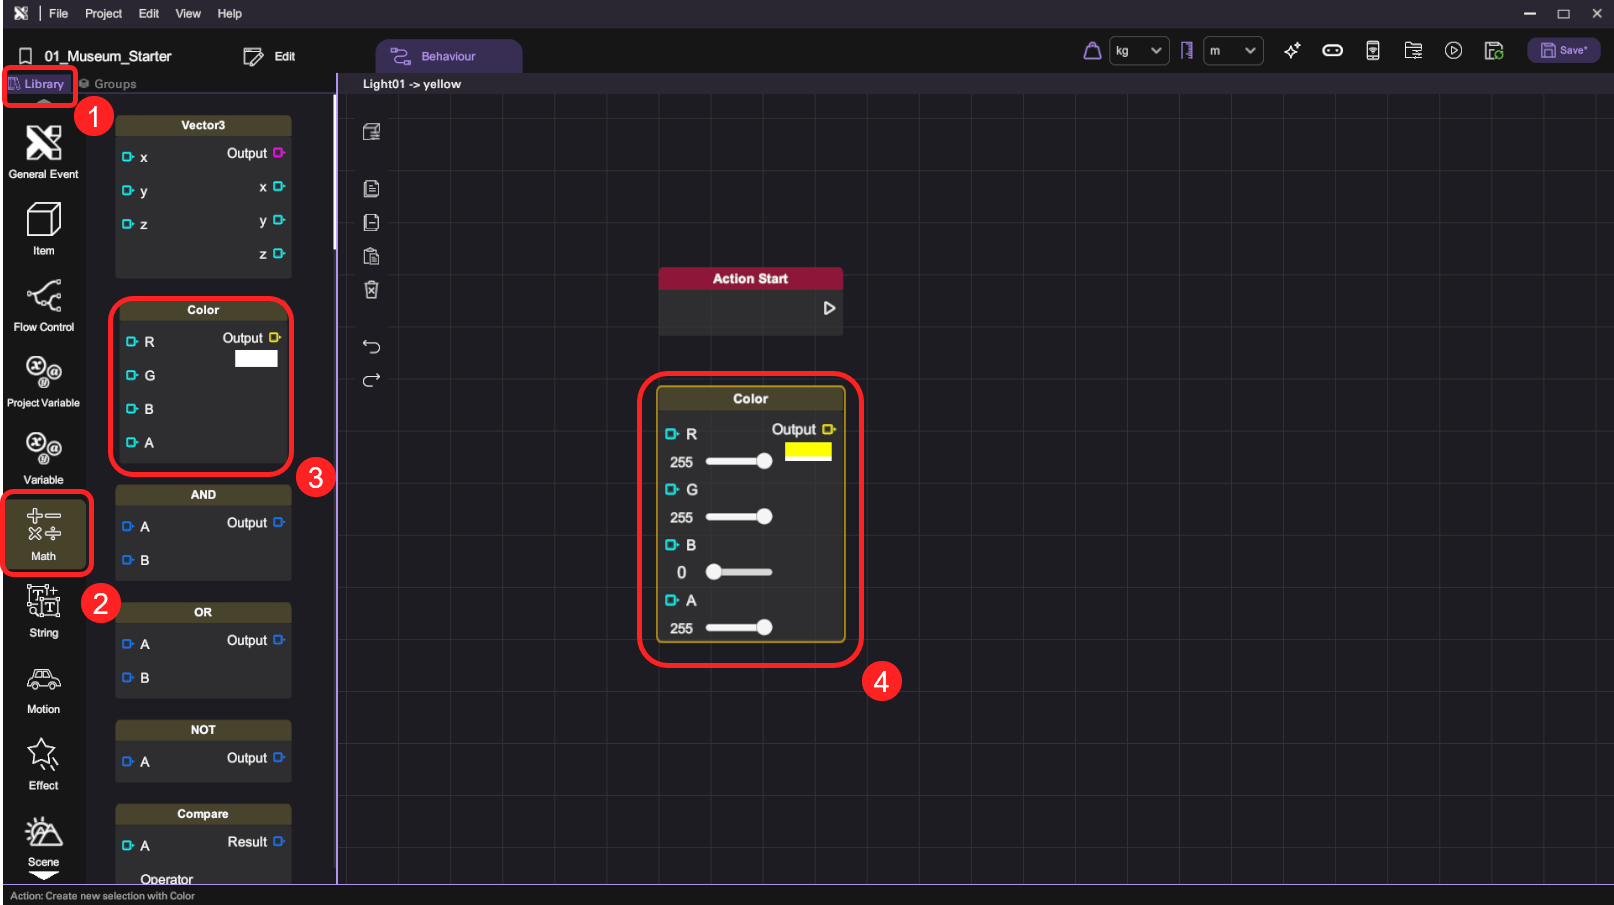
- Change to the "Light" category then drag and drop a "Set Light Property" block to the canvas. Connect the "Action Start" block's out flow node to the "Set Light Property" block's in flow node, then connect the "Color" block's "Output" node to the "Set Light Property" block's "Color" input node.

-
Repeat the same procedure to set up the "white" and "blue" actions.
-
Select the option box object and open its "Inspector". For the first option "White", select the light object's "white" action for its "Action" under "Option Detail". Switch to the "Yellow" and "Blue" options and repeat the procedure to set up their corresponding actions.
-
Press the "Play" button and test your scene, the spotlight will change color when you select different options on the option box. Use the "Esc" button to return to scene editing after your testing.
-
Duplicate the spotlight and light objects, then position the duplicated set to the ceiling pointing at the display cabinet on the right-side.
-
Go back to select the light object on the left-side, open its behaviour panel and select the "yellow" action you've configured earlier. Switch to behaviour library, drag and drop the "Call Action" block under the "Flow Control" category to the canvas, and append it behind the "Set Color" block. Select the duplicated light object's "yellow" action under "Call Action" block's "Target Action".
tipThis call action will change the light color of the duplicated light object, meaning that selecting the option box's light color options will change light color on both lights simultaneously.
-
Repeat the same procedure to set up the "white" and "blue" actions.
-
Press the "Play" button and test your scene again, you can see both lights changing color simultaneously when the corresponding option box button is selected.
Add Point of Interest
Introducing Point of Interest object in this section. This will allow users to interact with specific locations, enabling teleportation to designated spots within the scene, thereby enhancing navigation and user experience.
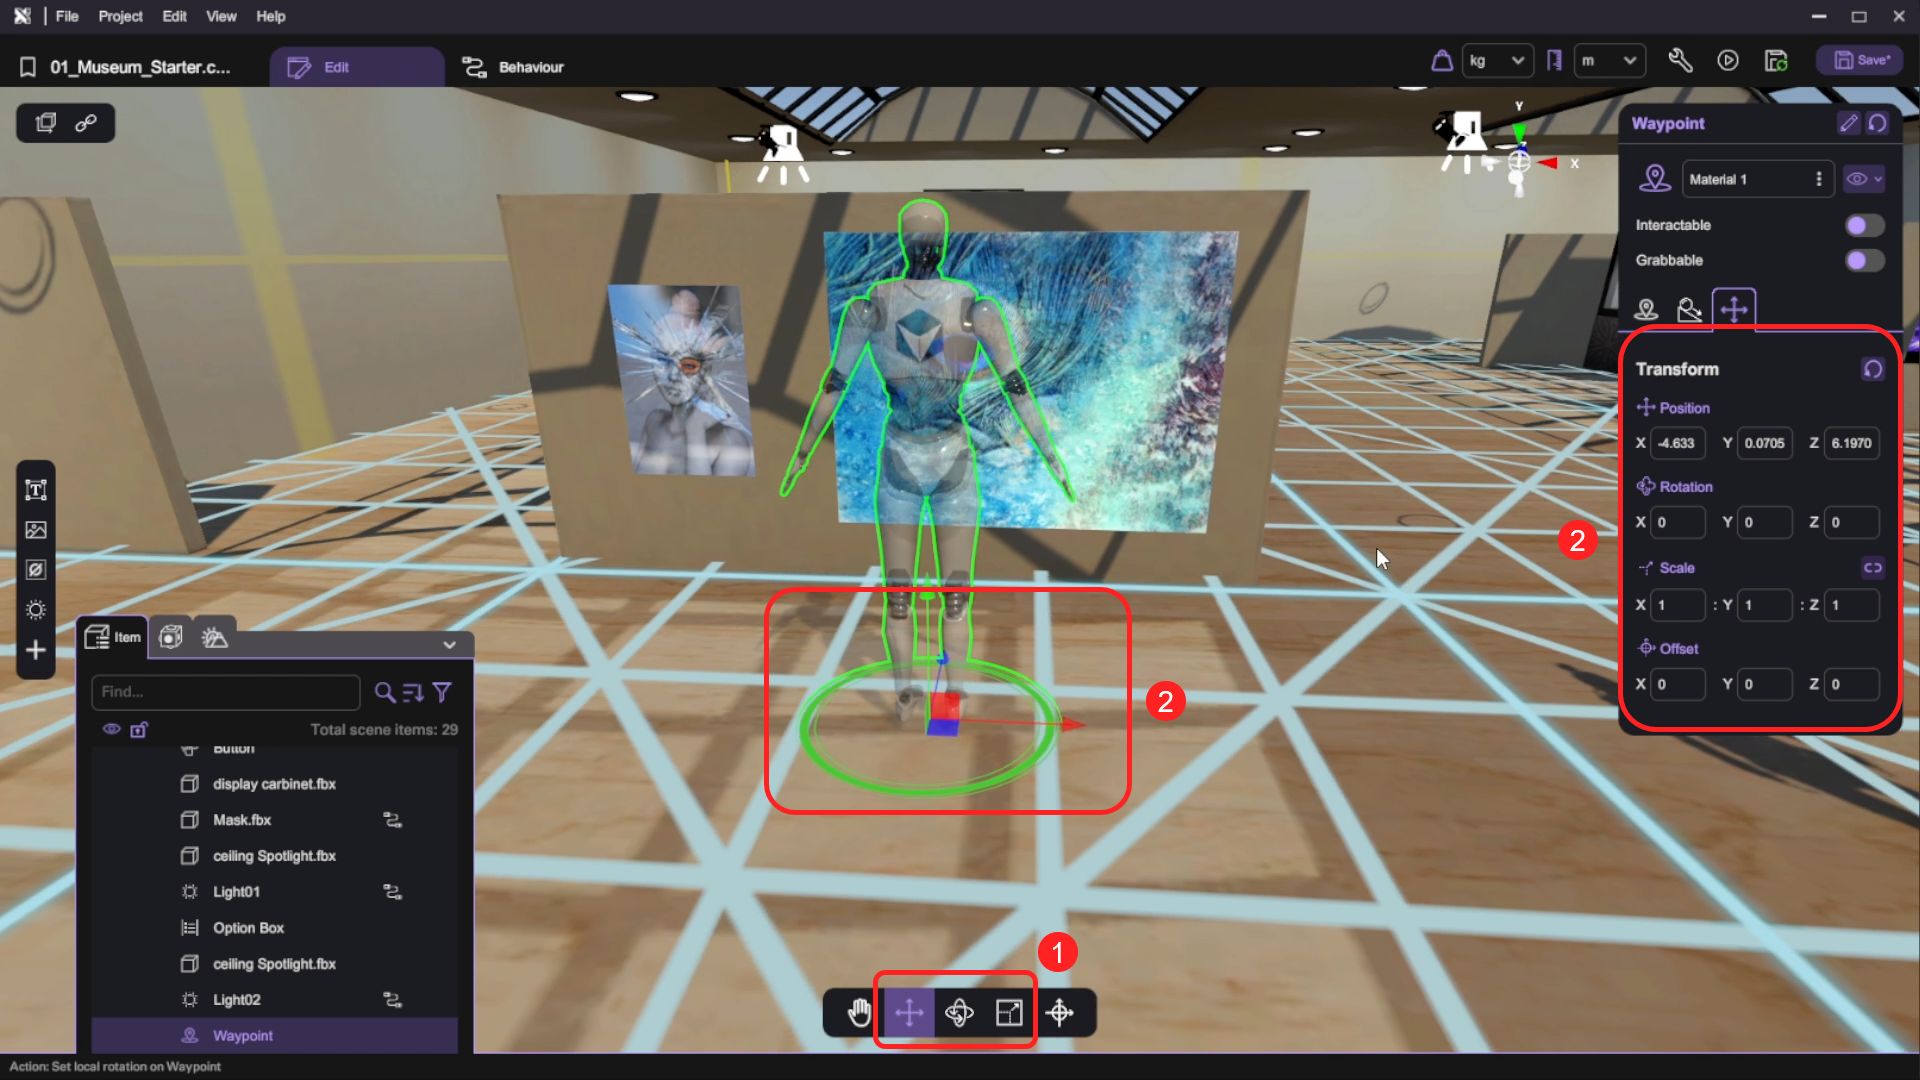
- Open the "Asset Panel" and from the "Special Objects" tab, select and add a "Point of Interest" to the scene.
-
Use the transform tools (move/rotate/scale) to place the point of interest object in front of and facing the slideshow object.
tipThe teleport tool will automatically snap to the point of interest object in XR mode. When clicked on it with the teleport tool, the user will be transitioned to the exact position and orientation defined by the point of interest object.
-
Deselect any objects in the scene and open the "Inspector" to configure the scene settings. Select "Auto" for the "Default Tool". This sets the Auto tool as the default interaction tool in XR mode.
tipWhen the auto tool is pointing upright, it displays a VR wand that can be used to select and click on interactable objects; when the auto tool is pointing to the ground object or a point of interest object, it changes into a teleport tool that transitions the user to the position indicated by the teleport ring. The auto tool can only be tested using XRCC's XR mode.