AnimalBuster Part 2 - Create a Bullet
Overview
You will build an interactive VR shooting game using XRCC in this tutorial. Please go through Animal Buster part 1 before this tutorial.
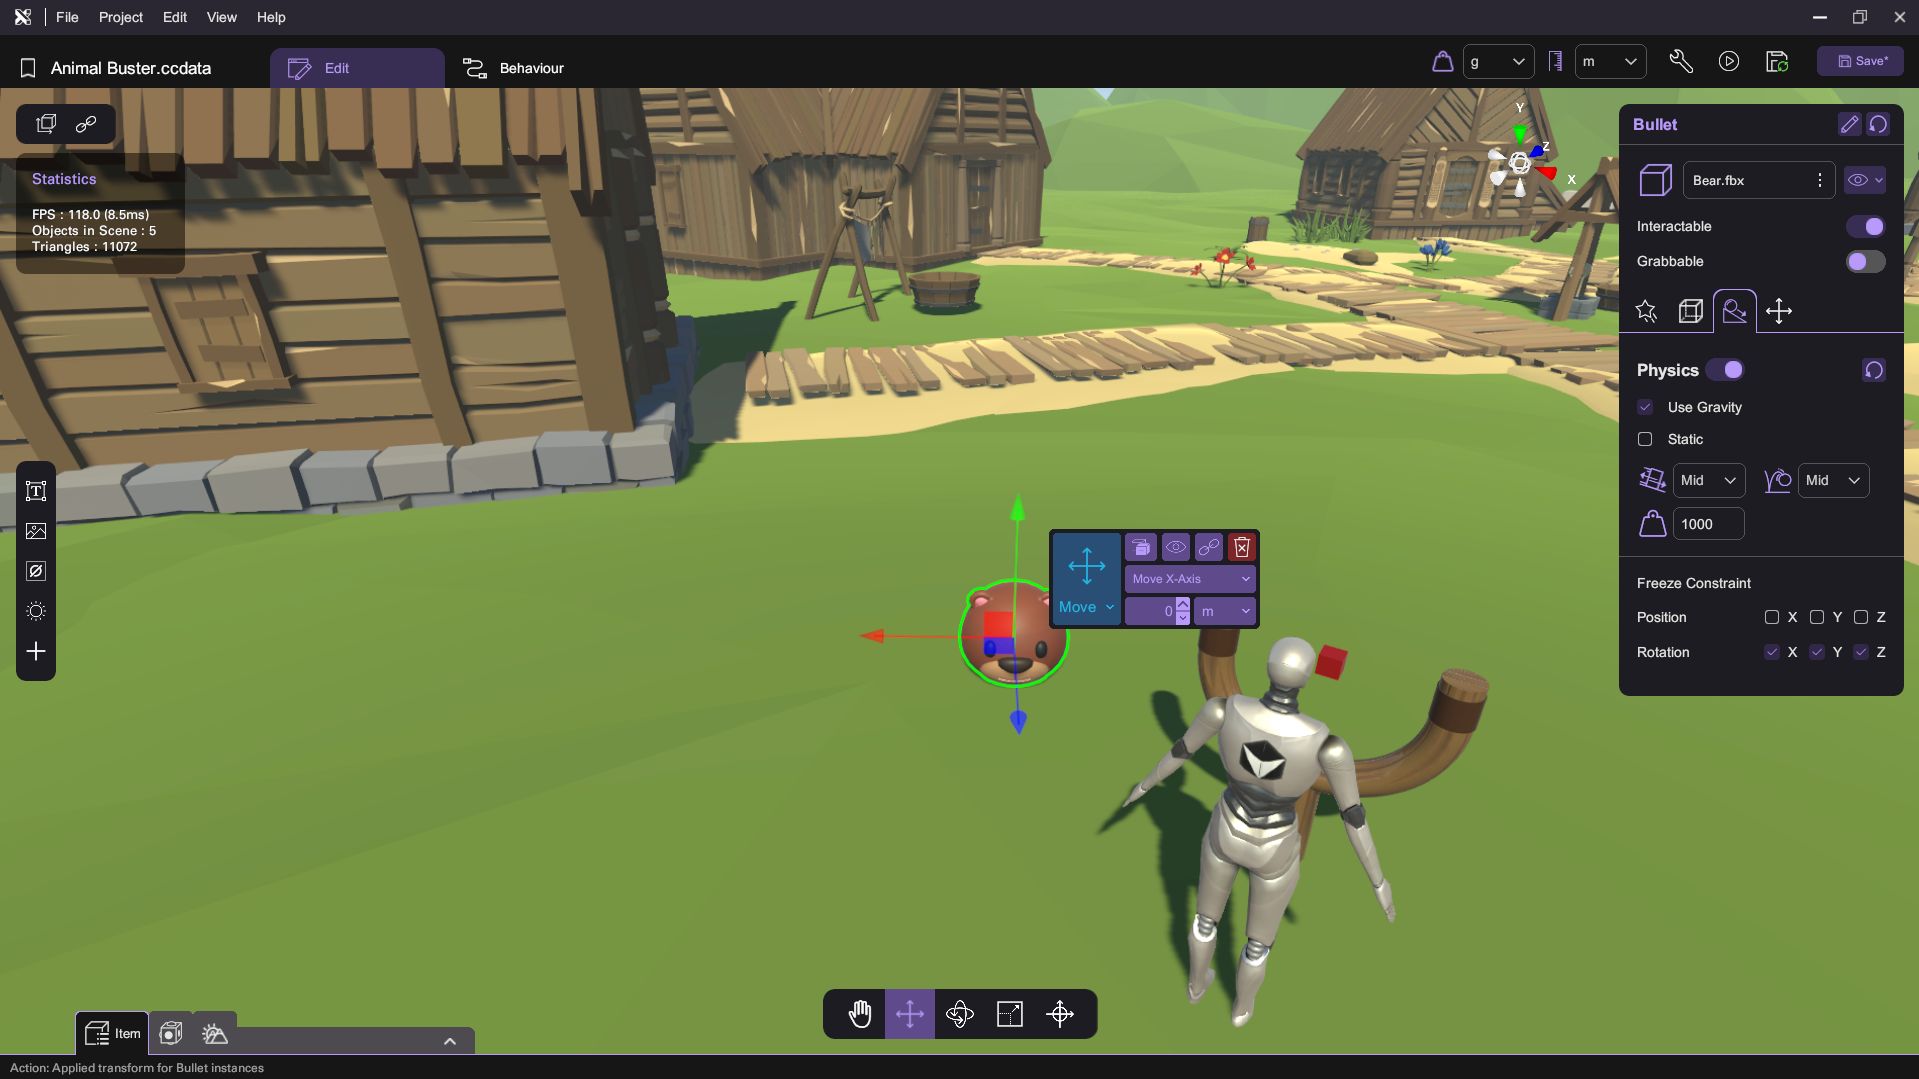
Step 1: Spawn the Bullet
- Open the Asset Panel:
- Navigate to the 3D Model category.
- Find the Bullet Model:
- Locate the Bullet model and spawn it at the World Center.
- Set Bullet Attributes:
- Enable the following attributes:
- Interactable
- Physics
- Use Gravity
- Lock the bullet's rotations.
- Enable the following attributes:
Step 2: Define Variables
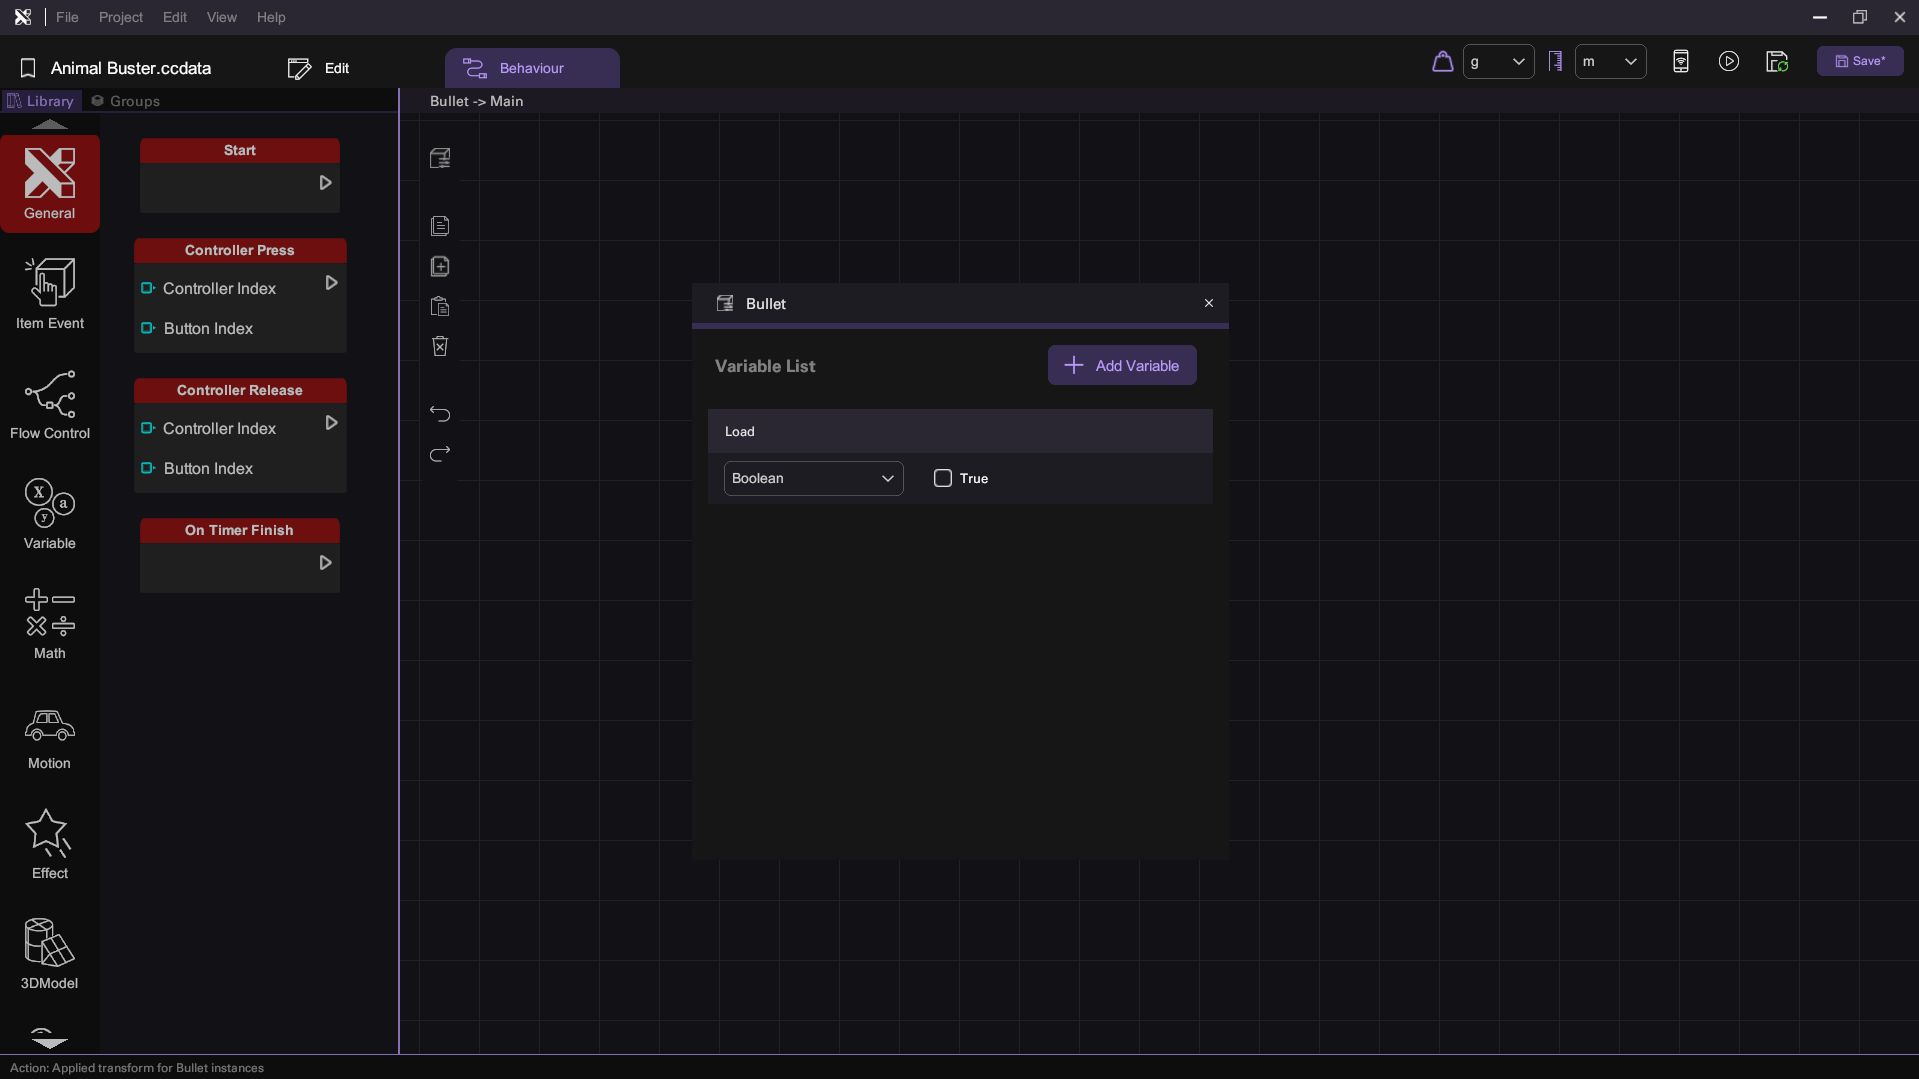
- Open the Behavior Tab:
- Click on the Variable Panel.
- Create a Boolean Variable:
- Define a boolean variable named Load.
- Set the default value to false.
Step 3: Create Bullet Actions
- Go to the Groups Tab:
- Define two new actions:
- Load Bullet
- Shoot Bullet
- Define two new actions:
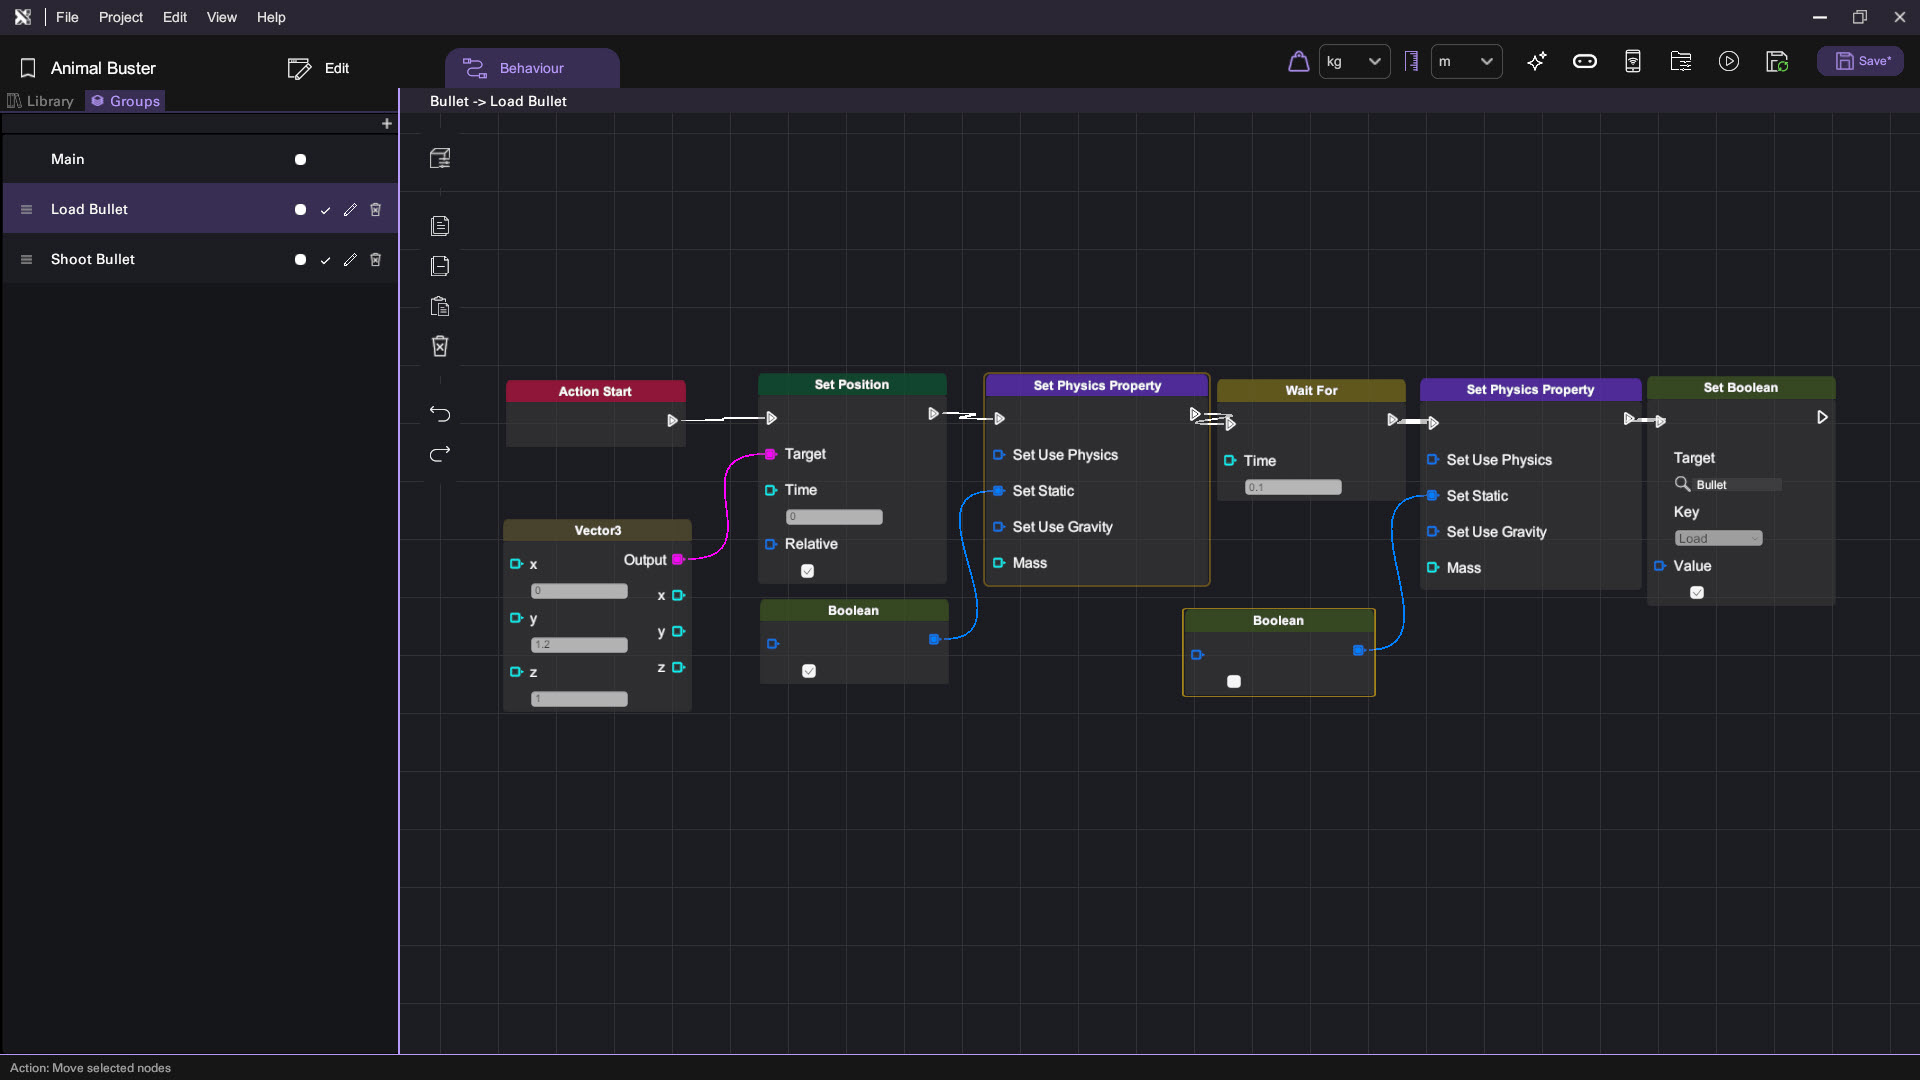
- Load Bullet Action:
- Click on the Load Bullet action to open its behavior.
- Drag the following nodes:
- Set Position (from Motion section)
- Vector3 (from Math section)
- Set the bullet position to 0, 1.2, 1 (the position of the slingshot pad).
- Drag the following nodes:
- Set Physics Property (from Physics section)
- Wait for (from Flow Control section)
- Set the wait time to 0.1 seconds.
- Change the bullet state to static, then non-static after 0.1 seconds.
- Drag a Set Boolean node from the Variable section to set the Load variable to true.
Step 4: Setup Slingshot Pad Behavior
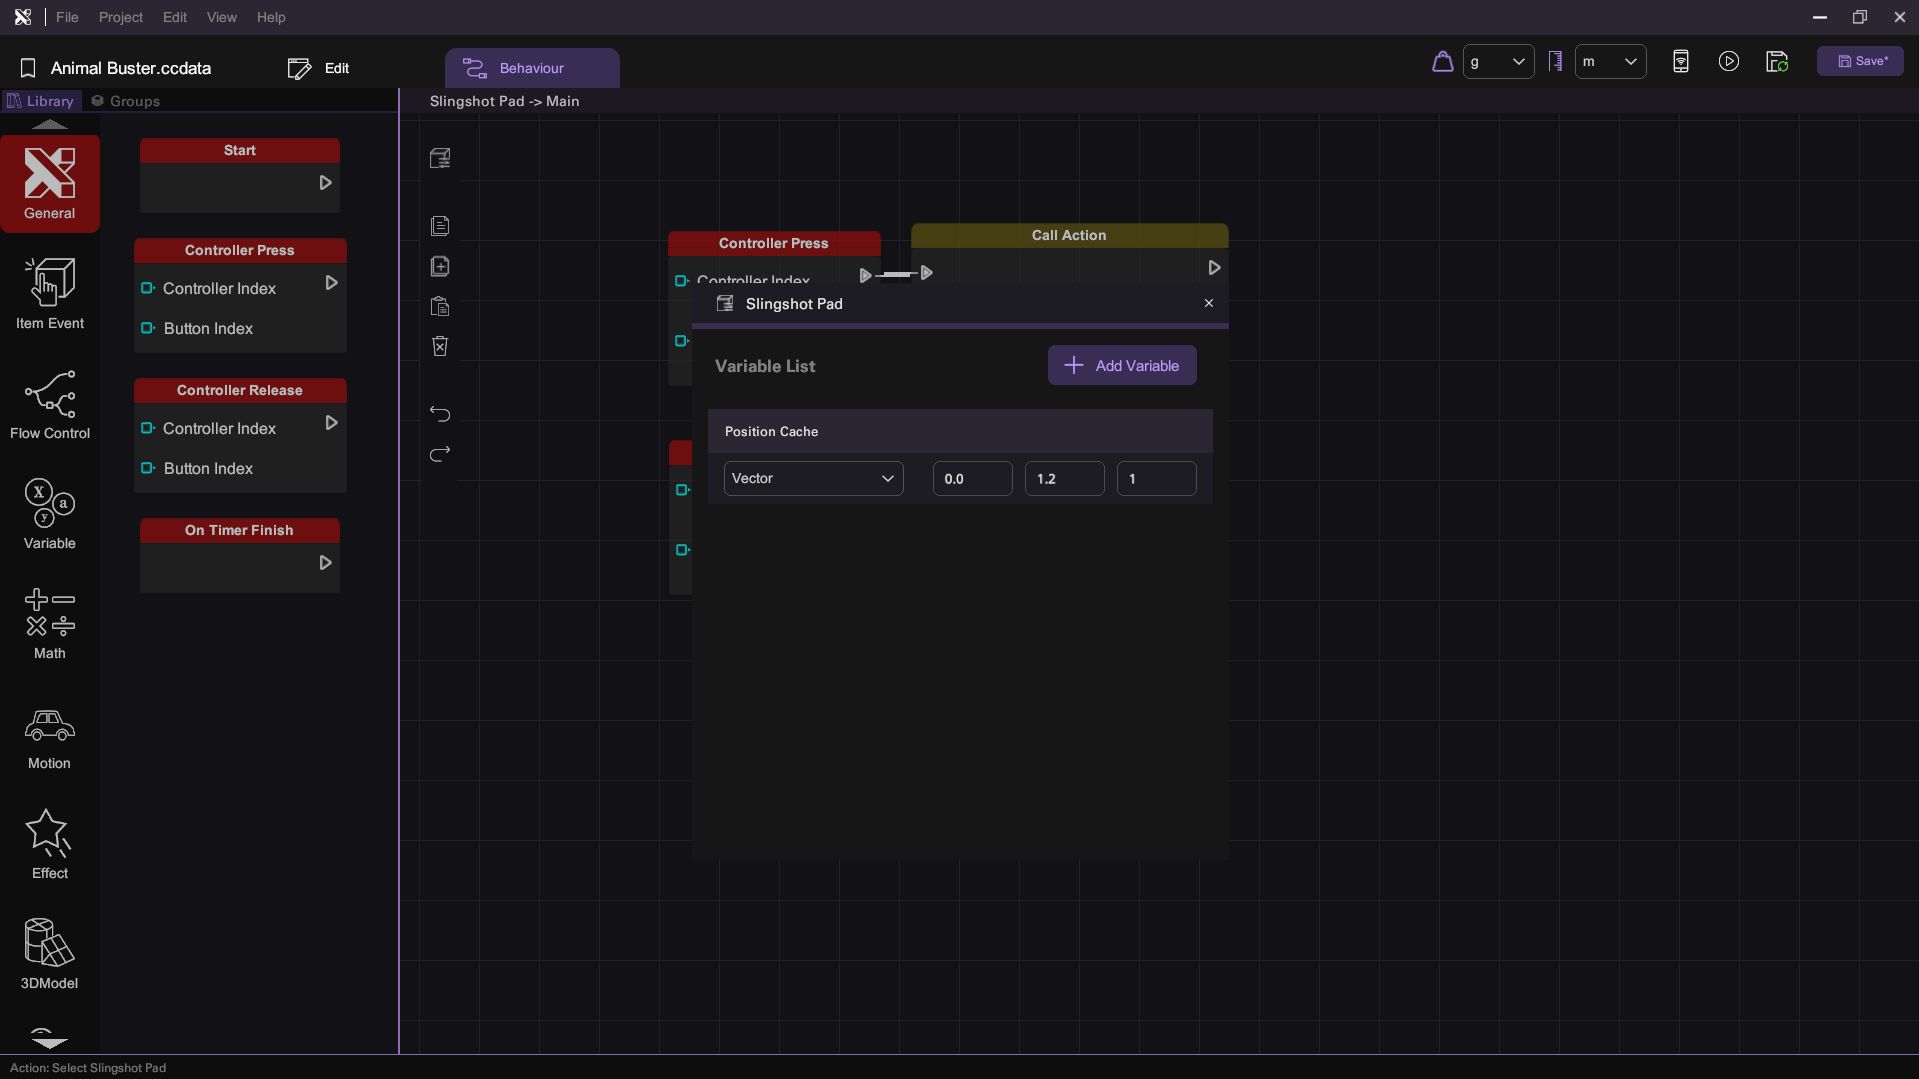
- Go to the Slingshot Pad Behavior:
- Define a Position Cache vector variable to store the position of the slingshot pad for distance calculations.
Step 5: Create Shoot Bullet Action
- Return to the Bullet Behavior:
- Select the Shoot Bullet action.
- Set Conditions for Shooting:
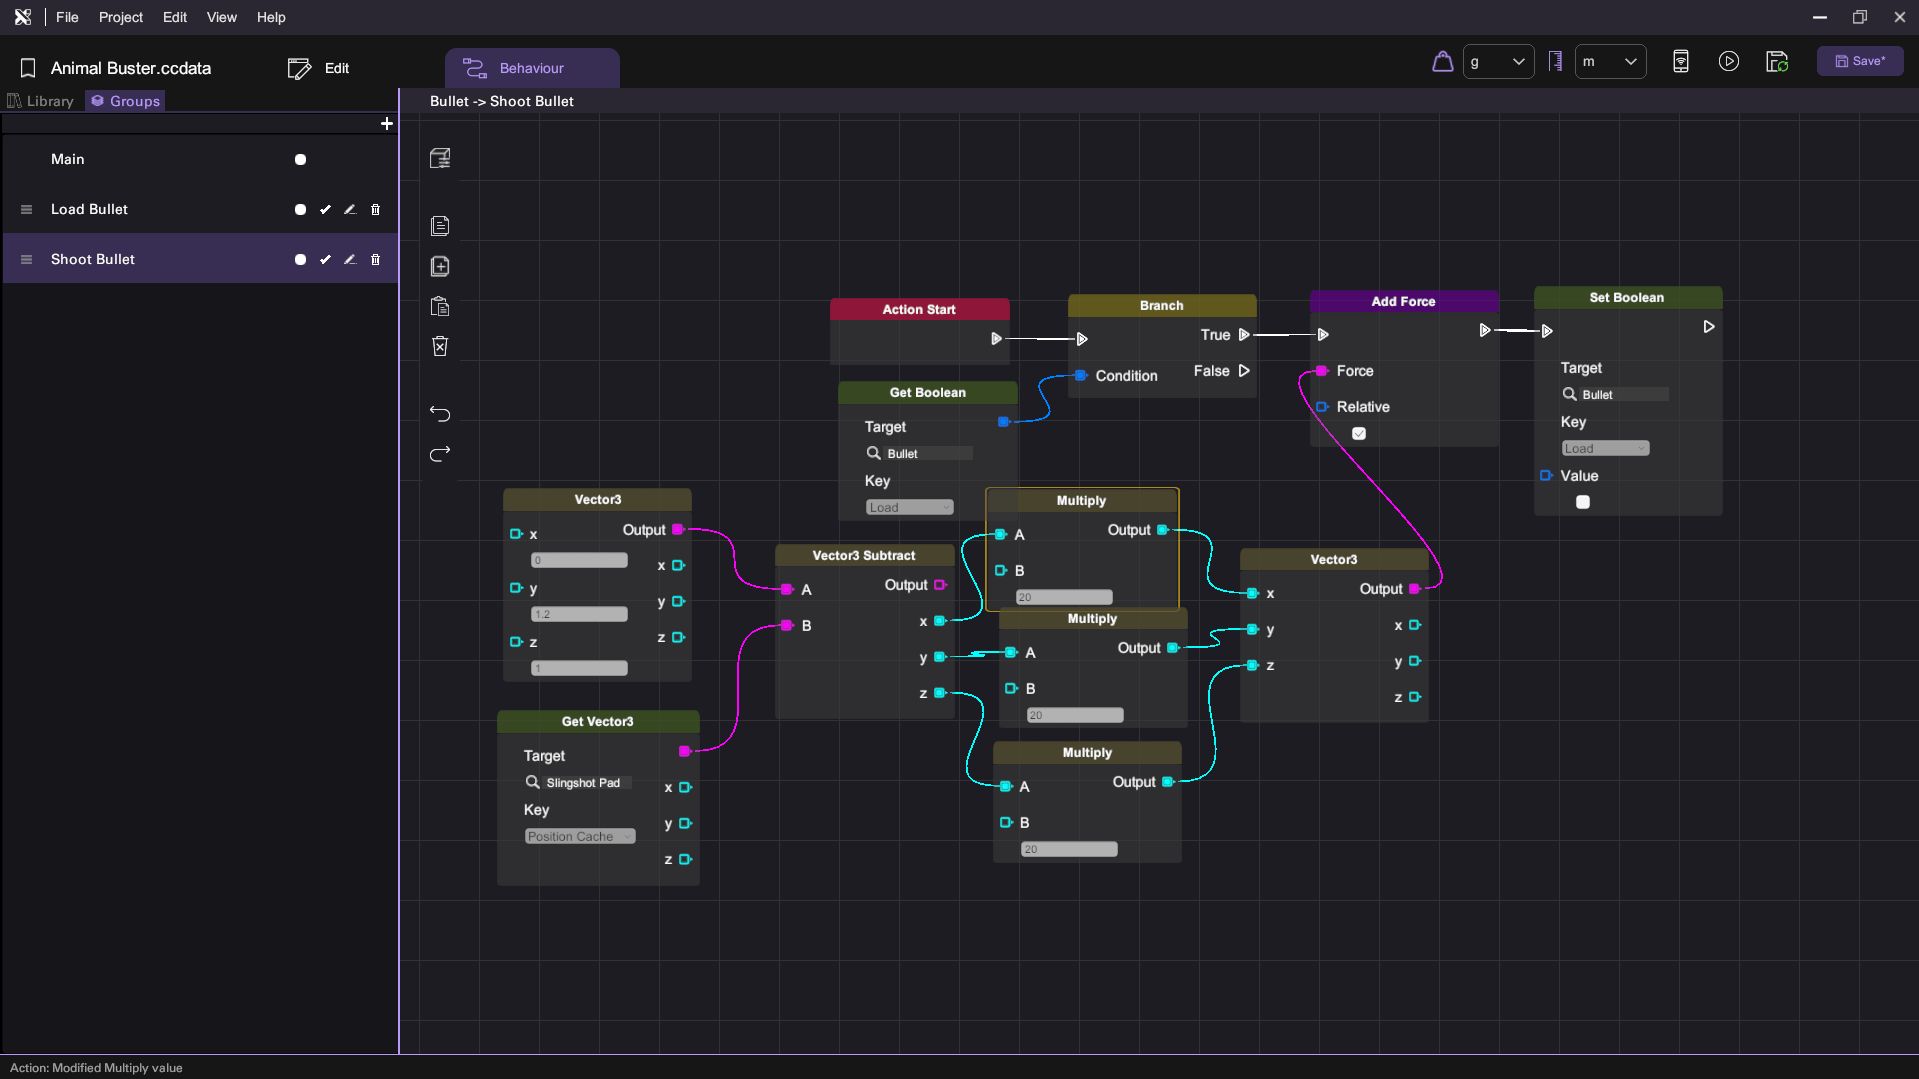
- Use a Branch node (from Flow Control section) and a Get Boolean node (from Variable section) to check if the bullet is loaded.
- Add Force to Bullet:
- Drag an Add Force node from the Physics section and set it to Close Relative.
- Use Get Vector3 to fetch the PositionCache variable from the Slingshot Pad.
- Subtract the bullet's position from the slingshot pad's position using Vector3Subtract (from Math section).
- Scale the resulting force using the Multiply node (from Math section) with a factor of 20.
- Connect this scaled force to the Force input of the Add Force node.
- Reset Load Variable:
- Drag a Set Boolean node to set the Load variable to false after shooting.
Step 6: Update Position Cache
- Return to the Slingshot Pad Behavior:
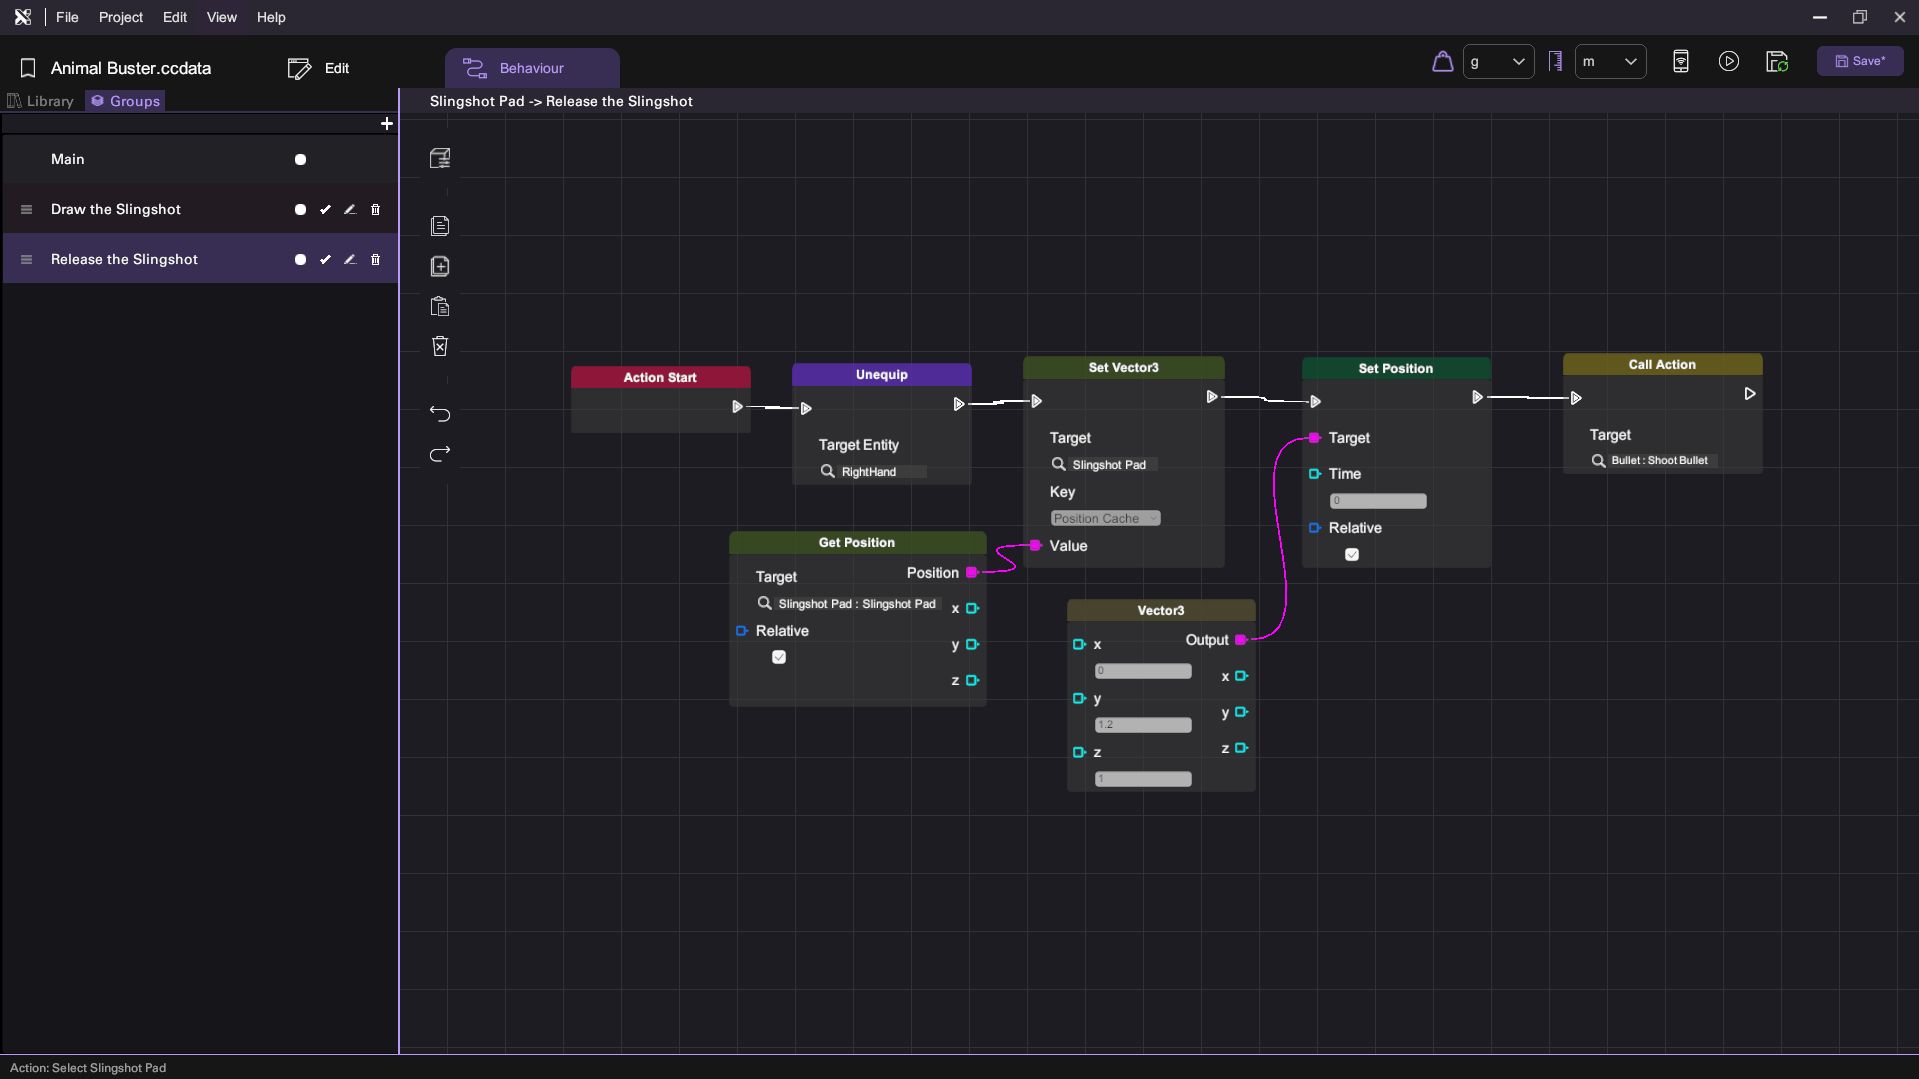
- Select the Release the Slingshot action.
- Use a Get Position node (from Variable section) to obtain the slingshot pad's position.
- Update the Position Cache using a Set Vector3 node (from Variable section).
- Finally, drag a Call Action node (from Flow Control section) and select the Shoot Bullet action.
Step 7: Create Load Bullet Button
- Go to the Edit Tab:
- In the Asset Panel, find the Special Object category.
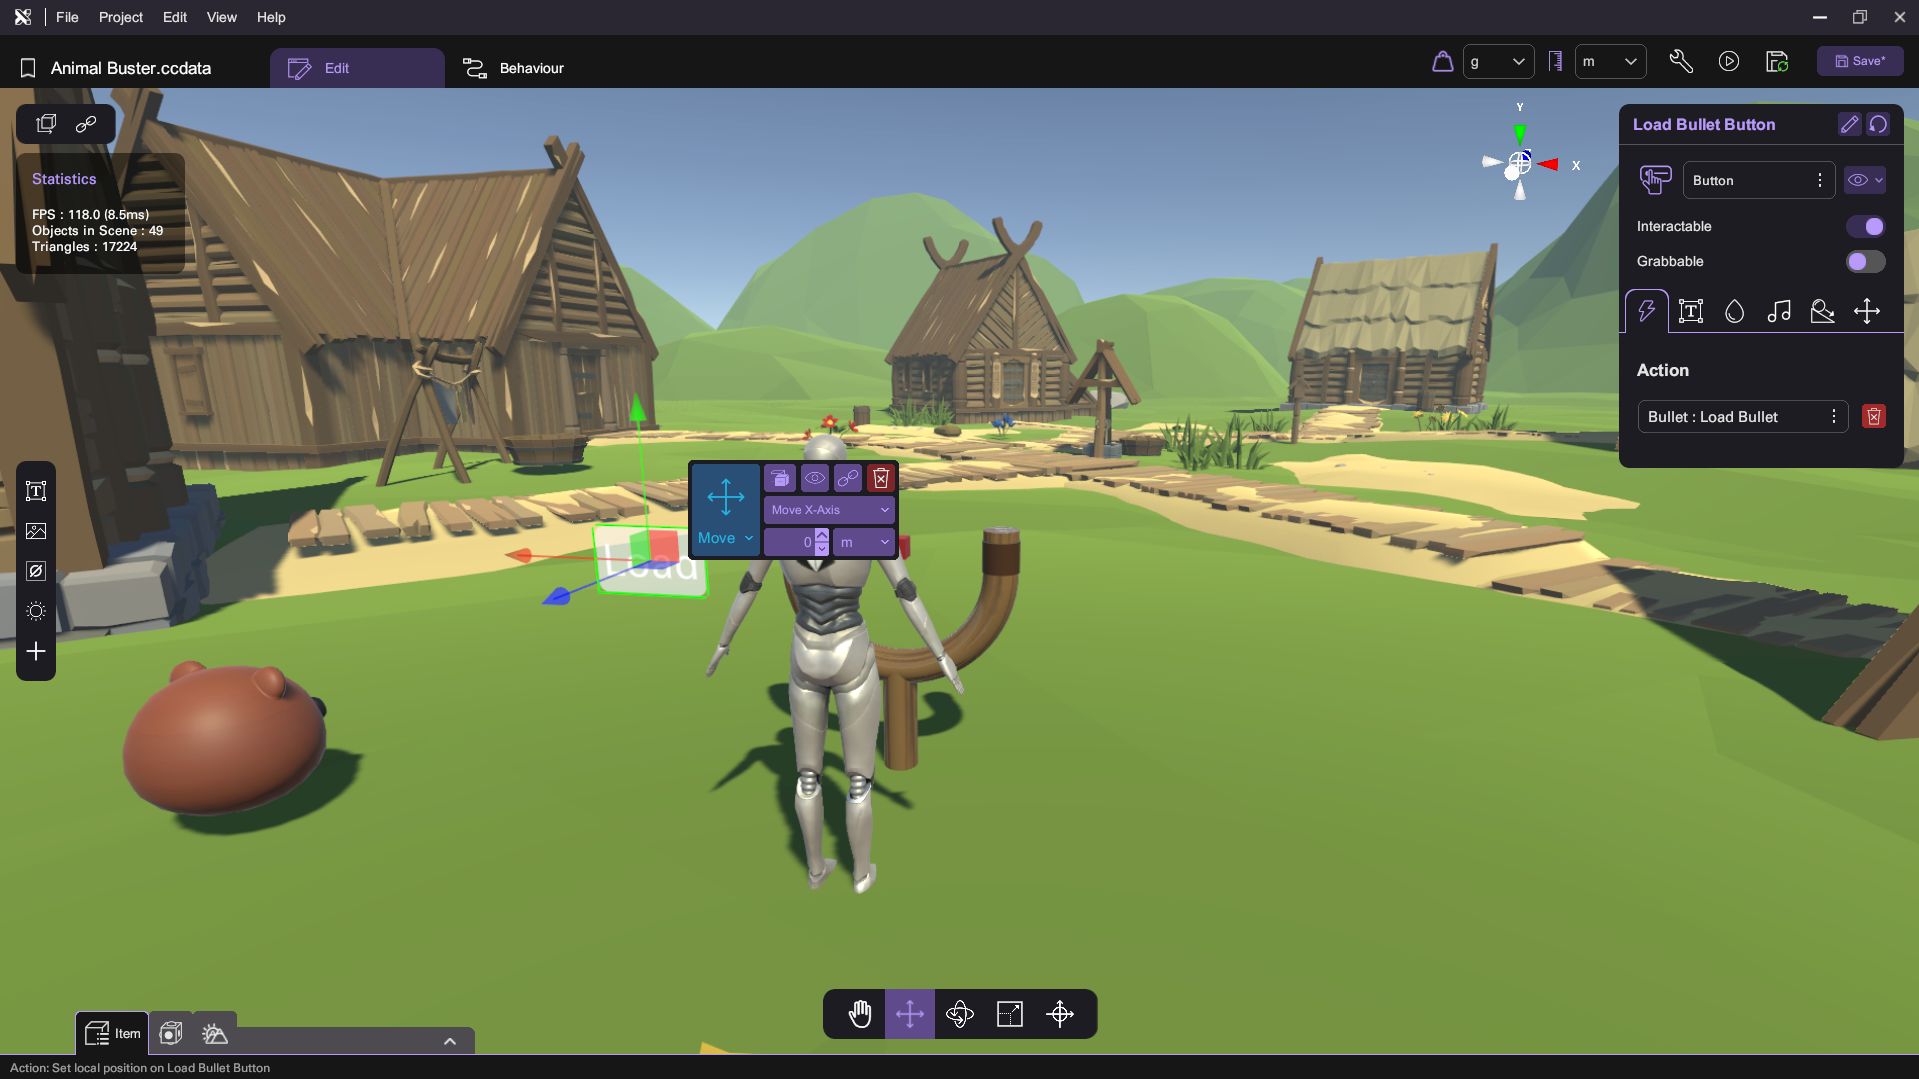
- Create a Button Object:
- Create a button object and rename it as Load Bullet Button.
- Set the button text to Load and text size to 20.
- Position the button at -1, 1.2, 0.5 and set rotation to 0, 180, 0.
- Set the Action to Load Bullet.
Step 8: Create Bullet Holder
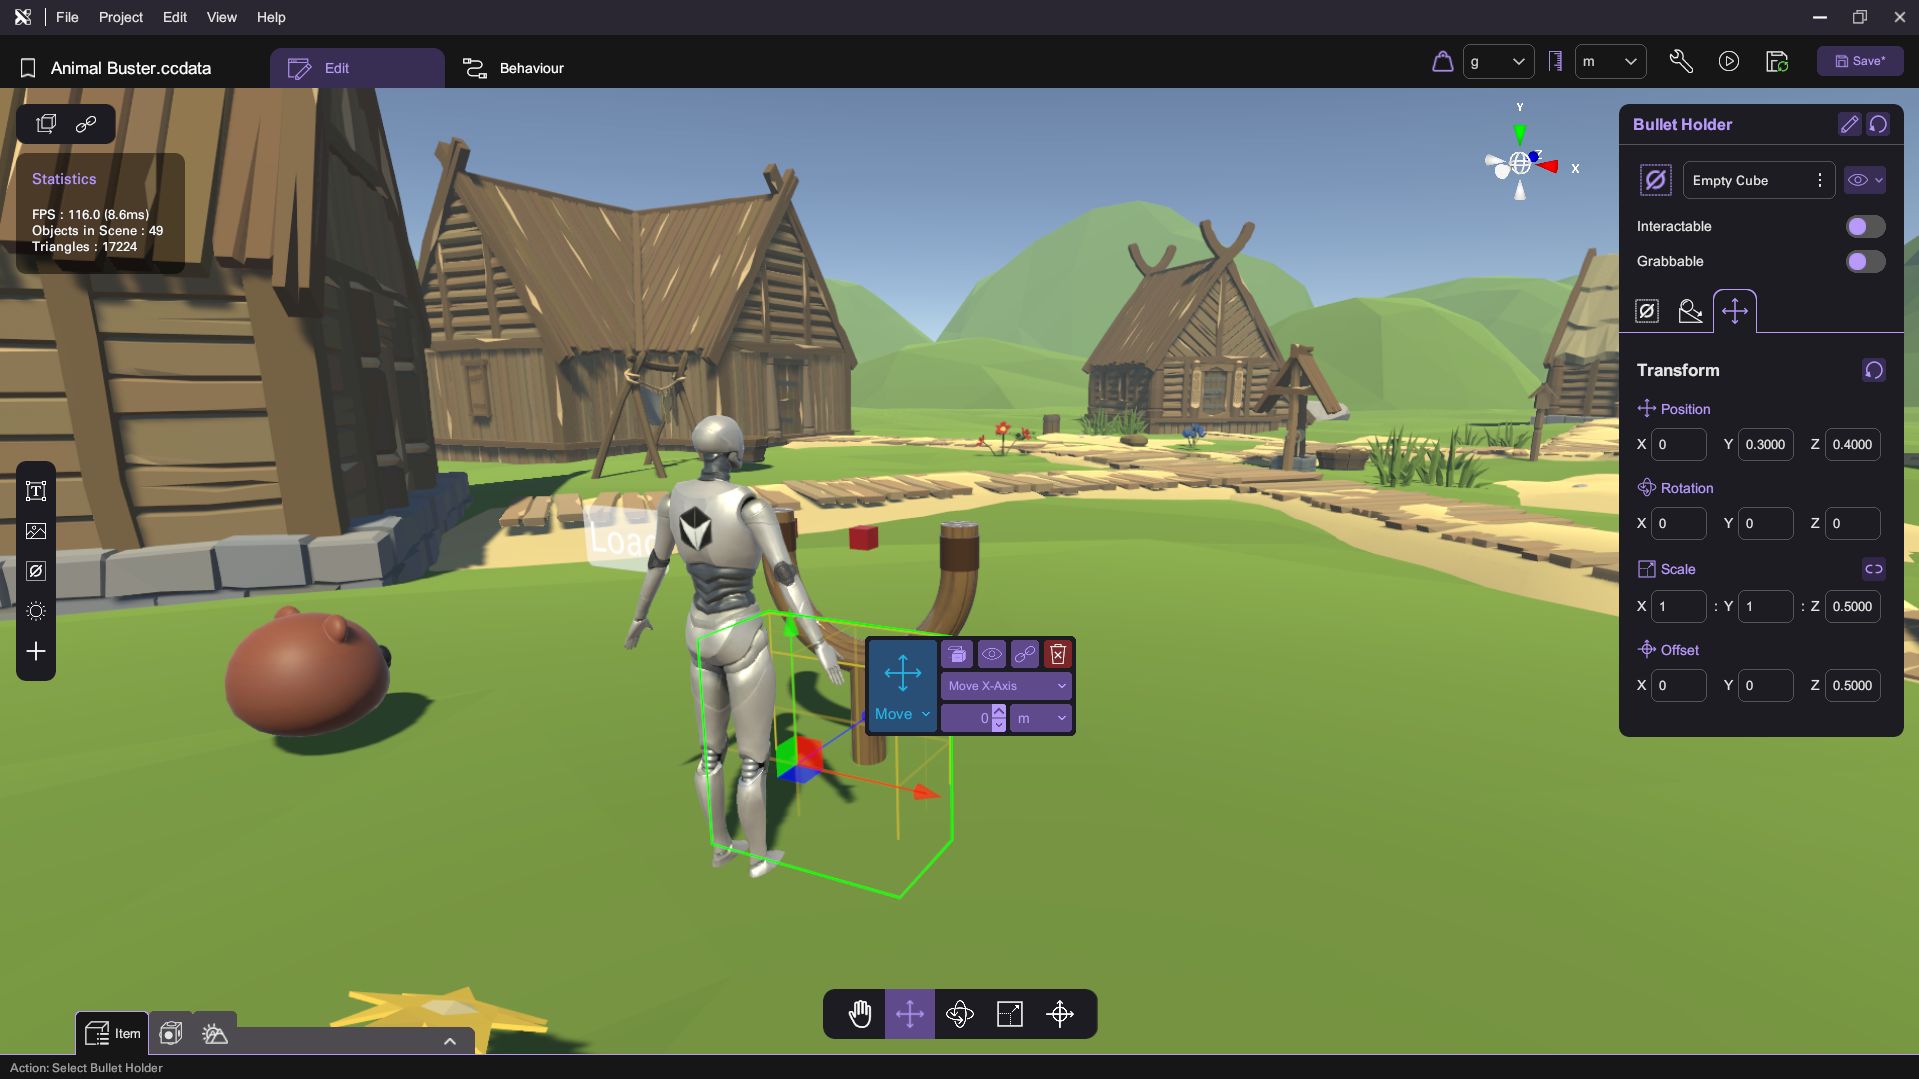
- Create an Empty Cube:
- Rename it as Bullet Holder to hold the bullet.
- Turn on the IsWall attributes.
- Set the position of the Bullet Holder to 0, 0.3, 0.4.
- Set the scale to 1, 1, 0.5.
- Set the offset to 0, 0, 0.5.
Conclusion
Congratulations! You've successfully created the bullet mechanics for the Animal Buster game. You can now load and shoot the bullet using the slingshot. Stay tuned for more tutorials!