XRCC Tutorial - GenAI Art Gallery
Overview
In this tutorial, you will build a VR art gallery featuring generative AI paintings. You’ll also use XRCC to build an interactive AI guide capable of chatting with visitors and explaining the artwork.
To complete this project, you will need:
- A POE key (ensure it has available credits)
- A microphone (or any audio input device)
Techniques Covered
| Specific Techniques Covered | |
|---|---|
| |
|
Tutorial Project
You can download the project files for this tutorial in two formats: a starter project for step-by-step guidance and a completed project for your reference.
Gameplay Flow
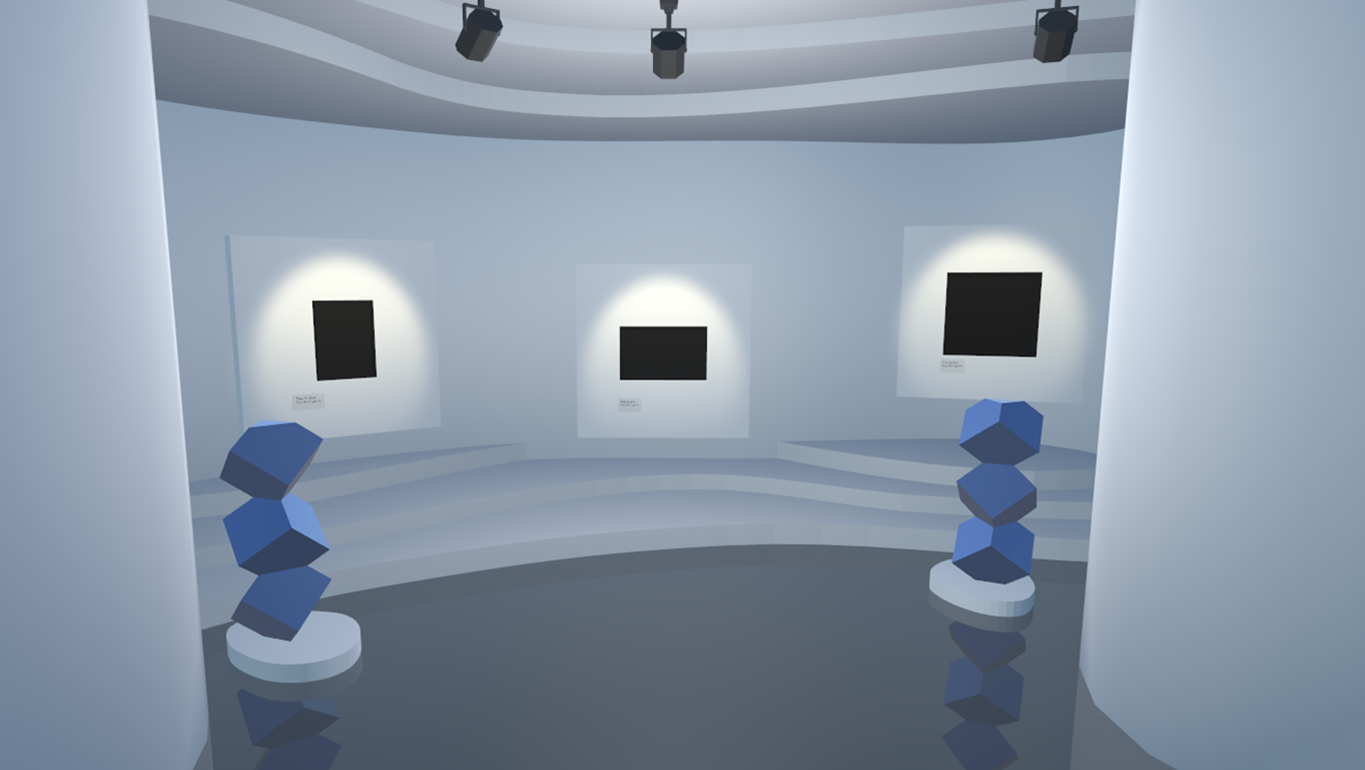
- You are the visitor of an art gallery
- You can view GenAI paintings in the gallery
- You can chat with AI guide character to ask info about the GenAI paintings
You are encouraged to make adjustments to the project as you see fit — part of the fun in game-making is bringing your unique concepts to life!
Assets Provided in the Starter Project
The starter project for the tutorial provides a comprehensive set of assets and functionalities to get you started. This includes some 3D models for building the scene, inclduing an art gallery, several art painting frames and a guide character model. With these assets and functionalities in place, you'll be able to build the tutorial scene.
Set up the GenAI paintings
Let's start with creating the painting images to fill in the empty frames of the gallery scene.
Create the Paintings
- Go to Create with AI (AI icon, top-right) > 2D Image tab.
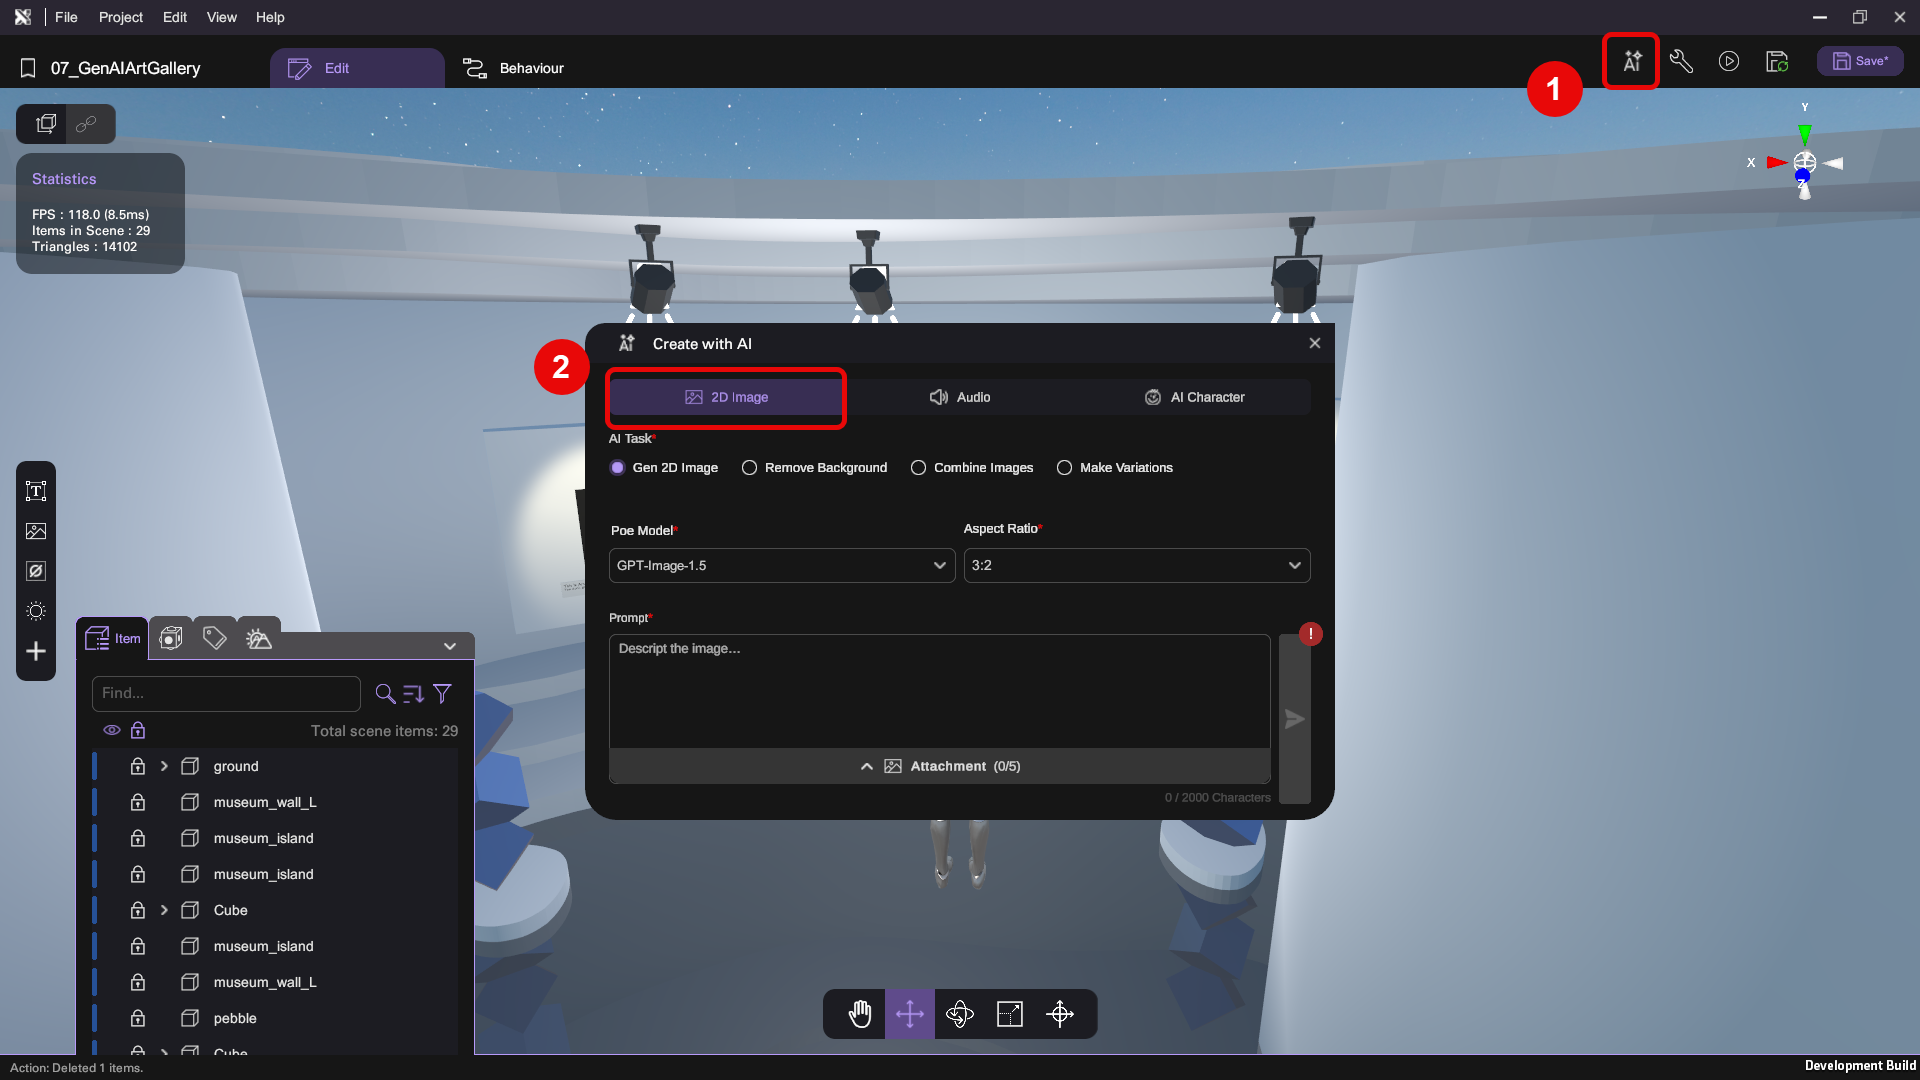
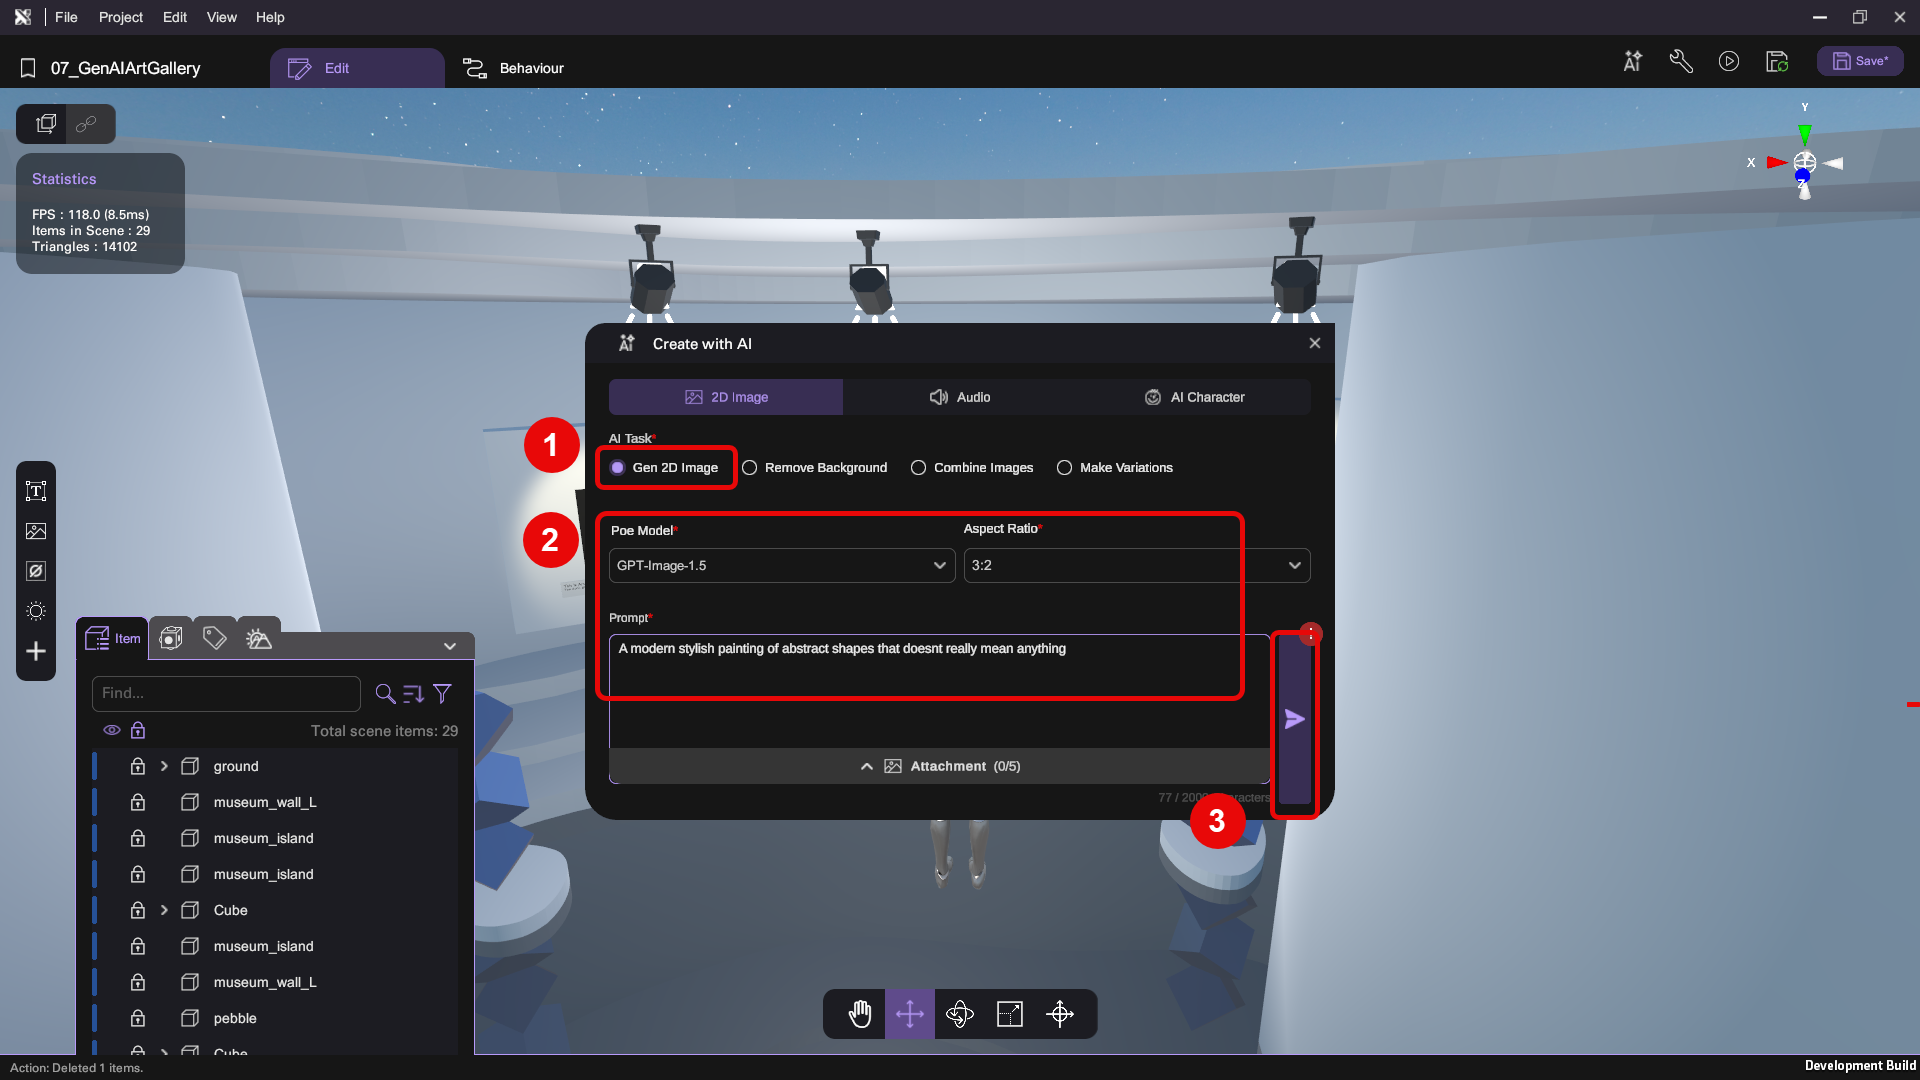
- Think of something you'd want to show in your art gallery. Select Gen 2D Image and configure the following settings:
- POE Model — The AI model you want to use for image generation
- Aspect Ratio — The aspect ratio of result image
- Prompt — Describe to AI what you want this image to be
You can use our configuration shown in the picture below as a reference:
- POE Model: GPT-image-1.5
- Aspect Ratio: 3:2
- Prompt: A modern stylish painting of abstract shapes that doesn't really mean anything
You have the creative liberty to decide what you want to make here.
- Click Proceed (arrow icon, bottom-right) to start generating the image.
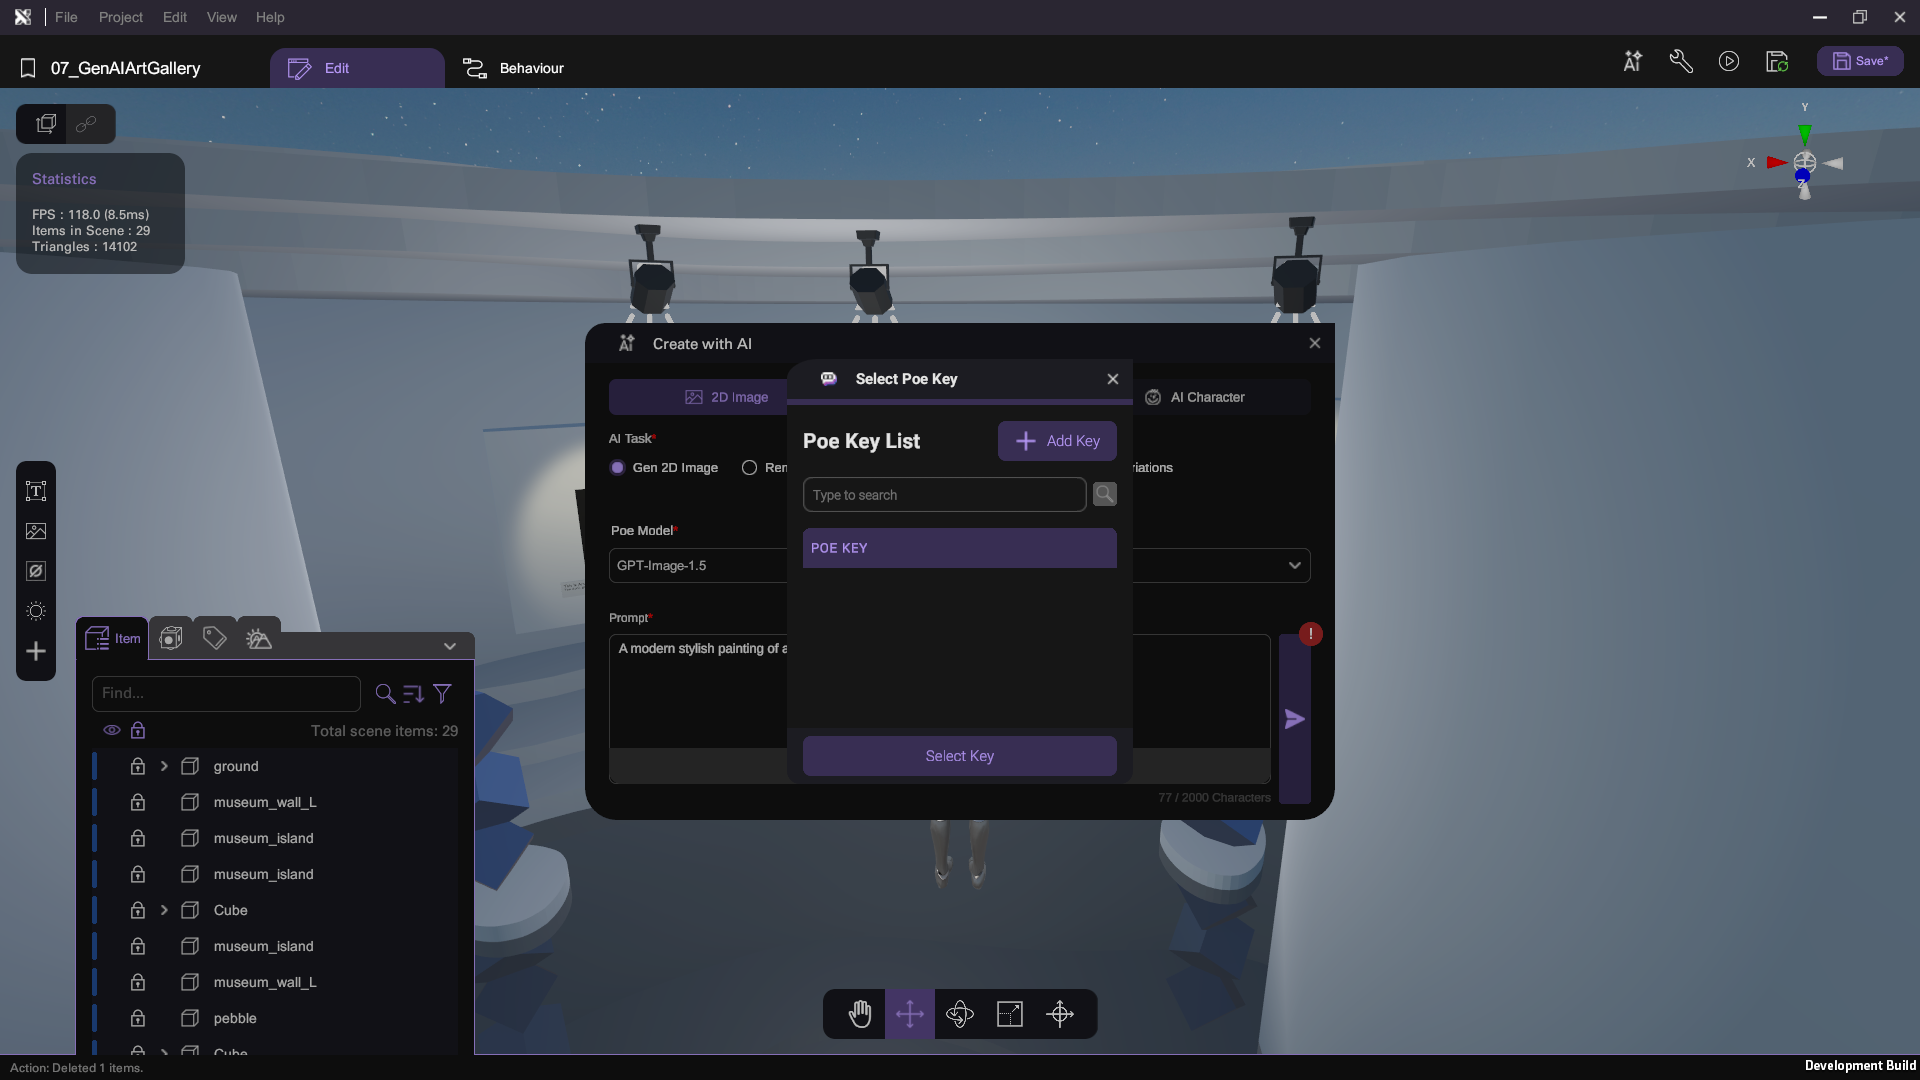
You will need to configure your Poe API key to use the GenAI features inside XRCC. If you haven't done so already, you may be prompted to set it up.
- Wait until the generation result is ready then Add To Scene.

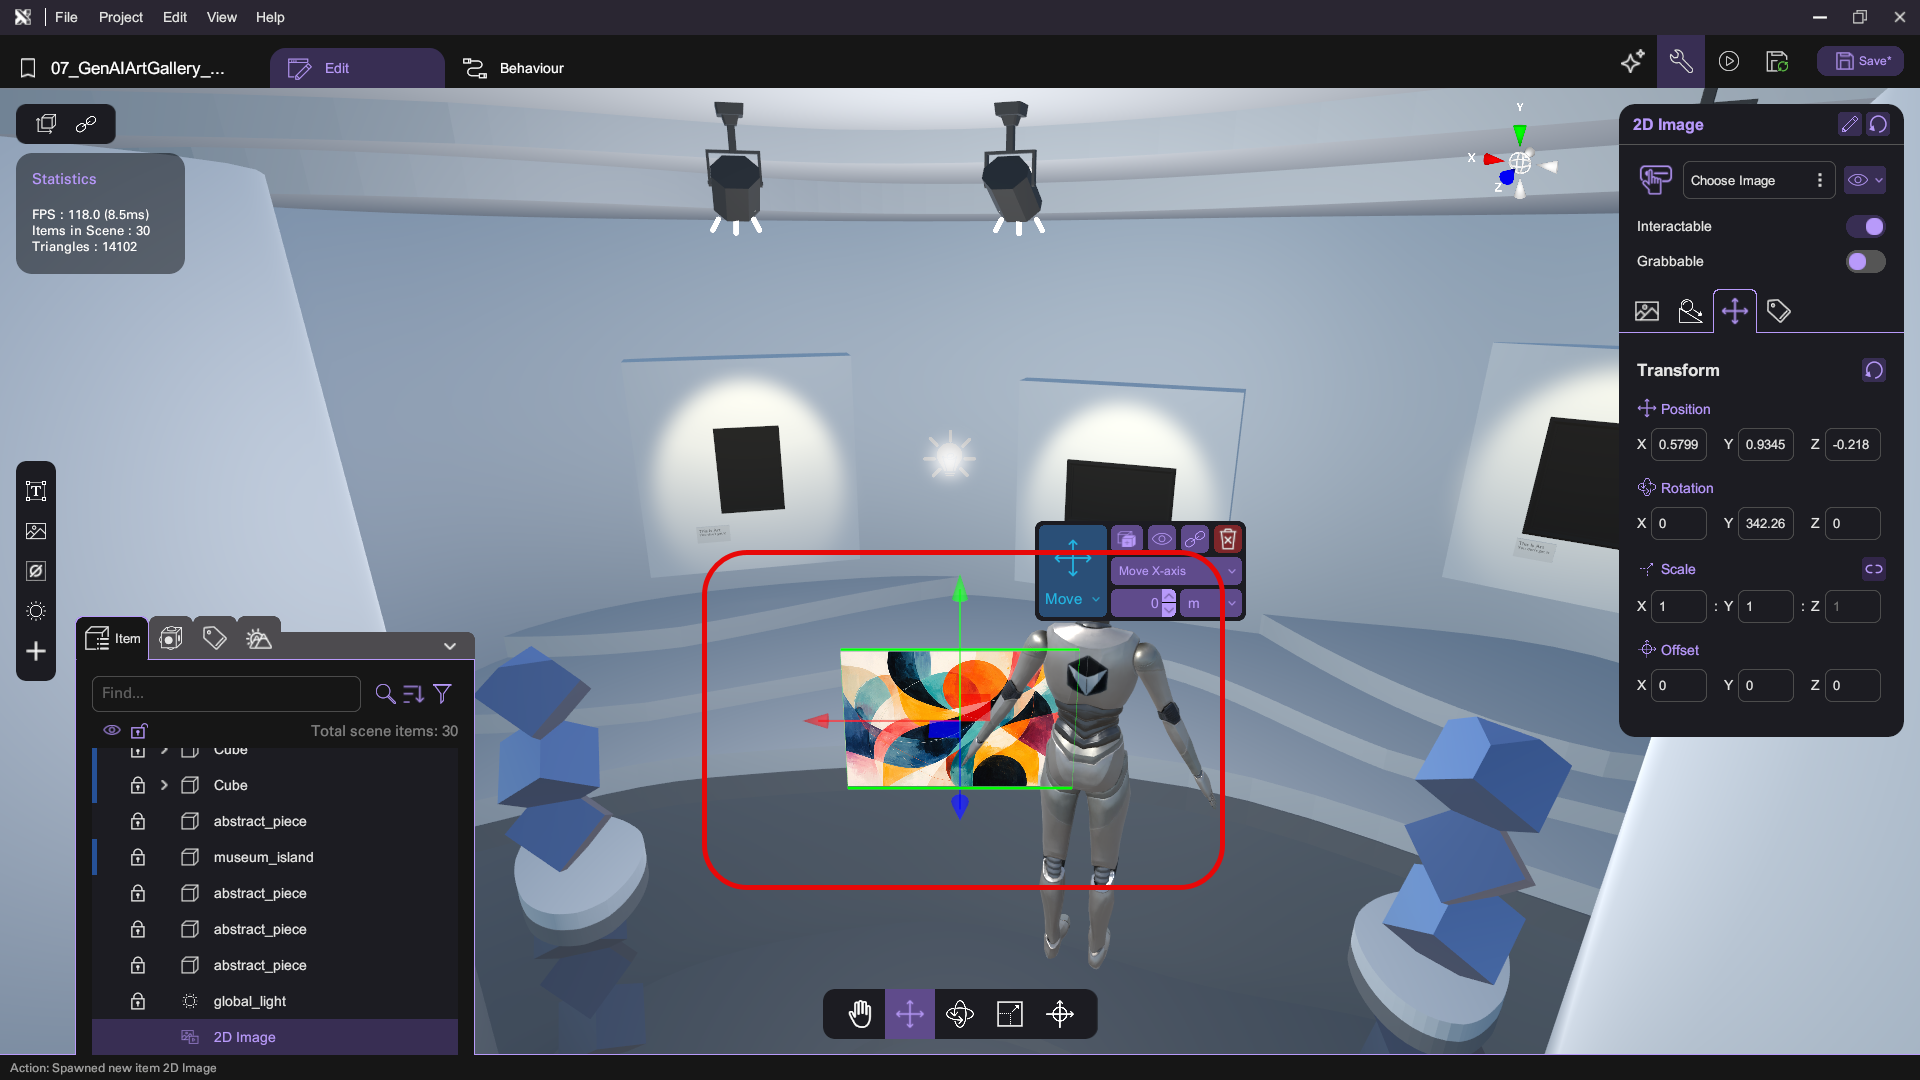
Don't worry if your generation result doesn't match the pictures in this tutorial. GenAI outputs are probablistic and will vary.
Add the Paintings to Scene
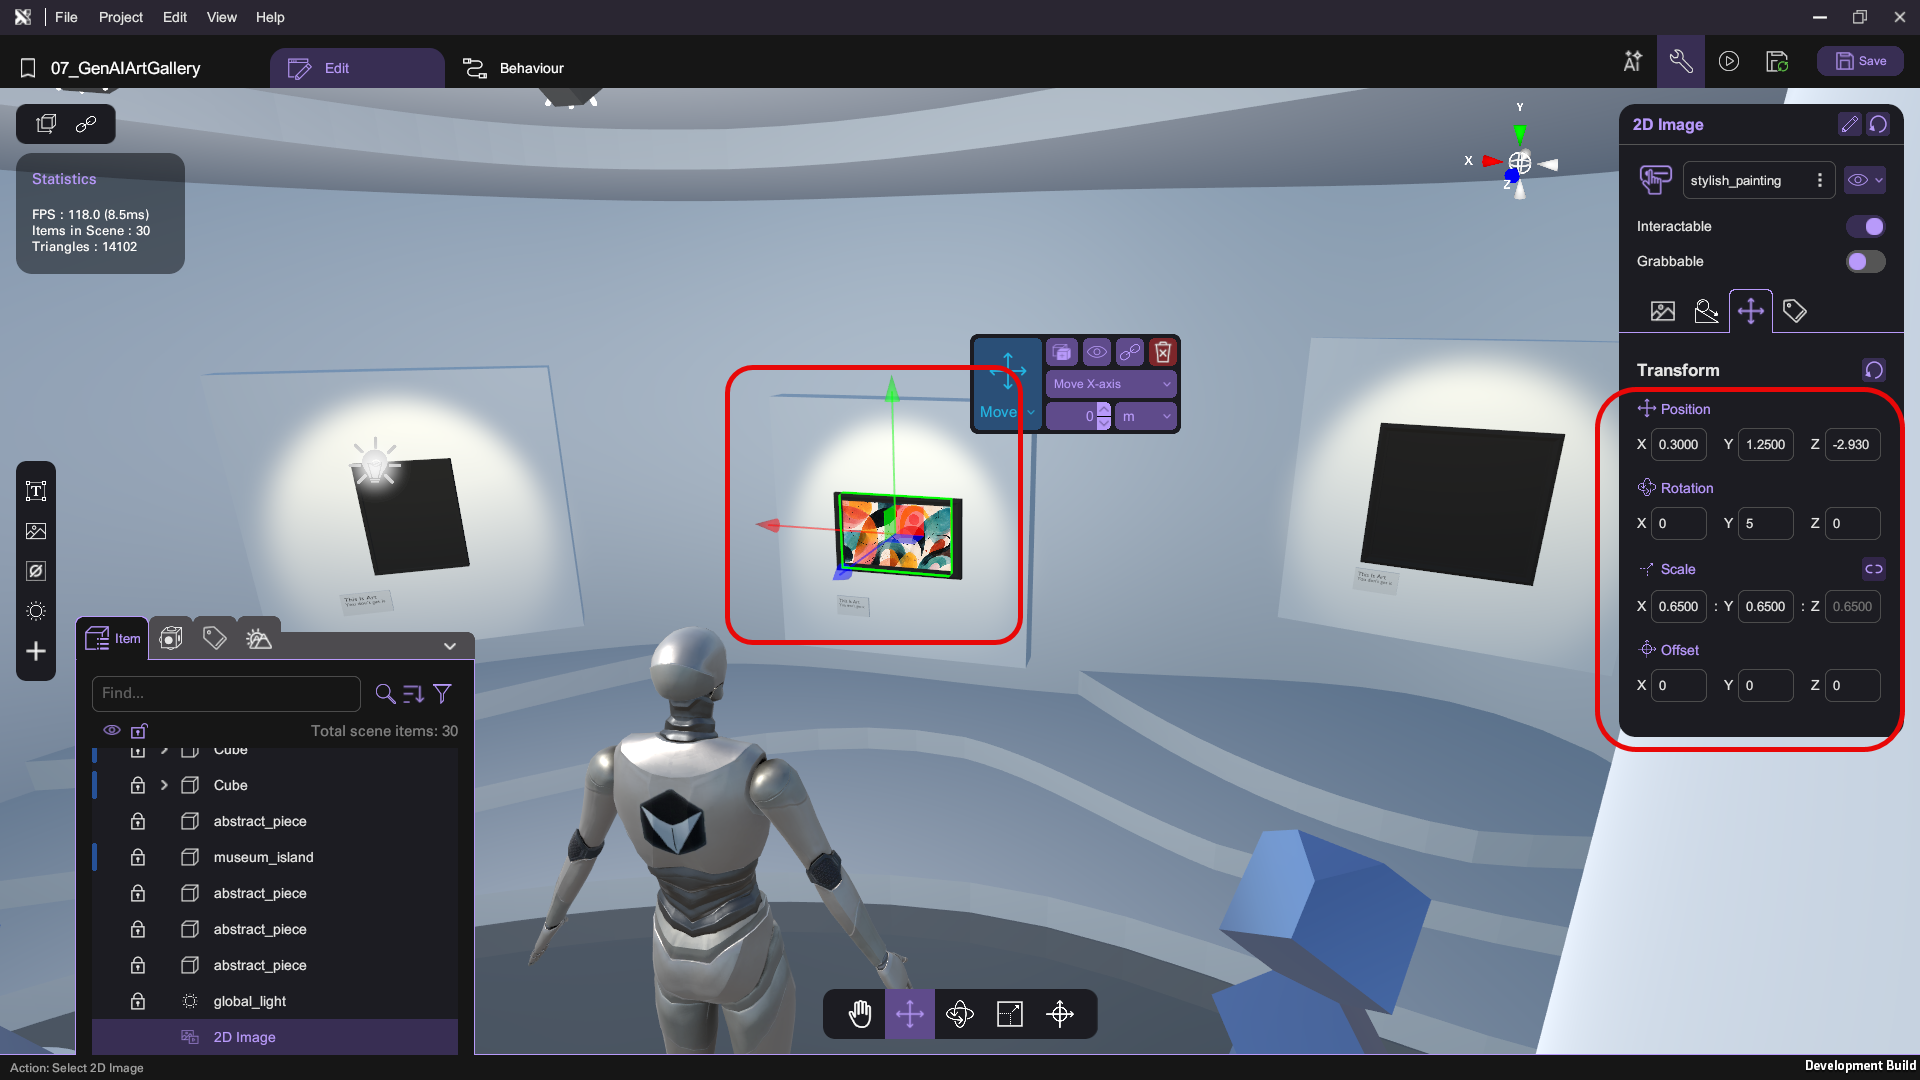
- Adjust the painting image so that it fits into the painting frame. In the picture below, we have set the position to (0.3, 1.25, -2.93), rotation to (0, 5, 0) and scale to (0.65, 0.65, 0.65).
- Repeat generating the painting images (step 1 - 4) to create 2 more paintings, then place them into the frames.
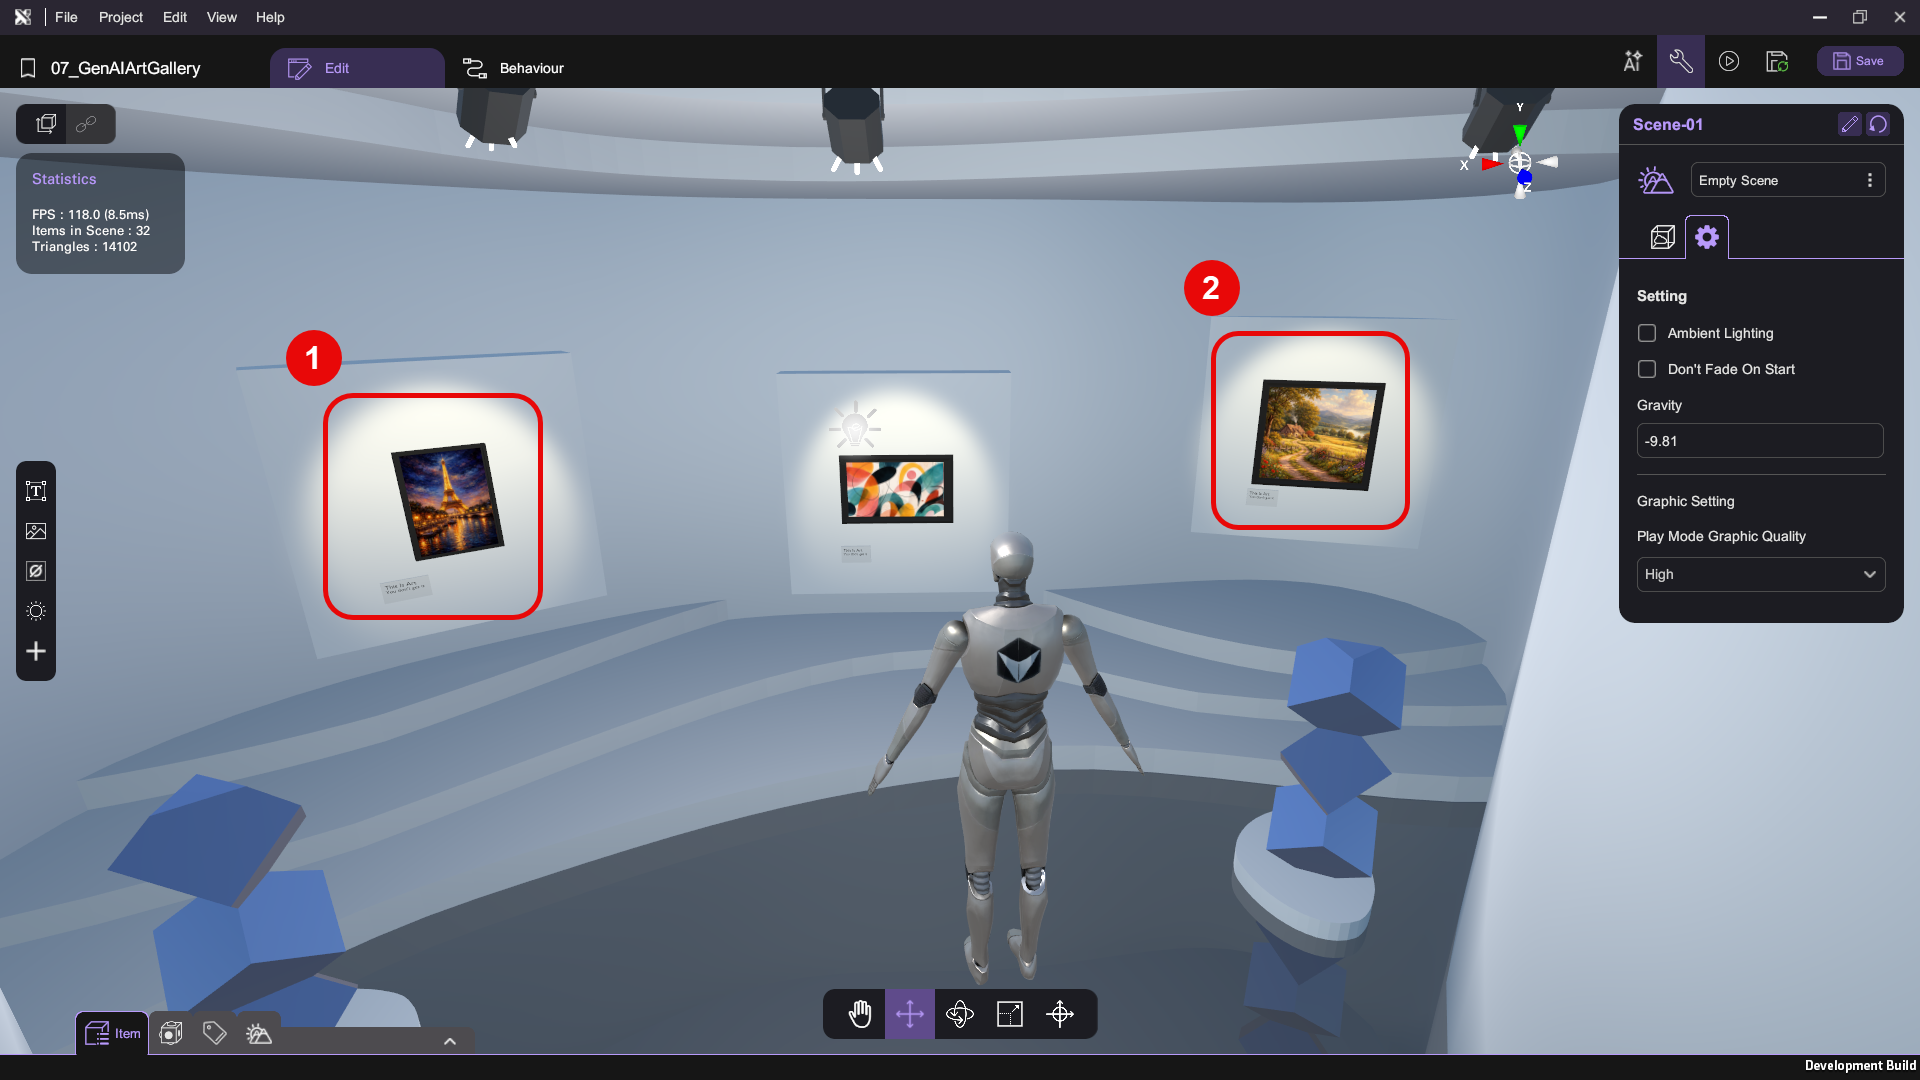
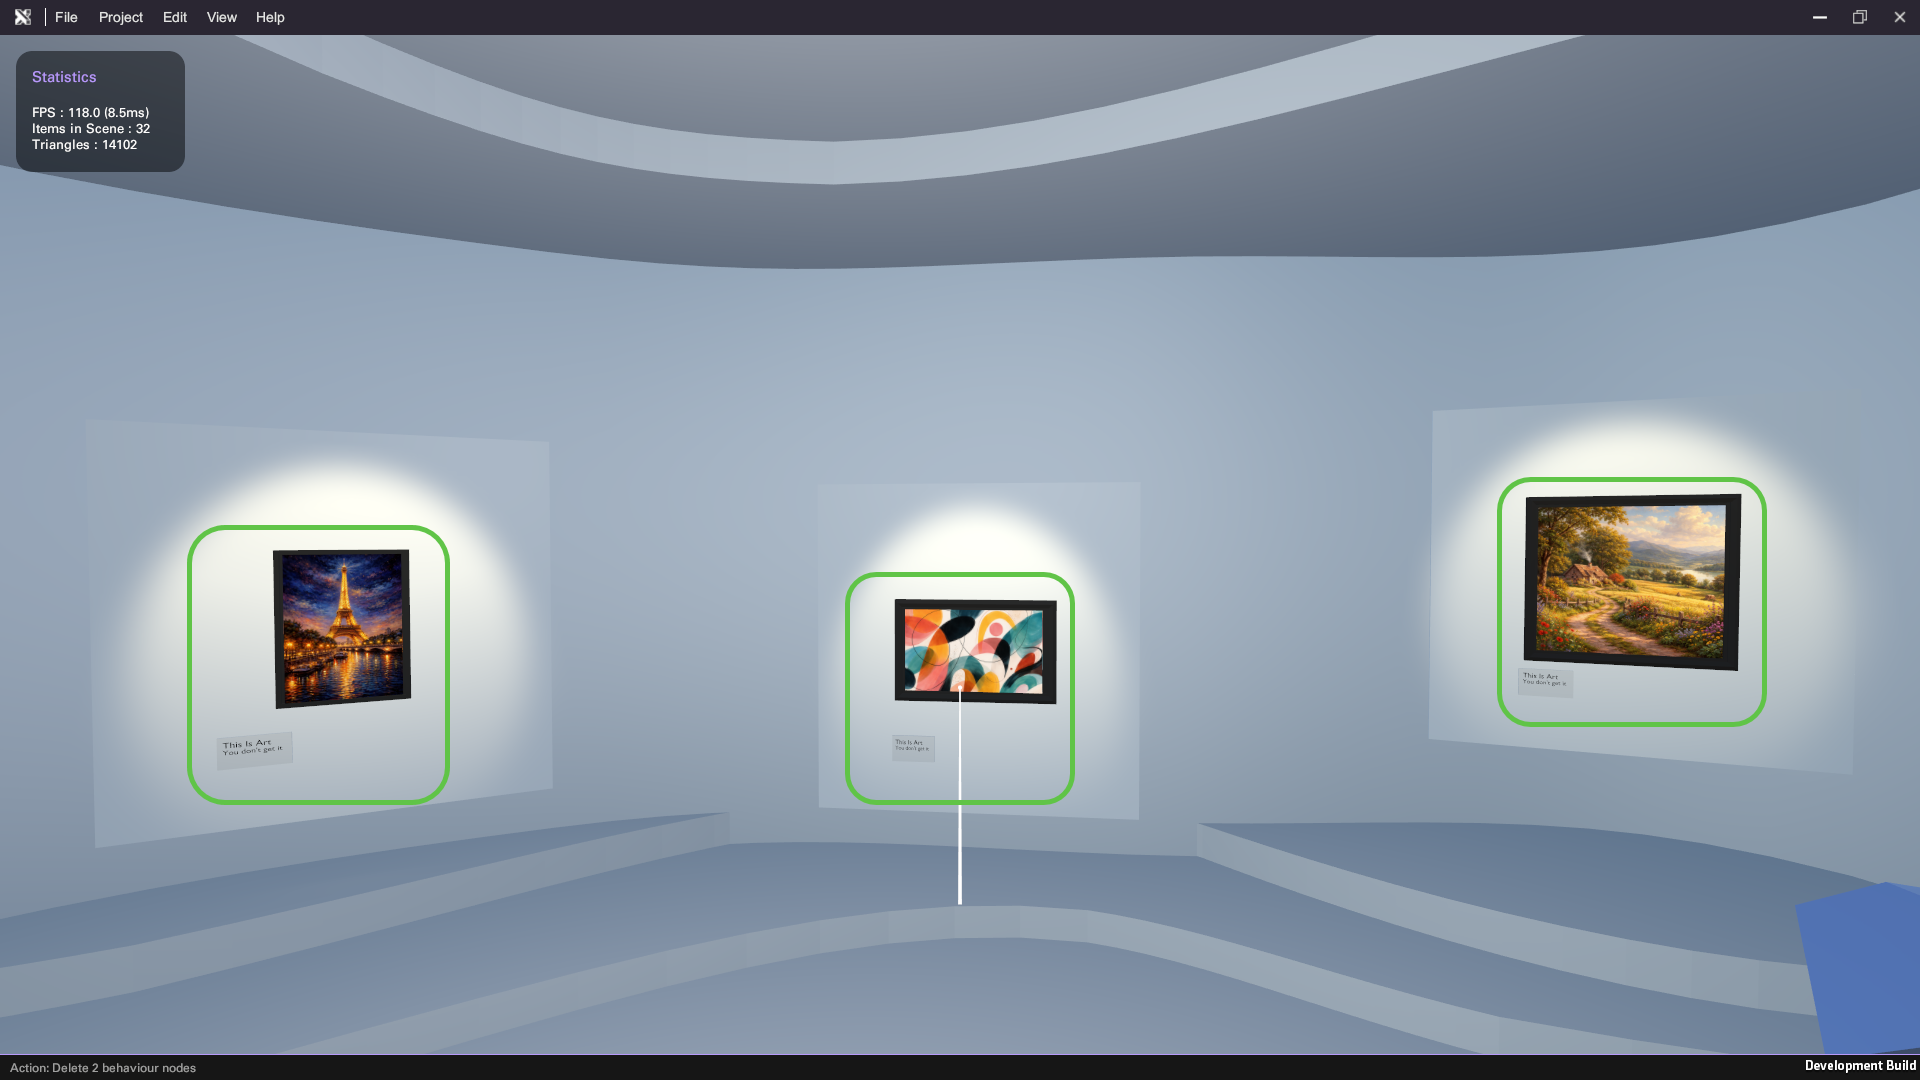
Run your project. Check that:
- You have 3 paintings in the scene
Set Up the AI Gallery Guide
Next, you will add an AI guide character to interact with gallery visitors. Using XRCC’s AI character feature, you can quickly build an interactive virtual guide to answer visitors' questions about the artwork in your VR scene.
Create the AI Character
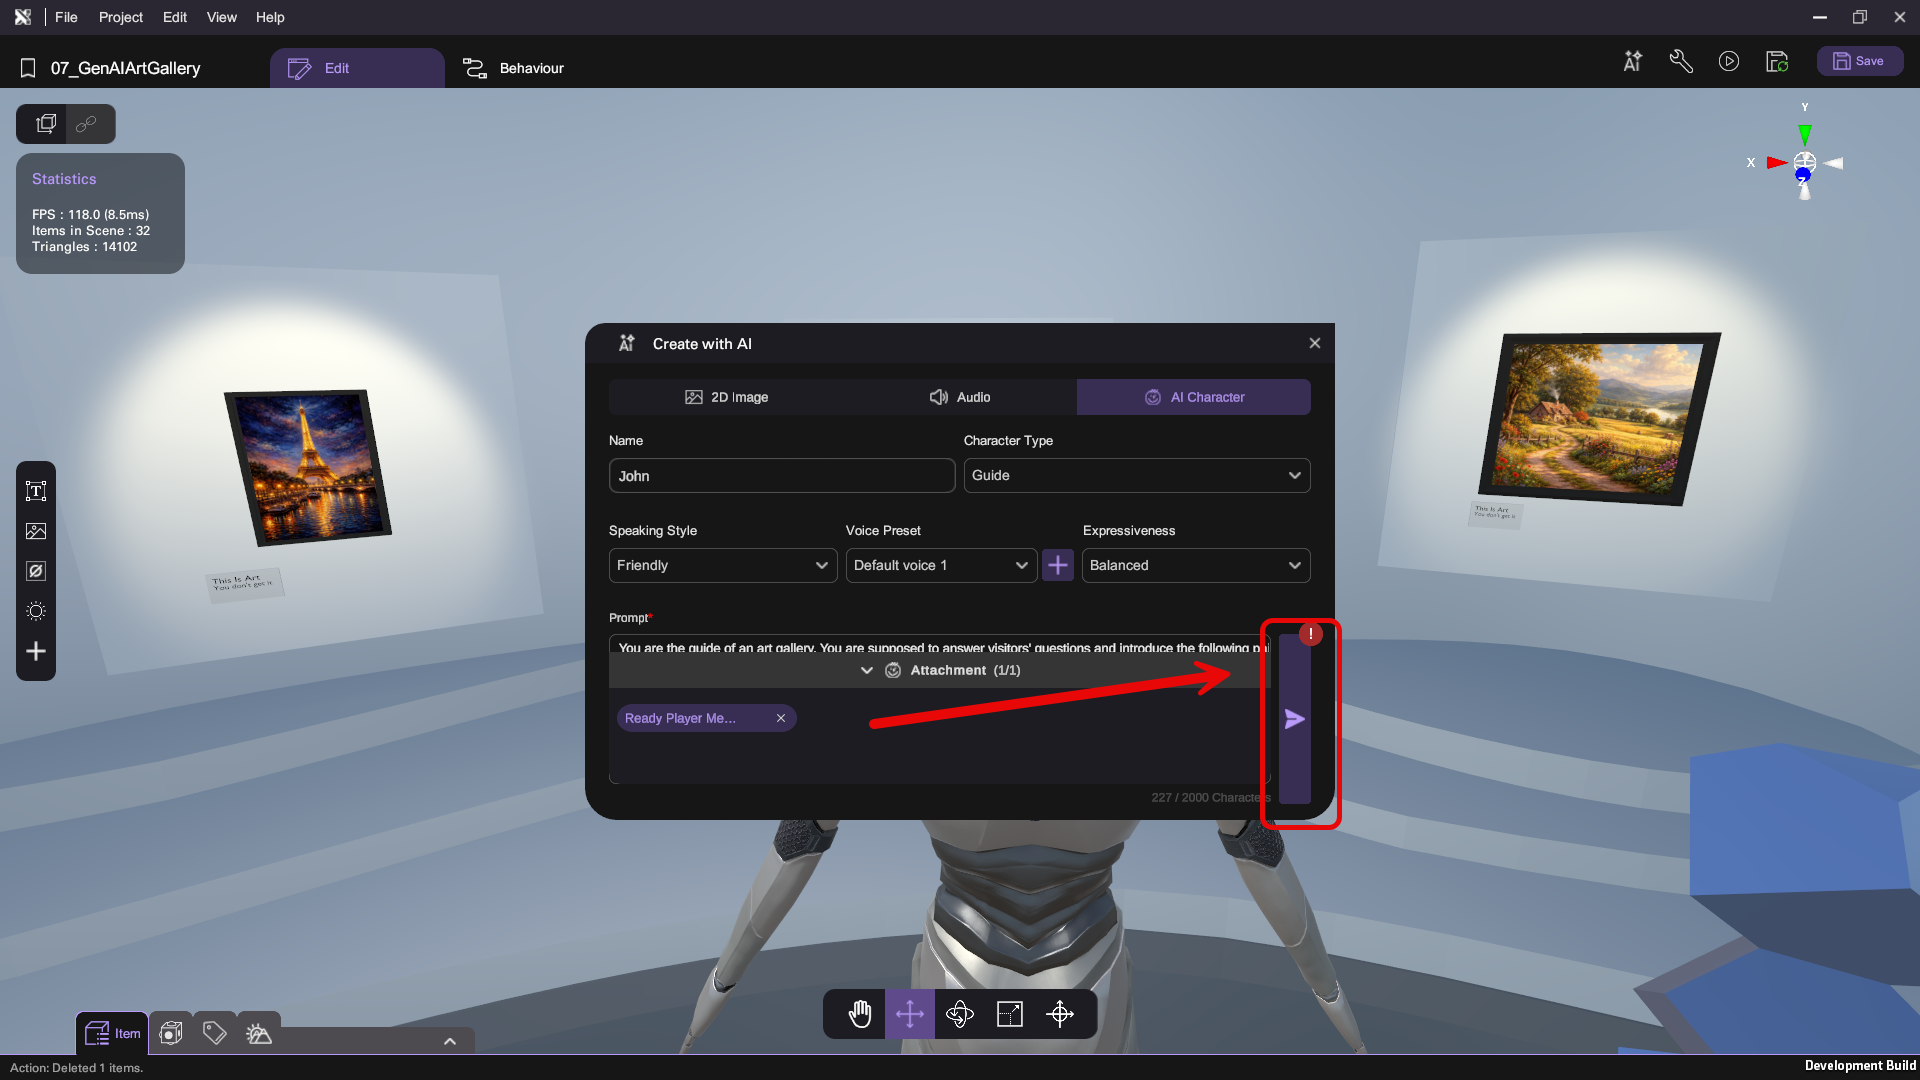
- Go to Create with AI (AI icon, top-right) > AI Character.
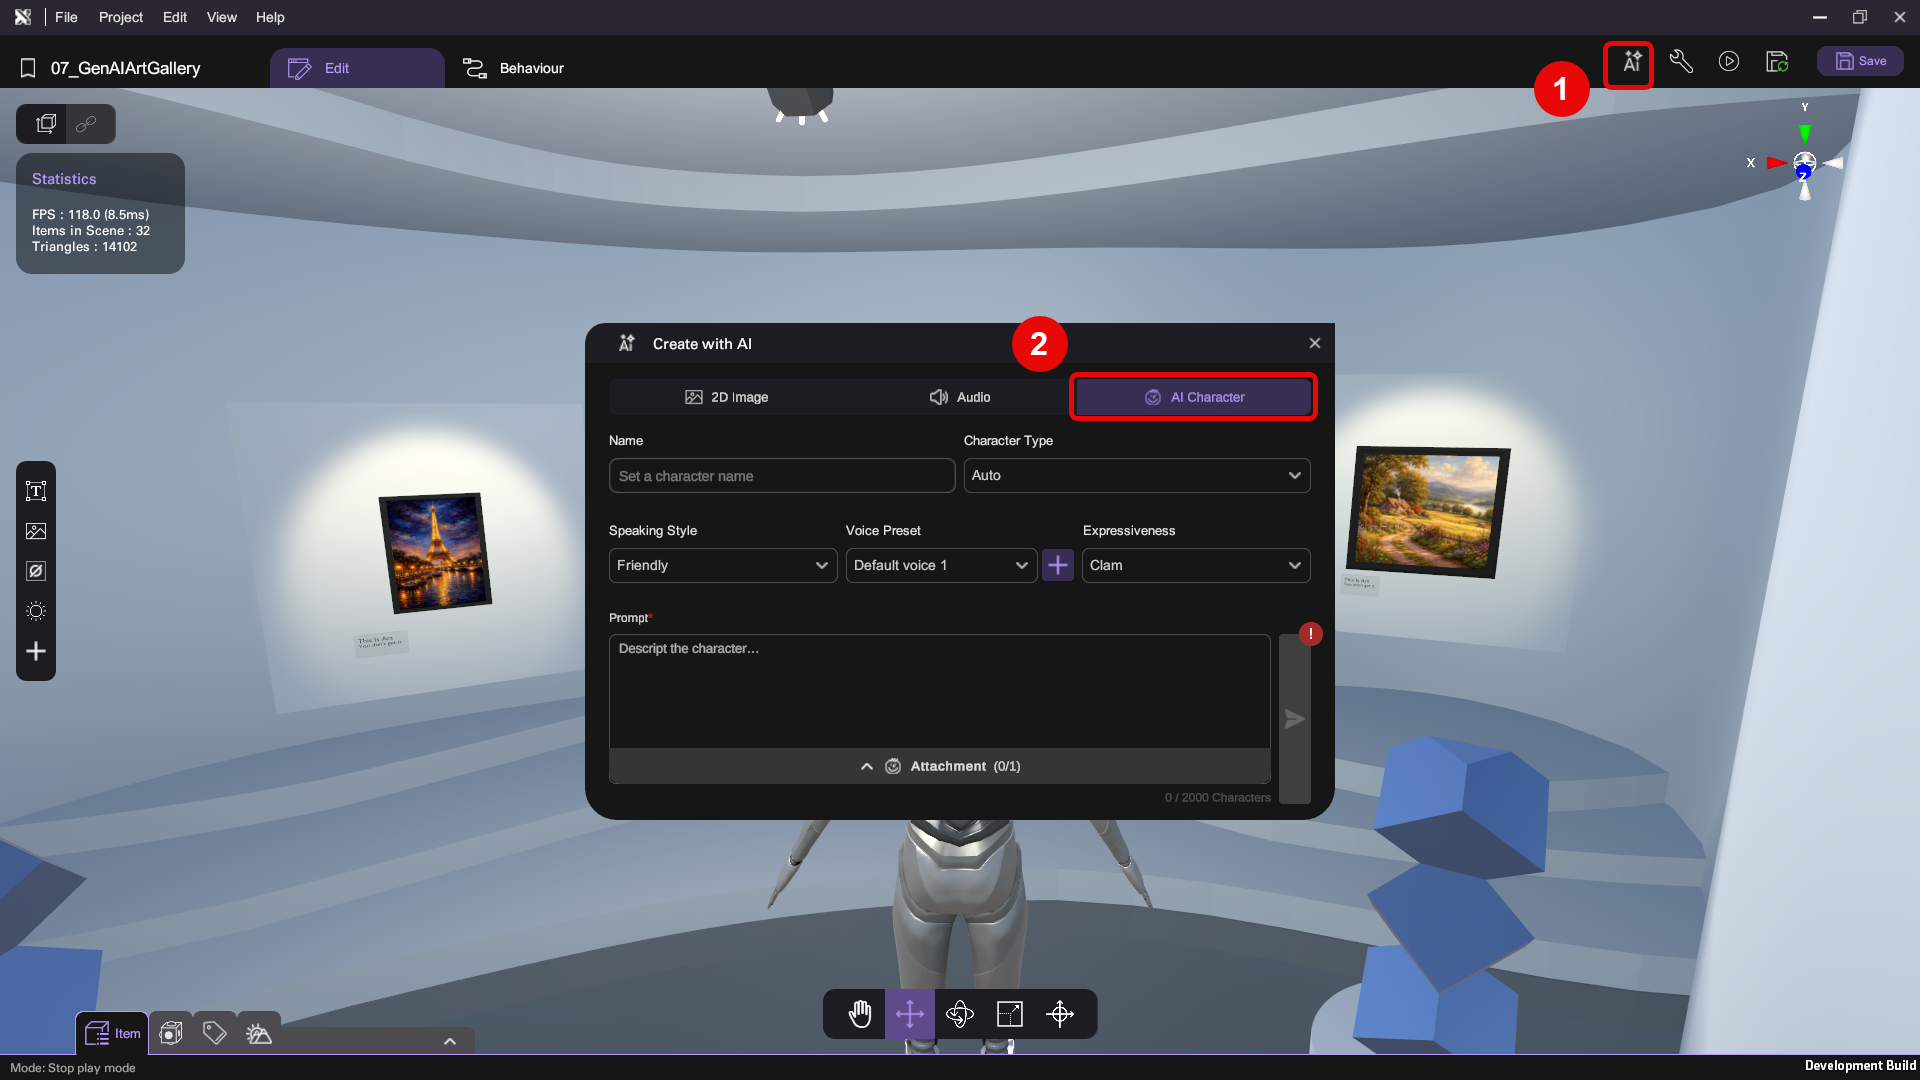
- Fill in the following settings in the panel:
- Name
- Character Type
- Speaking Style
- Voice Preset
- Expressiveness
- Prompt - Describe to AI what you want this character to be
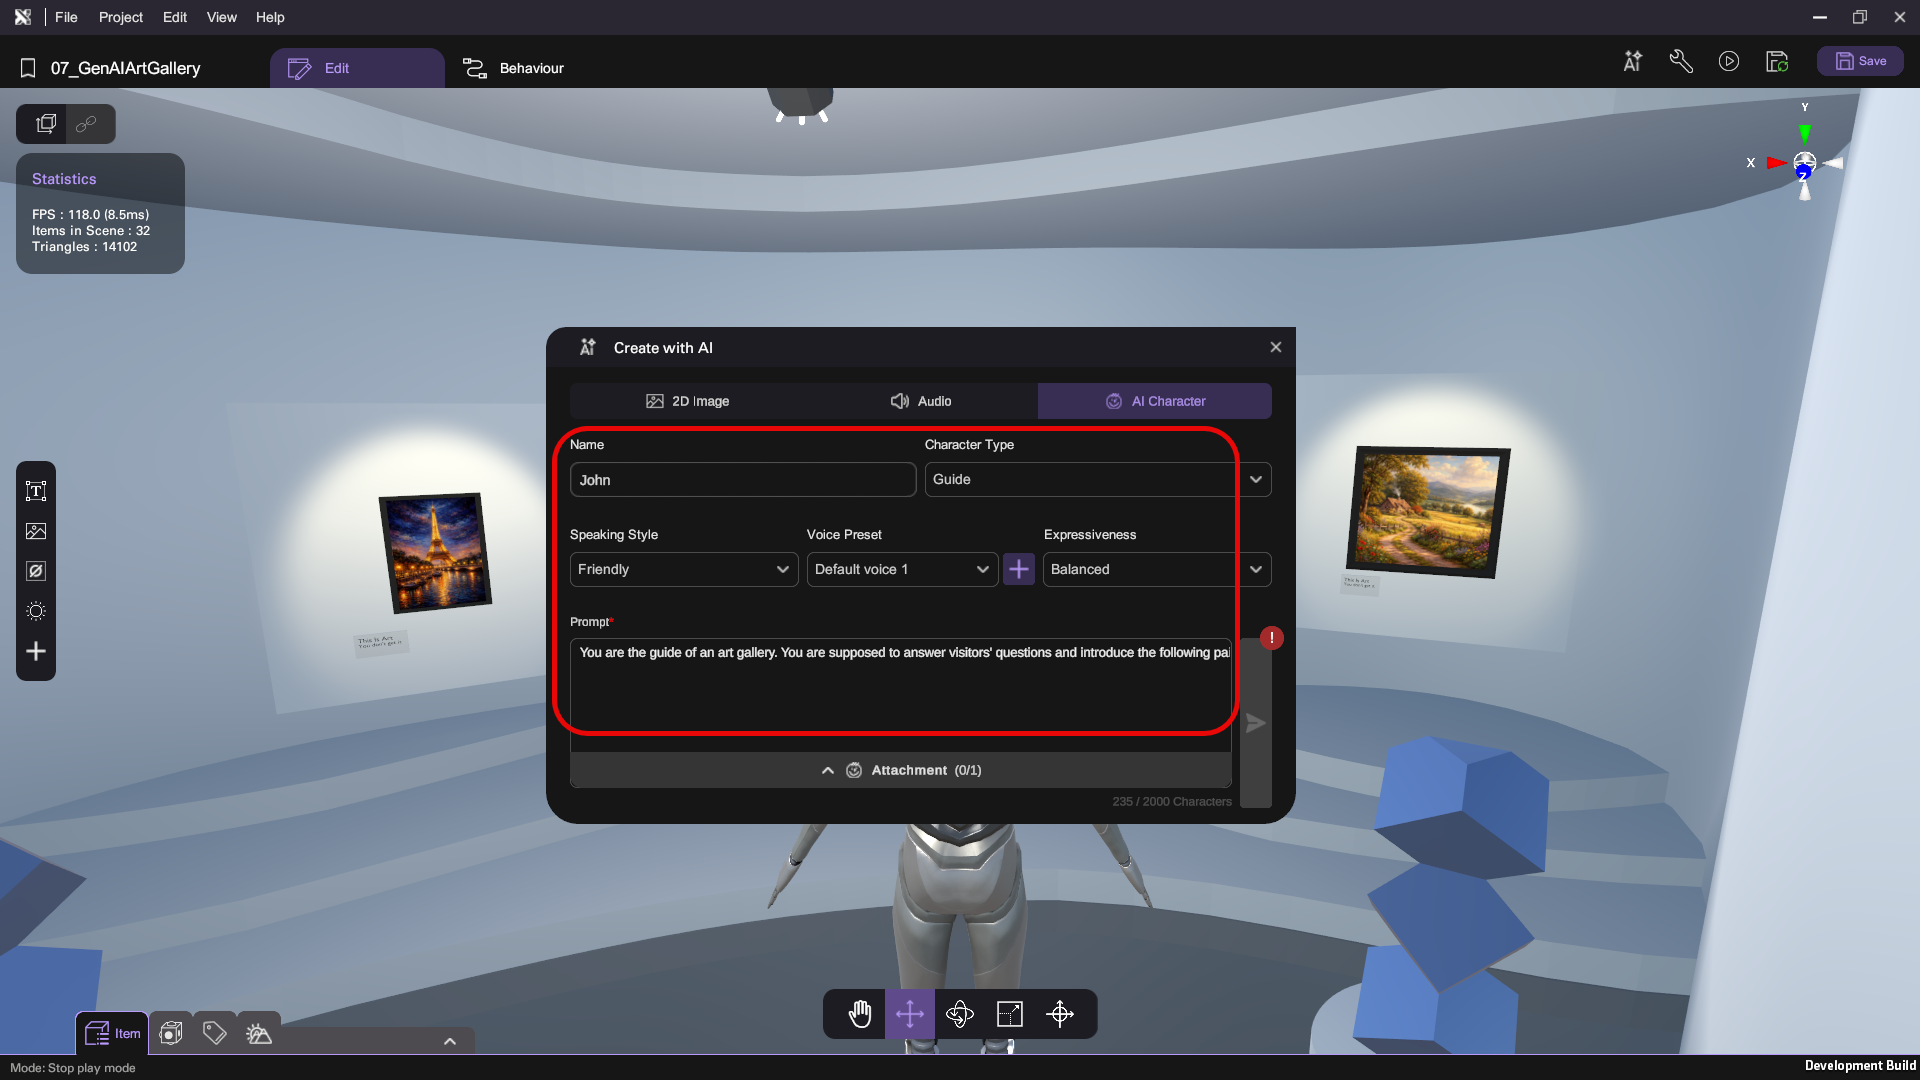
You can use our configuration shown in the picture below as a reference:
- Name: John
- Character Type: Guide
- Speaking Style: Friendly
- Voice Preset: Default Voice 1
- Expressiveness: Balanced
- Prompt: You are the guide of an art gallery. You are supposed to answer visitors' questions and introduce paintings to them.
You have the creative liberty to decide what you want to make here.
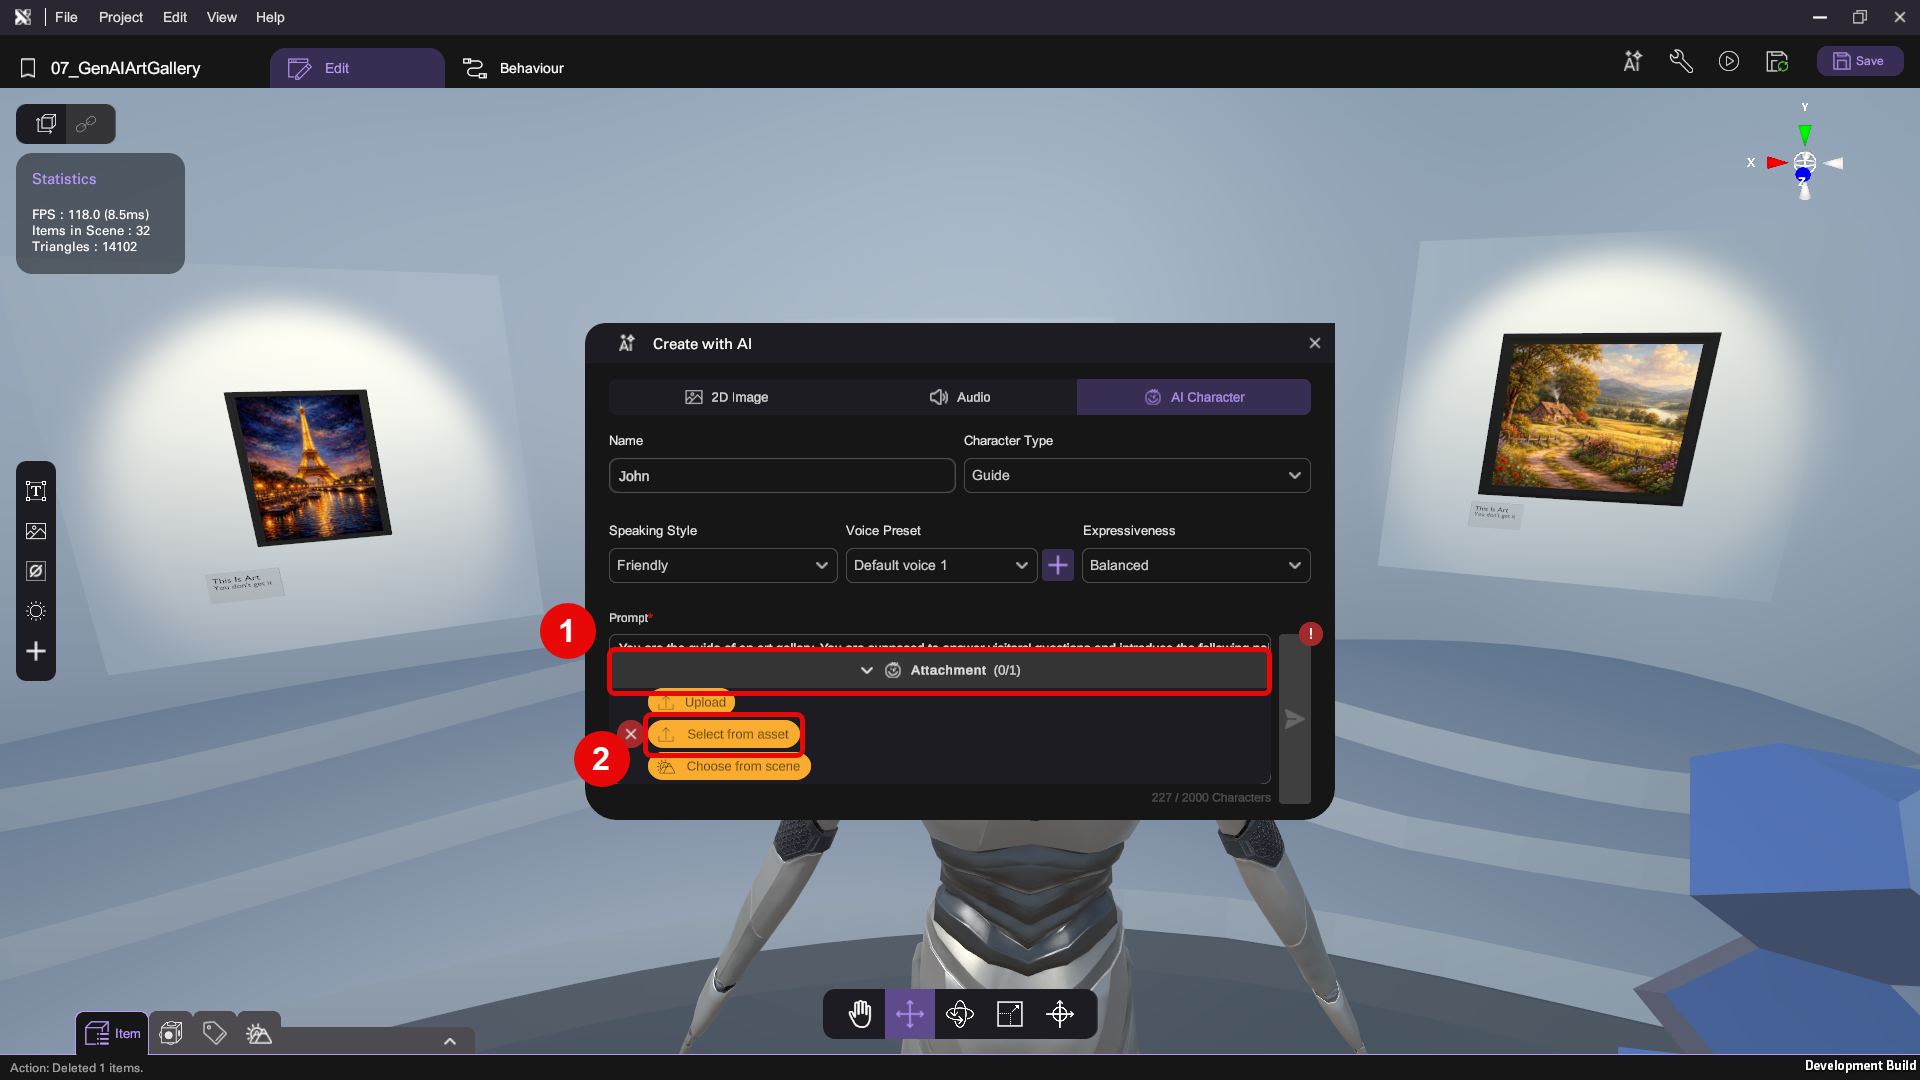
- Next, attach a character model to your AI character. Go to Attachment > Select from asset.
- Choose a 3D model for your character. In this example, we are using Ready Player Me 05.
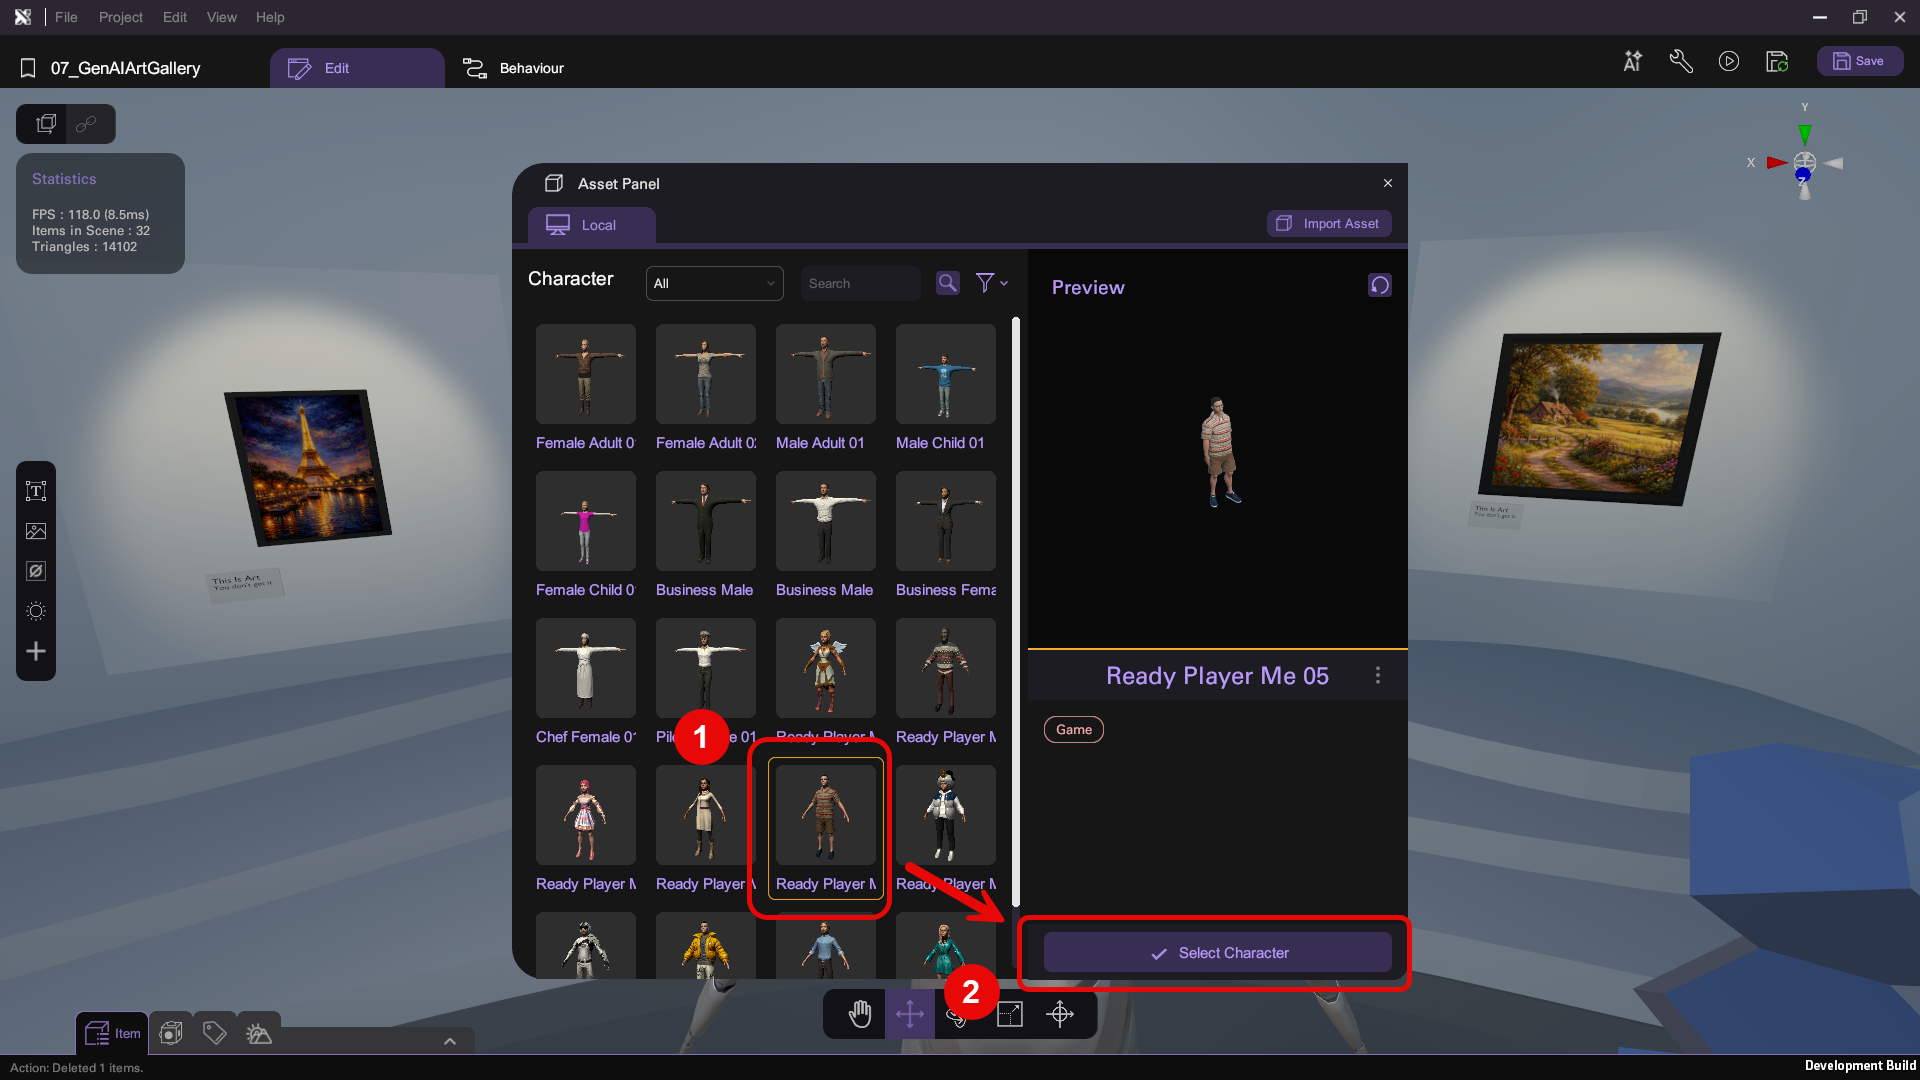
- Click Proceed (arrow icon, bottom-right) to create the character.
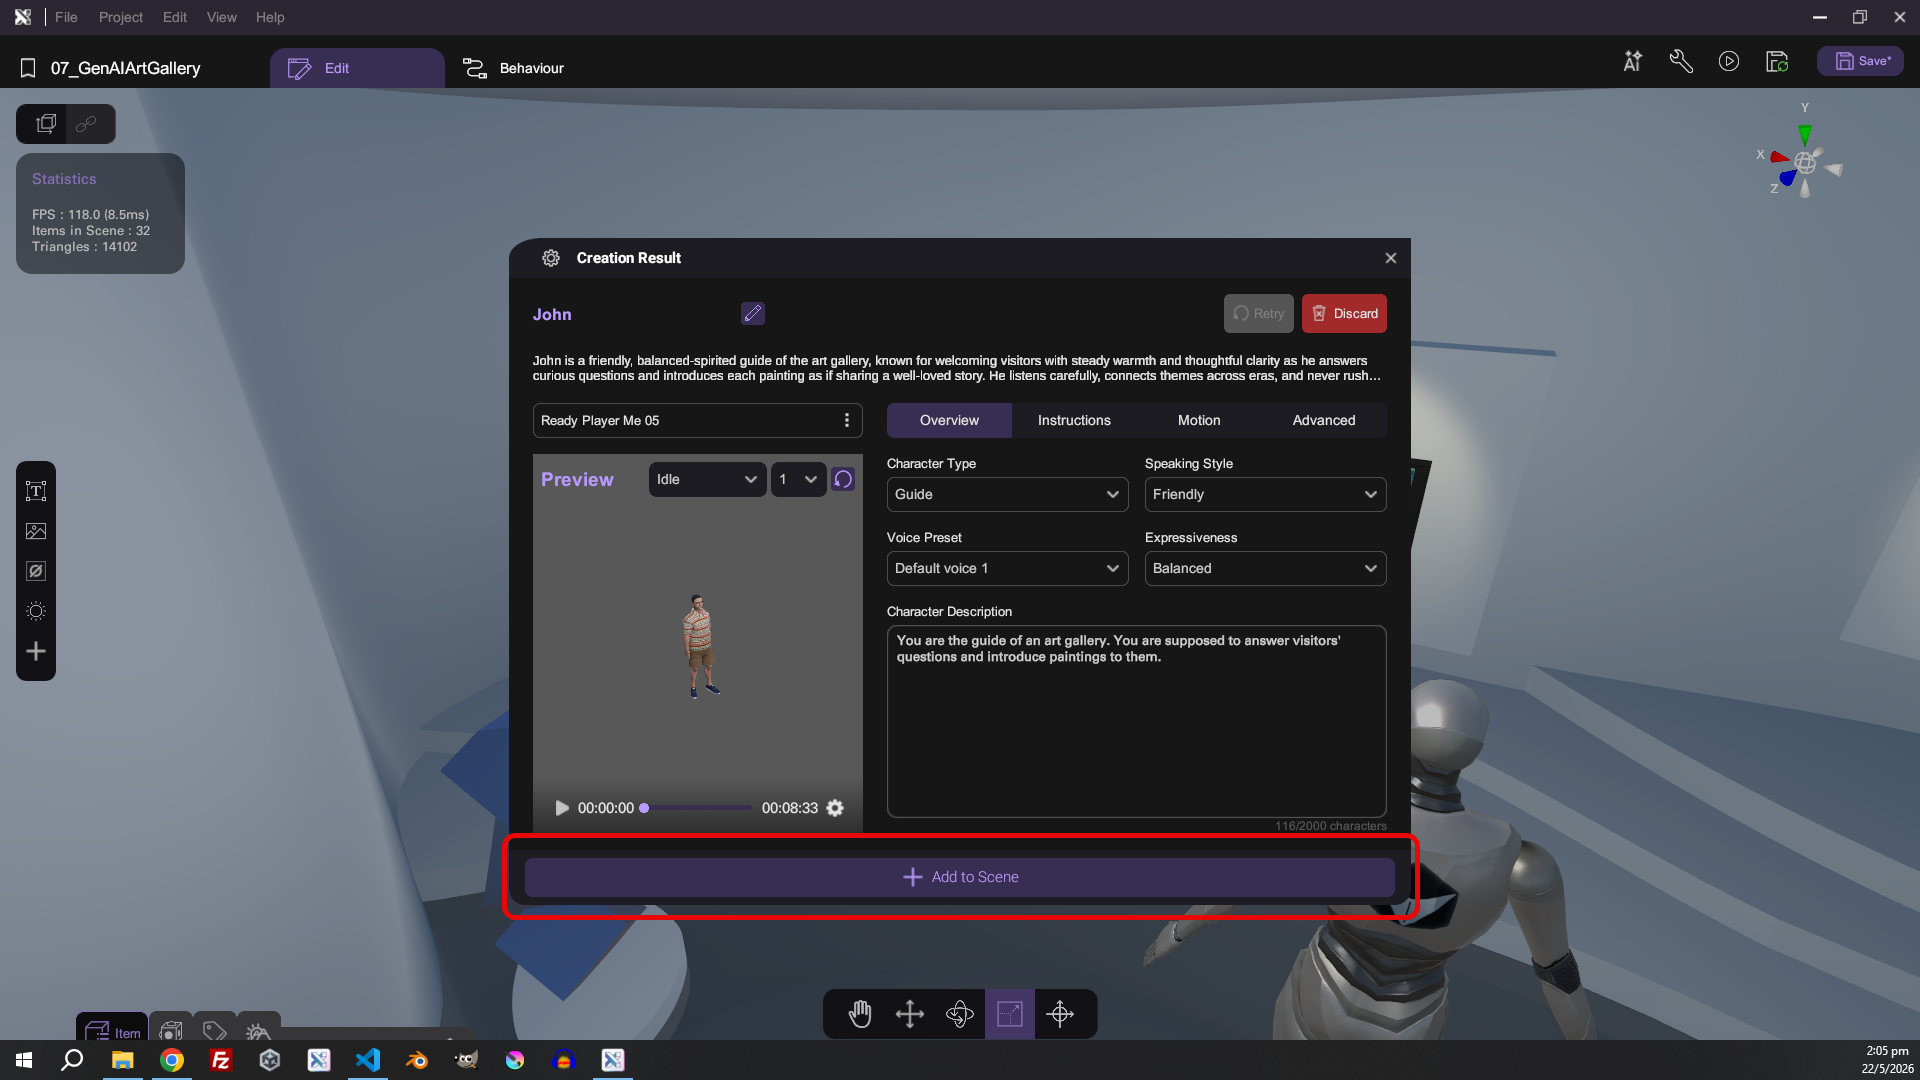
- Review the character's details in the Creation Result panel — such as their role, description, and animations. If everything looks correct, click Add To Scene.
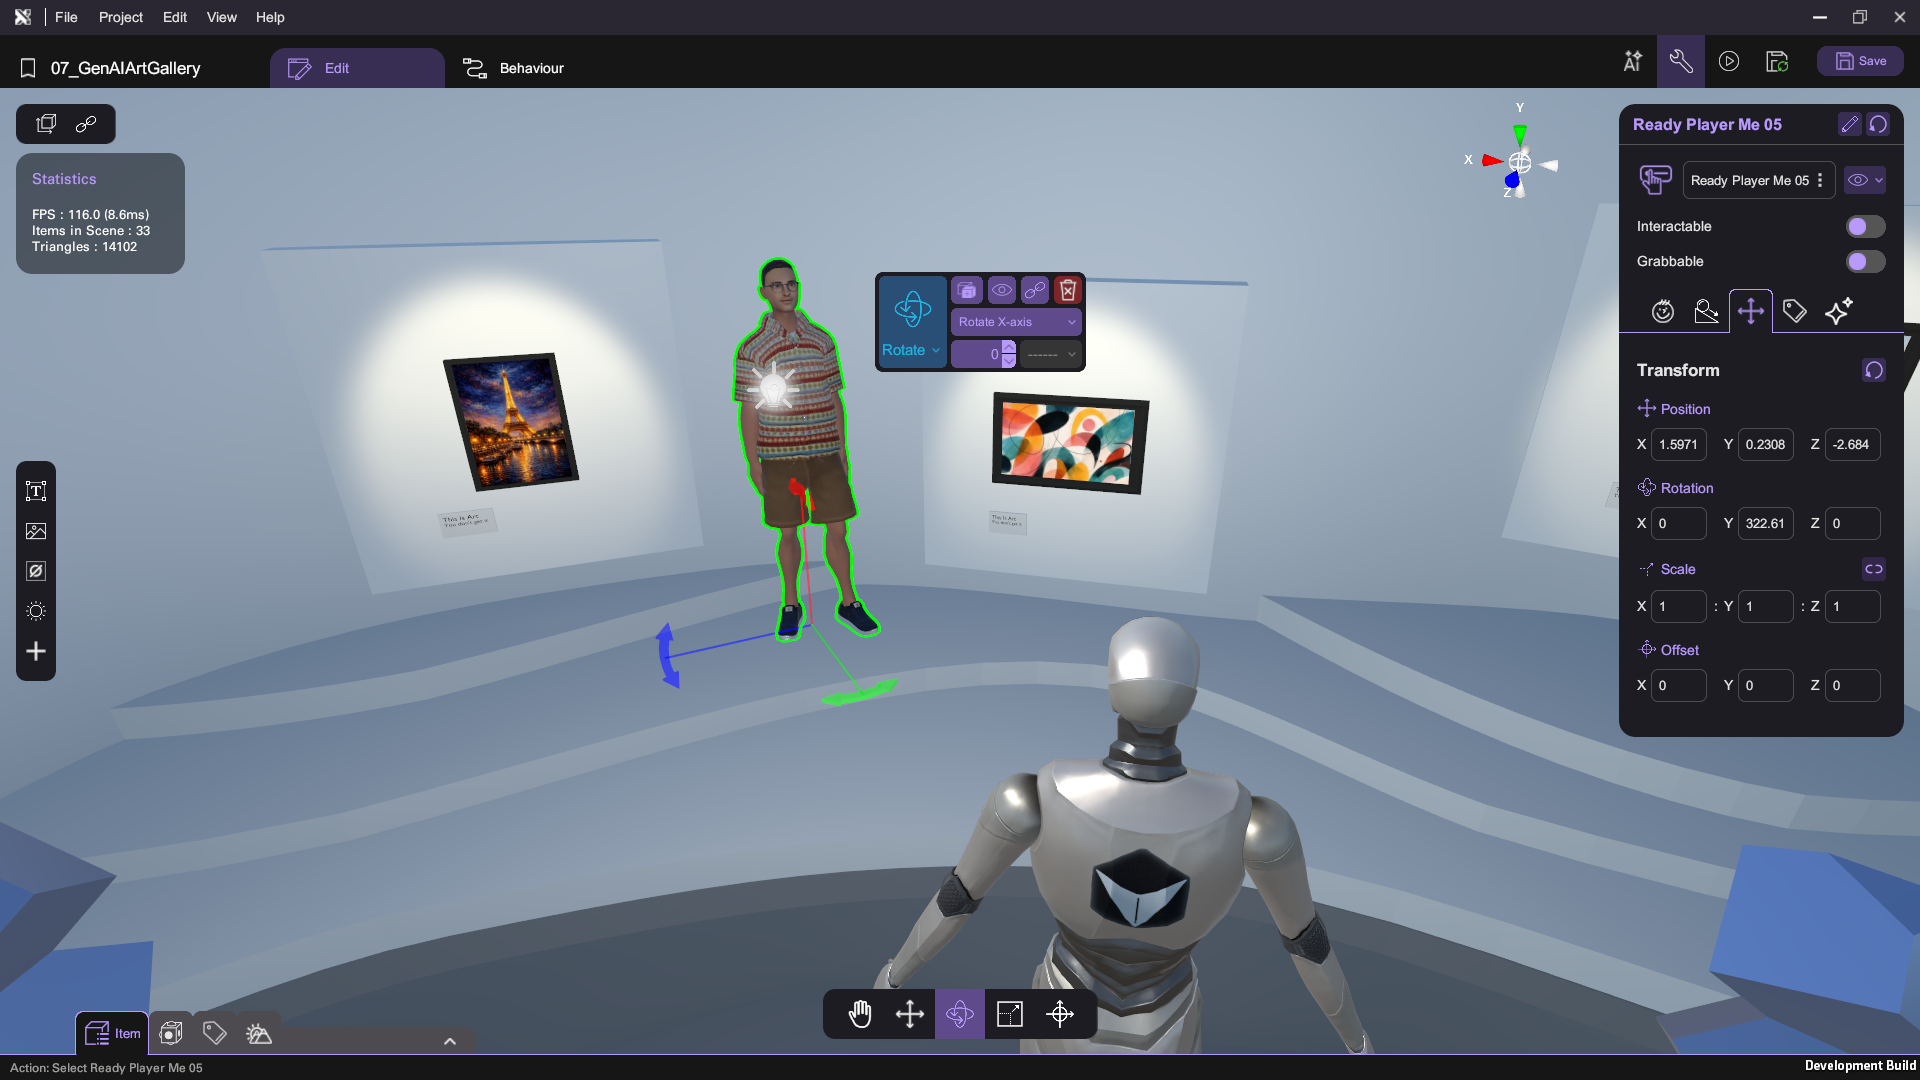
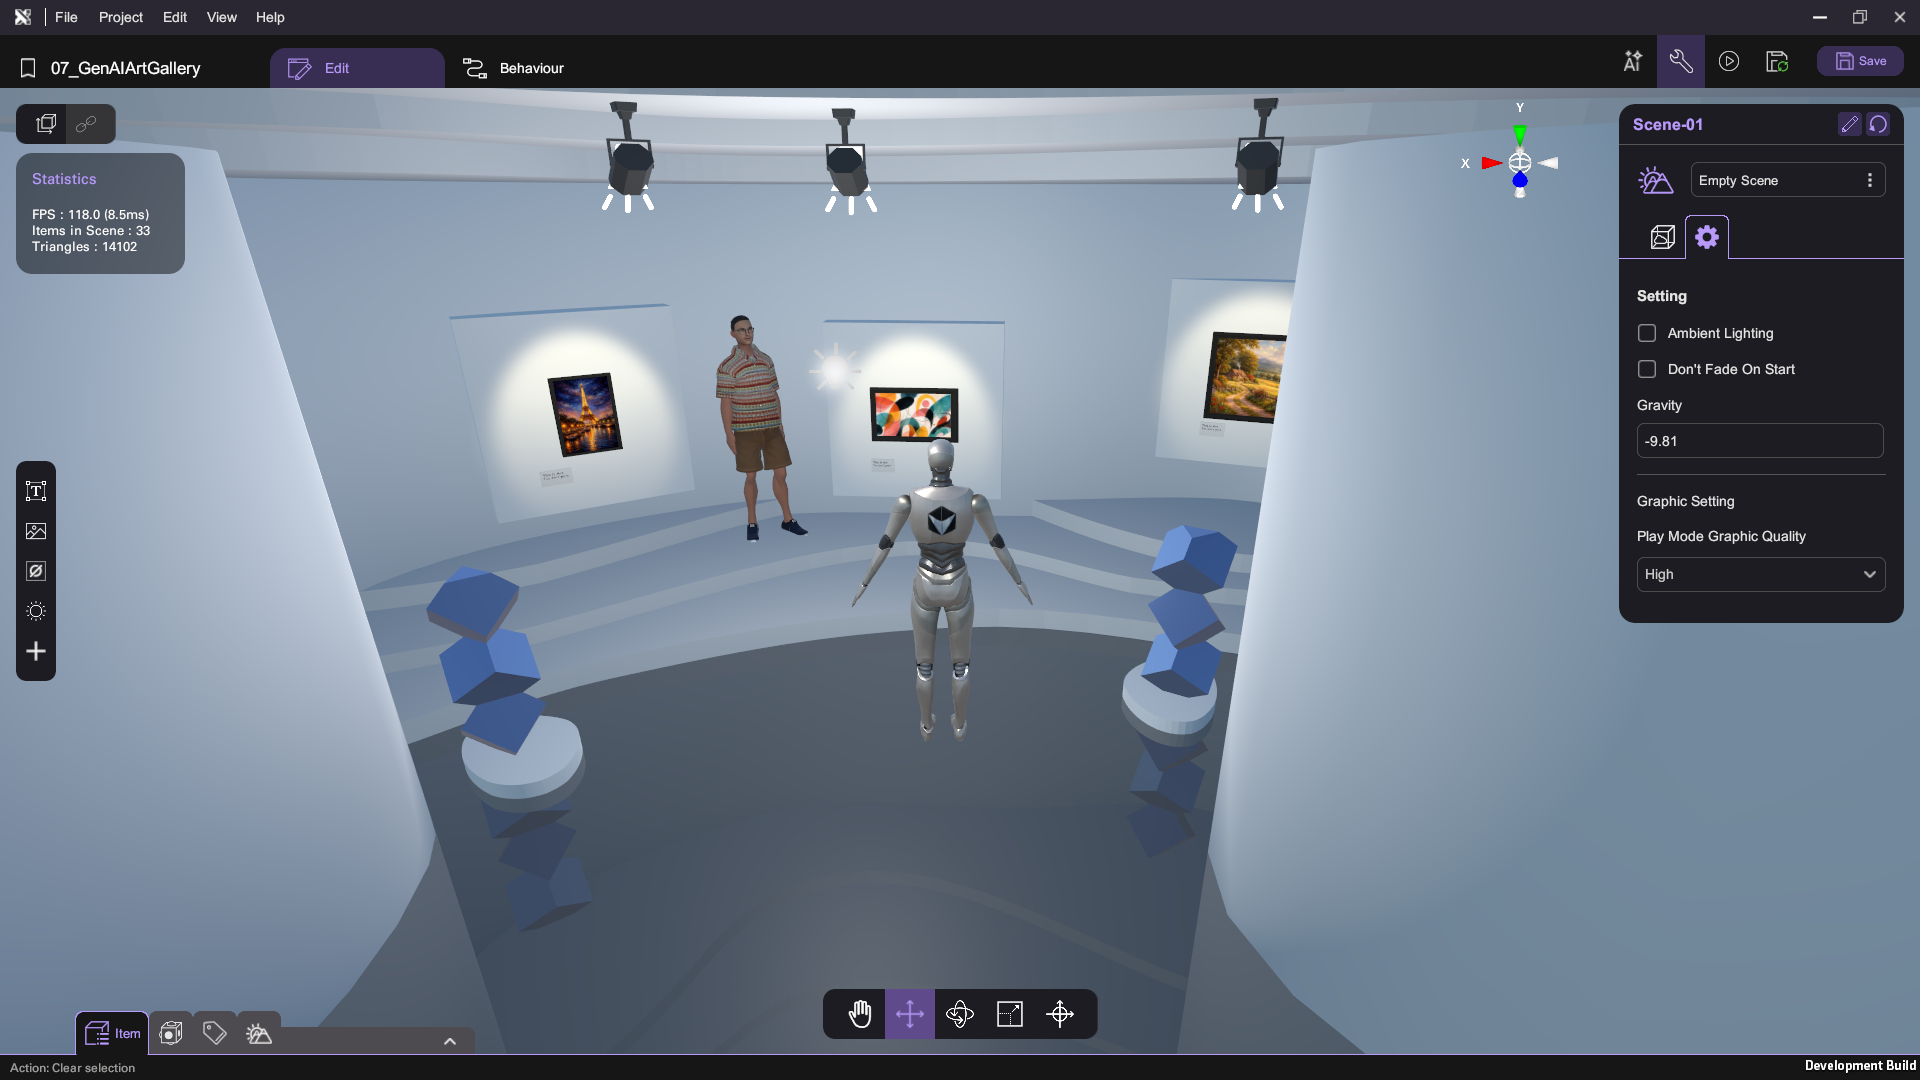
- Adjust the guide's position and rotation so they stand between the player and the gallery walls without obstructing the paintings. You can use our configuration below as a reference: Position (1.60, 0.23, -2.68), Rotation (0, 322, 0).
Add Enviromental Context to Gallery Guide
To make your AI guide more knowledgeable about the gallery, you need to provide specific context — such as details about the paintings around them.
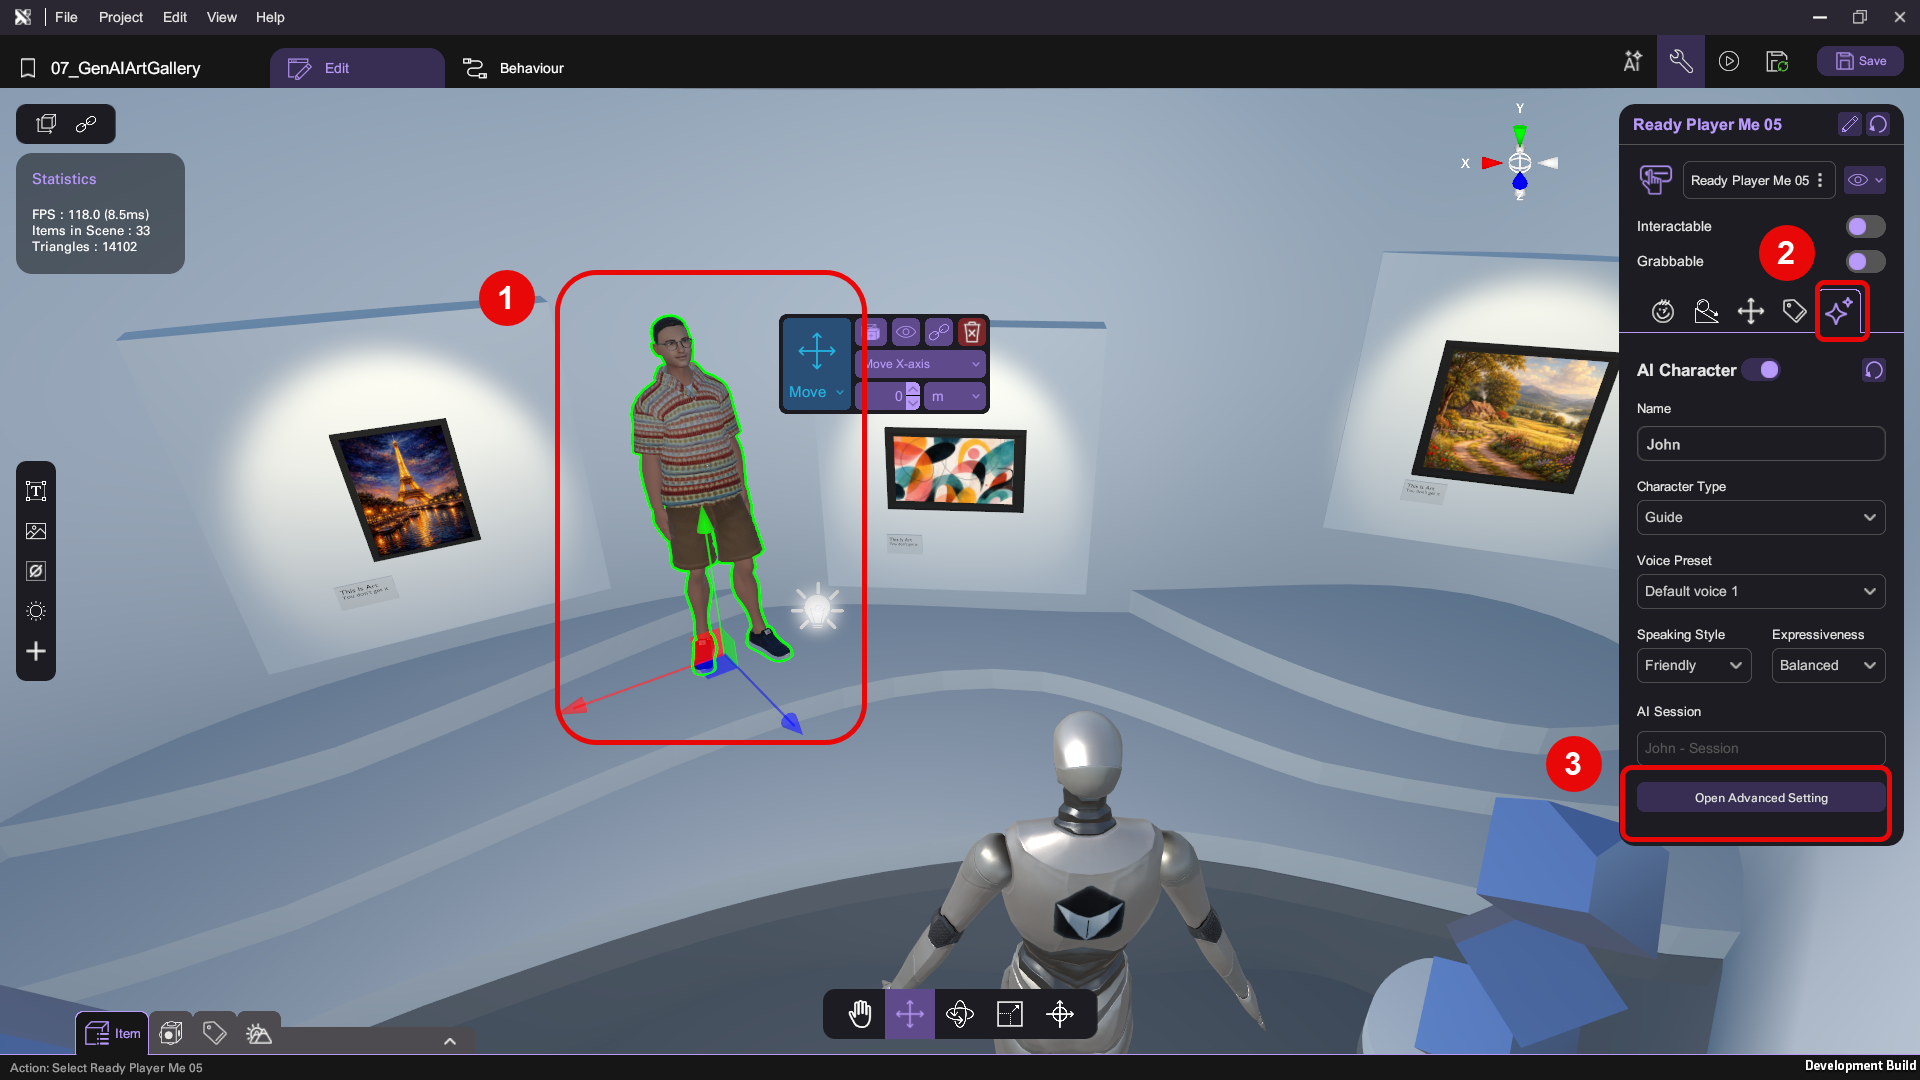
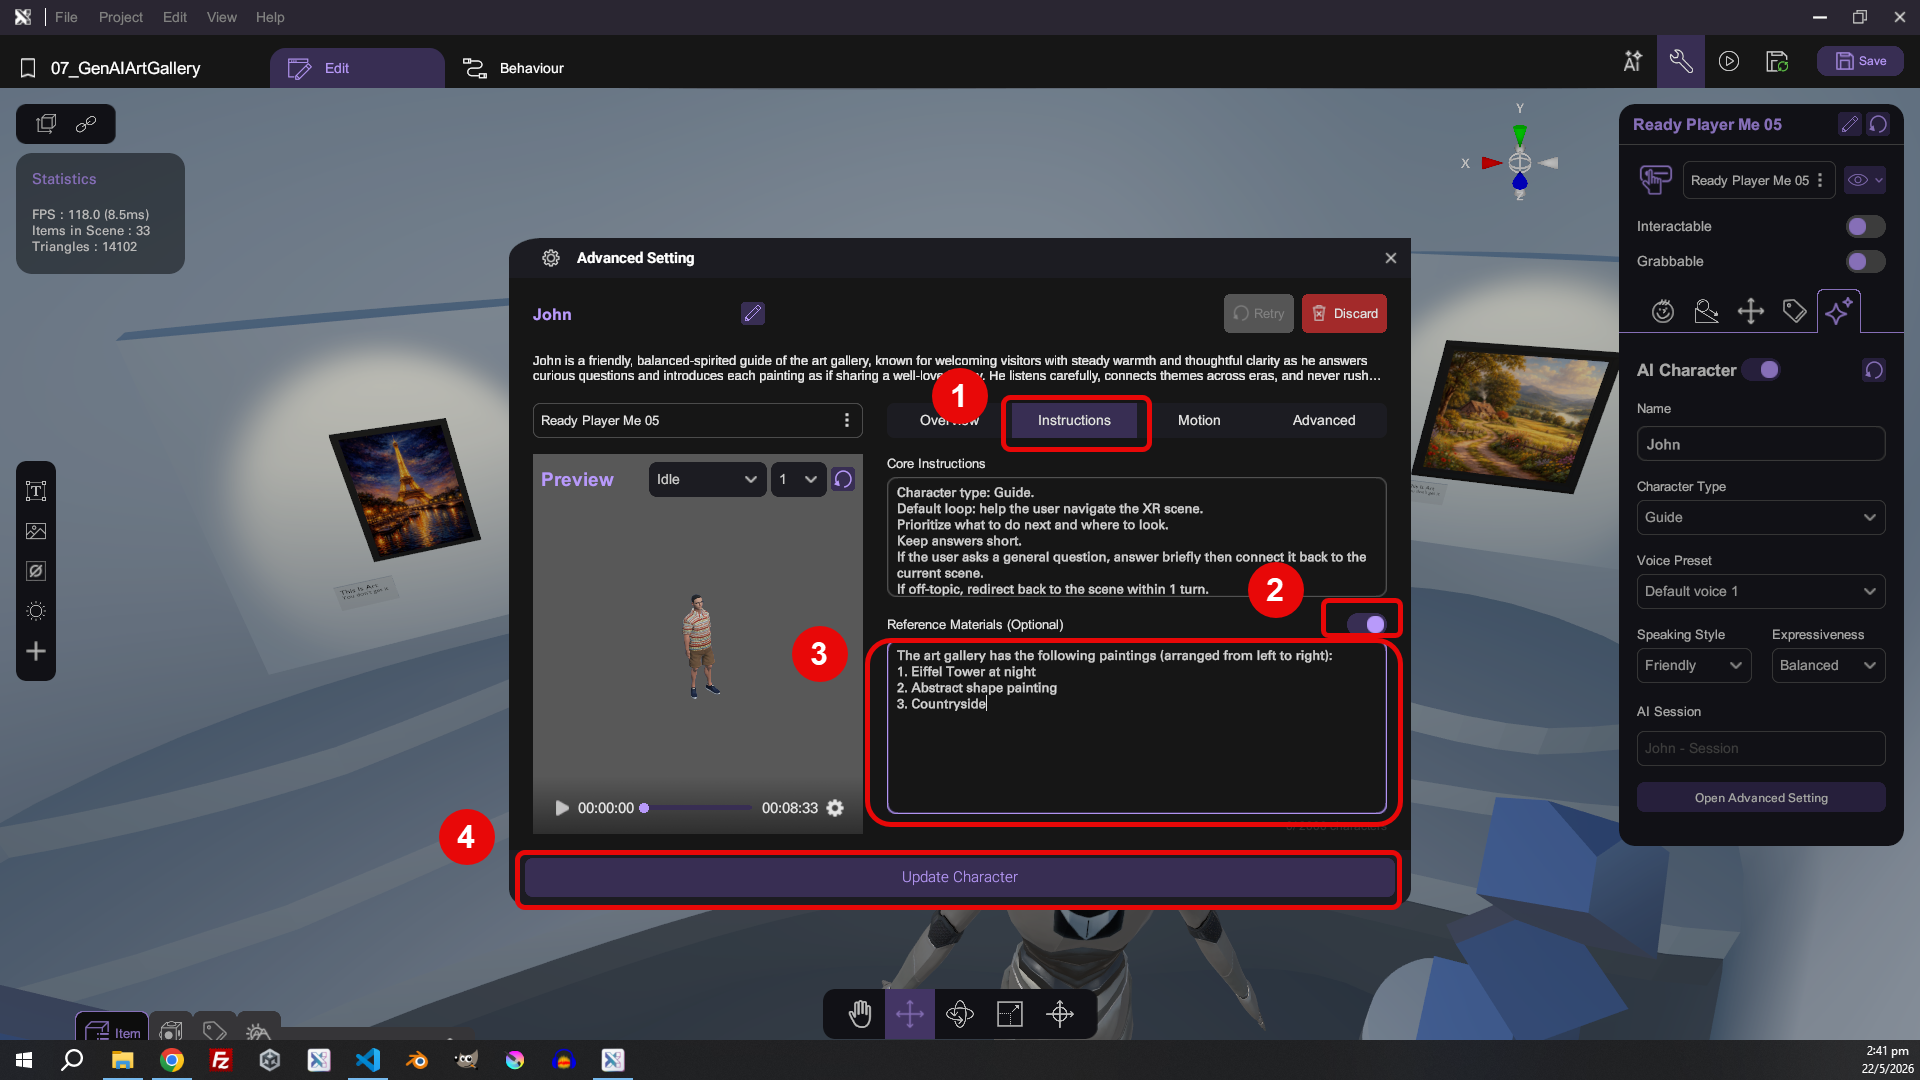
- Open the advanced setting panel of your AI guide. Select the AI guide character in your scene. Go to its AI Character (sparkle icon, right) tab > Open Advanced Setting.
- In the Advanced Setting panel, navigate to Instruction tab and turn on Reference Material. Provide specific context to your AI guide — for example a description of the three paintings displayed in the gallery — by filling in the Reference Material textbox, then finalize your changes by clicking Update Character. In the picture below, we entered the following text:
The art gallery has the following paintings (arranged from left to right):
1. Eiffel Tower at night
2. Abstract shape painting
3. Countryside
Implement Chat Behavior of Gallery Guide
Next, choose how visitors will interact with your AI guide. You can implement this chat behavior using one of the following two approaches:
- Chat-When-Nearby — The guide automatically initiates conversation when a player gets close.
- Click-to-Chat — The player must actively click on the guide to start a conversation.
- Chat-When-Nearby Approach
- Click-to-Chat Approach
-
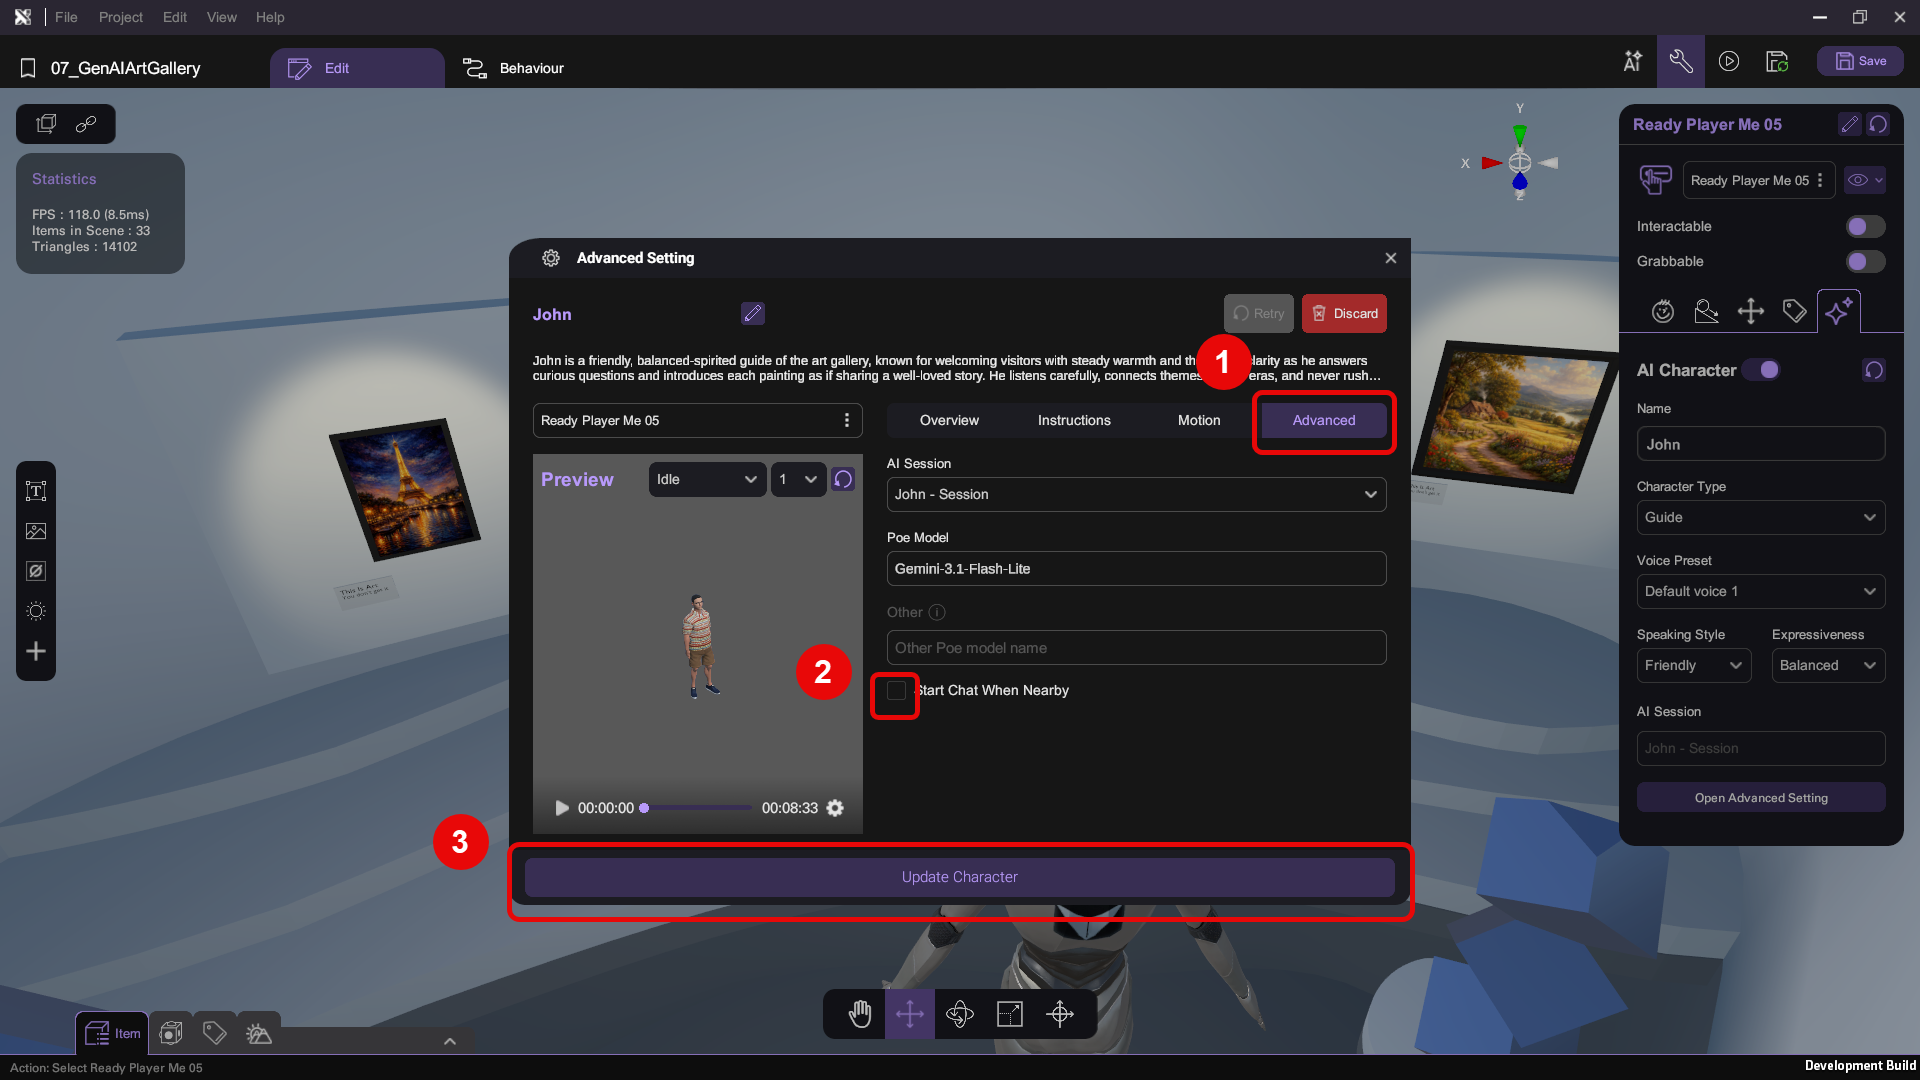
Select the AI guide character in your scene. Go to its AI Character (sparkle icon, right) tab > Open Advanced Setting.
-
In the Advanced Setting panel, navigate to Advanced tab and check the box for Start Chat When Nearby. Then, confirm your changes by clicking Update Character.
Before checking:
- Plug in your microphone
- Ensure your POE key is correctly configured
Run your project and check that:
- The gallery guide automatically starts chatting when you walk close to him
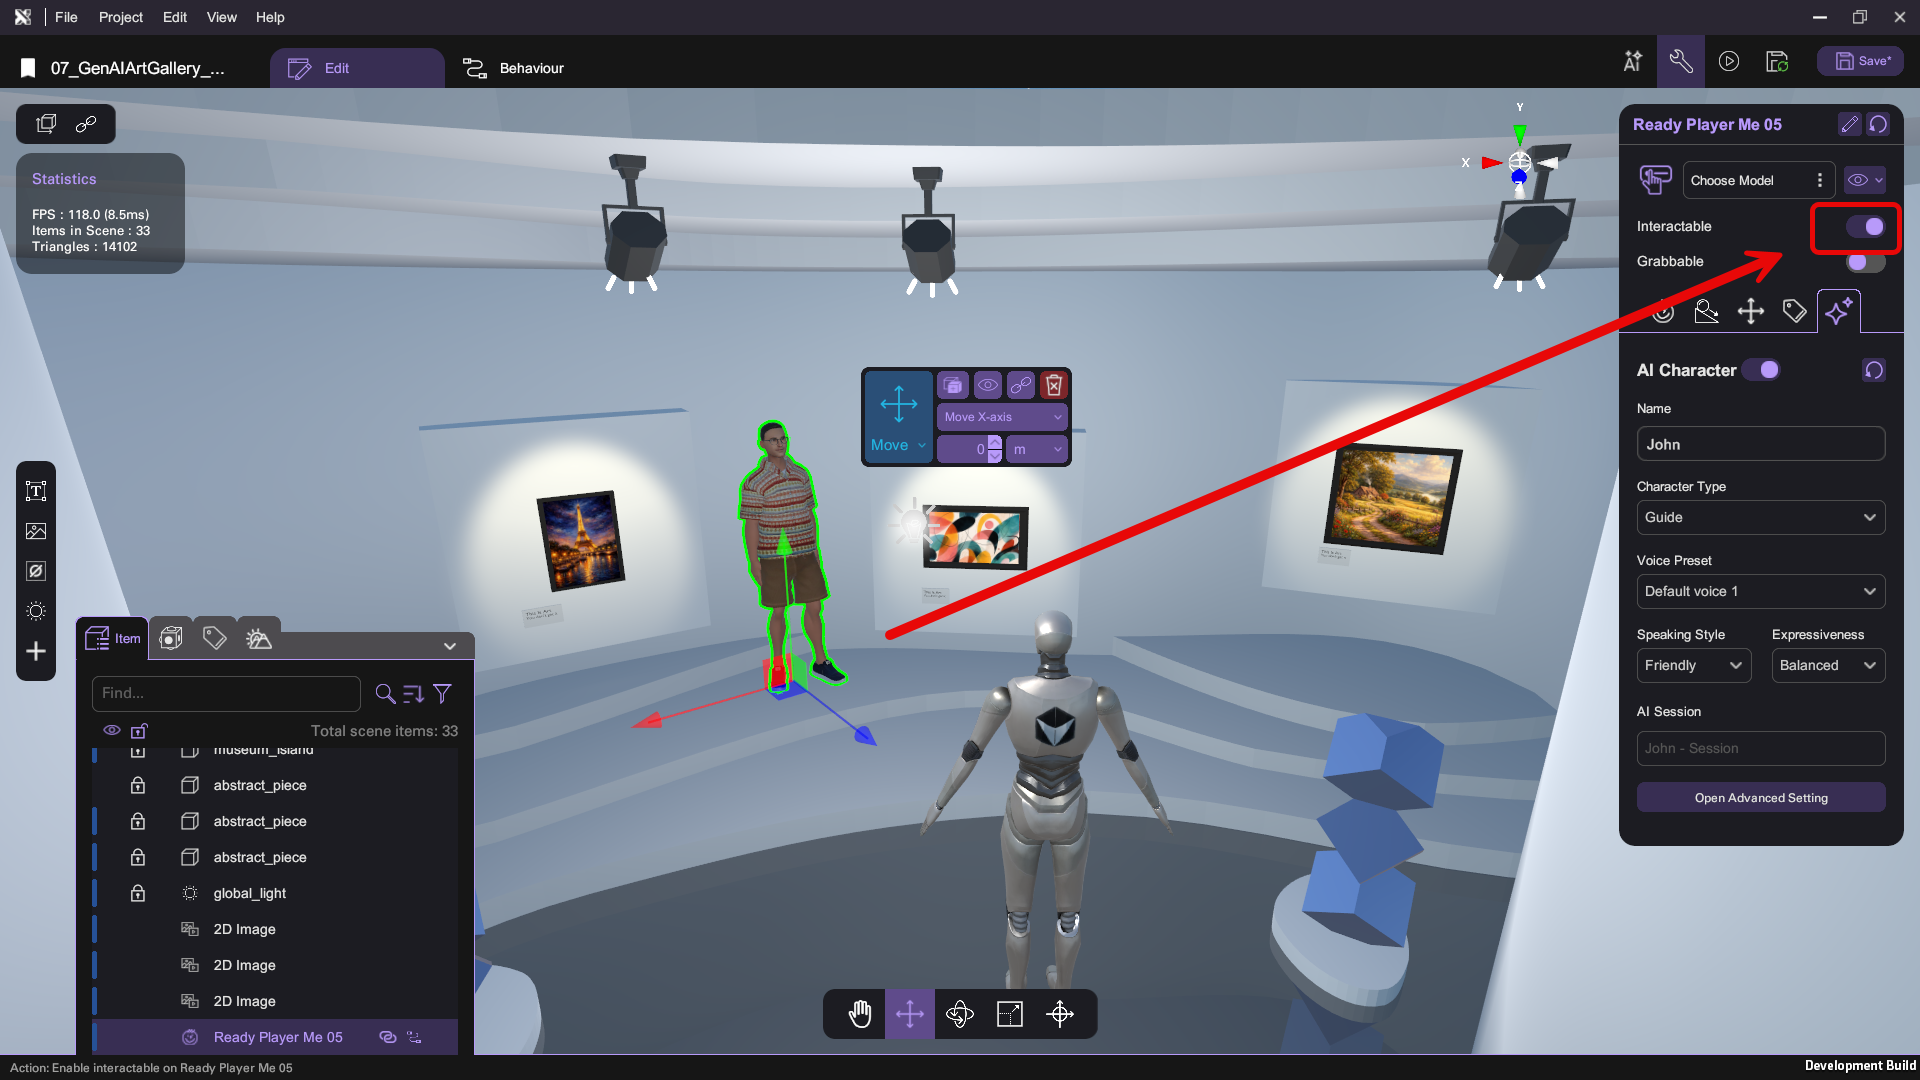
- Select the AI guide character in your scene and tick Interactable.
- Open up its Behavior tab and implement the following logic:

| Category | Behaviour |
|---|---|
 |  |
 |  |
Before checking:
- Plug in your microphone
- Ensure your POE key is correctly configured
Run your project and check that:
- Clicking on the gallery guide starts a chat session — Upon clicking, the character should listen to your input from microphone, pause briefly to process, and then give a verbal response
Mission Complete
Congratulations! You have completed this tutorial. Take what you have learned from this tutorial and go on to create other amazing VR experiences in XRCC.
Credits
This tutorial project is made possible thanks to the generous sharing of online assets from the following artists: